This site is supported by our readers. We may earn a commission, at no cost to you, if you purchase through links.
Fuse interfacing to the wrong side of the main and lining panels for added structure. Next, sew the straps by folding long fabric strips lengthwise, stitching, and turning them right side out.
Attach pockets if needed, then sew the straps to the main panels. With right sides together, sew the bag’s outer panels and lining pieces separately, leaving a gap in the lining.
Turn the bag right side out, press, and finish with topstitching. Want clever customization ideas? Stay tuned for added structure and more!
Table Of Contents
- Key Takeaways
- How to Sew a Market Tote
- Step-by-Step Directions
- Finished Size of The Market Bag/Basket – 3 Sizes!
- Supplies for Sewing The Tote Bag
- How to Make a Tote Bag – Tutorial
- Additional Sewing Tips
- How to Interface The Tote Bag for More Stability
- Topstitching or Understitching?
- Want to Add Magnetic Closure?
- Want a Printable Copy of The Whole Tutorial?
- Frequently Asked Questions (FAQs)
- Conclusion
Key Takeaways
- Use durable fabrics like canvas or sturdy cotton for a long-lasting and stylish market tote.
- Add interfacing to both the outer and lining fabrics for extra structure and a professional finish.
- Securely reinforce straps with "X" or box stitches to handle heavy weights without tearing.
- Topstitch the bag edges and handles for added durability and a polished look.
How to Sew a Market Tote
Creating a market tote is easier than you might think, and it’s a perfect project for all skill levels.
A market tote is the perfect beginner-friendly project—sturdy, stylish, and surprisingly simple to sew in just a few steps!
With a few basic supplies and detailed steps, you’ll have a sturdy, stylish bag ready for groceries or everyday use in no time, making it a great option for those looking for a stylish bag.
Supplies Needed
When prepping to sew your market tote, gather the essentials for smooth stitching. Start by choosing your fabric—100% cotton works beautifully for durability and style. Reliable interfacing enhances structure, while precise tools like a rotary cutter and mat keep cuts sharp.
For a versatile and durable option, consider exploring different types of available cotton textiles.
- Cutting Tools: Scissors or rotary cutter with a mat.
- Key Materials: Fabric, iron-on interfacing, heavyweight webbing.
- Sewing Staples: Measuring tape, sewing machine, pins, and thread.
Choose contrasting fabrics or thread to personalize your project uniquely!
Finished Market Bag Tips
Now that you’ve gathered everything, let’s talk finishing touches to perfect your market tote bag.
Adding interfacing is a game-changer for structure, especially if you’re aiming for a polished, professional finish.
Adding interfacing transforms your tote, creating a sturdy, professional look that’s perfect for groceries, books, or everyday essentials!
Topstitching may seem intimidating, but it boosts bag durability and gives it a shop-ready look—just practice a few scrap runs first.
Handle reinforcement is non-negotiable; secure those straps with a neat "X" or box stitch to guarantee they can handle the weight of your groceries.
Consider closure options like magnetic snaps for a sleek yet functional detail.
Adjust the size if needed, and don’t skip seam finishing—clean edges guarantee fabric durability and elevate your tote from DIY to truly stunning.
Happy sewing!
Step-by-Step Directions
Let’s break the process into simple, manageable steps so you can sew your market tote with ease.
Grab your materials, follow along carefully, and you’ll have a sturdy, stylish bag ready in no time!
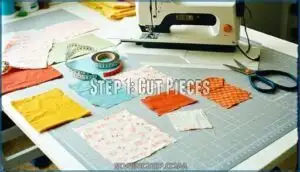
Step 1: Cut Pieces
Start by carefully following the cutting instructions. Lay your fabric on a flat surface, aligning the pattern pieces with the fabric grain for accurate cutting.
Use a rotary cutter for precision or fabric scissors if you prefer. Don’t forget to include seam allowance! Thoughtful pattern placement saves fabric and guarantees perfect shapes.
Rotary cutters improve precision during fabric cutting. Sharp cutting tools make all the difference in your project, and using them is a key part of the process, which can be considered a complete concept.
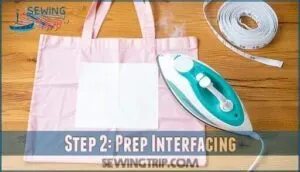
Step 2: Prep Interfacing
Applying interfacing is a must for that polished, professional look! Choose the right weight and type based on your fabric.
Here’s how to fuse interfacing effectively:
- Lay interfacing’s adhesive side onto the fabric’s wrong side.
- Press with a hot iron, no steam, for 10-15 seconds.
- Use a damp pressing cloth for tricky spots.
Test adhesion before sewing. Many projects benefit from using fusible interfacing fabric.
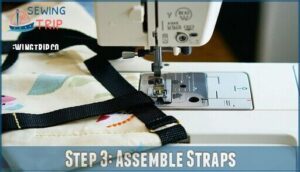
Step 3: Assemble Straps
When creating bag straps, focus on strap reinforcement and handle comfort for long-term durability.
Use webbing for strength, or fabric pieces for a custom touch.
Fold your fabric lengthwise, press edges inward, and sew with a sewing machine.
Add decorative stitching for style or adjustable straps for versatility.
Webbing options are practical and sturdy, especially for heavier loads.
With careful measuring, you’ll produce straps that look professional and can handle daily use, ensuring long-term durability.
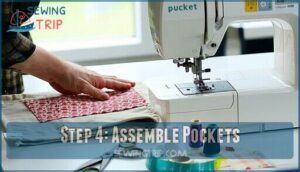
Step 4: Assemble Pockets
Let’s get started with assembling pockets! Carefully consider pocket placement to maximize functionality and style.
Follow these steps for smooth pocket installation:
- Cut fabric to desired pocket size.
- Attach interfacing to stabilize pockets.
- Fold and press edges neatly.
- Topstitch edges for reinforcement.
- Securely stitch pockets to the lining.
Precision matters—strong stitching guarantees durability while showcasing your sewing skills.
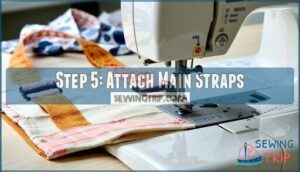
Step 5: Attach Main Straps
A secure attachment for the main straps guarantees your tote stays durable and stylish.
Position straps evenly for balanced weight distribution, considering your preferred handle length. Reinforce stitching for extra strength using webbing options or fabric straps.
Follow these step-by-step instructions for precise strap placement:
| Tip | Why It Matters |
|---|---|
| Measure twice | Avoid uneven handles. |
| Backstitch at ends | Strengthens bag handles. |
| Use a sturdy needle | Prevents machine jams. |
Finished Size of The Market Bag/Basket – 3 Sizes!
When sewing a market tote, knowing the finished size helps you match the bag to your needs.
These market tote bags come in three sizes, offering flexibility for size customization based on capacity needs. The small size features an 11" x 11" bottom, stands 13" tall, with a 22" x 22" top opening—perfect for light groceries or books.
If you’re looking for a large capacity tote, the medium and large options expand on these dimensions, making them ideal for bulkier items or multi-use purposes.
Understanding factors affecting quilt size can help in scaling this tote pattern.
Whatever size you pick, this fabric tote pattern balances roomy capacity with stylish practicality, making organization and transport surprisingly simple, and allowing for proportional scaling that guarantees the bag’s size meets your fabric choice and intended use.
Choose your size, then get sewing!
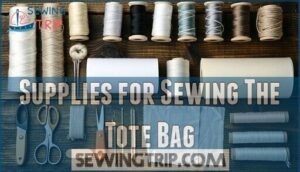
Supplies for Sewing The Tote Bag
Before starting your market tote, you’ll want to gather the right sewing supplies to keep things smooth and frustration-free.
The durable design calls for thoughtful material choices and reliable tools.
- Fabric Choices: Use quality cotton, canvas, or home decor fabrics for strength and style. Mix prints or go bold with a single color!
- Interfacing Types: Lightweight or fusible interfacing adds structure, keeping your tote sturdy yet flexible.
- Webbing Options: Heavy-duty cotton webbing for straps guarantees comfort and prevents digging into your shoulder.
- Thread Selection & Closure Hardware: Blend thread color with fabric or contrast for flair. Magnetic closures add a functional, polished touch.
A trusty sewing machine, fabric scissors, and a pressing iron are also must-haves in your toolbox.
Consider using heavy-duty fabrics like canvas for long-term durability.
Got everything? Let’s create something you’ll love!
How to Make a Tote Bag – Tutorial
You’re ready to make your own market tote, so let’s break it down into simple steps.
Follow this tutorial to transform fabric, thread, and a little time into a functional, stylish bag you’ll actually enjoy carrying.
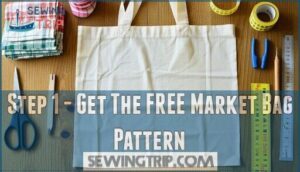
Step 1 – Get The FREE Market Bag Pattern
To get started on your market tote, grab the free pattern!
Pattern access is simple—download options are usually just a click away.
Check the printing instructions to verify proper scaling.
Need pattern adjustments? Most freebies are flexible for tweaking.
This sewing tutorial makes your DIY tote bag project smooth and enjoyable.
A good sewing pattern sets the tone!
It is crucial to have a good sewing pattern for a successful project.
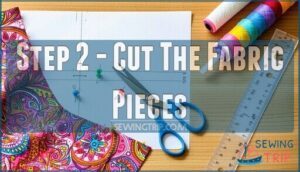
Step 2 – Cut The Fabric Pieces
Now that you’ve got the free market bag pattern, it’s time to cut your fabric pieces precisely. Accurate cutting guarantees a polished bag.
- Align fabric on the grain; wrinkles can throw off measurements.
- Pin the pattern for steady placement.
- Use sharp scissors or a rotary cutter for clean edges.
- Remember, include seam allowances—every fraction matters in your sewing project, as it ensures a professional finish.
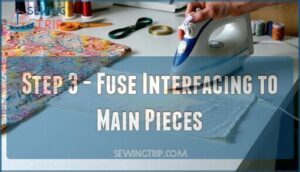
Step 3 – Fuse Interfacing to Main Pieces
Once your fabric pieces are cut, it’s time to add structure.
Apply interfacing to the wrong side of the body and lining fabric. Use fusible fleece for lightweight flexibility or a heavier type for sturdier bags.
Iron settings matter—adjust heat based on fabric compatibility. Press firmly but avoid wrinkles.
Troubleshooting issues? Always test a scrap first to perfect your technique.
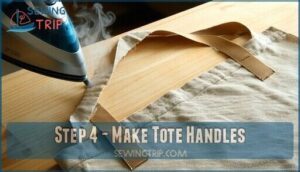
Step 4 – Make Tote Handles
Bag handles are where comfort meets durability.
Cut fabric strips to your preferred strap length, then reinforce them with interfacing for strength.
Fold, press, and sew the layers, using sturdy webbing if desired for added comfort factors.
Follow attachment methods by securely sewing the straps near the top edges.
Handle reinforcement guarantees reliability, keeping your tote functional and stylish.
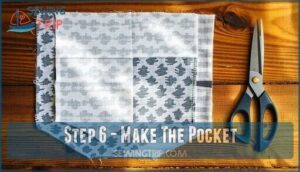
Step 6 – Make The Pocket
Let’s move on to the pocket. Start by planning your pocket size and placement—consider what fits your needs.
Cut two fabric pieces, ensuring your fabric choice complements the bag. Fuse lightweight interfacing to one piece for sturdiness.
Stitch the pieces right sides together, leaving a gap. Turn it out, press, and edge-stitch the top for a clean finish.
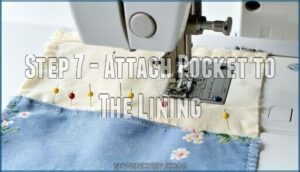
Step 7 – Attach Pocket to The Lining
Position the pocket on the lining where it’s easy to reach—usually a few inches from the top edge.
Pin securely and check the pocket placement for alignment.
Stitch around the edges, reinforcing the top corners for durability.
Pay attention to the pocket size and fabric choice, ensuring it fits seamlessly with the lining, and follow these precise sewing instructions for neat results!
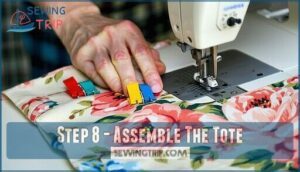
Step 8 – Assemble The Tote
Now it’s time to assemble your tote! Line up the edges of your bag pieces, ensuring perfect seam alignment. Pin or clip everything securely, especially around the corners.
Sew carefully, using corner boxing techniques for structure. Don’t forget to insert the lining slightly smaller for a snug fit. Choose topstitching options for extra polish.
- Check seams for alignment.
- Box corners carefully.
- Secure handles for durability.
Step 9 – Turn Right Side Out and Press
Smoothly turn the tote right side out, easing out corners for perfect shaping.
Use pressing techniques to iron seams flat, removing all fabric wrinkles.
Align seams carefully while pressing to guarantee crisp edges and durability.
| Step | Action | Tip |
|---|---|---|
| 1 | Turn bag right side out | Use a blunt tool for corners. |
| 2 | Press seams flat | Test fabric heat tolerance first. |
| 3 | Inspect for wrinkles | Repress if needed for neatness. |
Your tote’s final inspection guarantees professional-quality results!
Your tote is now ready for use, with a final inspection that ensures it looks great and functions well.
Additional Sewing Tips
For a professional finish, focus on these key sewing tips. Topstitch straps and pockets for durability and polish. Experiment with fabric selection, mixing solids and patterns to make your tote unique.
Use interfacing techniques to add structure and stability—an essential for tote-making success. Also, upgrade handles by choosing contrasting fabrics or heavy-duty webbing.
Ensuring a smooth operation requires basic machine maintenance.
- Seam finishes: Reinforce edges to prevent fraying.
- Thread tension: Adjust carefully for smooth, even stitches.
- Needle types: Match needles to fabric for best results.
- Pressing techniques: Press seams for crisp, clean lines.
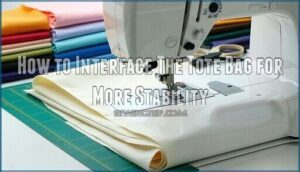
How to Interface The Tote Bag for More Stability
Adding interfacing to your market tote can transform it from floppy to fabulous. It’s how you get that structured, professional look.
Use fusible interfacing for ease or sew-in if you want more control during bag construction. The right choice depends on your fabric and desired bag stability.
Here’s what to keep in mind:
- Interfacing Types: Lightweight adds softness, while firm interfacing gives a stand-up structure.
- Layering Interfacing: Combine interfacing weights for custom stiffness.
- Cut Smart: Trim interfacing slightly smaller to reduce seam bulk.
- Achieving Stiffness: Apply interfacing to both outer and lining fabrics for extra strength.
A little more prep with these sewing techniques guarantees your tote looks polished and carries heavier loads with ease!
Topstitching or Understitching?
Topstitching and understitching each add their own magic to your market tote.
Topstitching benefits include visible, decorative stitches that secure seams and add a professional finish, perfect for polished edges.
Understitching benefits lie in its invisibility, keeping linings in place and edges crisp without showing through.
Stitch visibility plays a key role—use topstitching for bold designs and understitching for subtler touches.
Fabric choice matters too; heavier fabrics handle topstitches well, while lightweight ones suit understitching.
Master these sewing techniques for standout results!
Want to Add Magnetic Closure?
To elevate your DIY tote bag, try adding a magnetic closure! It’s an easy upgrade that offers closure strength and a clean, professional finish.
For placement options, test the magnet’s position before sewing for proper alignment. Use sew-in magnetic types secured between fabric scraps or interfacing.
Be mindful of sewing techniques—avoid cutting main fabric and sew gently to prevent magnets sticking to the needle. Neodymium magnets provide a strong and durable hold for your tote.
Magnetic closures work well on any market tote but consider alternative closures like buttons or zippers for high-security needs.
Want a Printable Copy of The Whole Tutorial?
If adding a magnetic closure got you excited about finishing your tote, you’ll love having a printable copy of the whole tutorial ready to go.
A printable tutorial offers benefits like offline access, easy reference during your sewing project, and saving paper by printing just what you need.
Plus, keeping a PDF pattern handy helps with pattern storage and organizing future sewing patterns.
Whether you’re perfecting topstitching or aligning your pocket placement, having the step-by-step sewing tutorial at your fingertips guarantees a smooth process.
Printing also saves you the hassle of scrolling while working, letting you focus on crafting a beautiful market tote.
Ready? Grab the printable tutorial and pattern to make your next sewing project easier than ever!
Frequently Asked Questions (FAQs)
What Type of Fabric is Best for Making a Market Tote?
Think of fabric as the soul of your market tote.
Choose durable materials like linen, canvas, or home décor weight cotton.
These fabrics provide strength, easy care, and a polished, professional finish for daily use.
How Long Does It Take to Sew a Market Tote?
Sewing a market tote typically takes 1-2 hours, depending on your experience and the bag’s complexity.
Simple designs go faster, while adding details like pockets or reinforced straps might require extra time and focus, which can be considered a complete concept in the context of sewing a market tote.
What Type of Thread Should I Use When Sewing a Tote?
Use all-purpose polyester thread for durability, as it resists breakage and handles heavy seams well.
Avoid cotton thread—it frays easily with wear.
Match the thread color to your fabric or use contrasting thread for style.
Are There Any Special Techniques for Topstitching a Market Tote?
Topstitching adds that cherry-on-top finish.
Use matching or contrasting thread, keep stitches straight with a guide, and slow down at corners.
A longer stitch length guarantees polish while reinforcing seams for durability.
What type of fabric is best for making a market tote?
The best fabric for a market tote is durable, washable, and lightweight.
Opt for 100% cotton, canvas, or home décor fabric.
For extra toughness, outdoor fabrics with water-resistant finishes work perfectly, keeping spills manageable.
How long does it take to sew a market tote?
It typically takes 2–4 hours to sew a market tote, depending on your experience and the design details. Cutting fabric, adding interfacing, and finishing straps might stretch the time for beginners.
What type of thread should I use when sewing a tote?
Go with a strong polyester or cotton-poly blend thread.
It’s durable, handles stress well, and won’t snap easily.
Plus, it pairs perfectly with heavyweight fabrics and keeps your tote sturdy for everyday use, making it a durable choice.
Are there any special techniques for topstitching a market tote?
You might think topstitching is purely decorative, but it strengthens seams too.
Keep your stitch length slightly longer, guide fabric consistently, and sew 1/8 inch from the edge for clean, professional-looking lines.
What are alternative fabrics for a durable tote?
For a durable tote, consider canvas, denim, oilcloth, or even repurposed materials like old jeans.
These fabrics withstand heavy use, resist wear, and maintain structure, making them perfect for carrying groceries or daily essentials.
How do I clean a fabric market tote?
To clean your fabric market tote, hand wash in cold water with mild detergent.
Gently scrub stains, rinse thoroughly, and air dry.
For stubborn spots, use a soft brush.
Avoid bleach and intense heat.
Conclusion
Creating your own market tote is simpler than it sounds, and with durable fabric and clear steps, you’ll have a functional, stylish bag in no time.
From preparing interfacing to sewing perfect straps, every detail counts for lasting quality.
Whether you’re using the free pattern or adding custom pockets, learning how to sew a market tote opens the door to endless designs. So grab your supplies, follow the tutorial, and enjoy the satisfaction of crafting something practical and unique!

