This site is supported by our readers. We may earn a commission, at no cost to you, if you purchase through links.
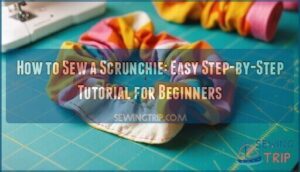
You’ll cut fabric into a 3.5 x 22-inch strip, fold it lengthwise with right sides together, and sew a straight seam.
After turning the tube right side out, thread 9 inches of elastic through using a safety pin, then tie the elastic ends together.
This creates a perfect hair accessory that’s both functional and stylish.
The real magic happens when you discover fabric combinations and sizing tricks that transform ordinary scrunchies into custom accessories.
Table Of Contents
Key Takeaways
- You’ll need basic materials that are likely already at home: fabric strips (3.5 x 22 inches), 9 inches of elastic, and a sewing machine to create a functional scrunchie in just 15 minutes.
- Cotton quilting fabric works best for beginners because it’s durable, doesn’t fray easily, and comes in countless prints, while 1/4-inch elastic provides the right stretch for most hair types.
- You can customize your scrunchie’s size by adjusting fabric dimensions and elastic length: use 3" x 16" fabric with 6.5" elastic for small scrunchies, or 4.5" x 22" fabric with 9" elastic for large ones.
- Threading elastic through the fabric tube using a safety pin makes the process easier, and you’ll secure it with a double knot before trimming excess elastic for a professional finish.
Sewing Scrunchie Basics
Before you start sewing your scrunchie, you’ll need to choose the right fabric and elastic for your project.
Cotton quilting fabric works best for beginners, while 1/4-inch elastic provides the perfect stretch for most hair types.
Choosing Fabric Type
When choosing fabric for your scrunchie project, you’ll discover endless fabric options that transform simple hair accessories into personalized statements.
Quilting cotton offers excellent fabric durability and countless fabric prints, making it perfect for beginners.
Fabric scraps from your stash provide cost effectiveness while reducing waste.
Consider velvet considerations like fabric nap direction for luxurious texture variety.
Fabric weight matters for the final product.
Your fabric selection directly impacts the final result’s appearance and longevity.
Selecting Elastic Size
Your elastic choice determines how well your scrunchie fits and feels.
Hair thickness influences elastic length, while wrist comfort depends on elastic stretch.
Consider these three factors when selecting scrunchie elastic:
- Standard elastic length: 8 inches works for most hair types
- Thick hair adjustment: Use 9 inches for better scrunchie tightness
- Elastic durability: Choose braided elastic over knit for frequent use
Overlap elastic ends by half an inch when joining to prevent breakage during styling.
Finding the right scrunchie elastic dimensions is key for comfort and durability.
Gathering Necessary Tools
Before you start cutting fabric, you’ll need the right scrunchie supplies on hand.
Gather fabric scissors, a sewing machine, measuring tools, and a cutting surface for accurate work.
Don’t forget your elastic threader – it’ll save you major headaches when threading elastic through tight spaces.
Investing in quality cutting tools enhances precision.
Having proper sewing tools ready makes this project flow smoothly.
How to Sew Scrunchie
Now you’re ready to transform your fabric strip into a functional scrunchie through three simple sewing steps.
The process involves cutting your fabric to size, creating a tube through folding and stitching, then turning it right side out to prepare for elastic insertion.
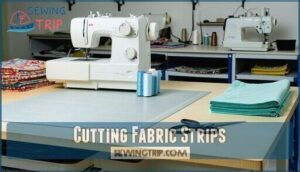
Cutting Fabric Strips
Sharp fabric scissors make clean cuts without fraying.
Get your fabric strips ready with these measurements and techniques:
- Cut fabric strips measuring 4" x 19" for regular scrunchies using rotary cutters on cutting mats
- Follow fabric grain direction when cutting to prevent stretching and guarantee proper drape
- Use fabric scraps effectively by arranging pattern placement on template shapes before cutting
Rotary cutters work faster than fabric scissors for straight cuts.
Different fabric types require specific cutting techniques for best results.
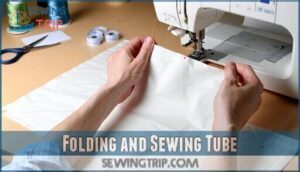
Folding and Sewing Tube
Fold your fabric strip lengthwise with right sides together, creating a neat crease.
Pin along the raw edges to maintain proper seam allowance during fabric manipulation. Stitch down the long edge using a straight stitch, securing both ends with backstitches.
| Step | Action | Tips |
|---|---|---|
| 1 | Fold fabric in half lengthwise | Keep right sides together |
| 2 | Pin raw edges together | Maintain ¼" seam allowance |
| 3 | Stitch down long edge | Use straight stitch for durability |
| 4 | Backstitch at both ends | Prevents seam from unraveling |
This fabric folding technique creates the foundation for your sewing tube, ensuring clean edge finishing when you sew scrunchie projects.
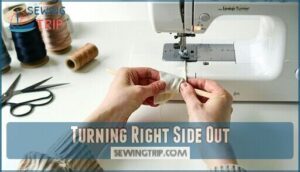
Turning Right Side Out
After turning your sewn fabric tube right side out, you’ll transform the inside-out seam into a professional-looking scrunchie.
Use a chopstick or similar tool to gently push the fabric through without snagging. This turning technique prevents fabric twisting while maintaining proper seam placement.
For delicate fabrics, consider using loop turner tools to prevent tearing. Take your time to avoid finger fatigue during this essential step in your scrunchie sewing tutorial.
Scrunchie Fabric Options
You’ll find three main fabric categories work best for scrunchies: quilting cotton, knit fabrics, and specialty materials. Each option offers different benefits for comfort, durability, and style.
Quilting Cotton Benefits
Quilting cotton stands out as the perfect fabric choice for your first scrunchie tutorial.
**Quilting cotton delivers the perfect blend of durability and beginner-friendly handling for flawless scrunchie success.
This lightweight durability champion offers unmatched beginner friendly qualities that make sewing effortless. You’ll discover cost effectiveness paired with stunning print variety that transforms simple fabric scrunchie projects into personalized accessories.
You can find a wide selection of quilting cotton prints online.
Here’s why quilting cotton rocks your sewing tutorial:
- Print Variety – Thousands of patterns and colors let you match any outfit or mood
- Lightweight Durability – Won’t bulk up your ponytail but survives daily hair adventures
- Beginner Friendly – Forgiving fabric that doesn’t fray easily or slip during sewing
- Cost Effectiveness – Budget-friendly option that delivers professional results every time
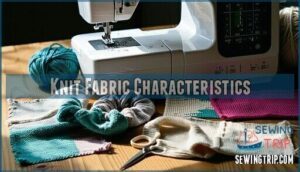
Knit Fabric Characteristics
Beyond cotton’s structured weave, knit fabric offers superior stretch and drape for your scrunchies.
You’ll notice knit fabric recovery allows gentle hair release while maintaining shape.
The fabric’s breathability prevents moisture buildup during wear.
When sewing with knit on your sewing machine, the fabric gathering creates fuller, softer scrunchies.
Knit fabric durability withstands repeated elastic stretching better than woven alternatives.
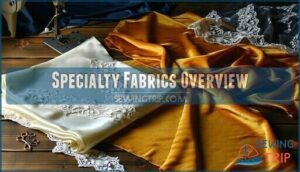
Specialty Fabrics Overview
Silk scrunchies offer unmatched smoothness and reduce hair breakage with their natural proteins. Velvet textures provide luxurious grip and volume, perfect for fine hair.
These specialty fabrics elevate your scrunchie game beyond basic cotton: They also help maintain natural hair oils, contributing to overall hair health.
- Silk scrunchies – Your hair’s best friend for overnight protection
- Velvet scrunchie – Adds drama and stays put during workouts
- Lace details – Creates elegant accessories for special occasions
- Jersey challenges – Stretchy but tricky to sew for beginners
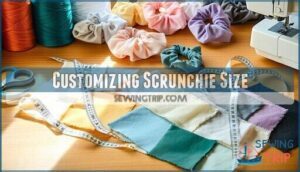
Customizing Scrunchie Size
Getting the right scrunchie size makes all the difference for comfort and style.
You can easily customize your scrunchie by adjusting the fabric strip dimensions and elastic length to fit small, regular, or large preferences.
Measuring for Small Scrunchies
Perfect sizing matters for little ones’ delicate hair.
Little scrunchies need special care—too big overwhelms tiny ponytails, too small pulls precious strands.
Cut your fabric strip to 3″ by 16″ for Kids Scrunchie Size, ensuring comfortable wear without tugging.
Use 6.5″ Elastic Length Guide for proper tension.
These Mini Scrunchie Template dimensions work beautifully for toddlers through elementary age.
The smaller Fabric Strip Dimensions prevent overwhelming tiny ponytails while providing secure hold.
Measuring for Regular Scrunchies
Regular scrunchies hit the sweet spot for most hair types.
You’ll need a 4-inch by 19-inch fabric strip paired with 8 inches of elastic for standard dimensions. These scrunchie measurements work perfectly for medium hair thickness.
The elastic length guide guarantees proper stretch without being too loose or tight. This sizing delivers the classic scrunchie look that’s neither too bulky nor too small for everyday wear, providing the perfect everyday wear experience.
Measuring for Large Scrunchies
Large scrunchies require 4.5" by 22" fabric with 9" elastic for maximum volume control. This scrunchie diameter accommodates thick hair perfectly while maintaining comfortable tension.
Your fabric length determines the final fullness, so don’t skimp on measurements. These DIY scrunchie dimensions create statement pieces that won’t slip from heavy hair.
When you sew scrunchie projects this size, your elastic choice becomes essential for durability and comfort during extended wear.
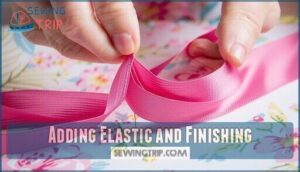
Adding Elastic and Finishing
Now you’ll thread the elastic through your fabric tube to bring your scrunchie to life. This step transforms your sewn tube into a functional hair accessory that’s ready to use.
Threading Elastic Through Tube
With your fabric tube ready, it’s time to thread the elastic through using the safety pin method. Attach one elastic end to a safety pin and gently push it through the tube opening.
Here’s your threading checklist:
- Pin the free elastic end to prevent it from disappearing into the tube
- Work the safety pin through slowly to avoid fabric bunching
- Keep fabric evenly distributed as you pull the elastic through
Use a chopstick or tube turner alternatives to help guide stubborn spots and prevent elastic twists.
Securing Elastic With Knot
Once your elastic is threaded through the fabric tube, overlap the ends by half an inch and tie them together with a secure double knot.
This knot tying technique guarantees elastic durability and prevents the scrunchie from coming apart during use.
Pull the knot tight and gently tug both ends to test knot strength before proceeding.
Trimming Excess Elastic
After securing your elastic with a sturdy knot, trim any excess elastic end to prevent bulk and maintain a professional finish.
Sharp fabric scissors work best for clean cuts, ensuring no fraying occurs.
Cut close to the knot without compromising knot security aftermath.
To prevent fraying, consider using liquid fabric stabilizer on the cut edges.
This final step eliminates unnecessary bulk while preserving the elastic length impact on your scrunchie’s fit and function, ensuring a clean cut and preventing bulk with the use of liquid fabric stabilizer.
Advanced Scrunchie Techniques
Once you’ve mastered basic scrunchie construction, you can explore decorative techniques that transform simple hair accessories into unique statement pieces.
These advanced methods include adding fabric ties, embellishing with bows or beads, and creating no-sew alternatives using fabric glue, which can help make your scrunchies into unique statement pieces.
Creating Decorative Ties
Once you’ve mastered the basic scrunchie, decorative ties add flair to your DIY scrunchie project.
Cut a 3" x 8" fabric strip and fold lengthwise. Create pointed ends by cutting from the fold to 1.5" from the edge.
Your tie fabric choice should complement your scrunchie pattern. Experiment with tie length variation and different knotting techniques for unique bow style options that showcase your patterned tie designs.
Adding Bows or Beads
You can transform your handmade scrunchie into a stunning hair accessory by adding decorative elements. Choose bow material that complements your DIY scrunchie pattern while ensuring proper bead size selection for balance.
For a delicate touch, consider using the shell stitch edges to add a scalloped texture.
- Bow attachment methods: Sew small bows directly onto fabric before final assembly
- Securing embellishments: Use strong thread to attach beads through fabric layers
- Trim color coordination: Match decorative elements to your sewing projects’ color scheme
- Bow material choice: Select lightweight ribbons that won’t weigh down hair accessories
Making No-Sew Scrunchies
Sometimes fabric glue becomes your best friend when sewing machines aren’t available. These no-sew scrunchies offer quick assembly without compromising style. You’ll create handmade scrunchies using fabric glue and elastic threading techniques that rival traditional methods.
You can even make them quickly with a no sew scrunchie.
| Fabric Glue Types | Best Use |
|---|---|
| Hot glue | Quick setting, immediate hold |
| Fabric adhesive | Washable, flexible bond |
| Spray adhesive | Even coverage, smooth finish |
Master these knotting techniques and elastic alternatives for DIY scrunchie success. No-sew closures provide durable results when proper drying time is allowed.
Frequently Asked Questions (FAQs)
How to sew a scrunchie for beginners?
Crafting colorful scrunchies starts simply! Cut fabric 4" by 19", fold lengthwise, sew edges, turn inside-out, thread 8" elastic through with safety pin, tie elastic ends, and you’re done!
What are the measurements for a scrunchie?
Standard scrunchie measurements use a 22" x 4" fabric strip with 8-9" of ¼" elastic. You’ll adjust these dimensions based on your hair thickness and desired scrunchie size.
How much fabric do you need for a scrunchie?
You’ll need a fabric strip measuring 18-22 inches long by 3-5 inches wide, depending on your desired scrunchie size. Regular scrunchies typically use 4" by 19" fabric pieces for the perfect fit.
How to sew the ends of a scrunchie together?
Fold your fabric strip lengthwise with right sides together, then sew a straight seam along the raw edge.
Leave both ends open to create a tube for threading elastic through later.
How long do homemade scrunchies last?
Well-made scrunchies last 6-12 months with regular use.
Your fabric choice matters most – cotton and velvet hold up better than silk.
They’ll outlast store-bought versions if you’ve reinforced your seams properly.
Can scrunchies damage different hair types?
Like a gentle guardian protecting delicate strands, scrunchies won’t damage your hair when chosen correctly.
Cotton and silk fabrics glide smoothly without snagging, while proper elastic tension prevents breakage across all hair types, ensuring that delicate strands are protected.
Whats the best way to wash scrunchies?
Machine wash scrunchies in a mesh bag on gentle cycle with cold water.
Air dry them to prevent elastic damage and fabric shrinkage.
Hand washing works too—just squeeze gently and lay flat to dry, which is an alternative to machine wash.
How many scrunchies can one yard make?
One yard releases a treasure trove of scrunchie-making potential! You’ll create approximately 12-16 regular scrunchies from one yard of fabric, depending on your cutting efficiency and desired fullness.
Why do scrunchies lose their stretch?
Your scrunchie’s elastic degrades from repeated stretching and washing.
Heat from dryers accelerates breakdown.
Over time, the elastic fibers lose their molecular memory and can’t bounce back to their original shape.
Conclusion
With your newly learned skills, you’re now equipped to create beautiful scrunchies that’ll have everyone asking where you bought them.
Learning how to sew a scrunchie opens up endless possibilities for custom accessories that match your style perfectly.
You’ve mastered the basic technique, from cutting fabric strips to threading elastic through the tube.
Now you can experiment with different fabrics, sizes, and decorative elements to create unique pieces.
Your sewing machine will become your best friend as you discover how satisfying it’s to transform simple materials into functional accessories that add personality to any outfit, making it a great way to express your personal style and have fun with custom accessories.

