This site is supported by our readers. We may earn a commission, at no cost to you, if you purchase through links.

Start by gathering basic supplies: fabric, thread, scissors, and pins. Create or download a simple stocking pattern, then cut two pieces from your chosen fabric.
Pin the pieces together with right sides facing, leaving the top open. Sew around the edges with a ¼-inch seam allowance, clip curves, and turn right side out.
Add a cuff by folding the top edge and stitching, then attach a hanging loop. The whole process takes just a couple hours, even for beginners.
But choosing the right materials and mastering those finishing touches can make all the difference.
Table Of Contents
Key Takeaways
- You’ll need basic supplies like fabric, thread, scissors, and pins, plus a sewing machine with multiple stitch settings for best results.
- Cut two mirrored pieces from your chosen fabric using a pattern, then sew them together with right sides facing and a ¼-inch seam allowance.
- Add structure with interfacing for thin fabrics and create a hanging loop using sturdy ribbon or fabric strips for proper mantle display.
- Finish with decorative touches like trim or embroidery positioned 7.5-8.5 inches from the top to avoid cuff overlap and create a professional look.
Gathering Sewing Tools
Before you start your Christmas stocking project, you’ll need to gather a few key sewing tools to make the process smooth and enjoyable.
Having the right equipment on hand will save you time and help you create a professional-looking stocking that’ll be the envy of every mantle, with the right equipment being crucial for a successful project.
Essential Sewing Machines
Several machine types work perfectly for your Christmas stocking sewing project.
Look for machines with multiple stitch settings—at least 10-15 built-in options give you decorative flexibility.
Brother CS7000X and Singer Heavy Duty 4423 are stellar budget options under $250.
For tougher fabrics, consider using heavy-duty sewing machines to guarantee durability.
Choose machines with needle up/down buttons for precise corners, and don’t forget basic maintenance like cleaning lint regularly.
Your beginner sewing project deserves reliable stitching power!
Necessary Fabric Cutting Tools
You’ll need sharp tools to slice through your DIY Christmas stocking project like butter.
Rotary Cutters paired with Cutting Mats give clean, straight cuts on multiple fabric layers. Fabric Scissors handle detailed work, while Pinking Shears prevent fraying edges.
Keep Seam Rippers handy for those "oops" moments when your stocking sewing pattern goes slightly awry.
Many sewers find rotary cutter options useful for various projects.
Measuring and Marking Tools
Accurate measurements make or break your DIY Christmas stocking project.
You’ll need a reliable ruler or flexible tape measure for precise fabric dimensions.
Fabric chalk marks cutting lines clearly and washes out easily.
A seam gauge helps maintain consistent ¼-inch seam allowances.
Pattern weights hold your stocking sewing pattern steady while cutting, and a tracing wheel transfers markings effortlessly for your easy stocking tutorial success.
For intricate designs, consider using fine point tools for accuracy and precision, and to help with measurements and cutting lines clearly with fabric chalk.
Sewing Christmas Stocking
Now that you’ve got your tools ready, it’s time to bring your personalized Christmas stocking to life. Starting with stocking pattern selection will set the foundation for your entire project. You’ll want to choose a pattern that matches your skill level and desired finished size.
Begin by cutting your pattern pieces with proper seam allowance – typically ¼ to ½ inch around all edges. This extra fabric guarantees your seams won’t fray and gives you room for adjustments. When sewing the main seams, remember that curve clipping is your best friend for achieving smooth, professional-looking contours.
Here’s what makes this process truly magical:
Creating something special for someone you love makes every stitch worth the effort.
- The anticipation builds as each stitch brings your custom stocking design closer to reality
- Your hands create something that’ll hold precious memories for years to come
- Every careful cut and measured seam reflects your love for the recipient
Pay special attention to hanging loop reinforcement – nobody wants their festive stocking ideas falling from the mantle! These Christmas sewing projects require patience, but the joy of creating something uniquely yours makes every moment worthwhile. Your stocking fabric choices will truly shine once everything comes together.
Choosing Fabric Materials
Selecting the right fabrics transforms your Christmas stocking from ordinary to extraordinary, making this choice vital for both durability and festive appeal.
You’ll need to evaluate outer fabric, lining material, and optional interfacing to create a stocking that’s both beautiful and built to last through years of holiday traditions.
Outer Fabric Options
When selecting outer fabric for your Christmas sewing projects, you’ll want fabrics that strike the perfect balance between festive appeal and durability.
Velvet tops the list for its luxurious finish, especially in traditional red, green, or blue shades. Cotton offers endless color choices and material blends, making it ideal for personalized holiday fabrics.
Consider fabric weight carefully—medium-weight options like quilting cotton provide structure without being too bulky. These stocking fabric choices guarantee your finished stockings can handle heavy filling while maintaining their beauty for years of holiday use.
It’s also important to be aware of flammable decorative materials when choosing fabrics.
Lining Fabric Choices
Your stocking’s inner layer matters just as much as its stunning exterior.
Cotton offers excellent durability and easy handling, while flannel provides cozy warmth for cold climates.
Lightweight linings like cotton or linen prevent bulk, making stuffing easier.
Consider color coordination with your outer fabric – white or cream linings work universally.
For budget-friendly options, basic quilting cotton delivers quality results without breaking the bank.
For summer garments, it’s best to think about breathable lining options, and consider the overall durability of the fabric.
Interfacing and Batting Materials
Adding interfacing or batting gives your stocking structure and professional shape retention.
Fusible interfacing works perfectly for lightweight fabrics that need extra body. Consider purchasing interfacing options for your project.
Choose low-loft batting for quilted Christmas stockings or when you want soft padding. Medium-weight cotton doesn’t need interfacing, but thin materials benefit from this backup.
Press fusible interfacing onto wrong sides before cutting your stocking pieces for best results.
Assembling Stocking Pieces
Now you’re ready to bring all your stocking pieces together into a beautiful finished piece.
This is where your careful preparation pays off, and you’ll see your Christmas stocking take shape with each step.
Cutting Out Stocking Patterns
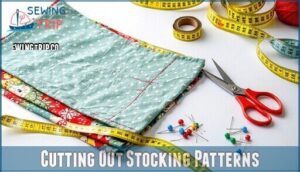
Now you’ll fold your fabric right sides together and pin that free pattern in place.
Cut carefully around the edges, creating two mirrored pieces for each layer—outer fabric and lining.
Remember to add that half-inch seam allowance for durability.
Marking notches will guarantee proper alignment of the pieces.
Pattern mirroring ensures perfect symmetry while proper fabric folding prevents wonky stockings.
If using thin materials, press interfacing prep onto wrong sides first for better structure.
Sewing Outer and Lining Pieces
Now that you’ve cut your stocking patterns, it’s time to bring them together like puzzle pieces.
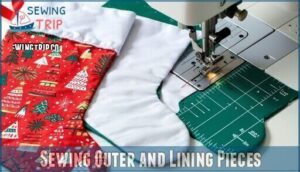
Begin by pairing your outer and lining pieces with matching fabrics, then sew along the top edge using proper seam allowances. Press seams flat for a crisp finish.
Next, match front and back units together, carefully sewing around curves while leaving a gap in the stocking lining for turning. Remember to clip curves without cutting through seams—this prevents puckering when turning stocking right-side out.
These sewing tutorials emphasize precision during this pivotal step, as proper pressing seams and clipping curves determine your final result’s professional appearance.
Adding Cuffs and Hanging Loops
With your cuff fabric choices ready, position the rectangular cuff piece around the stocking’s top edge, ensuring raw edges align perfectly.
Create your hanging loop using sturdy ribbon or fabric strips—about 10 inches works best for proper hanging loop placement.
Use secure seam techniques by sewing through all layers with reinforced stitching. This creates both functional and decorative cuff styles that’ll withstand holiday use.
Adding Decorative Finishing
Now you’re ready to transform your basic stocking into something truly special with decorative finishing touches.
These final details will make your handmade stocking stand out on the mantle and create a cherished holiday keepsake.
Embellishing With Trim and Piping
Now transform your stockings into showstoppers by adding trim and piping that’ll make Santa himself jealous.
These finishing touches turn ordinary stockings into heirloom treasures worth hanging with pride.
- Piping techniques: Insert contrasting piping between cuff seams for crisp, professional edges
- Trim placement: Position vintage crochet lace along cuff borders for elegant texture contrast
- Color coordination: Choose applique elements that complement your stocking’s base fabric
- Seam concealment: Use decorative trim to hide raw edges while enhancing stocking embellishment techniques
Piping can also add professional finishing touches to your stocking.
Personalizing With Embroidery
Adding personal touches to your stockings makes them truly special.
Position embroidery designs 7.5-8.5 inches from the top edge to avoid cuff overlap. Choose thread colors that complement your fabric – contrasting hues make monogram options pop beautifully.
Use stabilizer choice like tear-away backing for clean stitches on stretchy materials.
Machine embroidery guarantees consistent results for holiday sewing crafts, while hand-stitched applique adds artisan charm to Christmas decor.
Adding Decorative Trims and Ribbons
Once you’ve finished the basic structure, it’s time to jazz things up with trims that’ll make your handmade Christmas gifts truly shine.
- Trim Placement – Position ric rac, pom-poms, or faux fur along the cuff’s bottom edge for maximum visual impact
- Ribbon Types – Choose grosgrain or satin ribbons in coordinating colors for durable hanging loops that won’t fray
- Seam Concealment – Use decorative bias tape or piping to hide raw edges while adding professional-looking color coordination
- Loop Durability – Reinforce ribbon attachment points with extra stitching to support heavy Christmas decor filling
These finishing touches transform basic stocking lining instructions into stunning stocking cuff design worthy of any mantle display.
Frequently Asked Questions (FAQs)
How much fabric is needed for standard-sized stockings?
Most standard Christmas stockings need under 1 yard of fabric total.
You’ll use about half a yard for the outer layer and another half for the lining, giving you plenty for a festive 11×14 inch stocking.
Can Christmas stockings be made without sewing machines?
Yes, you can absolutely hand-sew Christmas stockings.
Use a backstitch or running stitch for seams, and it’ll take more time but creates a charming, handmade finish that’s totally worth the effort.
Whats the best way to store handmade stockings?
Store your carefully crafted Christmas stockings in breathable cotton bags or acid-free tissue paper.
Avoid plastic storage that traps moisture.
Keep them flat in cedar chests or archival boxes away from direct sunlight and humidity.
How long does it take to complete one stocking?
Most sewers complete one Christmas stocking in 2-4 hours, depending on your experience level and decorative details.
Beginners might need an extra hour, while seasoned stitchers can whip one up quickly.
Are there beginner-friendly stocking patterns available for download?
Over 80% of sewers start with free downloadable PDF patterns before investing in premium designs.
You’ll find beginner-friendly Christmas stocking patterns with step-by-step instructions, cutting guides, and seam allowances already included for foolproof results.
Conclusion
Practice makes perfect, and now you’ve mastered how to sew a stocking for Christmas.
You’ve learned everything from selecting the right fabrics to adding those special finishing touches that make your creation truly shine.
With these skills under your belt, you can create personalized stockings that’ll become treasured family heirlooms for years to come.
Don’t be surprised if relatives start requesting custom stockings—your newfound talent might just make you the family’s official Christmas stocking maker!
- https://www.reddit.com/r/sewingpatterns/comments/18acfcw/how_do_you_make_a_stocking_pattern/
- https://homemadeonourhomestead.com/how-to-sew-a-simple-christmas-stocking/
- https://happiestcamper.com/how-to-sew-a-christmas-stocking/
- https://rooneyclothing.com/products/christmas-stocking-sewing-guide
- https://www.sewdiy.com/blog/2022/stocking-fabric-and-supplies


