This site is supported by our readers. We may earn a commission, at no cost to you, if you purchase through links.
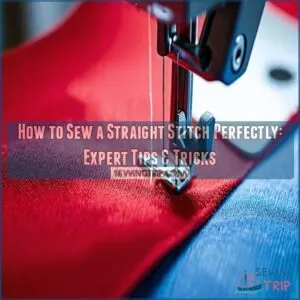
Choose the right foot, like a general-purpose or edge-stitching foot.
Place your fabric precisely under the presser foot, aligning the edge with a seam guide.
Now, here comes the fun part: press the foot pedal gingerly, like you’re cautiously testing the brakes on a new bike.
Start slow and steady.
Use guides like tape to maintain a straight line, and remember, practice makes perfect.
Want to explore advanced techniques that even pros swear by? Stick around for more master tips!
Table Of Contents
- Key Takeaways
- Sewing Straight Fundamentals
- Choosing The Right Sewing Machine Foot
- Seam Allowance Guides and Tools
- Presser Feet With Built-in Guides
- Marking and Drawing Stitch Lines
- General Tips for Sewing Straight Lines
- Specialized Sewing Tools and Techniques
- Utilizing Diagonal Seam Tape and Frixion Pens
- Mastering The Art of Slow and Steady Sewing
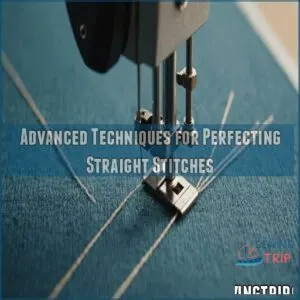
- Advanced Techniques for Perfecting Straight Stitches
- Frequently Asked Questions (FAQs)
- Conclusion
Key Takeaways
- Use seam guides like masking tape or seam guide rulers to maintain consistent seam allowances and achieve straight lines.
- Choose the right presser foot for your fabric and project needs to improve stitch accuracy and prevent fabric tangles.
- Start sewing at a slow and steady pace, focusing on the fabric edge rather than the needle, to maintain control and precision.
- Adjust thread tension and needle size according to fabric type to prevent issues like puckering and ensure smooth stitching.
Sewing Straight Fundamentals
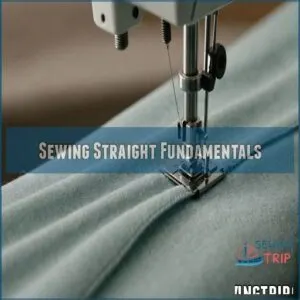
To sew a straight stitch perfectly, you need to understand the importance of seam allowances in guiding your fabric.
With just a bit of focus and some simple tools, you’ll soon be stitching like a pro.
Understanding Seam Allowances
Seam allowances might seem like small details, but they can make or break a project.
Imagine your sewing as a dance with rhythm and plan for these variations.
Use:
- Standard seam allowances for consistency
- Seam allowance variations to suit different fabrics
- Marking allowances accurately using guides
- Presser foot alignment for straight stitching
- Creative tools like tapes or notes for practice.
Importance of Accurate Seam Allowance
Nailing that accurate seam allowance is like having a trusty GPS for your fabric path.
It guarantees a neat garment drape and fabric fit, essential for a professional finish.
Whether you’re using your presser foot or creative sewing guides, keeping those seam lines precise turns any project into a success.
Remember, sewing accuracy isn’t just a goal—it’s your secret weapon!
Factors Affecting Seam Allowance Accuracy
Accurate seam allowance hinges on understanding key factors: fabric type, sewing machine settings, and thread tension.
Needle size and pressing techniques also play pivotal roles.
A sharp needle and a relaxed thread tension prevent puckering, while a compatible presser foot guides steady stitching.
Your sewing tools, from rulers to marking pens, guarantee precision.
Master these, and sewing straight becomes second nature.
Choosing The Right Sewing Machine Foot
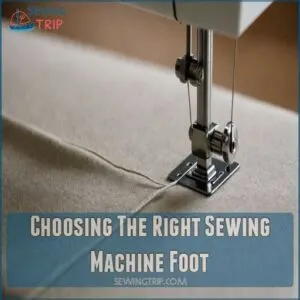
Mastering the straight stitch starts with understanding the basics of stitches, such as the ones found in a comprehensive sewing machine stitches library Sewing Machine Stitches, which includes essential stitches like the straight stitch. Picking the right sewing machine foot is key to sewing perfectly straight stitches.
The right foot can make all the difference, from a perfectly aligned seam to avoiding frustrating fabric tangles.
Trust me, you’ll thank yourself later!
SUBTOPIC: Cybersecurity Best Practices
Just like choosing the right sewing machine foot guarantees your seam allowance is spot on, adopting cybersecurity best practices can save you from digital downfalls.
Watch out for data breaches and phishing scams by keeping your software updates current.
Use two-factor authentication to secure your accounts, much like an edgestitching foot keeps your straight stitch in line.
Password Strength Importance
Thinking about cybersecurity best practices, password strength is like choosing the right sewing machine foot—vital for success.
Imagine sewing a dress with these four basics:
- Password length: Aim for longer.
- Character variety: Mix letters, numbers.
- Symbol usage: Add special symbols.
- Guard against dictionary attacks: Avoid common words.
Remember, a strong password keeps your digital seams secure!
Multi-factor Authentication Benefits
Jumping from password strength to multi-factor authentication gives your account security a boost, like choosing the right presser foot for perfect seam allowances.
It’s a handy tool in your cybersecurity kit, reducing risk and enhancing data protection.
Just like a presser foot, an edge guide with this setup makes your privacy less likely to stitch itself a hole.
Regular Software Updates
Secure your sewing machine’s performance like a well-oiled engine with regular updates.
Just as keeping software current with security patches and bug fixes enhances stability and features, choosing the right presser foot makes sure your straight stitch stays on track.
According to the sewing machine presser foot guide, having the right foot, such as a Teflon foot for smooth surfaces, is important for specific fabrics and stitches.
With the right tools, your seam allowance will glide smoothly, making sewing straight feel as easy as pie.
Seam Allowance Guides and Tools
For achieving that perfectly straight stitch, seam allowance guides and tools are your best friends.
Whether you’re using a magnetic seam guide or simply some masking tape, these handy helpers keep your fabric in line without the drama.
Types of Seam Allowance Guides
Got your sewing machine foot sorted?
Let’s chat seam allowance guides.
For a wide variety of sewing machines and compatible tools, consider checking out online resources like sewing machine products.
They’re important for keeping your stitches straight and true.
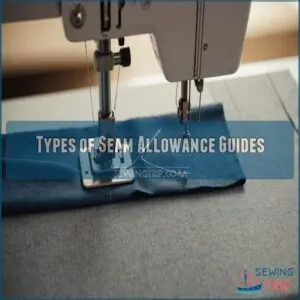
Whether you’re using masking tape for a DIY guide or relying on presser foot markings, each tool offers distinct pros and cons.
Consider accuracy, guide placement, and sewing machine compatibility to find the right setup for your next project.
Magnetic Seam Guides
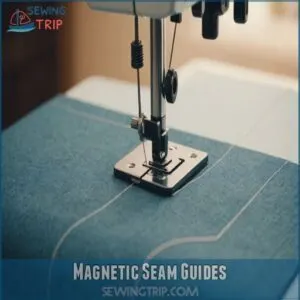
Ready to conquer those wonky seams? Magnetic seam guides are your new best friend! These handy little helpers stick right to your sewing machine’s needle plate, acting as a super-simple seam allowance guide.
Different types offer varying strengths and placements.
Removing them’s a breeze, too.
If magnets aren’t your thing, explore other alternatives!
Sewing straight has never been easier.
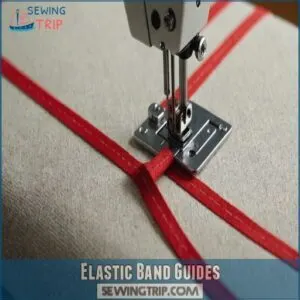
Elastic Band Guides
Finding your way with a DIY elastic band guide can be as handy as a pocket on a shirt.
Just loop an elastic band over your sewing machine bed, and let it guide your fabric for straight stitches.
Adjusting elastic band guides is simple—just slide it for your desired seam allowance.
It’s a flexible, cost-effective alternative offering precision and ease.
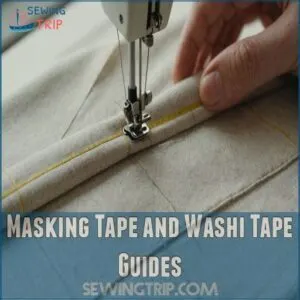
Masking Tape and Washi Tape Guides
Picture your sewing machine as a blank canvas, ready for creativity.
Masking tape and washi tape are brilliant seam allowance guides! They stick securely, help you sew straight, and aren’t a hassle to remove.
Just remember:
- Tape placement is key.
- Tape types avoid damage.
- Tape guide cons include possible residue.
Mastering this is like art!
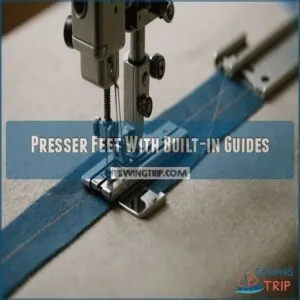
Presser Feet With Built-in Guides
You’ll love how the versatile J Foot, ideal for straight stitching, zigzags, and decorative designs, is a must-have presser foot, as explained in must have presser feet for sewing, and how presser feet with built-in guides can transform your sewing experience by keeping your stitching perfectly aligned without any guesswork.
These handy attachments work like training wheels for your fabric, giving you the confidence to create professional-looking seams every time.
Adjustable Guide Presser Feet
Your secret weapon for perfect seam allowances has arrived: adjustable guide presser feet.
While basic guides serve their purpose, these versatile feet come with built-in rulers that let you fine-tune your seam width on the fly.
Let’s look at how they stack up:
| Feature | Benefit |
|---|---|
| Adjustable Guide | Customizable seam widths |
| Built-in Ruler | Precise measurements |
| Quick-Release | Easy width changes |
You’ll love how these feet give you total control over your stitching precision.
Fixed Seam Allowance Presser Feet
Sometimes the simplest tools pack the biggest punch! Fixed seam allowance presser feet take the guesswork out of perfect stitching.
These handy attachments come with built-in guides that maintain consistent spacing as you sew.
- The popular ¼-inch foot creates flawless quilt seams without measuring
- Standard 5/8-inch feet make garment construction a breeze
- The 3/8-inch foot excels at home décor projects and quick fixes
Think of them as your sewing autopilot – just align and go!
Edge-Stitching and Edge-Joining Presser Feet
Built-in guides on edge-stitching and edge-joining feet work like training wheels for perfect topstitching.
The metal blade in the center keeps your fabric perfectly aligned while you sew.
For quilting or working with bulky fabrics, these feet are game-changers – they’ll help you nail those parallel stitches every time.
Just line up your fabric edge with the guide, and you’re ready to create professional-looking finishes.
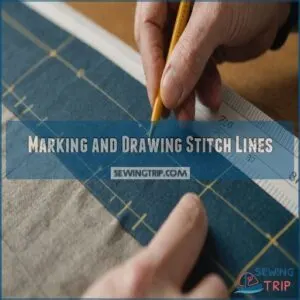
Marking and Drawing Stitch Lines
You’ll find marking stitch lines directly on your fabric is like creating a roadmap for your sewing success – it’s one of the simplest yet most effective ways to achieve those perfectly straight stitches you’re aiming for.
When you’re tackling a tricky seam or want to make sure you have precise topstitching, grabbing your favorite fabric marking tool and ruler will help you create clear guidelines that’ll keep your stitches on track.
Direct Fabric Marking
Marking fabric directly lets you master those tricky stitching lines with pinpoint accuracy.
While presser feet are handy guides, drawing your stitch lines gives you complete control over your sewing path.
Grab your favorite fabric marking tool and a ruler to create precise guidelines.
These marks act like your personal roadmap, helping you navigate each seam with confidence.
The best part? They’ll disappear when you’re done!
Using Chalk and Tailor’s Pencils
When you’re ready to level up your marking game, chalk and tailor’s pencils become your new best friends.
Hold your tailor’s pencil like you’re writing a love letter to your fabric – light and gentle does it.
Be sure to test your tools first, considering the fabric type considerations.
For dark fabrics, white chalk‘s your go-to, while colored pencils work wonders on lighter materials.
Keep your lines whisper-thin – just enough to guide your stitches without showing through.
Removing Markings
Those pesky fabric marks won’t stand in your way once you’ve finished your perfect straight stitch.
For chalk marks, simply brush them away with your hand or use a soft cloth.
Heat-erasable pens vanish like magic with a quick press of your iron, while water-soluble markers disappear with a light dab of water.
Test your removal method on a scrap piece first to avoid any surprises.
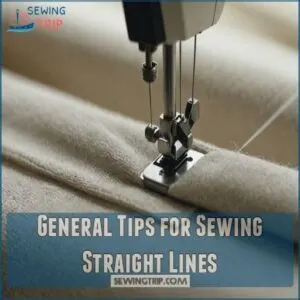
General Tips for Sewing Straight Lines
You’ll find that mastering straight stitches isn’t about having the steadiest hands, but rather using smart techniques and the right tools for guidance.
Whether you’re a beginner or seasoned sewist, these practical tips will help you create those crisp, professional-looking seams you’ve always wanted.
Focusing on Seam Allowance Guides
For straight-as-an-arrow stitches, keep your eyes on the prize: your seam allowance guide.
Don’t get hypnotized by the needle!
Your sewing machine’s built-in markings are your best friends, but if they’re playing hide-and-seek, no worries.
Slap on some masking tape or grab a magnetic guide.
Remember, different fabrics might need different guides.
Mix and match until you find your perfect sewing sidekick.
You’ve got this, stitch wizard!
Maintaining a Flat Fabric Surface
Keeping your fabric flat as you sew is key to nailing those straight stitches. You’ve got your seam allowance down, now let’s smooth things out.
Adjust your feed dog settings to match your fabric’s thickness.
Use a pressing surface before and as you sew to banish those pesky wrinkles.
To further guarantee accuracy, set a seam guide by choosing the right needle size for the fabric, as this is essential for achieving straight seams, see how to sew straight.
A walking foot can be your best friend for tricky fabrics.
- Feel the satisfaction of a perfectly smooth seam
- Experience the joy of effortless fabric control
- Revel in the pride of professional-looking results
- Embrace the zen-like flow of hassle-free sewing
Backstitching and Trimming Fabric Edges
Backstitching is your sewing secret weapon!
Start and end your seams with a few reverse stitches to lock them in place.
It’s like tying a knot in your thread, but way cooler.
Then, trim those fabric edges to prevent fraying and achieve a pro finish.
Use sharp scissors or a rotary cutter for clean cuts.
You’ll boost your sewing confidence and create garments that look straight-up amazing!
Specialized Sewing Tools and Techniques
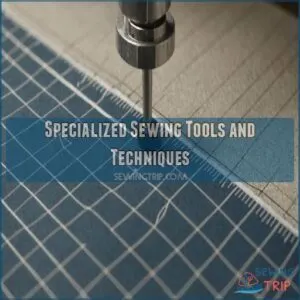
You’ll find sewing straight lines much easier with specialized tools like gridded mats and seam guide rulers.
These nifty gadgets take the guesswork out of maintaining accurate seam allowances, helping you achieve pro-level stitches without breaking a sweat.
Gridded Mats and Grid Gliders
Ready to take your straight stitching game to the next level? Enter gridded mats and grid gliders – your new best friends for sewing accuracy.
These nifty tools adhere to your sewing machine bed, providing a visual grid to guide your fabric.
Here’s why you’ll love them:
- Precise seam allowances at a glance
- Boost your confidence with each perfect stitch
- Say goodbye to wonky lines and hello to pro-level results
- Become a quilting pro
No more eyeballing or guesswork – just smooth sailing and straight stitches!
Seam Guide Rulers
To achieve perfect straight stitches, it’s crucial to adjust your stitch length based on fabric thickness and type. Seam guide rulers are your secret weapon for nailing those perfect straight stitches.
These handy tools let you set exact seam allowances, giving you spot-on accuracy every time.
Just place one on your sewing machine bed, and you’re golden.
To make the most of these specialized sewing tools, consider combining them with other essential tools, such as a measuring tape for precision.
They’re a game-changer for quilting and following sewing patterns.
Plus, they’re versatile enough to use with different fabrics and projects.
Give ’em a try – you’ll wonder how you ever sewed without them!
Attachable Seam Guides and Cloth Guides
On your quest for the perfect straight stitch, attachable seam guides and cloth guides are your trusty sidekicks.
These nifty tools clip onto your sewing machine, providing a steady barrier for fabric alignment.
You’ll find various types, from magnetic to adjustable options, each offering precise seam allowance control.
Place them strategically, and you’ll be sewing straight lines like a pro in no time.
Remember to keep them clean for best performance!
Utilizing Diagonal Seam Tape and Frixion Pens
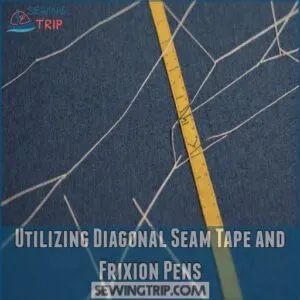
You’ll love using diagonal seam tape and Frixion pens to achieve perfect straight stitches.
These handy tools make marking and following sewing lines a breeze, helping you create professional-looking seams with ease.
Benefits of Diagonal Seam Tape
Ever wondered how to achieve laser-straight seams without breaking a sweat?
Enter diagonal seam tape, your new secret weapon for precision sewing.
This versatile tool offers a bunch of perks, especially when combined with proper sewing machine maintenance, to make sure your sewing machine is running smoothly.
- Accuracy: Guides your fabric perfectly along the seam allowance
- Durability: Withstands multiple uses without losing its stick
- Versatility: Works on various fabric types and projects
- Cost-effectiveness: Saves time and reduces fabric waste
Simply stick the tape along your seam line, and you’re good to go.
It’s like having a pro seamstress guiding your hands!
Plus, it’s a game-changer for DIY sewing projects and specialty work.
Say goodbye to wonky seams and hello to sewing mastery!
Using Frixion Pens for Marking
Say goodbye to chalk smudges! Frixion pens are your new secret weapon for precise fabric marking.
These heat-erasable ink pens come in various colors and tip sizes, perfect for different fabrics and projects.
Here’s a quick guide to mastering Frixion pens:
| Fabric Type | Pen Tip | Technique |
|---|---|---|
| Delicate | Fine | Light touch |
| Medium | Medium | Normal pressure |
| Heavy | Bold | Firm stroke |
Use Frixion pens to mark seam allowances, pattern pieces, or quilting lines.
When you’re done, a quick iron zaps the marks away like magic! Just remember, extreme cold can bring marks back, so store your projects wisely.
Mastering The Art of Slow and Steady Sewing
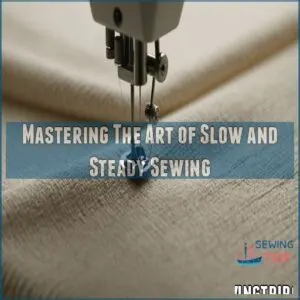
You’ll find that slowing down your sewing speed is key to achieving perfect straight stitches.
By taking your time and avoiding fatigue, you’ll master the art of steady sewing, especially when using techniques like adjusting tension settings, and create flawless seams that’ll make your projects shine.
Controlling Sewing Machine Speed
For sewing straight, speed is your secret weapon.
Think of your foot pedal as a gas pedal – easy does it!
Start slow, like you’re tiptoeing through a field of fabric.
As you get comfy, gradually pick up the pace.
Different fabrics need different speeds, so listen to your machine’s hum.
Lighter fabrics? Go slow and steady.
Heavier materials? You can rev it up a bit.
Remember, it’s not a race – it’s about control.
Practice makes perfect, so don’t be afraid to experiment with your speed settings.
You’ll find your rhythm in no time!
Taking Breaks and Avoiding Fatigue
Despite your excitement to finish that quilt top, remember that sewing marathons can leave you feeling like a wrung-out dishrag.
Take regular breaks to keep your stitches as straight as an arrow.
Every 30 minutes, step away from your sewing cabinet and stretch those muscles.
Do some eye exercises to prevent strain, especially if you’ve been paper piecing or free-motion quilting.
A quick walk or a cup of tea can refresh your mind, helping you maintain that perfect posture when you return.
By pacing yourself, you’ll master the art of slow and steady sewing, producing straighter stitches and enjoying the process more.
Advanced Techniques for Perfecting Straight Stitches
You’ve mastered the basics, now it’s time to level up your straight stitching game with some clever hacks.
From using sticky notes as adjustable guides to create custom seam allowance markers for various sewing stitches, including the straight stitch technique, these advanced techniques will help you achieve pro-level precision in your sewing projects.
Using Sticky Notes as Adjustable Guides
Ready to take your straight stitching to the next level? Let’s talk sticky notes! These handy little squares aren’t just for reminders; they’re your secret weapon for perfect seams.
Stack ’em up on your sewing machine bed to create an adjustable guide that’s as flexible as you are.
Need a wider seam allowance for quilt sewing? Add another note. Working with narrow straps or piping? Remove a few. You can even use different colors to mark various widths.
It’s like having a customizable roadmap for your fabric – no more wandering stitches!
Creating Custom Seam Allowance Guides
Sticky notes are great, but let’s take your straight stitching game to the next level with custom seam allowance guides.
You’ll feel like a sewing boss with this DIY hack!
Grab some cardstock or thin plastic and cut it into strips matching your desired seam width.
Voila!
You’ve just created a reusable, precision guide.
Slide it under your presser foot, align your fabric’s edge with the guide, and you’re off to the races.
This nifty trick works wonders for tricky fabrics or intricate patterns.
Plus, you can make multiple guides for different projects.
Talk about a tailor-made solution!
Frequently Asked Questions (FAQs)
How to sew a perfect straight line?
Picture yourself as a sewing Jedi, guiding fabric under your needle with ease.
Focus on the fabric’s edge against the seam guide, sew slowly, and keep fabric flat.
Maintain steady hands, and practice often for perfection.
How to sew perfectly straight seams?
To sew perfectly straight seams, focus on consistent seam allowances.
Use guides like masking tape or seam guide rulers.
Slow your speed for precision.
Watch the fabric edge, not the needle.
Practice patience and persistence—you’ll master it!
What are the best sewing machine settings for straight stitch?
My grandma always said, "straight stitching‘s a marathon, not a sprint!"
Start with a straight stitch setting.
Adjust your needle position.
And don’t forget to use a seam guide.
Slow and steady wins the race!
How to do a straight stitch step by step?
Sewing a straight stitch like a pro starts with aligning fabric edges, setting your machine to straight stitch mode, and using guides like tape or presser feet.
Focus on the guide, sew steadily, and enjoy the process!
Whats the best fabric for easy sewing?
Start with cotton fabric—your go-to hero in the sewing world.
It’s forgiving, doesn’t slide around, and handles nicely under the needle.
Plus, its predictable behavior gives you more control, making it perfect for beginners.
How do I fix crooked stitches?
To fix crooked stitches, start by re-threading your machine, adjusting tension, and checking the needle.
Use a seam ripper to remove uneven stitches, then re-sew slowly.
Practice makes perfect, so be patient and steady.
What thread tension suits straight stitches?
Imagine this: your thread glides like silk through buttery fabric.
For straight stitches, set your sewing machine’s tension around 4 to
Experiment slightly, adjusting for fabric type and thread, to achieve that seamless, professional finish.
Why does my machine skip stitches?
When your sewing machine skips stitches, common causes include skipped zigzag stitches issues, it’s likely due to a dull needle, improper threading, or incorrect tension.
Check that the needle is sharp and installed correctly.
Also, make sure threading is accurate and tension balanced.
How often should I change my needle?
You should change your sewing machine needle after every 8 to 10 hours of sewing or when it hits a pin.
Regular changes prevent fabric damage and improve stitch quality.
Listen to your machine; it’s talking to you!
Conclusion
So, you’ve mastered the basics of how to sew a straight stitch perfectly!
Remember consistent practice, using the right tools, and paying attention to detail are key.
You’ll be sewing flawlessly in no time.
Don’t be afraid to experiment with different techniques and find what works best for you.
A perfectly straight stitch isn’t just about technique; it’s about confidence and precision.
Keep practicing, and soon, even your most challenging sewing projects will boast those picture-perfect straight stitches.
Happy sewing!

