This site is supported by our readers. We may earn a commission, at no cost to you, if you purchase through links.
The process isn’t as complicated as tailors make it seem. You’ll need bias-cut fabric, the right interfacing, and a few essential techniques that transform a flat piece of cloth into something you’ll reach for every morning.
Table Of Contents
Key Takeaways
- Sewing your own tie lets you control quality and fit while cutting costs dramatically—most store-bought ties mark up $10 worth of fabric to $50-$150, but DIY takes just 30-45 minutes once you’ve learned the basics.
- The secret to professional drape is cutting all fabric pieces on the bias (at a 45-degree angle), using sewn-in interfacing instead of fusible, and matching your interfacing weight to your outer fabric so the tie flexes naturally and holds its knot.
- Your fabric choice defines the tie’s character—silk dominates luxury markets with natural sheen, polyester offers wrinkle resistance at 45% market share, wool adds winter texture, and linen breathes well for summer despite wrinkling easily.
- Hand-finishing with slip stitches (the invisible seam technique that takes about 30 minutes) separates quality handmade ties from machine-sewn alternatives because it allows the fabric to move naturally and recover its shape after knotting.
Essential Supplies for Sewing a Tie
Before you cut your first piece of fabric, you’ll need to gather the right supplies. The materials you choose will affect how your tie looks, feels, and holds its shape.
Here’s what you’ll need to have on hand before you start sewing.
Recommended Fabrics for Ties
Fabric selection can make or break your tie. You’ll want something with good fabric drape that holds its shape but doesn’t feel stiff. Here’s what works best:
- Silk fabric: Holds nearly 70% of luxury tie sales thanks to its natural sheen and year-round wearability
- Polyester benefits: Most popular choice at 45% market share; it’s wrinkle-resistant and nearly twice as strong as cotton fabric
- Wool textures: Perfect for cold months with thick, substantial knot formation
- Linen breathability: Lightweight and moisture-wicking for summer wear, though it wrinkles easily
Eco-friendly options like recycled polyester now appear in 25% of new collections.
For formal events, a silk tie is popular.
Choosing Lining and Interfacing
Once you’ve picked your fabric, you’ll need the right lining fabric and interfacing to give your tie structure. These hidden layers control how your tie drapes and knots. A key factor is that the best ties are handmade, ensuring higher quality and excellent drape.
| Component | Best Choice |
|---|---|
| Lining Material | Silk habotai for delicate fabrics; cotton or wool for breathability |
| Interfacing Properties | Medium-weight sewn-in wool blends (not fusible) |
| Weight Considerations | Match interfacing weight to outer fabric for smooth knotting |
Cut both the lining and interfacing on the bias—that’s at a 45-degree angle—so your tie flexes naturally. Sewn-in interfacing beats fusible every time because it bounces back after wear. The cutting methods matter: overlap interfacing edges and zigzag stitch them together for strength throughout the tie. Poor fabric selection here means stiff knots or limp ties that won’t hold their shape.
Must-Have Sewing Tools and Notions
With the right supplies in hand, you’ll need tools that turn fabric into a finished tie. Your setup shapes whether you’re wrestling with crooked edges or coasting through crisp seams.
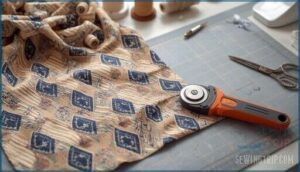
- Rotary cutters and self-healing mats let you slice through bias-cut fabric with 33% better accuracy than scissors alone
- Marking tools like tailor’s chalk or water-soluble pens prevent the 11% of fit issues caused by placement errors
- Stitching tools including a seam ripper (essential for 92% of sewists), sharp needles replaced every 7 hours, and quality thread matched to your fabric
- Pressing equipment such as a steam iron and pressing cloth to set seams without shine, plus pins or clips to hold your seam allowance as you work—bias tape helps finish the tie keeper neatly
Creating or Sourcing a Tie Pattern
Before you can start sewing, you’ll need a solid pattern to work from. You have a few options depending on what you already have at home and your comfort level with pattern-making.
Let’s look at three ways to get the pattern you need.
Tracing an Existing Tie
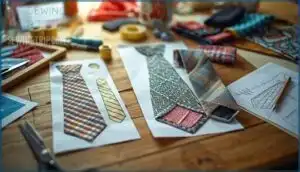
If you’ve got a tie you love but want to replicate the pattern, tracing an existing tie is your best starting point. First, press the tie flat to prevent distortion from wrinkles—this keeps your grainline accuracy on point.
Lay it on craft paper and stabilize the fabric with pins so it won’t shift. Use chalk or a pencil to trace the outlines, noting seam allowance (usually 1.5 cm), curve tracing details, and pattern markings like notches and fold lines to guide your sewing later.
Using Printable or Commercial Patterns
Printable tie patterns and commercial necktie patterns simplify construction for beginners, with over 80% preferring digital formats for flexibility. PDFs account for more than 60% of pattern downloads, offering pattern accuracy through built-in scaling checks and seam allowance markings.
These patterns support waste reduction—proper layout can reduce fabric costs greatly. Look for options with pattern customization guides, as half of all tie pattern sales include adjustable measurements for individual DIY tie pattern results.
Adjusting Pattern Size and Length
When you adjust your tie pattern, grading principles help you scale proportionally without distorting shape. Most printable tie patterns measure 57 to 62 inches, but length methods like slashing and spreading let you customize finished tie length.
Width preferences range from classic 3.5 inches to skinny 2-inch styles. Consider knot impact and height considerations—taller wearers need extra length since Windsor knots consume more fabric than simpler ties.
Cutting and Preparing Tie Pieces
Once you’ve got your pattern ready, it’s time to turn fabric into tie pieces. This stage requires attention to grain direction, precise measurements, and clean cuts.
Let’s walk through the key steps to set you up for a smooth assembly process.
Cutting Fabric on The Bias
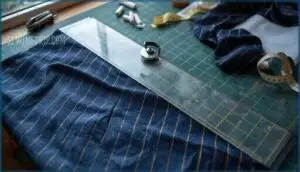
Cutting fabric on the bias means slicing at a 45-degree angle to the grainline, and it’s the secret behind a tie that drapes beautifully without twisting. Use a 45-degree ruler to align your pattern pieces, then cut each section in a single layer to avoid stretching.
This technique maximizes fabric drape and reduces fraying, though it does increase material waste—expect about 70% scrap per tie.
The bias cut lets patterns like stripes run diagonally, creating striking visual effects.
Marking and Cutting Lining and Interfacing
Mark lining and interfacing with carbon tracing for precision, or try pin marking on stable fabric. Test fabric marking tools on scraps first, then cut carefully with a ½-inch seam allowance in mind.
Both lining fabric and interfacing should be cut on the bias at 45 degrees, using your tie blade as the template. Quality wool or cotton lining works best with your shell fabric, while medium-weight wool blend interfacing provides shape without stiffness.
Tips for Accurate Fabric Cutting
You’ll cut more accurately with sharp rotary cutters and grid-lined mats—they reduce errors to under 2 mm. Always align your pattern pieces with the grainline parallel to the selvage, within a 1–2 mm tolerance, to prevent warping.
Use fabric marking tools like tailor’s chalk on scraps first, mark your ½-inch seam allowance clearly, and stabilize slippery fabrics between paper layers before cutting to minimize shifting.
Assembling and Sewing The Tie
Once your tie pieces are cut and ready, it’s time to bring them together. You’ll stitch the sections, attach your lining and interfacing, then press and fold to create that classic tie shape.
Each step builds on the last, so work carefully and your tie will come out looking sharp.
Stitching Main Tie Sections
When you stitch the main tie sections together, you’re creating the foundation that holds everything else in place. This is where your choice of seam allowance and sewing techniques really matters. Most patterns call for a 1/4-inch seam allowance, which keeps the tie sleek without bulk.
- Start with backstitching at the beginning and end of each seam to lock your stitches and prevent unraveling
- Maintain 8–10 stitches per inch for prime stitch density that balances strength with flexibility
- Use bias stitching when joining sections cut on the diagonal, which gives your tie natural drape and stretch
- Apply reinforced stitching at stress points like the tip and narrow end where the tie takes the most wear
- Press seams flat immediately after sewing a tie to keep edges crisp and assure quality control throughout assembly
Machine-sewn seams deliver stronger results than hand stitching for these main sections, so don’t hesitate to let your sewing machine do the heavy lifting here.
Attaching Lining and Interfacing
Once your main sections are stitched, you need to add the interfacing and lining fabric that give your tie its structure and polished look. These layers work together to create shape, prevent wrinkling, and help the tie hold a neat knot.
| Component | Best Application Method |
|---|---|
| Woven interfacing (silk ties) | Fusible application with protective cloth |
| Knit interfacing (stretch fabrics) | Sew-in methods with basting |
| Wool/cotton lining | Hand stitching with slip stitch |
Center your interfacing panel along the tie’s length, then attach it using either fusible application with low heat or sew-in methods for delicate fabrics.
Pin lining pieces right-side-down against tie tips, stitch with a 0.5-inch seam allowance, clip corners, and turn right-side out.
This tie construction technique ensures your finished tie won’t twist or buckle after wear, and proper weighting between lining materials and interfacing types delivers the drape and knot stability you’re after.
Pressing and Folding Edges for Shape
With lining and interfacing in place, your tie needs crisp edges to look professional. Pre-pressing tie fabric before you stitch improves accuracy and reduces wrinkles, while pressing seams right after sewing keeps edges sharp and prevents distortion.
Use a pressing cloth to protect delicate fabrics from shine or heat damage—cotton ties press best at 320–360°F for about 30 seconds.
Fold fabric edges consistently for a symmetrical shape, using steam to soften fibers and roll out seams flat. These edge pressing and folding techniques prevent common errors like puckering and misaligned tips, giving your handmade tie the polished finish you’re aiming for.
Finishing Touches for Your Handmade Tie
You’ve assembled your tie, and now it’s time to bring everything together with those final details that turn a good tie into a great one.
These finishing steps secure loose edges, add practical features, and give you a chance to make the piece truly your own.
Let’s walk through the techniques that’ll polish off your handmade necktie.
Hand Stitching and Slip Stitch Techniques
With the right hand sewing techniques, you’ll close your tie’s seam invisibly and securely. The slip stitch is your go-to method here—it’s the hallmark of quality hand-finished ties.
Here’s how to execute it:
- Start with a double knot to anchor your thread
- Insert the needle through one fold every 0.25 inches, catching just a few threads on the opposite side
- Match your thread color to the fabric for an invisible finish
- End with a back-tack knot, burying it within the seam
This continuous stitching approach takes about 30 minutes but allows the tie to move naturally and recover its shape after knotting—skill indicators that separate handmade quality from machine-sewn alternatives.
Adding a Tie Keeper
Once your seams are secure, the tie keeper is what keeps the narrow blade tucked in place—preventing it from swinging free or ruining the tie’s clean profile. Most ready-made ties position this loop about 4 to 6 inches below the neck seam, and you’ll want to follow that standard for best results.
| Element | Recommendation |
|---|---|
| Keeper loop placement | 4–6 inches below neck seam |
| Material durability | Silk or polyester remnants |
| Length | 3–4.5 inches |
| Width | 0.5–0.75 inch |
| Stitching techniques | Hand tack or insert into seam |
Cut a strip of your lining fabric or bias tape, fold the raw edges inward, and press flat. Loop it around the tie’s back seam, then hand sew both ends securely using a slip stitch or backstitch—the same technique you just practiced.
Stitching the keeper into the main seam during assembly saves time and adds tear resistance, but hand tacking afterward works perfectly for a beginner-friendly approach. Either way, you’re upgrading both the user experience and aesthetic variation of your necktie construction.
Personalizing With Labels or Embellishments
Beyond function, you’ve got an opportunity to make your tie truly yours. Adding personal touches turns a handmade accessory into something memorable—and the options have grown with consumer preferences shifting toward subtle, custom embroidery and tech-integrated labels.
Here are three ways to add character:
- Sew in a custom tie label featuring your initials, a monogram, or care instructions—over 41% of buyers want this kind of sewn-in personalization.
- Attach trim or ribbon along the back seam for a pop of color or texture that nods to label sustainability through reused materials.
- Embroider a small motif near the keeper or tip lining—durability considerations matter here, since quality embroidery holds up for 3–5 years with regular wear.
Weaving in these details elevates your tie from DIY project to signature piece.
Frequently Asked Questions (FAQs)
What width should my tie be?
Think of your tie width like Goldilocks—not too slim, not too wide. You’ll want 75 to 25 inches for most builds and lapel widths.
Match your necktie width to your suit lapel and body type for balanced menswear proportions.
Can I use a different fabric instead of silk?
Yes, you can use cotton, polyester, wool, or linen instead of silk. Polyester offers excellent wrinkle resistance and durability at lower cost.
Cotton and linen work well for casual summer ties, while wool provides warmth and texture for winter wear.
How long does it take to make a tie?
Making a tie takes less time than you’d think, yet longer than most assume. Beginners need about 1 to 2 hours for this DIY neckties project, while experienced sewers finish in 30 minutes.
Your handmade tie timeline depends on skill level, fabric choice, and interfacing type—complexity impacts everything.
Can I add embroidery or other decorative details?
You can absolutely add embroidery or other decorative details to your handmade tie. Hand stitch designs using embroidery floss on the blade before assembling, or apply fabric paint for custom motifs.
Just remember that embellishments affect fabric integrity and drape, so keep needlework light to maintain the tie’s flexibility and ease future maintenance considerations.
What is the best way to press my finished tie?
Press your finished tie using low heat and steam, working from the narrow end outward. Place a pressing cloth over the fabric to prevent shine, especially on silk. Let the tie cool flat before handling to set the shape and avoid new wrinkles.
How do you calculate fabric yardage for different tie widths?
Standard ties need about 3/4 yard of fabric. Slim ties use 10-15% less, while wider styles require slightly more. Bias cut impact increases yardage by 20-25%.
Interfacing considerations and lining fabric needs generally add 3/8 to 1/2 yard, depending on efficient pattern layout.
Can you sew ties without a sewing machine?
Yes, you can hand stitch a tie using just needle and thread. Hand-sewing techniques like slip stitch and bar tacks guarantee flexibility and durability.
Expect 30 to 45 minutes per tie, compared to minutes with a machine.
How do you fix mistakes when sewing a tie?
When seam imperfections appear, use a seam ripper to carefully remove the stitches, then resew with proper tension and grain alignment.
For pressing errors or interfacing issues, adjust your sewing machine settings and follow sewing instructions closely when reattaching.
Whats the best way to store handmade ties?
While some might treat handmade ties like ancient scrolls—preserved in glass and rarely touched—you’ll want practical storage instead. Hang ties on racks or loosely roll them to prevent creases, especially for silk.
Keep them in cool, dry spaces around 60-65°F to avoid fading and damage.
How long does it take to sew one necktie?
Most sewists finish a necktie in 30 to 45 minutes. Your skill level and fabric choice matter—beginners might need over an hour, while experienced makers work faster.
Pattern complexity and technique efficiency, like batch sewing, also affect timing.
Conclusion
Learning how to sew a tie is like unlocking a tailor’s secret—once you see how simple the mechanics are, you’ll wonder why you ever paid triple digits for something stitched in minutes. You’ve walked through bias cuts, interfacing choices, and slip stitches that hold everything invisibly in place.
Now you’ve got a skill that saves money, fixes wardrobe emergencies, and lets you craft accessories nobody else owns. The next time someone compliments your tie, you’ll know exactly what went into it.
- https://www.businessresearchinsights.com/market-reports/necktie-market-124684
- https://sino-silk.com/what-is-silk-cotton-fabric/
- https://www.linkedin.com/pulse/necktie-fabric-guide-manufacturers-perspective-mary-lou
- https://www.craftsy.com/post/how-to-sew-a-tie
- https://fashion-incubator.com/lessons_in_calculating_fabric_use_pattern_engineering/

