This site is supported by our readers. We may earn a commission, at no cost to you, if you purchase through links.
 You may not know this, but on average, each person uses 307 plastic bags per year. Bring down the count by learning how to sew a tote bag.
This easy DIY guide will help you make stylish and functional accessories that are both eco-friendly and customizable. In greater detail, it will teach you the basic steps from choosing fabrics to adding finishing touches.
From absolute beginners to accomplished sewists, you will learn how to create functional, versatile, and beautiful totes that show off some of your character while minimizing plastic waste.
Table Of Contents
- Key Takeaways
- How to Sew a Tote Bag?
- Understanding Tote Bag Basics
- Gathering Your Materials
- Measuring and Cutting the Fabric
- Preparing the Fabric Pieces
- Sewing the Main Body
- Creating and Attaching Handles
- Adding Interior Pockets
- Constructing the Lining
- Finishing Touches
- Troubleshooting Common Issues
- Frequently Asked Questions (FAQs)
- Conclusion
Key Takeaways
- Ditch the plastic and stitch the fantastic! Each tote bag you make saves a whopping 307 plastic bags from ending up in landfills or oceans. Talk about carrying the weight of the world on your shoulders – in style!
- From canvas warriors to denim dreamers, your fabric choice sets the tone. Remember, a stitch in time saves nine, so reinforce those stress points and your tote will be tougher than a two-dollar steak.
- Pockets are the spice of life – or at least the secret sauce of a great tote. Whether you’re team zippered for Fort Knox-level security or patch pocket for easy access, your bag will be more organized than a librarian’s bookshelf.
- The devil’s in the details, so don’t skimp on those finishing touches. A snazzy closure can turn your tote from drab to fab faster than you can say "magnetic snap." Who knew being eco-friendly could look so good?
How to Sew a Tote Bag?
To sew a tote bag, you’ll need fabric, thread, and basic sewing tools.
Start by cutting your fabric to size, including pieces for the main body, handles, and optional lining. Apply interfacing to reinforce the fabric, then press and mark your pieces.
Sew the main body with right sides together, using a 1/2-inch seam allowance. Reinforce stress points like handle attachments and corners.
Create and attach handles securely. If desired, add interior pockets for organization.
Finally, construct and attach the lining, and add any closures.
With these steps, you’ll craft a stylish, functional accessory.
Stick around to uncover more tips for perfecting your tote bag creation.
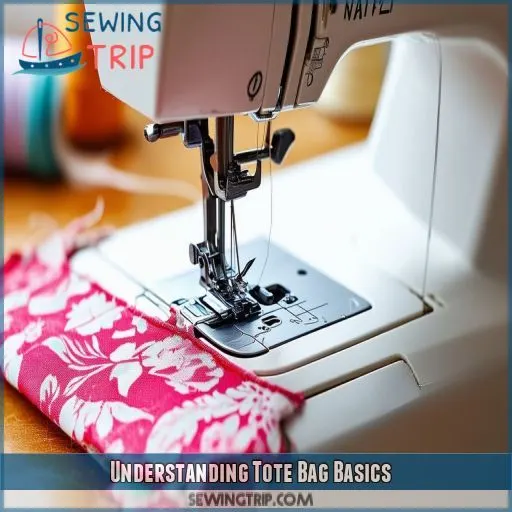
Understanding Tote Bag Basics
You’ll find various types of tote bags, including open-top, zippered, and structured styles, each serving different purposes. Tote bags are versatile accessories commonly used for shopping, carrying books, beach outings, and as everyday carryalls for work or leisure activities.
Types of Tote Bags
You’ll find a variety of tote bag types to suit your style and needs. Classic rectangular totes are versatile workhorses, while beach totes often feature a wider base. Boat totes sport distinctive canvas straps, and market totes boast a deep, roomy design.
Experiment with fabric patterns and color combinations to create unique looks. Add decorative embellishments like appliqués or embroidery for a personal touch. Consider personalization options such as monograms or custom prints.
From sturdy canvas to lightweight cotton, your fabric choice impacts the tote’s functionality. Remember, the handles and straps you select can dramatically alter the bag’s aesthetics and practicality.
Common Uses
You’ll find tote bags incredibly versatile in your daily life. They’re perfect for grocery runs, offering an eco-friendly alternative to plastic bags.
At the beach, a canvas tote‘s durability shines, easily carrying towels and sunscreen. Heading to work? Your trusty tote holds laptops, documents, and lunch with ease.
Get creative with material upcycling to craft unique bags for gift-giving or selling at craft fairs. Personalized designs and trendy patterns make your tote a fashion statement.
Don’t forget to add pockets for organization and reinforcement for heavy loads. With a bit of sewing skill, you’ll create functional, stylish accessories for every occasion.
Gathering Your Materials
To begin your tote bag project, you’ll need to select appropriate fabrics and gather essential tools. Choose sturdy materials like cotton canvas or denim for the exterior, and don’t forget to pick up thread, scissors, pins, and a sewing machine if you don’t already have them.
Fabric Selection
Now, letting the tote get underway with some basics in hand, dive onto the stage of choosing your fabric. The right choice of fabric will set up your DIY tote for success.
Consider the weight: heavier weights, such as canvas or denim, for durability, while light to mid-weight cotton makes great casual totes.
Color coordination is vital; choose colors one desires to fit with one’s style. Regarding print selection, bold patterns make a statement, whereas subtle designs offer great versatility.
Don’t forget texture contrast. Mix smooth and textured fabrics for visual interest.
Sustainability-minded? Go green by using eco-friendly materials like organic cotton or recycled polyester.
Recall that the feel of your tote bag project will be based on the fabric you choose to use.
Notions and Tools
Make a tote bag with these few essential tools and notions on hand. Have some sewing needles appropriate for your fabric, and THREAD—choose types that best complement your design. Also, have on-hand measuring tools like a tape measure and a good, sturdy ruler to make accurate cuts. Pressing Tools: These are necessary for sharp seams and hems. You’ll also need:
- Interfacing to add structure
- Webbing for strong handles
- Scissors for fabric and thread
Add an interior pocket if you want extra functionality. Besides, the right tool will make all the difference in finishing your work professionally. From top hem to bottom seam, you’ll be equipped with everything needed for your tote bag project.
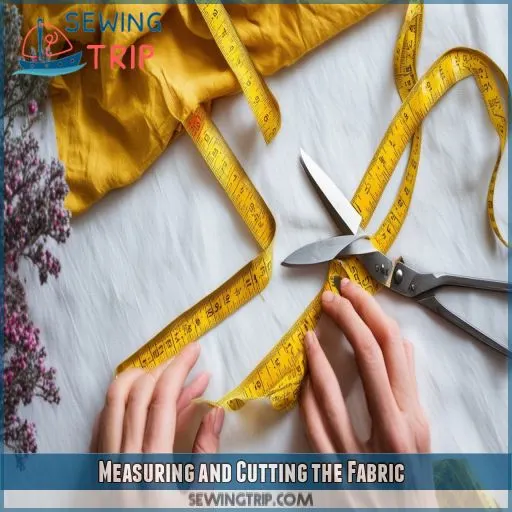
Measuring and Cutting the Fabric
To begin creating your tote bag, you’ll need to determine the desired size and cut out your pattern pieces accordingly. Use a ruler or measuring tape to mark your fabric dimensions, ensuring you add extra inches for seam allowances and hems before carefully cutting along your marked lines.
Determining Bag Size
First, decide how big you want your tote to be for storage and fashion purposes. Measure things that you’d typically put inside the tote so that you have enough capacity for the purpose it will be used for.
For a more general tote, aim for sides of about 16-18 inches wide by 14-16 inches high. Don’t forget to include seam allowances here!
The fabric’s durability will also be one of the considerations; heavier material, like a drop cloth, could accommodate larger sizes.
Think of customization possibilities—perhaps you want a big and roomy tote at the beach or a small grocery bag. After all, the perfect size will meld functionality and look together.
Whether you’re just learning to sew a tote or looking to fine-tune your creations, you’ll want to get the dimensions right.
Creating Pattern Pieces
Now that you have calculated the size of your bag, draft your pattern pieces. Draw a template for your design on paper with seam allowances added. You can also opt to use a ready-made pattern or create a new one.
Be sure to consider grain direction as you cut to achieve maximum strength. For straight edges, a rotary cutter will be suitable, whereas for curved edges, scissors are somewhat ideal to be used. Don’t forget to mark notches and darts.
If you’re a true beginner at pattern making, start simple. Get a feel for it, and then watch yourself tackle more complex designs.
Remember: Your finished product is polished because your cuts are accurate.
Preparing the Fabric Pieces
Now that you’ve cut your fabric pieces, it’s time to prepare them for sewing. You’ll need to apply interfacing to reinforce the fabric and press everything carefully, making sure to mark any important points or placement lines for pockets or straps.
Interfacing Application
Now it’s time to add a bit of structure to your tote bag with interfacing. Choose the right type for your fabric: fusible or sew-in, lightweight or heavyweight. Pellon is a famous brand that covers all price ranges. For most totes, fusible works just fine.
Cut the interfacing smaller than your fabric pieces so you don’t have fat seams. Place the bumpy side to the wrong side of the fabric, and position it according to the manufacturer’s instructions.
Iron carefully in small circles to ensure complete adhesion. This step will take your floppy fabric and turn it into a sturdy, professional-looking tote.
Pressing and Marking
Now that you have ironed on your interfacing, iron and mark your fabric pieces. This will be the critical step in giving your tote its professional finish. Get a pressing temperature right for your fabric type, then press each piece at a larger space. Use seam allowance to allow significant marks, such as the position of handles and pockets. Here are three pro tips to remember:
- Always test your iron on a scrap piece first to prevent scorching.
- Press open seams for a flat, crisp finish.
- The Chalk/Disappearing Ink shall be used for temporary markings.
Sewing the Main Body
Start sewing the main body of your tote bag by aligning the fabric pieces with right sides together and using a 1/2-inch seam allowance. Reinforce stress points, such as the top of the handles and the bottom corners, by sewing a second line of stitches or using a shorter stitch length in these areas.
Seam Allowances
Now that you have prepared your fabric pieces, you can start sewing the body of your tote bag. As far as professional finishing goes, seam allowances do matter a lot. For most seam constructions, you’ll use a 1/2-inch seam allowance.
First, pin your fabric pieces with the right sides together by lining up the edges carefully. While sewing, maintain the same seam allowance for equal seam finishing.
Seam type can also be a contributing factor to the durability of a bag; French seams or flat-felled ones are perfect for this.
Press your seams open after sewing so that it gives a crisp feel. Proper pressing of the seams will give your tote a professional look.
Reinforcing Stress Points
After sewing your seams, one needs to reinforce the stress points so that your tote bag lasts long. Focus on those areas that will take the weight and strain the most. Here are essential techniques for reinforcing the stress points:
- Bar tacks: Use short, tight zigzag stitches at the handle attachments and pocket corners.
Box stitch: Make a square or rectangle of stitching to distribute stress evenly.
• Bias tape: Apply to raw edges for added strength and a clean finish.
- Topstitching: Run an extra line of stitching a 1/4 inch from the seam for added durability.
You’ll thank yourself later when your tote handles heavy loads without tearing!
Creating and Attaching Handles
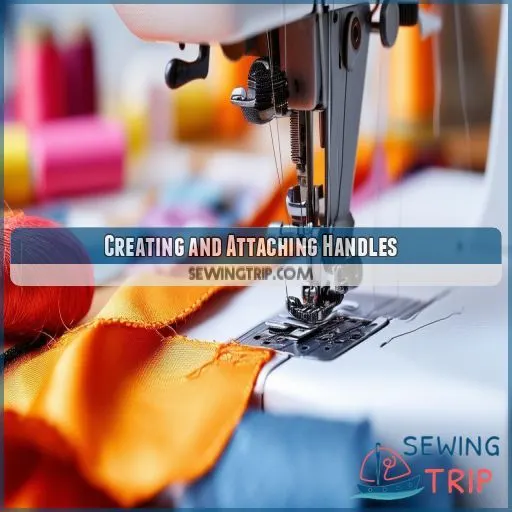
You’ll need to decide between fabric straps or webbing for your tote bag handles, considering factors like durability and style. Once you’ve chosen your handle type, you’ll secure them to the bag using one of several methods, such as topstitching or box stitching for added strength.
Handle Types
You have many options for the handle types in your tote bag. Let’s explore some popular choices and their characteristics:
| Handle Type | Material | Durability | Adjustability | Placement |
|---|---|---|---|---|
| Flat Straps | Cotton | Moderate | Limited | Top |
| Rope | Nylon | High | Easy | Side |
| Leather | Cowhide | Excellent | Moderate | Corners |
| Chain | Metal | Very High | Difficult | Top |
| Webbing | Polyester | High | Easy | Side/Top |
Consider the use of your bag when choosing handles. Flat straps or webbing work well and are comfortable for everyday totes. Want a little personality? Try embellishing with beads or embroidery!
Securing Methods
Now that you’ve chosen your handle type, it’s time to secure them to your tote. Here are four reliable methods to attach your handles:
- Box stitch: Create a square with an "X" inside for maximum strength.
- French seam: Encase raw edges for a clean, professional finish.
- Top stitching: Add durability and a decorative touch in one go.
- Grommet installation: For a metal-reinforced attachment point.
Adding Interior Pockets
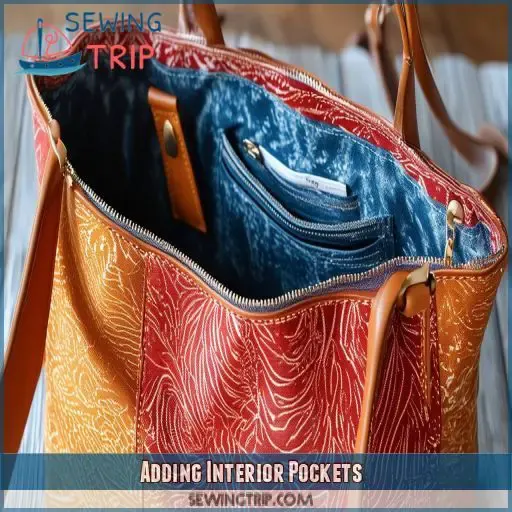
You’ll enhance your tote bag’s functionality by adding interior pockets, which come in two main types: patch pockets and zippered pockets. Patch pockets are simpler to create and attach, while zippered pockets offer more security for small items but require a bit more skill to install.
Patch Pockets
Now that you’ve attached your handles, let’s add some functionality with patch pockets. These versatile additions can transform your tote’s interior. Here’s a quick guide to inspire your pocket design:
| Patch Style | Placement | Fabric Combo |
|---|---|---|
| Classic | Center | Matching |
| Divided | Side | Contrasting |
| Pleated | Bottom | Patterned |
| Appliqued | Corner | Textured |
Choose a style that suits your needs and complements your tote’s design. For a polished look, consider adding button closures. Remember, pocket placement affects accessibility, so think about what you’ll store. With patch pockets, you’re not just adding storage—you’re crafting a personalized touch that’ll make your tote uniquely yours.
Zippered Pockets
While patch pockets are great, zippered pockets offer a secure option for valuables.
To create concealed compartments, cut two fabric pieces slightly larger than your desired pocket size. Install a hidden zipper between them, ensuring reinforced stitching at the ends. Attach this unit to your lining fabric, leaving one side open. Flip the pocket through this opening and topstitch around the edges for a clean finish.
Consider fabric durability when choosing pocket materials. For added functionality, create multiple zippered pockets of varying sizes.
Constructing the Lining
To construct the lining for your tote bag, you’ll need to choose a suitable fabric that complements the exterior while providing durability and structure. Once you’ve cut and prepared your lining pieces, you’ll attach them to the main body of the bag, ensuring a clean finish and added functionality to your handmade accessory.
Lining Materials
When choosing lining fabrics, opt for lightweight, smooth materials that complement your outer fabric. Cotton, polyester, or silk work well. Consider interfacing options to add structure, especially for thinner linings.
As you construct the lining, focus on clean seam finishes to prevent fraying. Top-stitching techniques can add a professional touch and reinforce seams.
Don’t forget about pocket placement – now’s the time to add those handy interior compartments. Experiment with contrasting colors or fun prints for a pop of personality.
Attaching to Main Body
Now that you have prepared your lining, it’s time to attach it to the main body. If you’re looking forward to a polished finish, this step is crucial. Here is how to do it:
- You want to flip your main bag inside out.
- Place lining inside, right sides together
- Pin top edges, matching seams
- Sew around the top, leaving a small opening.
Remember to think about pocket placement and strap length when positioning for sewing. Add a nice, bold pop of color or pattern to your lining fabric. Turn the bag right side out through the opening once attached. At the very end, topstitch around the opening of the bag to give a professional finish but also to hold the lining in place.
Finishing Touches
To complete your tote bag, you’ll want to add a closure for security and style. You can choose from options like magnetic snaps, zippers, or button loops, depending on your preference and the bag’s intended use.
Adding Closures
Now that you’ve attached the lining, it’s time to add a closure to your tote bag. You’ve got several options to choose from, depending on your style and security needs.
Magnetic snaps offer a sleek, hidden solution that’s perfect for everyday use. For extra protection, consider zipper closures – they’ll keep your belongings safe and sound.
If you’re going for a more casual look, drawstring ties or toggle buttons can add a fun, relaxed vibe. Velcro fasteners are quick and easy but may wear out faster.
Choose the closure that best fits your bag’s purpose and your personal style.
Troubleshooting Common Issues
Even seasoned sewers often have issues with tote bags, from uneven seams to puckering. You’ll be taught how to identify these common issues and ways of applying simple solutions so your tote bag looks finished and professional.
Uneven Seams
Uneven seams can be a frustrating hiccup in your tote bag creation. To diagnose the issue, check your machine’s tension and needle condition. Common causes include inconsistent seam allowances or fabric feeding problems.
Fix uneven seams by carefully unpicking and resewing, ensuring you maintain a steady speed and guide the fabric gently. Prevent future mishaps by using pins or clips to align edges, and consider investing in a seam guide.
For perfectly even seams, practice on scrap fabric first, and remember to keep your hands light on the material as you sew.
Fabric Puckering
Just as uneven seams can be frustrating, fabric puckering can also mar your tote bag’s appearance. This issue often stems from incorrect thread tension, mismatched needle size, or incompatible fabric type.
To tackle puckering, start by adjusting your machine’s thread tension. If that doesn’t work, try changing your needle size to match your fabric’s weight. Remember, different fabrics require different seam allowances and handling.
Always test on scrap fabric first. After sewing, press your seams carefully to smooth out any remaining puckers.
With practice, you’ll master the art of creating smooth, professional-looking tote bags.
Frequently Asked Questions (FAQs)
Is a tote bag easy to sew?
You’ll find sewing a tote bag quite manageable. It’s a great project for beginners, requiring basic straight stitches and simple construction. With the right materials and instructions, you’ll have a functional, custom-made bag in no time.
How much fabric is needed to make a tote bag?
You’ll need a mountain of fabric for your tote! Just kidding. Typically, you’ll want 1/2 to 1 yard of main fabric, depending on size. Don’t forget lining fabric and interfacing if you’re going all out.
How to make your own tote bag?
You’ll need fabric, straps, and a sewing machine. Cut your pieces, hem the top edges, attach straps, and sew the sides. Don’t forget to reinforce stress points. With practice, you’ll be crafting custom totes in no time!
What are the steps in making a tote bag?
You’ll need to cut fabric, sew side seams, create a bottom, attach handles, and add optional pockets. Don’t forget to hem the top for a polished look. It’s easier than you’d think – give it a try!
What is a DIY Tote Bag?
A DIY tote bag is a handmade carryall you’ll create yourself. You’ll choose fabric, cut patterns, and sew pieces together to form a sturdy, personalized bag. It’s a fun project that’ll save you money and showcase your creativity.
Can I make my own tote bag?
Yes, you can definitely make your own tote bag! With some basic sewing skills and materials, you’ll create a custom carry-all. It’s a fun project that’ll save you money and let you express your personal style.
Can you sew a big tote bag?
Tote-ally! You can craft a capacious carry-all. Choose sturdy fabric, cut larger pieces, and strengthen seams. Adjust measurements for your desired size, ensuring ample room. With patience and practice, you’ll create a big, beautiful bag for all your belongings.
How do you sew a tote bag?
You’ll need fabric, interfacing, and straps. Cut your pieces, sew the outer and inner bags separately, then combine them. Insert straps, stitch around the top, turn right-side out, and finish with topstitching. It’s easier than you think!
Can I use a sewing machine for thick fabrics?
Ready to tackle tough fabrics? You can use a sewing machine for thick materials. Switch to a heavy-duty needle, adjust tension, and use a walking foot. Go slowly, and don’t force the fabric. You’ll conquer those sturdy projects in no time!
How do I choose the right needle for tote bags?
You’ll want a sturdy needle for tote bags. Choose a size 14-16 universal or denim needle for medium to heavy fabrics. If you’re using canvas or thick layers, opt for a size 18 needle to prevent breakage.
What interfacing weight is best for structured tote bags?
You’ve stumbled upon the secret to structured totes! For a bag that stands tall, choose medium to heavyweight interfacing. It’ll give your creation body without being too stiff. You’ll want fusible interfacing for easy application.
Are there alternatives to traditional cotton canvas fabric?
You’ve got options beyond cotton canvas! Try denim for durability, linen for a lightweight feel, or even oilcloth for water resistance. Upcycle old curtains or tablecloths for unique textures. Experiment with these fabrics to craft your perfect tote.
How can I waterproof my tote bag?
You can waterproof your tote bag using fabric spray, wax, or a waterproof liner. Apply fabric spray evenly, rub wax into the fabric, or sew in a waterproof lining. Test the bag’s water resistance before use.
Conclusion
Now that you’ve learned how to sew a tote bag, you’re equipped to create stylish, functional accessories while reducing plastic waste. From selecting fabrics to adding final touches, you’ve mastered the essential steps.
Embrace this eco-friendly craft, and soon you’ll be carrying your own handmade totes with pride.

