This site is supported by our readers. We may earn a commission, at no cost to you, if you purchase through links.
 Learning how to sew a zipper in a pillow by hand isn’t rocket science, but it does take practice!
You’ll want to start by cutting your fabric pieces and choosing a zipper that matches your pillow’s style.
Hand-baste the zipper in place using small, even stitches to keep everything aligned.
Then, use a prick stitch to secure the zipper tape, working carefully along the edges. Make sure you’re pulling your thread tight enough to create clean, nearly invisible seams.
Pro tip: work slowly and keep your stitches consistent.
Once you’ve sewn the entire length, remove the basting stitches for a crisp, professional finish that’ll make your handmade pillow look store-bought.
Table Of Contents
Key Takeaways
- You’ll master the art of hand sewing a zipper by breaking down the process into precise steps like hand-basting, using a prick stitch, and carefully removing temporary stitches for a professional finish.
- Choose your zipper and fabric thoughtfully, matching color and style while ensuring the zipper length matches your pillow’s dimensions for seamless integration.
- Pay attention to detail with techniques like using a visible thread color for easy basting removal, following zipper tape lines for accuracy, and pressing seams to create a polished look.
- Practice makes perfect—don’t get discouraged by initial imperfections, as consistent hand-sewing and careful technique will help you transform your pillow-making skills from amateur to professional.
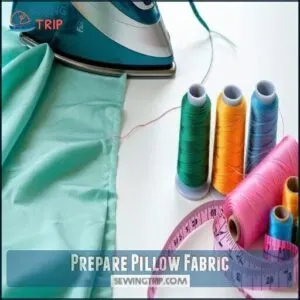
Prepare Pillow Fabric
You’ll want to start by selecting the perfect fabric and zipper for your pillow project, making sure they complement each other like peanut butter and jelly.
Grab your iron to smooth out those wrinkles and get ready to transform a plain piece of fabric into a professional-looking pillow with a sleek, hand-sewn zipper.
Cutting Fabric Pieces
With a keen eye for detail, gather your fabric pieces for the perfect pillow.
Measure twice, cut once—a sewer’s golden rule!
Align your pattern carefully, respecting the fabric’s grain direction.
Use sharp fabric scissors to create clean, precise cuts, allowing just enough seam allowance for a professional finish.
For best results, use very sharp scissors designed for fabric.
Your zipper pillow project starts here.
Ironing Fabric for Smooth Surface
After slicing your fabric pieces, grab that iron and get ready to smooth out the wrinkles.
Ironing fabric is an art: transform wrinkles into a smooth canvas for your creative masterpiece.
Different fabric types demand different temperatures, so check the care label first.
Use steam sparingly to prevent damage. Glide the iron gently, keeping it moving to avoid scorching.
Understanding proper ironing temperatures can prevent damage.
A perfectly pressed surface sets the stage for a flawless hand-sewn pillow zipper.
Choosing Zipper Color and Length
After smoothing out your fabric, it’s time to pick the perfect zipper!
Your choice can make or break the pillow’s look.
Here’s how to nail it:
- Match zipper color to fabric tone
- Consider pillow’s visual style
- Check zipper functionality
- Measure opening precisely
A well-chosen zipper blends seamlessly or makes a bold statement.
For heavy-duty applications, consider metal zippers durability.
Whether you want a concealed look or a contrasting pop, your hand-sewn pillow zipper DIY will shine with the right selection.
Trimming Zipper to Desired Length
Whether you’re a newbie or seasoned DIY enthusiast, trimming your zipper to the perfect length is fundamental for a pro pillow finish.
Grab sharp fabric scissors and measure twice before cutting.
Protect the zipper’s metal stop to prevent fraying, leaving a small buffer beyond your pillow’s opening. Precision is key in this delicate hand-sewing dance.
Sew Zipper in Pillow
Ready to transform your pillow-making skills with a perfectly placed zipper?
You’ll master the art of hand-sewing a zipper that looks professional and functions smoothly, giving your handmade pillows that polished, custom touch every time.
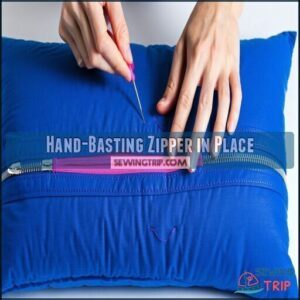
Hand-Basting Zipper in Place
Pin your zipper face-down along the basted seam, centering its teeth perfectly.
Use two rows of uneven hand-basting stitches—one through the zipper tape and another along the fabric edge—to hold everything in place.
Choose a bright, visible thread that’ll make removal easy.
For specialized applications, consider specific thread options.
Aim for that sweet "fabric kiss" where edges barely touch without overlapping.
Sewing Zipper With Prick Stitch
Now that you’ve hand-basted the zipper, it’s time to master the prick stitch for an invisible, durable finish.
Tiny, invisible stitches turn amateur sewing into professional art—your zipper’s secret weapon.
Bring your needle to the right side, catching just a few fabric threads.
Create tiny, nearly invisible stitches along the zipper tape, maintaining consistent tension.
Your hand-sew pillow zipper technique will transform from amateur to pro with this precise method.
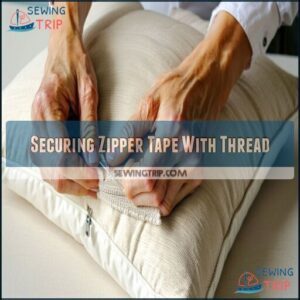
Securing Zipper Tape With Thread
Every seasoned DIY enthusiast knows securing zipper tape takes precision and skill.
Your hand-sewing journey continues with these critical thread-securing steps:
- Choose a strong thread matching your fabric color
- Double-thread your needle for extra durability
- Use small, consistent stitches along zipper tape
- Maintain even thread tension for professional results
Master the Prick Stitch Technique to create a flawless, durable zipper connection that’ll make your pillow project shine.
Removing Basting Stitches for Clean Finish
Since your hand-sewn pillow zipper is now secure, carefully remove basting stitches using sharp scissors or a stitch ripper.
Snip threads close to the fabric surface to prevent pulling permanent stitches.
Work slowly and methodically, maintaining fabric tension to avoid creating unwanted holes. This delicate process guarantees a clean, professional finish for your hand-sewn pillow zipper.
Hand-Sewing Zipper Techniques
Ready to transform your pillow-making skills with hand-sewing magic? Master the art of zipper installation using precise prick stitches and clever techniques that’ll make even seasoned sewers stop and stare.
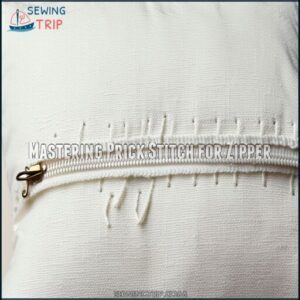
Mastering Prick Stitch for Zipper
Whether you’re a novice or seasoned crafter, mastering the prick stitch transforms your zipper installation from amateur to professional.
With careful needle control and precise tension, you’ll create nearly invisible stitching that hugs the zipper tape.
Choose a fine needle matching your fabric weight, and your hand-sewn pillow zipper will look seamlessly elegant.
For heavy-duty applications, consider using durable metal zippers for longevity.
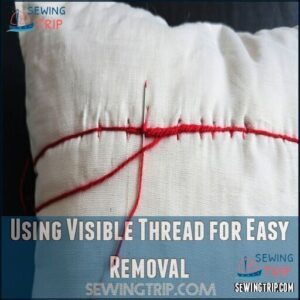
Using Visible Thread for Easy Removal
After perfecting your prick stitch technique, choose a bright, contrasting thread color for your basting stitch.
This visible thread trick lets you easily spot and remove temporary stitches without damaging delicate fabric.
Pro tip: Bright colors like red or neon green make tracking and removing hand-sewn guide stitches a breeze, keeping your pillow zipper installation clean and professional.
Following Zipper Tape Lines for Accuracy
Those woven lines on zipper tape are your secret weapon for precision!
Follow these guides carefully when hand sewing your pillow zipper.
They’ll help you maintain consistent alignment and prevent your fabric from skewing.
Accurate basting along these lines guarantees even stitching, transforming your DIY project from amateur to professional with just a few careful movements.
Marking Guidelines for Precise Placement
Often, marking your seam allowance is like drawing a roadmap for your zipper’s perfect journey.
Use a washable fabric marker to trace precise guidelines along the fabric edge, ensuring your zipper’s stop aligns just right.
These basting guide lines will help you hand sew the zipper with razor-sharp accuracy, keeping your pillow zipper tutorial on track.
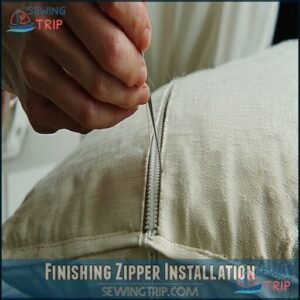
Finishing Zipper Installation
You’ve conquered the tricky part of sewing a zipper by hand, and now it’s time to put the finishing touches on your pillow cover.
With a few final steps, you’ll transform your hand-sewn creation from a work in progress to a professional-looking masterpiece that’ll have everyone asking, "Did you really make that yourself?
Trimming Excess Zipper Tape
A pillow’s zipper tape can make or break your DIY project!
Carefully trim excess tape using sharp fabric scissors, leaving about 1/2 inch beyond the pillow’s. This prevents fraying and guarantees a clean, professional.
Choose your cutting tool wisely—precision matters when hand sewing zippers.
A clean-cut zipper tape adds that perfect finishing touch to your handmade pillow.
For added durability, consider metal zippers, especially for heavy-duty applications.
Turning Pillow Cover Inside Out
Like a butterfly emerging from its cocoon, your pillow cover transforms when you turn it inside out!
This critical step reveals your hard work and craftsmanship.
- Gently push out each corner for a crisp, professional look
- Reduce bulk by carefully trimming excess fabric
- Use your fingertips to smoothly shape the corners
- Confirm the zipper opening is wide enough for easy turning
- Check that all seams are neat and aligned
Pressing Seams for Professional Finish
After flipping your pillow cover right-side out, grab your iron and press those seams like a pro.
Smooth out creases with gentle, even pressure, paying special attention to your seam allowance.
Different fabric types need unique pressing techniques—lightweight materials require a light touch, while bulky fabrics demand more strategic handling to prevent seam shadowing.
Topstitching Zipper Edges for Reinforcement
A strategic topstitch along your zipper edges transforms your hand-sewn pillow from homemade to professional.
Choose a fine needle and matching thread for seamless reinforcement.
Adjust your stitch length to medium (about 2.5mm) to guarantee durability without compromising the fabric’s delicate texture.
This hand sewing technique guarantees a clean, polished finish that’ll make your DIY project shine.
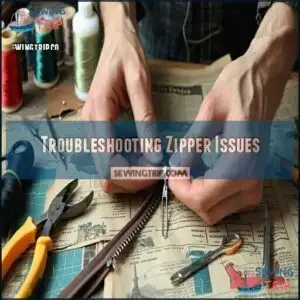
Troubleshooting Zipper Issues
Even the most careful sewers can run into zipper troubles that’ll make you want to toss your project in frustration.
Don’t worry—with a few pro tricks up your sleeve, you’ll learn how to tackle those pesky zipper problems and save your beautiful hand-sewn pillow from potential disaster.
Fixing Common Zipper Malfunctions
Stuck zippers can derail your hand-sewn pillow project, but don’t panic!
Here are four quick fixes for zipper troubles:
- Use graphite pencil to lubricate stuck teeth
- Pliers can realign bent slider mechanism
- Super glue helps reattach separated zipper components
- Paperclip works as an emergency zipper pull replacement
When a zipper fights back, these tricks will save your DIY hand-sewing adventure and keep your pillow looking professional.
To prevent future issues, understanding zipper anatomy can be helpful.
Cleaning and Lubricating Zippers
After wrestling with a stubborn zipper malfunction, you’ll want to keep it in top shape.
Grab a soft toothbrush and gently scrub between teeth to remove dirt.
Use soap and water for deeper cleaning, then dry completely.
Try zipper-specific lubricants or silicone-based products for smooth gliding.
Pro tip: Always clean and lubricate zippers after outdoor adventures to prevent corrosion and maintain functionality. Always clean and lubricate zippers after outdoor adventures to prevent corrosion and maintain functionality. Pro tip
Storing and Preserving Hand-Sewn Zippers
With a keen eye for preservation, protect your hand-sewn zippers by storing them in acid-free, cool environments away from direct sunlight.
Keep humidity levels low to prevent fabric deterioration.
Use moth-protective containers and gently clean zippers with a soft brush.
Carefully fold hand-stitched pillow covers, ensuring the zipper remains undamaged and ready for your next DIY project.
Avoiding Common Mistakes in Zipper Installation
Three rookie mistakes can derail your zipper pillow project faster than a sewing machine on the fritz.
When hand sewing zippers, watch out for:
- Puckering from uneven stitch tension
- Misaligned zipper placement
- Choosing an incorrect zipper length for your fabric
Remember zipper color options to complement your fabric.
Master these tips, and you’ll transform potential headaches into professional-looking hand-stitched pillow perfection.
Frequently Asked Questions (FAQs)
How do you sew a pillow with a zipper?
You’ll cut fabric pieces, press edges.
Pin a matching zipper along the seam, hand-sew with small stitches close to the teeth.
Then insert stuffing through the zipper and close it up for a neat pillow finish.
How do you sew a pillow cover?
You’ll need fabric, a zipper, and basic sewing supplies.
Measure and cut your pieces, press seams, pin the zipper in place, and stitch carefully by hand.
Turn the cover right side out, and you’re done!
How do you unzip a pillow cover?
Soft fabric meets stubborn zipper—your gateway to pillow comfort.
Gently grasp the zipper pull, sliding it smoothly from top to bottom.
Unzip with care, revealing the plush interior waiting to embrace your favorite stuffing or insert. Unzip with care, revealing the plush interior waiting to embrace your favorite stuffing or insert.
How do you sew a zipper in a sewing machine?
Position your zipper foot to the right of the needle.
Sew close to the zipper teeth, maintaining even pressure.
Backstitch at the start and end for durability.
Repeat on the opposite side for a secure, professional finish.
How do you sew a 20 inch square pillow?
Grab two 20-inch square fabric pieces.
Sew three sides, leaving one side open for the zipper.
Leave a 2-inch gap for stuffing.
Pin, stitch carefully, and turn right side out for a professional-looking pillow.
How long should a zipper be on a pillow?
Imagine your pillow’s perfect fit!
For a 20-inch square pillow, you’ll want a 16 to 18-inch zipper.
This length lets you easily stuff your pillow while keeping the closure neat and functional.
How do you attach a zipper to a pillow?
Pin your zipper face-down along the seam’s edge, baste carefully, then hand-stitch close to the teeth using small, even stitches.
Double-thread your needle for strength, and secure the tape to your fabric’s seam allowance.
Is it necessary to add a zipper to a pillow cover?
Not always.
A zipper adds versatility to your pillow cover, letting you easily swap out inserts, clean the cover, or adjust stuffing.
It’s a handy feature that transforms a simple pillow into a more functional home decor item. Complete concepts
How do you make a velvet pillow with a zipper?
Velvet’s luxurious softness meets precision crafting when you transform fabric into a pillow.
Carefully select a matching zipper, hand-stitch with delicate techniques, and watch your elegant creation come to life with professional, eye-catching finesse.
How do you sew a pillow?
Cut two fabric pieces, sew three sides, leave one side open for a zipper.
Press seams, pin zipper in place, hand-stitch carefully along the edges.
Stuff your pillow, then close the final seam with neat, tight stitches.
Conclusion
Ultimately, sewing a zipper in a pillow by hand transforms a simple craft into an art form.
You’ll go from novice to pro with practice, mastering each stitch and technique.
Remember, how to sew a zipper in a pillow by hand isn’t about perfection—it’s about patience and passion.
Your handmade pillow will showcase your growing skills, turning frustration into fabric finesse.
Keep practicing, and you’ll create professional-looking pieces that’ll make every sewist proud.
- http://www.thedailysew.com/2018/04/sewing-by-hand-even-basting-uneven-basting-tailor-basting/
- https://lifehacker.com/how-to-fix-every-common-zipper-problem-5975700
- https://www.fixnzip.com/understanding-the-main-causes-of-zipper-failure/?srsltid=AfmBOorcw12Of7LyRBdG9Bjb9wPmX-gNTAtr2dtP2jW55Ehf16P9bw1F
- https://www.sbs-zipper.com/zipper/10740.html
- https://www.cosmopolitan.com/uk/fashion/style/a28276133/how-to-fix-a-zipper/

