This site is supported by our readers. We may earn a commission, at no cost to you, if you purchase through links.
Always pre-wash and press your fabric—think of it as prepping ingredients before a big bake.
Mark your seam allowances, keep stitches straight with drawn lines, and don’t underestimate the power of a stubborn seam ripper for those “oops” moments.
Press seams flat and double-check your work for symmetry. A stitch in time really does save nine when you finish edges and refine those details.
There’s more to fine-tuning your sewing game than meets the eye—just wait until you see what’s next, and remember that mastering these skills takes time and practice to achieve sewing accuracy.
Table Of Contents
Key Takeaways
- Always prep your fabric by washing and pressing before you cut—this prevents shrinkage and keeps seams accurate.
- Use sharp scissors, precise measuring tools, and quality marking supplies to avoid crooked lines and frayed edges.
- Pin carefully, double-check measurements, and follow seam guides for straight stitching and perfect alignment.
- Don’t hesitate to use your seam ripper to fix mistakes—checking your work and correcting errors leads to professional results.
Essential Tools for Accurate Sewing
Having the right tools transforms your sewing from frustrating guesswork into precise, professional results.
Sharp tools and smart habits turn sewing into an art, not a guessing game
With sharp scissors, accurate measuring tools, and proper needles, you’ll wonder why you ever struggled with crooked seams and frayed edges.
Choosing The Right Needles and Threads
Your needle and thread combo is the foundation of accurate sewing—get this wrong, and you’ll fight your project every step.
Match needle sizes (60/8 for delicate fabrics, 110/18 for heavy materials) with appropriate thread types.
Universal needles work for woven fabrics, while ballpoint needles suit knits.
Quality polyester threads offer strength and consistency, preventing those frustrating breaks mid-seam.
Understanding the right sewing needle types is essential for a successful sewing project.
Using Sharp Scissors and Cutting Tools
Sharp scissors are your fabric’s best friend—dull blades create jagged edges that compromise seam allowances and overall accuracy.
Invest in quality fabric shears for cutting and reserve them exclusively for fabric use. Regular blade sharpening maintains precision, while cutting mats protect surfaces and extend blade life.
Clean cuts reduce excess fabric fraying, ensuring your pressing results look professional and polished.
Proper scissor care techniques are essential for maintaining sharp blades and achieving accurate cuts, which is crucial for overall accuracy.
Marking Tools for Precision
After cutting accurately, you’ll need precision markers to transfer patterns and guide your stitching.
Quality marking tools transform guesswork into accurate sewing by creating visible guides that disappear when needed.
Here are your marking tool must-haves:
- Tailor Chalk – Traditional white chalk for dark fabrics, easily brushed away
- Marking Pens – Water-soluble or air-erasable options for temporary guidelines
- Sewing Gauges – Adjustable metal rulers for consistent seam allowance guide measurements
- Ruler Guides – Clear acrylic rulers for straight lines and pressing accuracy
- Notching Tools – Small scissors or specialized cutters for transferring pattern notches
These tools guarantee your thread management stays organized while maintaining sewing accuracy throughout every project.
Investing in proper sewing marking tools is vital for achieving professional results.
Measuring Tapes, Rulers, and Mats
Accurate measurements form the foundation of professional sewing results. Your measuring tape should feature clear markings on both metric and imperial sides, with reinforced metal tips that won’t stretch over time.
A sturdy quilting ruler helps you cut precise seam allowances and maintain straight lines during pressing. When selecting a measuring tape, consider the importance of accurate measuring tape lengths for your projects.
| Tool Type | Key Features | Best Use |
|---|---|---|
| Measuring Tape | Flexible, dual markings, reinforced ends | Body measurements, curves |
| Clear Rulers | Non-slip grips, precise calibration | Straight cuts, seam guides |
| Cutting Mats | Self-healing, grid lines, rotary-safe | Fabric cutting, accuracy checks |
Quality cutting guides with grid patterns keep your fabric square and help maintain consistent seam allowances throughout your project.
Pins, Pincushions, and Thimbles
Quality pins hold your fabric pieces in place while you stitch, preventing shifting that destroys accuracy.
Choose glass-head pins that won’t melt under your iron’s heat.
A well-organized pincushion keeps these sewing aids within reach during hand sewing projects.
Thimbles provide finger protection when pushing needles through thick fabrics, making your sewing techniques more comfortable and precise for consistently neat sewing results.
Preparing Fabric for Precise Results
You’ve already got your fabric picked out, but don’t start cutting just yet.
Proper fabric preparation is the foundation of accurate sewing, and skipping these essential steps is like trying to build a house on shifting sand.
Pre-Washing and Ironing Fabric
Fabric Preparation starts with a smart pre wash to prevent fabric shrinkage disasters.
Toss your fabric into the washer using the same settings you’ll use for the finished garment.
After drying, pressing becomes your best friend for eliminating wrinkles and creating smooth surfaces.
Proper fabric prep through steaming techniques and careful ironing tips guarantees your seam allowances stay accurate throughout fabric sewing projects, ensuring a successful outcome with smooth surfaces.
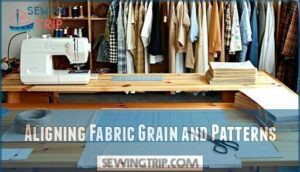
Aligning Fabric Grain and Patterns
Three fundamental truths govern Fabric Alignment success: lengthwise grain runs parallel to selvage, crosswise offers stretch, and bias provides maximum drape.
Place pattern pieces with grainline arrows exactly parallel to selvage edges. Use the tear test—snip and tear fabric to reveal true grain direction.
For Pattern Placement with stripes or plaids, anchor pieces on recognizable motifs, matching seamlines rather than raw edges. This Fabric Direction accuracy prevents warping and guarantees professional seam orientation throughout your project.
To achieve seamless results, understanding pattern matching techniques is also vital for aligning fabric designs.
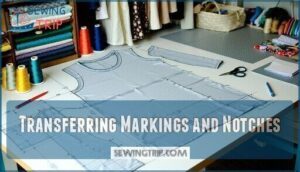
Transferring Markings and Notches
Once you’ve aligned your fabric grain and patterns, transferring markings and notches becomes your roadmap to accurate assembly.
Use marking tools like erasable pens or tailor’s chalk to copy pattern symbols onto fabric—these guide seam allowances and guarantee pattern alignment.
Make small clips at notch points for quick reference during construction.
These accuracy checks prevent costly mistakes and help you achieve neat sewing with professional-looking seams and finish edges.
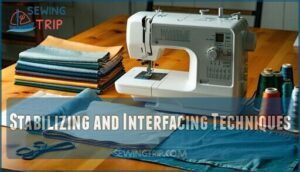
Stabilizing and Interfacing Techniques
Stabilizing your fabric with the right interfacing types is like giving it a backbone—no floppy collars here!
Try fusible webs for quick fixes or sew-in stabilizer materials for trickier projects.
Use pressing methods to secure sewing interfacing smoothly.
Remember, neat seam finishing and accurate seam allowances depend on solid interfacing techniques.
Don’t skip fabric stabilizers—they’re your secret weapon!
Step-by-Step Techniques for Accurate Stitching
You’ll get crisp seams and neat finishes when you follow proven techniques for accurate stitching, whether you’re working by hand or machine.
With a little patience and a steady hand, even your most stubborn fabric will behave—just don’t let the pins poke your sense of humor.
Maintaining Consistent Seam Allowances
Once your fabric grain is lined up and ready, focus on seam allowances.
Use seam guides on your machine or mark lines with tailor’s chalk for accuracy. Consistent seam allowances keep your seams straight and your project looking sharp.
Don’t eyeball it—stitch control is key! With steady hands and a few Sewing Tips, neat seams and tidy seam finishing are yours.
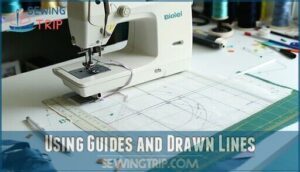
Using Guides and Drawn Lines
Once your seam allowance’s in check, lean on Guide Lines and Drawing Templates to keep your straight stitch or backstitch on track.
Pattern Marking with tailor’s chalk or erasable pens acts like a GPS for your needle.
Use Accuracy Tools and Sewing Aids—think rulers and mats—to boost Accurate Stitching. These Sewing Techniques and Sewing Tips make wonky lines a thing of the past.
Proper Pinning and Layer Alignment
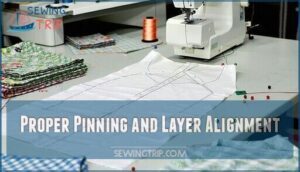
Think of pin placement as your secret weapon for perfect layer alignment.
Insert pins perpendicular to your seams for easy removal and precise fabric layering.
Match notches and pattern registration points—don’t let your pieces play hide-and-seek.
Double-check seam allowances and keep edges flush.
With careful fabric management, you’ll conquer accurate stitching and master sewing techniques like a pro, achieving perfect layer alignment.
Controlling Stitch Length and Tension
Once your layers are lined up, Stitch Control and Tension Management take center stage. Accurate Stitching means setting the right stitch length and thread tension for your fabric.
Don’t let your sewing machine boss you around—test on scraps first! A few quick checks:
- Adjust thread tension for smooth stitches
- Match stitch length to fabric stretch
- Backstitch for strong seams
Proper sewing also involves understanding thread tension settings to achieve the best results, which is crucial for Accurate Stitching and overall sewing quality.
Hand Vs. Machine Sewing Precision
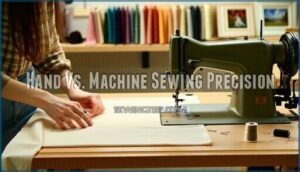
Mastering stitch control means knowing when to trust your hands or your sewing machine.
Hand sewing lets you finesse fabric tension and stitch length, perfect for precision stitches. Machines offer sewing speed and consistent accuracy—unless your thread quality rebels.
Choose wisely, and don’t be afraid to mix both for best results.
—:
—:
—:
Best Practices for Neat Seams and Finishing
You want seams so neat that even your picky aunt can’t find a loose thread. By mastering pressing, trimming, and finishing, you’ll give every project a polished look that lasts.
Pressing Seams and Blocks
Once your stitching’s spot-on, don’t skip Seam Pressing and Block Finishing—it’s like giving your project a spa day.
Grab your favorite pressing tools and try these:
- Press seam allowances to one side for smooth seams.
- Use the presser foot or quarterinch foot for precision.
- Smooth fabric with steady Pressing Techniques for crisp results.
Fabric Smoothing matters!
Edge Finishing to Prevent Fraying
Once your seams are pressed flat, it’s time for fray prevention.
Serging methods seal edges fast, while zigzag stitches and pinking shears handle excess fabric.
If you’re feeling old-school, a whip stitch or backstitch works wonders for edge binding.
Don’t forget seam sealing and fabric stabilizing—thread management makes all the difference when you want those edges neat and tidy!
Trimming and Grading Seam Allowances
In regard to Seam Trimming and Allowance Grading, think of it as giving your seams a haircut—snip away excess fabric so things lay flat.
Use sharp scissors for precise Fabric Cutting, and stagger seam layers for Seam Balancing.
This keeps edges smooth, makes Edge Finishing easier, and helps with Thread Management whether you’re using Sewing Machines or hand Seam Sewing.
To achieve professional results, understanding seam finishing techniques is essential for a polished garment with good Thread Management.
Final Symmetry and Fit Checks
After trimming and grading seam allowances, it’s time to play detective with your Fit Evaluation.
Stand back, eyeball the garment for Symmetry Checks—no one wants a lopsided look.
Garment Balance and Proportion Analysis matter just as much as Accuracy Verification.
Double-check seams, stitch length, and use quality thread.
Don’t forget backstitching—Sewing Machines can’t fix a wonky fit!
Tips to Improve Sewing Accuracy
You can boost your sewing accuracy by building smart habits and using a few simple tricks, even if your last seam wandered off course like a lost puppy.
With careful measurement, steady practice, and quick fixes for mistakes, you’ll see your results improve with every project, which helps to enhance your overall sewing accuracy.
Batch Sewing and Practice Exercises
After pressing seams to perfection, it’s time to sharpen your skills with batch sewing and practice exercises.
Batch Production isn’t just for factories—it’s your ticket to Stitch Mastery.
Try Sewing Drills: sew straight lines, curves, or repeat the running stitch on Fabric Sampling squares.
Hand sewing stitches improve fast, and a well-stocked sewing kit makes new Sewing Routines a breeze.
Double-Checking Measurements
Pause before you cut—double-check those measurements!
Your sewing kit’s Measurement Tools, like rulers and measuring tapes, are your best friends for Precision Cutting and Fabric Alignment.
It’s tempting to eyeball, but that’s a shortcut to wonky seams.
Stitch Control starts with accuracy.
A quick recheck means big Error Reduction and smoother Sewing Machine Tips in every project.
Mastering sewing skills is essential for achieving professional-looking results and avoiding common mistakes, which is crucial for Sewing Machine success.
Correcting Mistakes With Seam Rippers
With a trusty seam ripper, you can turn Mistake Correction into an art form.
Slide the tip under the offending Stitch Removal spot, gently wiggle, and snip—no drama required.
Seam Repair is just part of the journey, whether you’re fixing a crooked backstitch or undoing a wonky seam.
Ripper Techniques give you control, saving fabric, sewing tools, and pride.
Using Leaders, Enders, and Stitch Samples
After you’ve corrected those pesky mistakes with a seam ripper, it’s smart to embrace Leader Management and Ender Control.
Use scrap fabric as leaders and enders to prevent thread tangles and skipped stitches.
Stitch Sampling and Fabric Testing help you nail down stitch length and Thread Matching before starting your main sewing projects.
It’s like a dress rehearsal—less drama, more precision.
Developing Consistent Sewing Habits
Once you’ve tried leaders and enders, it’s time to lock in consistent Sewing Routines.
Habit Formation is key—think of it like watering plants daily.
For better sewing discipline, follow these five steps:
- Schedule Daily Practice
- Prep tools before starting
- Track progress on sewing projects
- Review stitches, like backstitch
- Celebrate small wins—consistency tips matter!
To achieve success, remember that Habit Formation is crucial, and by following these steps, you will be well on your way to improving your sewing skills.
Frequently Asked Questions (FAQs)
What are some common mistakes that can affect the accuracy of sewing?
Say you cut fabric in a hurry—your sleeve ends up longer than your arm, right?
Skipping fabric prep, sloppy measuring, or ignoring seam allowances can throw your whole project off balance.
This can make your seam ripper work overtime.
How do I choose the right thread for accurate sewing?
Pick a thread that matches your fabric’s weight and color; cotton for cotton, polyester for synthetics.
Avoid old, brittle spools.
Pull gently—if it snaps easily, ditch it.
A quality match smooths out headaches later.
Are there any specific techniques for sewing curved seams accurately?
Ever try to herd cats?
Sewing curved seams is just as tricky.
Go slow, use lots of pins, and pivot your fabric every few stitches.
Practice on scraps—curves get smoother with patience, not magic!
What can I do to prevent puckering or gathering in my seams?
Keep your fabric flat and gently guide it—don’t shove it.
Use the right needle and thread for your fabric weight.
Adjust your tension if needed.
Press seams open as you go; steam is your secret weapon!
How do I accurately match prints or stripes?
Worried about crooked stripes? Align your fabric’s print at notches before cutting, then pin carefully along the pattern.
Double-check your layers line up—don’t rush!
Sew slowly, using plenty of pins for tricky repeats. Precision beats luck.
How can I minimize fabric distortion while sewing curves?
Slow down as you guide the fabric, easing it gently without tugging.
Use plenty of pins and press curves with an iron before sewing.
Think of it like steering a bike—steady hands, smooth turns, no racing.
What practices prevent stretching when sewing knits?
Think of sewing knits like walking a tightrope—steady hands win the day.
Use a walking foot, don’t stretch the fabric as you sew, and stabilize edges with stay tape or lightweight interfacing for crisp, professional results.
How do I keep small pieces from shifting while sewing?
Tame those tiny pieces by pinning them like signposts on a winding road.
Use clips for extra grip. A dab of washable glue never hurts—just enough to keep things steady ’til the finish line.
Conclusion
Picture your sewing toolkit as a trusty compass guiding you through the journey of how to sew accurately.
With sharp scissors and a stubborn seam ripper, you’ll conquer crooked lines and uneven edges.
Don’t skip double-checking measurements or pressing seams—these small steps keep your projects on course.
Mistakes happen, but each fix teaches you something new.
Keep practicing, trust your tools, and soon you’ll stitch with confidence, turning fabric into creations you’re proud to show off, and remember that each fix is a learning opportunity.
- http://so-sew-easy.com/make-sewing-pattern-weights-11-ways/
- https://www.nationalsewingcircle.com/video/tips-for-finding-the-straight-grain-in-fabrics-009025/
- https://mypacklove.com/blog/label/what-is-cross-grain-simple-fabric-guide-why-it-matters/
- https://www.doinaalexei.com/aligning-pattern-grainlines-to-fabric.html
- https://www.lovenotions.com/what-is-fabric-grainline


