This site is supported by our readers. We may earn a commission, at no cost to you, if you purchase through links.
 You’re about to learn how to sew an apron, and it’s easier than you think.
Start by choosing a fabric that’s durable and comfy, then measure and cut it out.
Sew the pieces together, adding pockets or embroidery if you like.
With some basic sewing skills, you’ll have a custom apron in no time.
Now, let’s get started on the fun part – picking the perfect fabric and pattern to make your apron truly unique, and discovering the secret to making it last for years to come.
Table Of Contents
Key Takeaways
- You’ll start by choosing a durable and comfy fabric, then measure and cut it out, considering factors like mess levels and desired look.
- To sew your apron, you’ll assemble the main body pieces, attach neck straps and ties, and add any pockets or decorative trim you like, following a simple sewing pattern.
- You can customize your apron with unique fabrics, embellishments, or adjustable neck straps to make it truly one-of-a-kind, and it’s easier than you think.
- Once you’ve finished sewing, you’ll tidy up the edges, trim loose threads, and try on your new apron, enjoying the fruit of your labor and the knowledge that you’ve created something practical and stylish.
What is an Apron
You’ve probably seen aprons everywhere from your grandmother’s kitchen to fancy restaurants, but have you ever wondered what makes this simple garment so enduring?
Aprons are more than just a piece of fabric, they’re a timeless kitchen companion
An apron is basically a protective covering that shields your clothes from spills, stains, and mess while you’re cooking, crafting, or working.
This simple design makes the apron a practical and essential tool for various activities.
History of Aprons
You’re exploring apron history.
- Medieval Origins
- Apron Evolution
- Cultural Significance
- Historical Designs
- Vintage Styles
showcase the rich apron history, from medieval times to modern uses, highlighting its cultural significance and design evolution.
Types of Aprons
You’ll find various apron types, including Bib Aprons, Tabard Aprons, and Pinafore Aprons.
| Apron Type | Description | Usage |
|---|---|---|
| Bib Apron | Covers chest | Cooking |
| Tabard Apron | Covers front & back | Crafting |
| Pinafore Apron | Dress-like | Hosting |
The provided table describes each apron type in detail, including its description and usage.
Apron Materials
Ever wondered what makes an apron durable yet stylish? Choosing the right apron materials is key.
Here’s a quick rundown:
- Fabric Types: Cotton blends are perfect for kitchen aprons—soft, durable, and easy to clean.
- Material Selection: Leather options are great for heavy-duty tasks like woodworking.
- Synthetic Fabrics: Lightweight and water-resistant, ideal for messy crafts.
- Apron Fabric Choices: Mix and match for a unique look that’s as functional as it’s fun!
Got your fabric? Let’s get stitching!
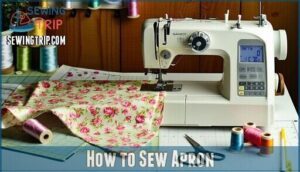
How to Sew Apron
You’re ready to sew an apron. Grab your sewing tools and let’s get started.
Here are some essential steps:
- Choose a simple apron pattern
- Select your fabric
- Start sewing your apron design.
With these sewing tips, you’ll have a DIY apron in no time. Follow an apron sewing tutorial for guidance, and don’t forget to explore different fabric choices for your apron sewing guide.
Understanding sewing machine basics is vital for a successful project.
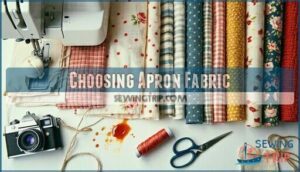
Choosing Apron Fabric
Picking the right fabric for your apron isn’t just about looks—it’s about how much mess you expect and how often you cook, craft, or clean.
Choose fabric wisely for a mess-free and stylish apron experience
Trust me, you don’t want to make a fancy apron out of silk if you’re anything like me and seem to attract spaghetti sauce like a magnet.
Cotton and Linen Fabrics
Once you’ve mapped out your apron pattern, let’s talk cotton and linen fabrics. Both are all-stars if you want breathable materials that are comfy for long kitchen sprints.
Cotton blends handle messes and still look sharp, while linen textures bring a crisp, natural vibe.
Just be mindful—fabric weight matters, especially for apron sewing success with your favorite sewing techniques.
When choosing the right fabric, consider the importance of durable fabric options to guarantee your apron is both functional and long-lasting.
Leather and Heavy-Duty Fabrics
A leather apron’s got grit—perfect for messy projects or when you want your Heavy Fabric game strong.
If you’re into durable, heirloom-style aprons, leather or canvas is your ticket.
Choose tough apron patterns and industrial sewing for the best results.
Don’t forget Leather Care: a little TLC keeps your heavyduty masterpiece looking sharp (and smelling less like a barn).
Seasonal Fabric Considerations
When the sun’s blazing, stick to lightweight cotton or linen—those breezes and playful seasonal prints make summer sewing a breeze.
In winter, reach for cozy textures like flannel or fleece in rich, warm colors.
Adjust your apron fabric selection by weather: think fabric weight, color choices, and pattern selection.
Matching apron fabric types keeps your seasonal apron comfy and practical.
For durable aprons, consider best fabric options to guarantee longevity and comfort.
Measuring for Apron
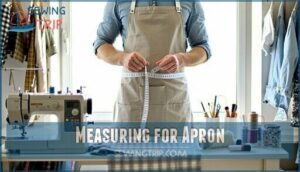
You’re getting close to sewing your apron, and now it’s time to measure up.
Take a minute to grab a tape measure and note down your body measurements, so you can create a custom fit that’s just right for you.
Taking Body Measurements
To guarantee a great body fit, take your measurements using sewing patterns or measurement tools. Consider your:
- Waist size
- Neck circumference
- Apron measurements
for accurate sizing charts and fabric requirements.
Calculating Fabric Requirements
When sewing an apron, calculate fabric requirements using a table:
| Apron Type | Yardage |
|---|---|
| Adult | 1-1.5 yards |
| Child | 0.75-1 yard |
Consider apron sizing, material estimation, and fabric allocation for accurate yardage calculation and apron fabric requirements.
To guarantee durability, choose the best fabric options for your specific apron needs, focusing on the best fabric.
Creating a Custom Fit
Your apron’s body measurements determine the perfect fit, so grab your measuring tape and get personal with those numbers.
Focus on your waist, chest, and desired length for custom waist sizing that flatters your frame.
Adjustable straps offer flexibility across different fit styles, making your sew apron pattern work for various body types.
This apron measurement guide guarantees your custom apron sewing project fits like a glove, giving you professional apron sewing tips for pattern success.
Cutting Apron Fabric
Once you’ve got your measurements, it’s time to cut your fabric with confidence and precision.
You’ll save time and avoid frustration by using the right tools and techniques from the start.
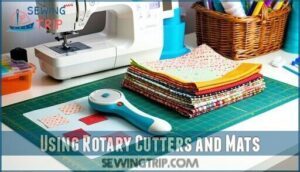
Using Rotary Cutters and Mats
Professional cutters make fabric cutting a breeze. You’ll slice through multiple layers like butter, saving tons of time compared to scissors.
Keep your cutting mat clean and rotate it regularly for even wear. Using the right rotary cutting tools can substantially improve your sewing experience.
- Rotary Cutter Tips: Replace dull blades immediately – they’ll snag and tear your fabric
- Mat Maintenance: Clean with mild soap and store flat to prevent warping
- Blade Safety: Always close the safety guard when not cutting to protect fingers
Cutting Straight Edges and Curves
Perfect timing matters when fabric cutting meets your scissors.
Use steady, deliberate strokes for straight edges, keeping your cutting tool perpendicular to the fabric surface.
For curves, take smaller snips and rotate the fabric rather than forcing your scissors around tight corners.
Sharp sewing tools make seam accuracy effortless, while dull blades create jagged edges that compromise your apron pattern’s professional finish, and using sharp sewing tools is crucial for a good outcome.
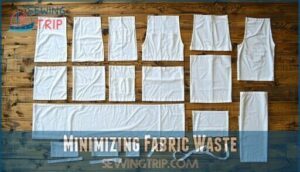
Minimizing Fabric Waste
Smart fabric scrap management starts with careful planning before you cut.
Lay out all apron pattern pieces on your fabric first, arranging them like puzzle pieces to maximize every inch.
Save leftover scraps for pockets, bias tape, or ties, this approach reduces fabric waste.
This sustainable sewing approach keeps your eco-friendly project budget-friendly and environmentally conscious.
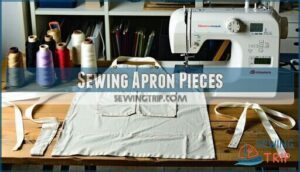
Sewing Apron Pieces
Now you’re ready to put everything together and watch your apron come to life.
Start by assembling the main body pieces, then attach your neck straps and ties before adding any pockets or decorative trim that’ll make your apron uniquely yours, with a focus on making it uniquely yours.
Assembling The Apron Body
With your fabric cut and ready, it’s time to bring those apron panels together.
Body assembly transforms separate pieces into your finished apron through careful sewing seams and layering fabric correctly.
Here’s your step-by-step approach:
- Pin apron panels with right sides facing together along side seams
- Sew fabric layers using a straight stitch with ¼-inch seam allowance
- Press seams open to create crisp, professional-looking edges
- Check apron construction by trying on your work-in-progress
Master these sewing techniques and you’ll have a sturdy apron body that’s ready for the finishing touches.
To achieve a professional finish, consider following proper sewing machine guidelines for superior results.
Attaching Neck Straps and Ties
Now, with your apron body ready, it’s time for the apron neck strap and ties—no use running around the kitchen trying to keep your masterpiece on!
Measure for Strap Length, then cut your chosen Strap Materials.
Pin them at the right spots for Apron Fitting, secure with strong stitches, minding Neck Strap Adjustment and Tie Placement.
Voilà, steady and comfy!
Adding Pockets and Trim
Now you’re ready to add pockets and trim.
Here are some ideas:
- Pocket Styles
- Trim Options
- Apron Embellishments
- Fabric Accents
- Sewing Notions
consider an apron pocket pattern for your sewing apron project.
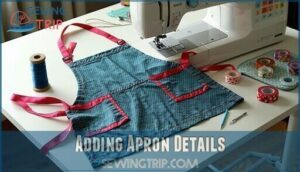
Adding Apron Details
You’re getting close to finishing your apron, and now it’s time to add some details that’ll make it truly special.
You can add embroidery, bias tape, or even stain-resistant treatments to give your apron a personal touch and make it more functional.
Embroidery and Monogramming
Many skilled sewers find that personalizing their apron through embroidery or monogramming transforms a basic garment into something truly special.
While monogramming focuses on adding initials, embroidery opens up endless creative possibilities with intricate designs and decorative elements.
| Design Element | Best For | Difficulty Level |
|---|---|---|
| Simple monogram | Beginner apron sewing | Easy |
| Decorative borders | Custom apron projects | Medium |
| Floral motifs | Kitchen aprons | Medium |
| Name embroidery | Gift aprons | Easy |
| Complex patterns | Advanced sewing techniques | Hard |
Choose thread colors that complement your fabric, experiment with different stitch types for texture, and consider various font styles for monogram ideas.
These embellishments make your handmade apron uniquely yours.
Applying Bias Tape and Elastic
Beyond embroidery, you’ll want to finish your apron with professional touches. Bias tape creates clean, polished edges while elastic straps offer comfort and adjustability. These sewing notions transform a basic apron into something that looks store-bought.
Using bias tape products can elevate the overall quality of your apron.
Here’s how to apply these finishing touches:
- Pin bias tape along raw edges, folding over both sides for complete fabric binding coverage
- Stitch close to edges using matching thread to secure the apron trim without puckering
- Insert elastic through neck strap casings for adjustable, comfortable fit during long cooking sessions
- Create buttonholes at strap ends if using detachable elastic straps for easy washing
- Press seams flat after attaching all bias tape to guarantee crisp, professional-looking apron sewing results
Adding Stain-Resistant Treatments
Before diving into fabric protection, know that stain-resistant treatments can be your apron’s best friend in the kitchen battlefield.
Apply commercial fabric protectors like Scotchgard after completing your apron sewing project.
These chemical treatments create an invisible water repellent barrier that makes cleanup easier, and when used correctly, provide long-lasting fabric protection. Simply spray evenly, let dry completely, then heat-set with your iron for maximum stain resistance.
Assembling The Apron
Now you’re ready to put all your pieces together and create your finished apron.
This is where your careful prep work pays off, and you’ll see your apron come to life with just a few key sewing steps.
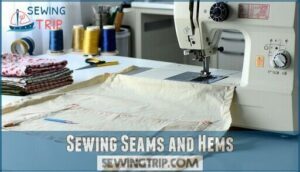
Sewing Seams and Hems
After adding those final touches, turn your focus to sewing seams and hems.
Grab your seam ripper (just in case) and keep your stitch line straight—think edge stitching, not a meandering river!
Fold the fabric, mind thread tension, then work your way through apron hemming like a champ.
Seam finishing and solid hemming techniques mean this apron’s ready to tackle kitchen chaos.
To achieve professional results, mastering serger hem techniques is essential for a polished finish.
Pressing and Ironing The Apron
When sewing an apron, pressing and ironing are essential.
Use ironing tips and steaming techniques for fabric smoothing and wrinkle removal.
This guarantees a crisp finish, especially for apron hemming, and is part of good apron fabric care and sewing instructions for ironable fabrics.
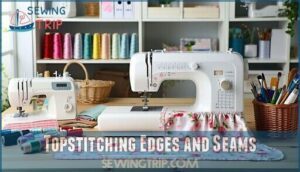
Topstitching Edges and Seams
You’re almost done with your apron.
Now, topstitching edges and seams adds a professional touch.
Use seam finishing techniques like edge stitching or fabric binding to secure your apron, then explore topstitch patterns for a decorative flourish, showcasing your sewing techniques and making your apron truly unique.
Customizing Your Apron
You’re almost done with your apron, and now it’s time to customize it to fit your style.
You can add unique fabrics, embellishments, or adjustable neck straps to make your apron truly one-of-a-kind, and it’s easier than you think.
Using Existing Aprons as Templates
You’re using an existing apron as a template to modify and create your own unique design.
This template selection helps with pattern making, allowing you to adapt fabric and transfer measurements easily.
Making apron sewing a breeze with your chosen apron template and design.
Adding Unique Fabrics and Embellishments
Transform your apron into something special with creative fabric choices and embellishment ideas.
Mix vintage tablecloths with modern prints or repurpose old dresses for one-of-a-kind charm.
- Unique fabrics: Explore poodle prints, Victorian designs, or farm fresh patterns
- Custom details: Add cross-stitch, monograms, or embroidered logos
- Decorative trims: Use bias tape, lace, or ruffles for shabby chic appeal
- Apron pockets: Incorporate contrasting fabrics or charm pack collections
- Embellishment ideas: Try buttons, sequins, gems, or vintage embroidery patterns
Creating Adjustable Neck Straps
If you’re tired of playing tug-of-war with your apron neck loop, adjustable neck straps are your ticket to comfort.
Go for webbing materials or add neck adjusters, sliding buckles, or even pads—your neck will thank you after marathon kitchen sessions!
Here’s a quick visual:
| Strap Length | Buckle Types |
|---|---|
| Customizable fit | D-Ring, Slide, Snap |
| Padded comfort | Plastic, Metal |
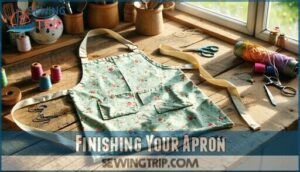
Finishing Your Apron
You’re in the home stretch—just a few finishing touches left, and your apron will be ready to take on kitchen chaos.
Tidy up those edges, snip the extra threads, and get ready to show off your creation (flour smudges optional), this will help you to have a clean and nice apron.
You now have a well-organized apron with your finishing touches.
Hemming Remaining Edges
You’ve added your personal spin, now let’s give those edges the final touch.
Folded hems keep things neat—think of them like clean cuffs for your apron.
A quick pass with your iron and then edge stitching make everything look tidy.
Don’t skip seam finishing; it keeps frays at bay.
Good hemming techniques turn apron sewing from “homemade” into “handcrafted.”
Trimming Loose Threads and Excess Fabric
After you’ve finished hemming, grab your scissors—it’s time for thread trimming and fabric cutting.
Snip away any loose threads and extra fabric hanging out at the seams.
Think of it as giving your apron a mini haircut.
Clean seam finishing and careful edge binding help with fray prevention, making your sewing look sharp and ready for real kitchen adventures.
Trying on and Enjoying Your New Apron
You’ve sewn your apron. Now, try it on and enjoy.
Consider:
- Apron Fitting
- Wear Comfort
- Apron Care for daily use and style expression in your DIY apron making journey, ensuring your sewing an apron experience is fun and rewarding.
Frequently Asked Questions (FAQs)
How to sew apron step by step for beginners?
You’ll start by cutting fabric, then sew the edges, and finally add straps, making it a fun, easy project for beginners to create a useful apron.
What are the measurements for making an apron?
You’ll need about 1 yard of fabric, with measurements depending on the apron style, such as bib or half apron, and your body size for a custom fit.
Are aprons hard to make?
You’ll find making aprons surprisingly easy, requiring basic sewing skills and simple measurements, perfect for beginners or a quick DIY project.
Can aprons be made for children?
You can make adorable aprons for kids, adjusting the size and fabric to fit their needs, and it’s a great way to get them involved in cooking or crafting activities.
How often should aprons be washed?
When in a pickle, you’ll want to wash aprons after every 3-4 uses to keep them clean and hygienic, depending on how messy you get while cooking or crafting.
Are aprons suitable for formal events?
You can wear aprons to formal events, especially pinafore styles, which add a touch of elegance and sophistication to any outfit, making them suitable for dressing up.
Can aprons be used for outdoor work?
You can definitely use aprons for outdoor work, like gardening or BBQs, to protect your clothes from dirt and stains, and they’re super practical too.
Do aprons make good gift ideas?
You’ll find aprons are thoughtful gifts, symbolizing care and practicality, perfect for cooking, gardening, or crafting enthusiasts, showing you’ve sewn a piece of love into their daily lives.
Conclusion
You’ve made it, now you can sew an apron.
About 70% of sewing enthusiasts start with simple projects, and learning how to sew an apron is a great beginning.
With these steps, you’ll master the art of sewing, specifically how to sew an apron, and create something truly unique and functional, so go ahead and give it a try with your new skills.
- https://alsco.com/resources/the-best-fabric-for-aprons-determined-by-top-level-chefs/
- https://www.gallantintl.com/blogs/wholesale-custom-aprons
- https://cheftog.com/pages/fabrics
- https://maake.com/blogs/news/dressmaking-inspiration-the-best-winter-fabrics-for-dresses
- https://www.cosmicaprons.com/blogs/news/best-fabrics-for-durable-aprons

