This site is supported by our readers. We may earn a commission, at no cost to you, if you purchase through links.
Whether you’re a seasoned seamstress or a beginner with a needle, you’ll find joy in creating something uniquely yours.
Let’s dive into the world of DIY fashion and learn how to sew an infinity scarf that’ll be the envy of all your friends.
Yes, you can sew an infinity scarf by folding a strip of fabric lengthwise, sewing along the long edge, then joining the ends and hand stitching the opening closed.
Table Of Contents
Key Takeaways
- Fabric Selection is Crucial: Choose comfortable and aesthetically pleasing fabrics like lightweight cotton, soft rayon, or cozy flannel, considering their properties such as stretch for versatility and durability for frequent use and washing.
- Precise Measuring and Cutting: Start with two matching pieces of fabric, each measuring 12 by at least 55 inches, cut accurately along the lengthwise grain, and consider prewashing fabrics like flannel to account for shrinkage.
- Sewing Techniques Matter: Pin and stitch the long edges of the fabric with a 1/4-inch seam allowance, ensuring fabric alignment and stitch accuracy, then create the loop by sewing the ends together neatly for a seamless look.
- Finishing Touches Enhance Quality: Secure and invisibly stitch the hole shut, press seams neatly to define the scarf’s shape, and consider hemming the edges for a polished look, experimenting with different techniques for a unique style.
Selecting Your Fabric
When selecting fabric for your infinity scarf, it’s crucial to choose a material that complements the scarf’s design and functionality. Opt for fabrics that are both aesthetically pleasing and comfortable against the skin, such as lightweight cotton, soft rayon, or cozy flannel, to ensure your scarf is both stylish and practical.
These fabrics not only offer a variety of textures and patterns to suit your personal style but also provide the necessary drape and breathability for a comfortable fit around your neck. Remember, the right fabric can transform your infinity scarf from a simple accessory to a standout piece in your wardrobe.
Best Fabrics for Infinity Scarves
When selecting fabric for an infinity scarf, one should consider materials that are both aesthetically pleasing and functional.
Lightweight fabrics that drape well and are comfortable against the skin, such as sweater knits, French terry, and cotton double gauze, are excellent choices.
These fabrics offer a variety of textures and weights, making them suitable for different seasons and styles.
Fleece and flannel can also be used for added warmth.
Preparing Your Fabric
Before you start sewing, it’s essential to choose the right fabric for your infinity scarf, considering both style and comfort.
- Pre-wash your chosen material to ensure fabric care and durability.
- Opt for fabrics with a soft drape for elegance and ease of wear.
- Check fabric properties, selecting stretch knits or cozy wovens for versatility.
- Consider fabric selection that complements your wardrobe.
- Test fabric durability to withstand frequent use and washing.
Measuring and Cutting
When it comes to crafting your own infinity scarf, the initial steps of measuring and cutting your fabric are crucial for a successful project.
First, you’ll need to select two matching pieces of fabric, each measuring 12 by at least 55, to ensure your scarf has the right length and width for a comfortable fit.
Cutting the fabric accurately along the lengthwise grain is essential, as it sets the foundation for the entire sewing process.
This stage isn’t only about getting the dimensions right but also about preparing your materials to create a scarf that’s both stylish and functional.
With the right measurements in hand, you’re well on your way to sewing an infinity scarf that’s uniquely yours.
Fabric Measurements for Infinity Scarves
Moving seamlessly from selecting your fabric, it’s crucial you measure and cut your material accurately for your infinity scarf project. You’ll need two matching pieces of fabric, each measuring 12 inches by at least 55 inches, to ensure your scarf has the right length and width for a comfortable fit.
When considering fabric stretch, remember that knit fabrics like jersey may require a slightly longer length to accommodate for their give. For a snug and cozy feel, flannel is a fabulous choice, but be sure to prewash to account for any shrinkage.
Material variations can greatly affect the final look of your scarf, so feel free to experiment with color options and sewing techniques to personalize your creation. Whether you opt for a vibrant print or a chic solid hue, the right fabric will make your scarf a statement piece.
Here’s a table to visualize the scarf dimensions:
| Fabric Type | Width (inches) | Length (inches) |
|---|---|---|
| Knit | 12 | 60 (ideal) |
| Woven | 12 | 55+ |
| Flannel | 12 | 55+ (prewash) |
Remember to press and stitch with care, and when you cut your fabric for infinity scarf, ensure your measurements are precise for a polished finish.
Cutting Instructions
Once you’ve selected your fabric and prepared it as discussed, you’re ready to measure and cut. Lay your fabric flat, remove any selvages, and then cut it in half lengthwise to create two equal pieces.
Embrace the creative flow as you wield your cutting tools, transforming fabric into the beginnings of a chic infinity scarf. Whether you’re working with knit or woven, ensure your edges are crisp and your pattern true.
This step is the foundation of your scarf’s flawless drape and seamless tube. With each snip, you’re not just cutting fabric; you’re crafting a piece of wearable art that embodies comfort and style.
Sewing the Long Edges
Once you’ve got your fabric cut to size, it’s time to start shaping your infinity scarf. Pin the long edges of your fabric together, right sides facing each other, to prepare for sewing.
You’ll be creating a French seam for a polished look, so stitch a straight line with a 1/4” seam allowance, then trim and press before sewing it again.
Pinning and Stitching
After measuring and cutting your fabric, you’ll need to pin the long edges together, ensuring the right sides are facing each other before you begin sewing.
Mastering pinning techniques is crucial for fabric alignment and seam allowances.
When stitching, focus on stitch accuracy to create a beautiful DIY infinity scarf.
This step transforms your project from fabric to a fashionable accessory, embodying your love for crafting and sharing.
Sewing French Seams
To create a polished look for your infinity scarf, you’ll now sew French seams along the long edges.
Begin by pinning the wrong sides together and stitch a narrow seam.
Trim, press, then fold right sides together, encasing the raw edge.
Sew again to complete the French seam.
This technique ensures a clean finish, hiding raw edges and adding durability to your chic infinity scarf.
Creating the Loop
Once you’ve turned your fabric right side out, it’s time to join the ends to create the loop that defines an infinity scarf. This step transforms your sewn fabric into a versatile accessory you can style in numerous ways.
Make sure the ends are aligned neatly before sewing to ensure a seamless look.
Turning the Fabric Right Side Out
How can you turn the fabric right side out to create the loop of your infinity scarf? This moment of textile reversal is where your creation truly begins to take shape.
- Feel the excitement as your flannel infinity scarf emerges.
- Revel in the magic of material transformation.
- Experience the satisfaction of mastering turning techniques.
- Cherish the anticipation of wearing your fall infinity scarf.
- Connect with the joy of sharing your craft with others.
Joining the Ends
Having turned the fabric right side out, you’ll now align the ends to form the loop of your infinity scarf.
| Step | End Connection | Seam Finishing |
|---|---|---|
| 1 | Match edges | Pin in place |
| 2 | Sew together | Seamless look |
| 3 | Trim excess | Neat edge |
| 4 | Turn loop | Closure method |
| 5 | Press seam | Complete join |
With care, create an end connection that’s both sturdy and stylish.
Finishing Touches
Once you’ve crafted the main loop of your infinity scarf, it’s time to give it a polished finish. You’ll need to sew the hole shut, ensuring the stitches are secure and invisible for a seamless look.
Then, press the seams neatly to define the scarf’s shape and drape beautifully when worn.
Sewing the Hole Shut
Every last stitch brings you closer to completing your handmade accessory; now it’s time to sew the hole shut, ensuring all edges are neatly tucked in and secure. Opt for hand-sewn closure techniques that blend seamlessly with your scarf’s fabric.
This final touch of seam finishing not only conceals any remaining holes but also perfects the seam concealment, making your infinity scarf a masterpiece of craftsmanship and love.
Pressing the Seams
After sewing the hole shut, it’s time to press the seams to give your infinity scarf a polished look.
Employ pressing techniques that respect your fabric’s care instructions. Gently iron along the seams, using a cloth if necessary to protect delicate fibers.
This seam finishing step ensures a crisp, clean edge. Handle your fabric with care to maintain its shape and integrity.
Hemming Techniques
When it comes to giving your infinity scarf a professional finish, hemming is key. You’ll want to choose a method that complements your fabric and gives that chic, polished look.
For sheer or lightweight fabrics, a narrow rolled hem can be particularly elegant. If you’re using a sewing machine, a narrow-hem foot can make the job easier and more precise.
Sewing a Narrow Hem
Starting with a narrow hem adds a professional and clean finish to your infinity scarf, ensuring the edges are neat and less prone to fraying.
- Sew a straight stitch 1/4” from the edge.
- Press the raw edge to the wrong side.
- Fold again, creating a double-fold hem.
- Stitch close to the inner fold, securing your work.
Optional Hemming Methods
For a more polished finish, you can use a narrow rolled hem foot on your sewing machine to create delicate hems on your infinity scarf.
Exploring other hemming methods, like bias binding, adds a touch of elegance.
Topstitching techniques and decorative edges offer unique flair, while serger finishes ensure durability.
Each method brings its own charm, inviting you to personalize your creation.
Styling Your Scarf
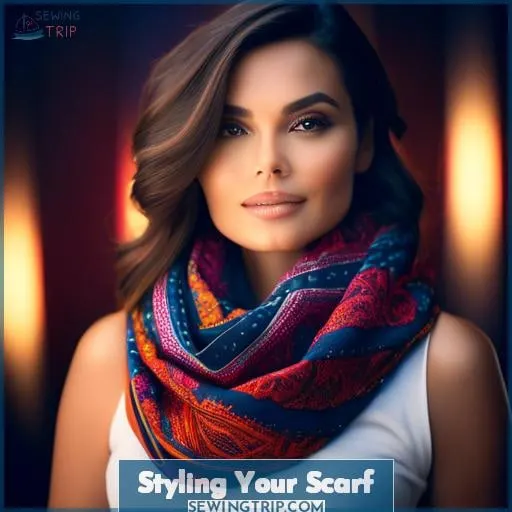
Once you’ve mastered sewing your infinity scarf, it’s time to explore the fun part: styling it.
Wearing it as a shawl offers a chic, versatile look that’s perfect for cooler evenings.
Experimenting with different variations can transform a simple outfit into a statement ensemble.
Wearing as a Shawl
While you’ve crafted your infinity scarf for warmth and style, you can also wear it as a shawl to add a chic touch to any outfit.
Embrace shawl styling by draping the fabric over your shoulders, creating an elegant shoulder wrap.
This scarf versatility offers endless layering options, allowing you to experiment with different draping techniques for a cozy yet sophisticated look.
Infinity Scarf Variations
Experimenting with different fabrics and patterns, you’ll find that each infinity scarf you create can be styled in a multitude of ways to suit your personal taste.
Dive into the world of fabric choices, exploring color combinations and pattern variations that reflect the current season.
Master styling techniques to adapt your scarf for any occasion, ensuring it becomes a cherished part of your wardrobe.
Infinity Scarf Lengths
When crafting your own infinity scarf, the length is a key factor to consider for both style and comfort.
For a snug fit that allows for a double wrap, aim for a standard length between 50 to 60 inches.
If you’re sewing for children, keep safety in mind and opt for shorter lengths, such as 23 inches for 2-3 years old and 27 inches for 4-10 years old.
Average Lengths and Widths
When you’re determining the size of your infinity scarf, it’s important to know that the average length for a store-bought infinity scarf is around 60 inches. This standard measurement ensures a comfortable fit and allows for various styling options, making it a versatile accessory for your wardrobe.
Width variations and custom lengths can tailor fabric choices to your unique style, enhancing draping effects and layering styles.
Sizing for Children
You’ll want to adjust the length and width of your infinity scarf when creating one for a child, ensuring it’s proportionate to their smaller size. Opt for vibrant color choices to spark joy and creativity in young wearers. Select fabric textures that are soft and comfortable against delicate skin, considering seasonal variations to ensure the scarf is appropriate for the weather.
Always prioritize safety considerations, avoiding overly long scarves that could pose risks. Adding creative embellishments like playful patterns or fun appliqués can make the scarf a cherished accessory.
This thoughtful approach ensures the scarf isn’t only stylish but also safe and enjoyable for children to wear.
Sewing Tools and Materials
To kick off your infinity scarf project, you’ll need a few essential supplies and perhaps some optional tools to streamline the process. Make sure you’ve got your fabric picked out—something soft and with a nice drape, like a lightweight cotton or jersey knit.
Gather your sewing machine, coordinating thread, and cutting tools; a rotary cutter and mat can make cutting your fabric a breeze.
Essential Sewing Supplies
To ensure you have everything you need for your infinity scarf project, let’s gather the essential sewing supplies.
You’ll need fabric, which can be anything from lightweight cotton to stretchy knit, depending on the look and feel you’re going for.
A rotary cutter and mat will make cutting your fabric to the correct dimensions a breeze, but scissors are a fine alternative if that’s what you have on hand.
Coordinating thread is a must to ensure your stitches blend seamlessly with your fabric.
Of course, a sewing machine will make the work much quicker, but if you’re up for it, you can sew by hand.
Don’t forget about pins or clips to hold your fabric in place as you sew, and an iron and ironing board for pressing your fabric before and after sewing to give your scarf a professional finish.
Optional Tools for Efficiency
While the foundational sewing tools are indispensable for every project, incorporating optional tools can significantly enhance your efficiency and enjoyment in sewing. These tools, ranging from specialized presser feet to ergonomic seam rippers, are designed to streamline your workflow and improve the quality of your finished projects.
By investing in these optional tools, you’ll find that tasks such as cutting, pressing, and stitching become more precise and less time-consuming. This allows you to focus more on creativity and less on the mechanics of sewing.
Caring for Your Scarf
After crafting your own infinity scarf, it’s crucial to know how to care for it to ensure it lasts for many seasons. Always wash your scarf according to the fabric’s specific needs; for instance, delicate materials like silk or cashmere should be hand-washed with a gentle detergent, while cotton and polyester might be machine washable on a delicate cycle.
To store your scarf, avoid hanging it in direct sunlight or in damp places; instead, lay it flat or gently fold it in a drawer to maintain its shape and prevent stretching or fading.
Washing and Storage
After selecting the perfect fabric and mastering the sewing techniques for your infinity scarf, it’s important to know how to properly care for and store your new accessory to maintain its beauty and longevity.
Fabric care starts with gentle washing and air drying.
For storage solutions, explore organizational tips like folding techniques and seasonal rotation.
This approach ensures your scarf remains a cherished part of your wardrobe.
Repair and Maintenance
You’ll find that a few simple techniques can significantly extend the life of your infinity scarf.
- Regularly inspect for any loose threads or minor tears and mend promptly to prevent further damage.
- Follow specific fabric care instructions to maintain the scarf’s texture and color vibrancy.
- Store your scarf in a dry, cool place to avoid moisture and mildew buildup.
- Implement gentle washing and drying methods to preserve the fabric’s integrity.
Frequently Asked Questions (FAQs)
Can I sew an infinity scarf without a sewing machine, using only hand stitching?
Yes, you can absolutely hand-stitch an infinity scarf. It’s a cozy project that’ll add a personal touch to your wardrobe or make a heartfelt gift.
Just choose a fabric that speaks to you, thread a needle, and use a simple running or backstitch along the edges.
It’s slower than machine sewing, but every stitch will carry your unique signature.
How do I adjust the pattern for an infinity scarf to fit a child or a toddler?
To resize an infinity scarf for a child, reduce the length and width proportionally.
For toddlers, aim for a length of about 36 inches and a width of 3 to 4 inches.
Adjust for comfort and safety.
What are some common mistakes to avoid when sewing an infinity scarf for the first time?
Like threading a needle in a haystack, sewing an infinity scarf for the first time can be tricky.
Avoid common pitfalls: not prewashing fabric, which can lead to shrinkage, and mismatching fabric patterns.
Ensure the fabric’s right sides face each other before sewing to avoid a fashion faux pas.
How can I incorporate embellishments like lace, beads, or fringe into my infinity scarf design?
To add a touch of elegance to your infinity scarf, sew lace along the edges or create a section in the middle.
For a boho vibe, attach beads or fringe to the ends.
These embellishments personalize your scarf, making it uniquely yours and a thoughtful gift for someone special.
Is it possible to upcycle old clothing or fabric scraps into an infinity scarf, and if so, how?
Yes, upcycling old clothing or fabric scraps into an infinity scarf is a creative way to breathe new life into forgotten pieces.
Imagine transforming a beloved but worn-out sweater or a collection of vibrant fabric scraps into a cozy, stylish accessory that wraps you in memories.
Start by selecting materials that complement each other in texture and color.
Cut them into strips or panels, then sew these pieces together end-to-end, creating a long rectangle.
Join the short ends, right sides together, to form a loop.
This project not only gives old fabrics a second chance but also adds a unique, personal touch to your wardrobe.
Conclusion
Crafting an infinity scarf is akin to weaving magic with your very own hands, transforming simple fabric into a masterpiece of warmth and style.
You’ve now mastered the art of how to sew an infinity scarf, blending creativity with practicality.
Cherish the journey from selecting the perfect fabric to the final press of the seams.
Wear your creation with pride, knowing it’s not just an accessory, but a testament to your skill and flair.
Keep stitching, keep shining!

