This site is supported by our readers. We may earn a commission, at no cost to you, if you purchase through links.
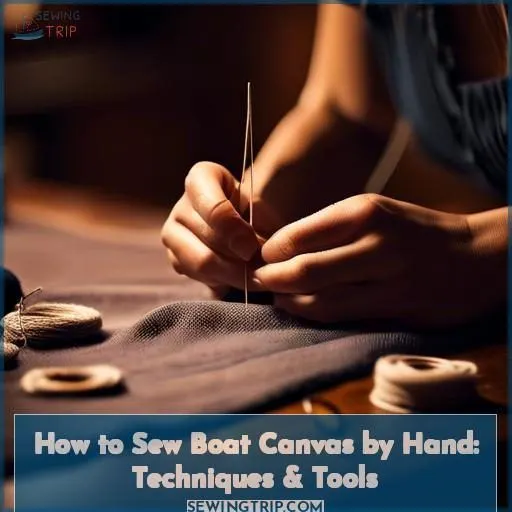
To sew boat canvas by hand, you’ll need heavy-duty thread, denim needles, an overlock sewing foot, scrap denim, and a soapstone pen.
Tools include a ruler, basting tape, scissors, and needles.
You’ll also need sewing twine and an awl.
Hand sewing techniques include running stitch, saddle stitch, blanket stitch, buttonhole stitch, and whip stitch.
For overlapping seams, align canvas edges, mark the overcast area, and use basting tape to hold layers.
Topstitch with heavy-duty thread.
For flat felled seams, use a soapstone marker or pencil, pins, and clips (optional).
Table Of Contents
Key Takeaways
- Use heavy-duty thread and denim needles for sewing boat canvas by hand.
- Utilize an overlock sewing foot, soap stone pen, and basting tape for optimal results.
- Master hand sewing techniques such as running stitch, saddle stitch, blanket stitch, buttonhole stitch, and whip stitch.
- Prevent fraying by folding edges, pinning them, or using Fray Check liquid or fabric glue.
How to Sew Boat Canvas by Hand?
To sew boat canvas by hand, you’ll need a few essential tools and techniques.
First, gather your sewing supplies, including a sturdy needle or awl, heavy-duty thread, and a ruler for measuring and marking your stitches.
If you’re working with a large canvas project, secure the material into a bench hook or use pins or clips to hold the edges together.
Keep your thread nearby and attach one end to the awl or needle, then repeat the stitching process along your hem until you’ve finished sewing your canvas.
Additionally, consider investing in high-quality hand sewing supplies, such as palms, thread, and needles, specifically designed for sails and marine canvas.
Materials and Tools
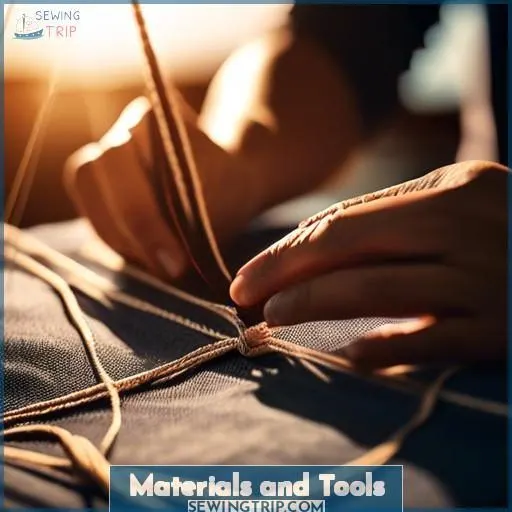
To sew boat canvas by hand, you’ll need a variety of materials and tools. Start with heavy-duty thread, denim needles, an overlock sewing foot, and scrap denim for practice.
You’ll also need a soapstone pen and ruler for marking measurements, basting tape for holding pieces together, and scissors for cutting fabric. Optional tools include a curved bench or sailmaker’s hook for holding fabric while sewing, sewing twine for securing pieces, and an awl for piercing thick materials.
Hand sewing techniques include the running stitch, saddle stitch, blanket stitch, buttonhole stitch, and whip stitch. For preventing fraying, fold edges, pin them, or use Fray Check liquid or fabric glue.
Heavy-duty Thread
Choosing the right heavy-duty thread is like picking the perfect ally for your canvas conquest. Here’s what you need to know:
- Thread Durability: Opt for polyester or nylon; they’re tough cookies under the sun and won’t ghost you when things get rough.
- Needle Compatibility: Match your thread to the needle size for a smooth sail.
- Bobbin Efficiency: Polyester threads promise longer stretches between bobbin changes, letting you focus on the horizon without looking back.
Denim Needles
Regarding hand sewing with denim, the proper needle is pivotal. Denim needles are tailored to handle the dense, robust fabric often found in jeans and other denim endeavors. These needles feature a sharp point that can pierce through multiple layers of denim without compromising its integrity, and they’re compatible with sewing machines, making them suitable for various sewing methods.
When selecting denim needles, it’s important to consider the needle’s attributes, such as its size, shape, and composition. Denim needles tend to be larger and more resilient than other hand sewing needles, and they may possess a reinforced blade for enhanced durability. Additionally, verify the needle’s compatibility with your sewing machine, as some denim needles are also designed for machine sewing.
Regarding thread selection, it’s imperative to choose a thread that can withstand the thick, sturdy fabric of denim. Heavy-duty threads such as polyester or bonded polyester are recommended for outdoor use and canvas projects, while V138 thread is regarded as the most robust and durable option for sewing denim.
To mitigate fraying, consider employing a flat fell seam or overlapping seam technique, which can aid in preventing the edges of the denim fabric from unraveling. When working with denim, it’s also prudent to have a supply of Fray Check liquid on hand to assist in sealing the edges and deterring fraying.
Overlock Sewing Foot
Regarding sewing boat canvas, possessing the appropriate tools is of utmost importance. One such instrument is the overlock sewing foot, engineered to enable professional-grade edge finishing and seam sewing. Here are five vital aspects of the overlock sewing foot that will assist you in becoming proficient in the art of hand sewing boat canvas:
- Overlock Stitch: The overlock sewing foot facilitates the creation of an overlock stitch, analogous to the stitch produced by a serger. This stitch completes the raw fabric edges in a fashion that precludes unraveling, akin to the action of a serger.
- Foot Pressure: Modifying the foot pressure is indispensable when utilizing an overlock sewing foot. This pressure aids in regulating the amount of tension exerted on the fabric, guaranteeing a seamless sewing process and averting potential issues with fabric curling or bunching.
- Thread Tension: The thread tension significantly influences the stitch’s integrity. Appropriate tension ensures that the stitches are uniform and secure, preventing any undesired fraying or unraveling of the fabric edges.
- Stitch Length: The stitch’s length is another essential factor to be taken into account when employing an overlock sewing foot. Longer stitches are generally more suitable for lightweight to medium-weight fabrics, while shorter stitches are more appropriate for medium to heavyweight fabrics.
- Fabric Compatibility: The overlock sewing foot is compatible with an array of fabrics, including knitwear and canvas. Nevertheless, it’s imperative to ascertain the foot’s compatibility with your specific sewing machine to guarantee optimal performance.
Scrap Denim
Scrap denim is a valuable resource for boat canvas sewing. It can be used to create patches or reinforce weak areas.
When using an overlock foot, scrap denim can be used to create a clean, finished edge. Sewing twine can be used to secure scrap denim pieces while sewing.
A curved bench or sailmaker’s hook can provide a comfortable sewing position. Running stitch and whip stitch are useful for repairing tears or holes in denim scraps.
Soapstone Pen
A soapstone pen is a versatile tool for marking lines on various materials, including metal, fabric, and even rocks. It creates thin, precise lines that can be easily removed when no longer needed. Soapstone markers are often used in welding and metal fabrication, but they’re also suitable for textile marking tools and markers. They’re particularly useful for making removable markings on steel, aluminum, and cast iron.
To use a soapstone pen, simply draw on the material you want to mark. The marks can be easily removed by rubbing them off with your fingers or a cloth. These pens are available in different sizes and shapes, such as flat, broad, or pointed, to suit different marking needs.
Here are some key points about soapstone pens:
- Temporary Marks: Soapstone pens create temporary marks that can be easily removed, making them ideal for marking lines that aren’t permanent.
- Widely Usable: Soapstone pens are suitable for various materials, including metal, fabric, and rocks.
- Easy to Remove: The marks made by soapstone pens can be easily wiped off when desired.
- Durable: Soapstone pens are made from natural white soapstone, which is eco-friendly and non-toxic, ensuring a long service life.
When using a soapstone pen for sewing, it’s important to remember that the marks are temporary and will need to be removed before washing or ironing the fabric. This makes them a great choice for marking lines on boat canvas or other fabrics that will be exposed to the elements.
Ruler
A ruler is an indispensable utensil for stitching boat canvas by hand. It offers accuracy and precision when gauging dimensions, making sure that your seams are even and your panels are cut to the appropriate size.
Look for a ruler with prominent measurement lines and legible markings, such as the Sailrite Clear Acrylic Ruler, which features 30-, 45- and 60-degree angles for bias measurements and cuts. This ruler is also reversible for right- and left-handed use and is ideal for measuring tools and rotary cutters.
Always make sure that the ruler is held firmly against the fabric to avoid any inaccuracies in measurement.
Basting Tape
Basting tape is a versatile sewing tool that can make your sewing projects more efficient and accurate. Here are three reasons why you should consider using basting tape:
- Prevents fabric shifting: Basting tape holds fabric layers together, preventing them from shifting or bunching during the sewing process. This guarantees that your seams are even and your hems are straight.
- Saves time: Basting tape eliminates the need for hand basting or using pins, which can be time-consuming. You can quickly apply the tape and start sewing without worrying about holding the fabric in place.
- Waterproof seams: Some basting tapes are designed to help waterproof seams, which is beneficial for outdoor projects like awnings, biminis, and T-tops.
Basting tape is available in various widths and can be used on a variety of fabrics, including canvas, sailcloth, cotton, mylar/kevlar, and coated ripstop or coated polyester spinnaker fabrics. It’s also repositionable, allowing you to adjust your hem or line up your panels if needed.
To use basting tape, apply it close to the edge of the fabric and carefully adhere it to the fabric as you unroll it. Once the tape is in place, remove the paper backing and fold your hem over or attach your fabric panel. Make sure to apply pressure to the fabric assembly to guarantee the tape has a secure hold on both layers.
Alternatives to basting tape include sewing pins and fabric clips, which can hold several layers of material together. However, pins must be removed before the clip nears the presser foot, and clips don’t pierce the fabric like pins do.
To remove basting tape, carefully peel it off the fabric, being careful not to damage the fabric. If the tape leaves residue, you can use rubbing alcohol or a bar of soap to clean the needle before sewing.
Scissors
Scissors are a vital implement in the sewing of boat canvas. They’re utilized for cutting fabric, trimming borders, and severing threads. For optimum outcomes, employ sharp scissors. Should your scissors become blunt, hone them periodically. Safeguard your scissors in a secure location to avert damage and guarantee they’re perpetually prepared for utilization.
Needles
When discussing sewing boat canvas, there are several types of needles you might come across. Here’s a summary of the most common ones:
- Sharps Needles: These are the general-purpose, medium-length hand sewing needles. They’re suitable for hand sewing, dressmaking, and a variety of other projects. Sharps needles come in different sizes, so it’s crucial to select one that matches the fabric you’re working with.
- Betweens Needles: These are shorter than sharps and are ideal for professional sewing and techniques such as backstitch or applique. They’re often used for hand quilting to assist with faster quilting.
- Darners Needles: These are longer than sharps and range in size from 5/0 to 9. They’re used for mending with yarn or cotton and are also suitable for tacking as they’re very long.
- Millinery Needles: These needles are comparatively longer than conventional hand sewing needles with round eyes and are exceptionally suited for sewing firmer materials such as in costume-making and hat making. They come in sizes 5 to 10.
- Chenille Needles: These needles resemble tapestry needles and have a large eye with a sharp point, useful for hand embroidery with thicker threads on linen. They come in sizes 16 to 24.
- Crewel Needles: These needles are made of hardened steel and are especially suitable for fine embroidery and sewing. The needles have the typical tapered and slim tip shape of a hand sewing needle and have a relatively large eye, which makes threading generally easier to do by hand. They come in sizes 3 to 10.
- Tapestry Needles: These needles are especially suitable for embroidery with coarser materials such as wool. They come in sizes 14 to 26.
- Beading Needles: These very fine and straight needles with long eyes are designed for threading beads, pearls, and sequins. Sizes 10 and 12 are commonly used.
- Leather Needles: These needles have unusual triangulated (cutting) points to enable them to pass through tough materials without causing damage. They’re ideal when working with other media such as suede and soft plastics.
Curved Bench or Sailmaker’s Hook (optional)
When sewing boat canvas by hand, a curved bench or sailmaker’s hook can be an optional tool to aid in the process. These tools are designed to hold the canvas taut while stitching, ensuring the seam remains straight and the canvas is tight. The sailmaker’s hook is particularly useful, as it allows you to hold the canvas with one hand while stitching with the other, which is essential for maintaining the desired tension and accuracy in your seams.
For those who prefer a more traditional approach, a curved bench can be used instead of a sailmaker’s hook. This bench is designed with a curved surface that follows the natural shape of the canvas, allowing you to work more efficiently and comfortably.
Both options can be beneficial for sail repair and other canvas work, as they help to maintain the necessary tension and keep the canvas from bunching or shifting while you sew. Additionally, they can help to prevent the canvas from slipping or moving, which can lead to uneven stitching or inaccurate seams.
Sewing Twine
Sewing twine is a crucial tool for various sewing projects, especially those involving boat canvas. It comes in distinct types, such as waxed twine, whipping twine, sail twine, and marine twine, each with specific characteristics and applications. Here’s a guide to effectively using sewing twine:
- Waxed Twine: This twine is commonly used for whipping or sewing rope. It’s coated with wax for waterproofing and wear resistance. To utilize it, thread the waxed twine through a needle and sew it onto the rope using a whipping stitch or blanket stitch.
- Whipping Twine: This robust twine is used for whipping rope ends. It’s typically made from polyester or nylon and comes in various colors. To use it, thread the whipping twine through a needle and sew it onto the rope using a whipping stitch or blanket stitch.
- Sail Twine: This sturdy, flexible twine is used in various marine applications, such as lashing sails or rigging. It’s often made from natural fibers like hemp or jute and is suitable for both hand and machine sewing.
- Marine Twine: This durable twine is designed specifically for marine applications. It’s commonly made from synthetic fibers like polyester or nylon and is suitable for both hand and machine sewing. It’s particularly useful for sewing boat covers, sails, and other marine upholstery.
When using sewing twine, it’s essential to select the appropriate needle size and thread tension to achieve a strong and secure stitch. For hand sewing, a sharp needle with a large eye is recommended, while for machine sewing, a universal sewing machine needle is suitable. Additionally, it’s crucial to maintain tension on the cord while sewing to prevent unraveling.
Sewing twine is available from various sources, including Jo Anne Fabrics for Sunbrella material and The Thread Exchange for bonded polyester thread. Consider the thread brand, as the thread quality can affect the final result.
Awl
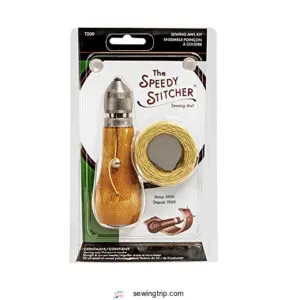
To use an awl for sewing boat canvas, follow these steps:
- Choose the appropriate awl for your project. The Speedy Stitcher Sewing Awl is a popular choice for sewing thick materials like leather and boat sails.
- Thread the awl with waxed thread. This type of thread is suitable for sewing outdoors and is often used for canvas work.
- Push the needle through the material of your project from the backside. On the front-side, fully draw out the thread, long enough to do the entire project.
- While keeping your thumb firmly over the thread on the handle of the awl, hold the thread and pull the needle back out of the hole. Then start it through the second hole.
- Push the needle through the second hole as far as it will go. Then pull back slightly on the awl just until a loop is formed.
- Pass all of the thread through this loop.
- Hold the thread end taut. Pull the needle out of the hole, forming a lock-stitch.
- Pull taut, the lock-stitch knot should be buried in the middle of the fabric layers.
- Release more thread between the needle and material to allow for the next stitch.
- Continue this process until your project is finished.
- After the last hole on the backside of your project, grasp the loop and pull the thread out of the hole.
- Cut the thread, leaving two 3 lengths to tie off.
- Tie the ends in the knot on the backside.
- Trim the excess thread.
To safely store the Speedy Stitcher® Sewing Awl, remove the needle from the threaded post and place it back in the appropriate slot. Screw the chuck lock back in place.
Using an awl for sewing boat canvas can be a fulfilling and convenient experience. It allows you to work with your hands and explore different materials for special projects, even when traveling.
Hand Sewing Techniques
Hand sewing is a traditional method of boat canvas repair and construction. It allows for greater control and precision compared to machine sewing. Here are some hand sewing techniques to master:
| Stitch | Description |
|---|---|
| Running | Simple, fast, and strong |
| Saddle | Strong, used for joining pieces |
| Blanket | Decorative, used for edges |
| Buttonhole | Creates a hole for buttons |
| Whip | Strong, used for binding edges |
Overlapping Seam
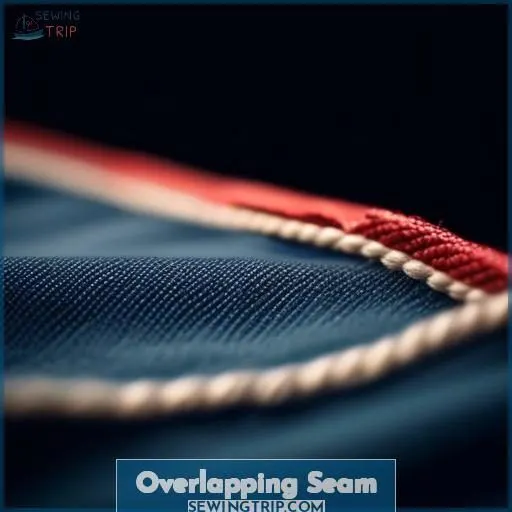
After mastering hand stitching techniques, you’re ready to tackle the overlapping seam, a cornerstone in sewing canvas for durability and strength.
Begin by aligning your canvas edges, ensuring they’re as snug as a ship in harbor. Use your soapstone pen and ruler to mark where you’ll overcast, creating a barrier against fraying.
Basting tape becomes your best mate here, holding the layers in place like a steadfast crew. With your needle and heavy-duty thread, topstitch with precision, as if guiding a vessel through treacherous waters.
This method isn’t just about joining fabric; it’s about repairing sails with the confidence of a seasoned sailor, ensuring every stitch is a step towards excelling in the art of canvas work.
Flat Fell Seam
To sew a flat fell seam by hand for boat canvas, you’ll need a few additional materials and tools:
- Soapstone marker or pencil
- Pins
- Clips (optional)
These items will help you mark the seam allowance, hold the fabric layers together, and guarantee accurate stitching. The soapstone marker or pencil will wear off with water, so choose a lighter pen for light-colored canvas and a darker pen for dark-colored canvas. Pins and clips can be used to secure the fabric layers and keep them in place while sewing.
Soapstone Marker or Pencil
To mark your fabric for your boat canvas project, you have two options: soapstone marking or graphite marking. Soapstone marking is a popular choice due to its durability and resistance to heat. Soapstone pencils are made from a soft clay mineral called talc, which is gentle enough to be used in baby powder. They leave a temporary white powder mark on surfaces, which is highly resistant to heat and remains visible when heated. This makes them ideal for use in welding and fabrication, as well as for temporary marking of metal surfaces.
To use a soapstone pencil, simply rub the soapstone on the surface of your fabric to create a thin line. The mark is easily removed by gently rubbing the fabric or washing it with plain water. Soapstone pencils are available in various sizes and can be sharpened with a pencil sharpener. They’re also available in a pencil-style case with ridges for a comfortable grip and a transparent barrel to show the length of the soapstone.
When choosing a soapstone pencil, consider the hardness of the graphite. A harder graphite will produce a thinner line, while a softer graphite will produce a thicker line. The durability of the pencil depends on the quality of the soapstone and the care taken in handling it. If the soapstone breaks, small pieces can still be used in the marking pencil.
Pins
Pin Placement:
When sewing a flat fell seam, you’ll want to pin the corresponding pieces with right sides together. This guarantees that the seam allowances are aligned and ready for sewing. The pin placement should be evenly spaced along the seam, allowing for precise stitching and a tidy finish.
Pin Types:
For sewing flat fell seams, you can use either quilting pins or sewing pins. Quilting pins are slightly larger and have a larger head, which can help to hold the fabric more securely. Sewing pins, on the other hand, are smaller and more commonly used for general sewing tasks. Both types of pins will work for flat fell seams, so choose the one that you’re most accustomed to.
Pin Sizes:
The size of the pins you use for flat fell seams isn’t as crucial as the placement and type of pins. However, it’s recommended to use pins that are long enough to hold the fabric securely without damaging it. A standard pin size of 1/2 inch is usually adequate for most fabrics.
Pin Costs:
The cost of pins can vary depending on the brand and type. Quilting pins tend to be slightly more expensive than sewing pins due to their larger size and head. However, you can find both types of pins at most sewing supply stores or online.
Pin Storage:
To keep your pins organized and readily available, consider using a pin cushion or a pin box. These storage solutions can help prevent pins from getting lost or damaged and maintain the tidiness of your sewing area.
Clips (optional)
Clamps, akin to alligator clamps, can revolutionize the process of hand-sewing boat canvas. They facilitate the precise alignment of edges** and prevent displacement, enabling a more accurate and efficient sewing process.
By employing clamps, you can secure fabric without relying on pins, which can be particularly beneficial when handling heavier materials. Always select appropriate clamps for your project and ensure their secure fastening to prevent any mishaps during sewing.
Frequently Asked Questions (FAQs)
What is the recommended tension for sewing canvas with a sewing machine?
You’ll want a tight tension that avoids buried stitches but doesn’t distort the canvas. Check your settings: raise the feed dogs and use the longest stitch length possible. This’ll give you mastery over that stubborn fabric.
Can I use a regular sewing machine for sewing canvas?
You can certainly use a regular sewing machine, but be warned – it’ll fight you like a rabid honey badger! A heavy-duty machine designed for canvas is your best bet. With the right tools and techniques, though, even a domestic machine can tame that stubborn fabric into submission.
What type of thread is best for sewing canvas?
For hand-sewing canvas, you’ll want a heavy-duty, bonded polyester thread like V-92 or V- These UV-resistant threads won’t stretch or break easily as you stitch through the thick fabric. Trust me, it’s worth investing in quality thread for your canvas projects.
How do I prevent fraying when sewing canvas?
Ever wonder how sailors’ canvas stays intact? Here’s the secret: apply fray check liquid along raw edges. Fold under twice, pinning for stability. Fabric glue also works wonders – transforming frays into fortresses withstanding wind and waves.
Can I use a walking foot sewing machine for sewing canvas?
You definitely can use a walking foot for sewing canvas—it feeds the thick material evenly from top and bottom, preventing shifting and bunching. Just be sure your machine is robust enough to handle the heavy-duty thread and layers of canvas without straining the motor.
Conclusion
Envision carefully stitching boat canvas with your hands. Each stitch is a reflection of your artistry.
Mastering how to sew boat canvas by hand is an art form. It requires patience, precision, and a keen eye for detail.
With the right tools and techniques at your disposal, you will create seams that withstand the elements. Ensuring your nautical adventures are both aesthetically pleasing and functionally sound.
Embrace this timeless skill. Let your handcrafted masterpieces set sail.

