This site is supported by our readers. We may earn a commission, at no cost to you, if you purchase through links.
First, pick a buckle that suits your project—center bar, double bar, or heel bar are popular choices.
Cut your strap to size, fold the end through the buckle, and secure it with a strong stitch like a box or zigzag pattern.
Use a heavy-duty needle and thread, especially for thick materials like leather or nylon.
Test the buckle to verify it moves smoothly but stays secure.
It’s like giving your project a little seatbelt!
Ready to tackle leather loops or tricky clasps?
Stick around for some pro tips ahead.
Table Of Contents
- Key Takeaways
- Types of Buckles
- Making Leather Keeper Loops
- Attaching Heel Bar Buckles
- Attaching Center Bar Buckles
- Attaching Double Bar Buckles
- Other Types of Clasps
- Buckles and Clasps Quiz
- Attach The Strap and Buckle to The Small Bag
- You Made a Custom Bag!
- Supplies and Material Assembly
- Frequently Asked Questions (FAQs)
- Conclusion
Key Takeaways
- Choose the right buckle for your project—metal for durability, plastic for lightweight use, or fabric for customization.
- Securely attach buckles using strong stitches like box or zigzag patterns, and test for smooth movement and fit.
- Use sharp tools and waxed thread for clean cuts and durable stitching, especially with leather or heavy fabrics.
- Customize buckles and straps with engravings, fabric covers, or trims to make your projects unique and functional.
Types of Buckles
In the context of buckle types, you’ve got plenty of choices to match your style and project needs.
Metal buckles, like brass or stainless steel, are the go-to for durability and a sleek finish, while plastic buckles keep things lightweight and are perfect for casual gear.
Metal buckles bring sleek durability, while plastic buckles keep it light—perfect options for any project or style!
For a vintage vibe, fabric buckles let you play with patterns and textures—just grab some glue and scissors to customize!
Heel bar buckles bring classic charm but need a keeper loop to keep straps in check.
Center bar buckles? They’re the tidy ones, holding loose strap ends effortlessly, and provide a modern alternative.
Want modern flair? Rolling bar buckles make threading a breeze.
You can even find decorative glass buckles for added flair.
Whether you’re after buckle durability, aesthetics, or mechanisms, the right choice can elevate your leatherwork or sewing project to pro level!
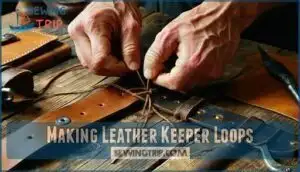
Making Leather Keeper Loops
To keep your straps neat and functional, leather keeper loops are a must. They prevent loose ends from flapping while adding a polished touch to your project.
Here’s how to create them:
- Loop Length Calculation: Measure the buckle width and adjustment range, then cut a strip accordingly.
- Leather Conditioning: Slightly dampen the leather for easy shaping and a smoother finish.
- Stitching Techniques: Use a butt stitch with waxed thread for strength and a clean look.
- Riveting vs Sewing: Rivets offer durability, while sewing showcases craftsmanship.
- Pre-made Loops: Short on time? Veg-tanned loops from suppliers like Tandy work great.
Test the loop’s fit before finalizing. A well-made keeper loop elevates your leatherworking game and keeps everything in place!
Consider using a curved needle for easier keeper loop stitching.
Attaching Heel Bar Buckles
After setting your keeper loop in place, it’s time to attach the heel bar buckle.
Start by marking the Prong Hole Placement on your strap. Punch holes that fit snugly around the prong, guaranteeing proper Buckle Tongue Clearance.
- Loop the strap end around the buckle bar, keeping the tongue free to move.
- Secure with your choice of Rivet vs Sewing for durability.
For sewing thicker materials, consider using a roller presser foot to guarantee smooth fabric movement.
- Finish the strap end neatly for a polished look.
You’ve now mastered one of the classic buckle attachment methods—practical and stylish!
Attaching Center Bar Buckles
Now that you’ve got heel bar buckles down, let’s tackle center bar buckles. These are fantastic for keeping loose strap ends in check—no keeper loop needed!
Start by cutting a clean slot for prong placement. Thread the strap through the buckle, ensuring proper tongue direction for easy adjustment.
Here’s a quick guide:
| Step | Action | Tip |
|---|---|---|
| Prong Placement | Cut a slot for the prong. | Use a sharp blade for precision. |
| Strap Looping | Thread strap through the bar. | Leave extra length for security. |
| Secure Fastening | Stitch or rivet the strap end. | Rivet reinforcement adds strength. |
With practice, buckle sewing becomes second nature! For an alternative fastening method, consider how to attach hook and loop for adjustable straps.
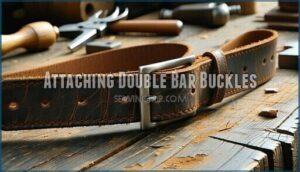
Attaching Double Bar Buckles
Double bar buckles are perfect for creating adjustable straps, but they need a little extra effort. Think of them as the overachievers of buckle sewing—worth it, but they keep you on your toes.
To attach one, follow these steps:
- Cut an extension about 6 inches longer than the fixed strap. Punch matching holes in both pieces.
- Thread the strap through both bars and loop it back through the slider for smooth functionality.
- Align the holes and secure the ends with rivets for a polished finish. For an alternative attachment method, consider fabric glue adhesion before securing the ends.
- Test the movement of the buckle and slider to confirm everything adjusts effortlessly.
With sharp tools and patience, you’ll master double bars like a pro!
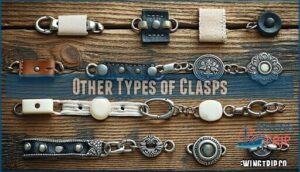
Other Types of Clasps
In the context of clasps, variety is the spice of life! Magnetic clasps are the silent heroes, hiding beneath fabric while firmly sealing bag flaps or jackets.
They’re like the ninjas of closures—strong, subtle, and oh-so-satisfying. For something more visible, lobster clasps steal the show with their bold, metallic grip, perfect for gear straps or keychains.
Hook and eye clasps bring a touch of elegance, ideal for dainty purses or evening bags, while toggle clasps handle the heavy lifting on tool bags or thick jackets with their sturdy, cylindrical design.
Considering alternatives to traditional buttons? Snap closures offer a quick, satisfying click, while drawstring closures and zipper types provide practical, versatile options. Each clasp adds its own flair, balancing function with style.
Many garments utilize durable plastic buttons as a common alternative.
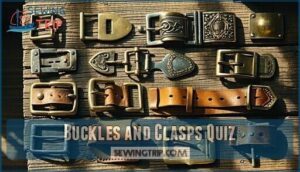
Buckles and Clasps Quiz
Think you’ve mastered buckle identification and clasp mechanisms? Let’s put your skills to the test! Understanding fastening methods and common challenges can make you a pro at sewing techniques and attaching buckles.
Here are some fun quiz prompts to sharpen your knowledge:
- **What keeps a buckle sturdy over time?
**Materials like stainless steel resist rust, while nickel plating prevents tarnish (though it can wear off).
- **How can you test clasp effectiveness?
**Attach clasps to leather scraps. Swing clasps should catch smoothly, and turn locks should release with gentle spring-bar pressure.
- **What weakens rivets?
**Water exposure causes corrosion. Stainless steel rivets and proper sealing are lifesavers.
- **How strong should magnet clasps be?
**Strong enough to hold leather ends but easy to pull apart with light force.
- **Why do historical buckles last?
**Quality craftsmanship and durable metals—less about shortcuts, more about timeless design!
To guarantee accurate fabric measurements, consider using essential measuring tools.
Ready to ace your buckle quiz?
Attach The Strap and Buckle to The Small Bag
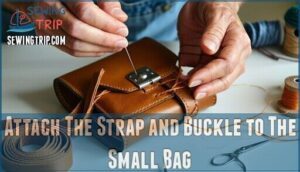
Let’s tackle attaching your strap and buckle to the small bag—it’s easier than it sounds! Start by measuring the Bag Strap Length to verify it fits your needs.
Position the buckle where it’s functional and stylish—Buckle Placement matters! Loop the strap through the buckle’s bar, making certain the tongue (if any) moves freely.
Secure Stitching is key here; use strong thread and neat sewing techniques to keep everything in place. Check Hardware Compatibility—your buckle should match the strap’s width and material.
For extra durability, consider using heavyweight cotton fabrics. Once attached, test the connection for Testing Strength by tugging gently.
Don’t skip Testing Strength; you don’t want your bag taking a tumble! With patience and precision, you’ll sew buckles like a pro and create a strap attachment that lasts.
You Made a Custom Bag!
Congratulations—you’ve created a custom bag that’s as unique as you are! From thoughtful bag design choices to clever buckle placement ideas, every detail reflects your personal touch. Whether it’s the sleek bag buckle styles you picked or the perfect strap length considerations you made, this bag is all about you.
Your custom bag is a masterpiece—every buckle, strap, and stitch showcases your creativity and craftsmanship!
Maybe you added closure hardware options that are both functional and chic or embossed your initials for a personal flair. Take a moment to admire your craftsmanship—it’s no small feat to sew buckles and attach buckles so seamlessly.
Consider using sturdy fabric for your next project, like cotton or linen, to guarantee durability. Now, show it off! Wear it proudly, knowing every strap buckle and stitch was your doing.
And don’t forget to care for it; a little TLC keeps your masterpiece looking fresh and fabulous!
Supplies and Material Assembly
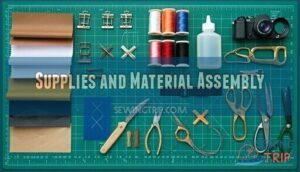
You’re almost there! Before attaching buckles and sewing straps, gather your sewing supplies for a smooth buckle installation.
Start with tool essentials like an X-Acto knife, scissors, and a sturdy needle. For fabric selection, choose durable materials—nylon for practicality or leather for a polished look.
Don’t forget thread types; waxed thread works wonders for strength. Consider hardware options like sleek metal roller buckles or lightweight plastic clips, depending on your style.
If adhesive choices come into play, opt for fabric glue to secure tricky areas. Fabric scissors are essential for achieving precision cutting tasks.
Cut straps to size, loop them through the buckles, and secure with an X-pattern stitch. With the right prep, sewing buckles becomes a breeze!
Frequently Asked Questions (FAQs)
How do I install a side release buckle?
Slide the webbing through the buckle slots, fold the end, and sew securely.
Verify the buckle moves freely.
Test it out—if it’s snug and smooth, you’re good to go!
How do you make a fabric buckle?
Creating a fabric buckle is easy!
Cut fabric to your chosen buckle’s shape, glue it to a blank buckle base, and smooth out wrinkles.
Once dry, customize it with trims, patterns, or bold designs.
How do you make a metal buckle?
Cut your metal sheet into shape, smooth edges with a file, and clean the surface.
Add a prong and bar loop using adhesive or rivets.
Customize with engravings or charms for a unique touch!
How do you make a belt buckle?
Grab a metal sheet, trace your buckle shape, and cut it out.
Smooth edges with a file, add a prong and bar loop, then customize with adhesive-backed charms or fabric.
Let creativity shine!
How do you attach a leather belt buckle?
It’s like threading a needle—loop the leather through the buckle bar, ensuring the tongue moves freely.
Punch holes for prongs, secure with rivets or stitching, and test for a snug, stylish finish.
How do you cut the fabric around the buckle?
Snip the fabric slightly larger than the buckle’s outline, leaving enough margin to fold neatly.
Trim excess at corners, then cut slits for prongs or bars.
Think precision, not panic—mistakes are just design opportunities!
What Are the Best Tools for Cutting Leather and Fabric for Straps?
You’ll want a sharp rotary cutter or utility knife for clean leather cuts, and fabric scissors for precise fabric trimming.
A cutting mat protects surfaces, while rulers and templates guarantee straight edges and accurate measurements.
The tools mentioned are essential for achieving clean cuts and precise trimming on different materials.
What Stitches Should I Use to Attach the Buckles Most Securely?
Use a strong saddle stitch or a double-loop stitch for maximum buckle security.
These stitches distribute tension evenly, preventing wear.
Waxed thread adds durability, and punching clean holes guarantees tight, professional-looking results every time, with strong saddle stitch or double-loop stitch.
How Can I Customize or Personalize My Buckles and Straps?
Think of buckles and straps as blank canvases.
You can paint them with fabric, engrave them with initials, or embellish them with gems.
Add stitching, dyes, or trims—it’s all about making them uniquely yours!
Where Can I Find Buckles and Clasps for Sale Online or Locally?
You can find buckles and clasps at craft stores like Michaels or Joann Fabrics, online shops like Etsy and Amazon, or specialty leatherworking suppliers like Tandy Leather.
Check thrift stores for unique, vintage finds too!
Conclusion
Did you know the average person uses over 20 buckles daily, from belts to bags?
Now that you’ve learned how to sew buckles, you can craft custom pieces that last. Whether it’s adding style to a strap or function to a bag, you’ve got the skills to tackle any project.
Don’t worry if it isn’t perfect—practice makes progress. So grab your materials, start sewing, and enjoy creating something truly yours.
Buckle up—it’s time to get crafty!
- https://www.youtube.com/watch?v=VCFAw_CYMtY
- https://www.instructables.com/Adjustable-buckle-strap
- https://sarkirsten.com/blog/2018/11/21/how-to-install-side-release-buckles-and-slide-adjusters
- https://fabricatedcloset.com/tutorial-how-to-sew-a-prong-belt-buckle
- https://sacotin.com/en/adjustable-clip-buckle-tutorial

