This site is supported by our readers. We may earn a commission, at no cost to you, if you purchase through links.

Learning how to sew comb attachments yourself puts you in control of placement, tension, and durability. You’ll match the comb size to your cap structure, pick materials that won’t snag delicate lace, and create anchor points that hold through wind, workouts, and long wear days.
The right technique transforms a slipping wig into one that stays put from morning until you decide to take it off.
Table Of Contents
Key Takeaways
- Sewing your own wig combs lets you control placement, tension, and durability better than factory-installed options that often use weak stitching or sit in the wrong spots.
- Choose metal combs for longevity and less static (lasting 5+ years) or plastic for variety and lower cost, then match comb size to your cap dimensions and hair density for a secure, comfortable fit.
- Use a curved upholstery needle with heavy-duty polyester thread, position combs at temples, crown, and nape where your natural hair is thickest, then reinforce stitches by doubling back through holes for a lasting hold.
- Inspect your sewn combs every few weeks for loose threads or bent teeth, and consider pairing them with wig bands, adhesives, or grippers for extra security without sacrificing comfort.
How to Choose The Right Wig Comb
Picking the right wig comb isn’t just about grabbing whatever’s on hand. The material, size, and shape all play a role in how well your wig stays put and feels comfortable throughout the day.
Let’s break down what you need to think about before threading that needle.
Metal Vs. Plastic Wig Combs
Choosing between metal and plastic wig combs isn’t just about preference—it’s about performance. Metal combs last over five years and generate 40% less static electricity, while plastic options offer over 70 style varieties at lower costs but wear out faster. Consider these factors when sewing wig combs into wigs:
- Durability comparison: Metal combs maintain integrity through heat styling and dyes, whereas plastic combs average 12-24 months before showing wear.
- Environmental impact: Metal combs are 90% recyclable, while plastic versions take over 450 years to decompose in landfills.
- Cost analysis: Plastic combs run $2-$6, metal ones $5-$15, but metal’s longevity often balances the price difference. Metal combs are also more eco-friendly.
Selecting The Correct Comb Size
Once you’ve picked metal or plastic, you’ll need the right size for your wig’s head circumference and hair volume. Smaller combs (1–1.5 inches) work for petite caps or low wig density, while larger combs (2–3 inches) suit average to large sizes and thicker hair.
To guarantee a comfortable and secure fit, proper wig measurements are essential. Proper comb placement and comfort considerations matter—tight caps need smaller combs to avoid pressure, and secure fit depends on matching comb size to your cap’s stretch and construction.
Matching Comb Shape to Wig Type
After settling on the right size, you’ll want to think about comb shape based on your wig’s hair texture and cap construction. Here’s what works best:
- Wide-tooth combs pair perfectly with curly or coily wigs (types 3A–4C), reducing tangles and stress on delicate lace.
- Curved or contoured shapes complement round or oval face shapes, especially for lace front wigs that elongate your look.
- Flexible, soft-edged combs protect monofilament and full lace caps from snags and tears during wig customization techniques.
- Pick-comb inspired designs anchor high-curl wigs (4B/4C) securely, greatly reducing slippage.
Matching shape to your wig type optimizes comfort and fit—commercial trends show proper pairing boosts satisfaction and cuts returns.
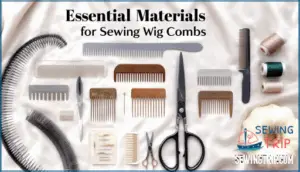
Essential Materials for Sewing Wig Combs
Before you start sewing, you’ll need to gather the right supplies. Having everything ready makes the process smoother and helps you avoid mistakes.
Let’s look at what you need to get started.
Choosing The Best Needle and Thread
Your needle and thread combo is the backbone of a strong, reliable attachment—pick the wrong pair, and your comb might fail when you need it most. Go for a curved upholstery needle paired with heavy-duty polyester thread for sewing wig combs—it’ll manage tight weaving through wig cap material without snapping. Thread strength test matters: tug it hard before you start stitching to avoid mid-project frustration.
| Thread Fiber Types | Needle Size Matters | Color Matching Guide |
|---|---|---|
| Polyester (synthetic) | Size 16-18 curved | Match to wig cap shade |
| Cotton (natural fiber) | Size 14 straight | Black, brown, blonde, auburn |
| Nylon blend | Heavy-duty upholstery | Test under wig hair first |
| Silk thread | Sharp point for lace | Invisible when stitches secure |
Selecting Wig-Friendly Scissors and Pins
Sharp scissors and the right pins are like your safety net—they keep everything in place without damaging delicate wig materials while you work. Use fabric shears with blade sharpness designed for lace, plus T-pins or ball-tipped pins for material compatibility.
Ergonomic design helps during longer wig application sessions, and safety features like rounded tips prevent accidental snags. Pinpoint accuracy matters when positioning combs before sewing wig combs permanently.
Preparing Your Wig and Workstation
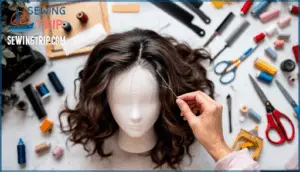
Setting up your workspace properly is like laying a solid foundation—it makes every stitch smoother and keeps frustration at bay. Place your wig on a mannequin head or wig stand in a well-lit area with ergonomic considerations for comfortable sewing.
Wipe down tools for tool sterilization, organize your needle, thread, and wig combs within reach, and arrange the wig cap flat for prep efficiency—good lighting conditions and workspace setup prevent eyestrain and mistakes.
Preparing Your Wig for Comb Attachment
Before you start stitching combs into place, you’ll need to set up your wig properly. This prep work makes the actual sewing much easier and helps you avoid mistakes that could damage the cap.
Let’s walk through the three key steps to get your wig ready for comb attachment.
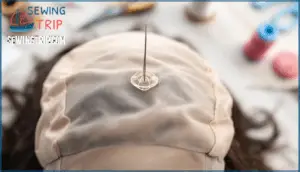
Securing The Wig on a Mannequin Head
Before you can thread a single stitch, you’ll need to anchor your wig firmly in place—think of the mannequin head as your extra pair of hands throughout this entire process.
- Match the mannequin head size to your wig cap dimensions for proper tension
- Choose a head material choice that grips without snagging delicate lace
- Pin the wig at key points to prevent wig slippage during work
These wig positioning tips make certain your wig combs attach exactly where you need them.
Detangling and Inspecting The Wig Cap
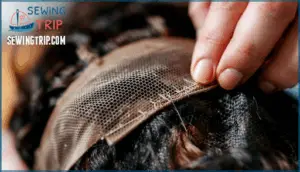
Once your wig sits steady on the mannequin, run a wide-tooth comb through every section to catch tangles and snags that could sabotage your stitching later. Gentle detangling protects delicate lace treatment and weft condition while you check cap integrity. Look for weak spots, tears, or loose threads before you commit to sewing wig combs.
This damage assessment saves you from wig maintenance headaches down the road.
| Inspection Area | What to Check | Action Needed |
|---|---|---|
| Lace edges | Tears or fraying | Reinforce with glue |
| Weft tracks | Loose or lifted sections | Secure before adding stitches |
| Cap fabric | Thin spots or holes | Patch or avoid for knot placement |
Positioning for Optimal Comb Placement
The spot where you stitch each comb can make or break your wig’s stability, so let’s nail down the sweet spots that keep everything locked in place without creating pressure points. Comb placement angles shift depending on face shape pairing and parting style impact—what works for a side part won’t work for a center one.
Securing wigs with combs means working with your head’s natural contours, not against them, for improving wig fit that lasts all day.
Consider these density considerations when positioning:
- Front temples: Secure the wig cap near your hairline for lace stability
- Crown area: Add a comb where your natural hair offers the most volume
- Nape: Place combs low to prevent slippage during movement
- Side panels: Position combs to match your hairstyle limitations without bulking
Step-by-Step Guide to Sewing Wig Combs
Now that your wig is prepped and ready, it’s time to get those combs securely attached. The actual sewing process involves three key techniques that’ll make sure your combs stay put through wear and styling.
Let’s walk through each step so you can attach your combs with confidence.
Threading and Knotting Techniques
A sturdy knot is your first line of defense against a comb that pops loose at the worst possible moment. Choose a medium-length needle with a sharp point for easy weaving through the wig cap, and select thread types that match your wig’s color for undetectable blending. Double your thread for extra stability, then tie a firm knot at the end—verify the knot security by pulling gently to be certain it won’t slip through the fabric.
| Element | Best Choice | Why It Matters |
|---|---|---|
| Thread types | Polyester or nylon | Strong, won’t break under tension |
| Needle selection | Medium sharp-point | Pierces cap easily without snagging |
| Knot security | Double-loop knot | Prevents thread from pulling through |
Attaching The Comb Securely to The Wig Cap
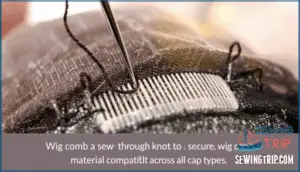
Now that your knot is locked in tight, position the comb against the wig cap where you need the hold, then push your needle up through the first hole in the comb and down through the cap fabric. Keep your thread tension consistent as you work through each hole, maintaining a steady comb angle flat against the cap material for maximum stability.
Essential Steps for Secure Attachment:
- Stitch placement matters—space your passes evenly through all comb holes to distribute pressure and prevent weak spots.
- Check knot security after your first pass to confirm nothing’s slipping before you continue weaving.
- Adjust for cap material—thicker caps need firmer pulls, while delicate lace requires gentler use to avoid tearing.
- Test the benefits of wig combs by giving a light tug after each hole to verify your stitches hold before moving forward.
Reinforcing Stitches for Lasting Hold
After your last stitch locks in, double back through at least two holes to build a backup layer that keeps combs from pulling free during wear. This weaving pattern boosts stitch durability and knot security while maintaining proper thread tension.
For extra stability, loop through the outer holes once more—this simple pattern variation makes certain your wig combs stay secure, giving you the full benefits of wig combs with material compatibility across all cap types.
Maintaining and Adjusting Sewn-in Wig Combs
Once you’ve sewn your combs in place, the work doesn’t stop there. Regular wear can loosen stitches or shift comb placement, so you’ll want to keep an eye on things.
Here’s how to maintain your combs and make adjustments when needed.
Inspecting Combs and Stitching Regularly
Check your wig combs every few weeks to catch wear and tear before it becomes a problem. Look for loose threads, bent comb teeth, or stress points where the stitches connect to the wig cap. Early detection means simple fixes instead of major repairs.
What to watch for during inspection:
- Frayed or broken threads around the comb attachment points that weaken the secure hold
- Bent or damaged comb teeth that won’t grip your natural hair properly
- Stretched fabric on the wig cap near the pins or clips, signaling stress
- Loose stitches that create gaps, requiring immediate stitch reinforcement for damage prevention
- Discoloration or wear patterns that indicate it’s time for comb replacement or professional repair to extend longevity
Reinforcing or Replacing Loose Combs
Once you’ve spotted a loose comb, you’ll need to decide whether a quick stitch repair will do the job or if it’s time to swap it out entirely. If the comb teeth are intact and only the threads have loosened, reinforce the area by weaving your needle through the existing holes multiple times to restore comb stitch integrity.
For broken combs, carefully cut away the old thread and attach a fresh one using the same positioning at the nape of the neck or temples. You can also try alternative reinforcements like adding a second smaller comb nearby to distribute tension and prevent future looseness.
Combining Combs With Other Securing Methods
When you pair wig combs with adhesives, you’ll want to test adhesive compatibility on the cap material first—some glues can weaken threads over time. For extra security, weave a wig band underneath your sewn combs so they anchor into both the cap and elastic.
Strategic gripper placement at the hairline alongside temple combs stops forward slippage, while clip reinforcement near the nape adds stability.
Comfort optimization means spacing these elements so they don’t overlap or create pressure points—your secure setup shouldn’t sacrifice all-day wearability.
Frequently Asked Questions (FAQs)
How do I determine the best placement for the comb on my head?
Placement depends on your head shape and hair density. Position combs where your natural hair is thickest—most often the temples and nape—for maximum wig security and comfort without causing pressure or tension.
Can you sew combs into synthetic wigs?
Synthetic wigs are like a blank canvas—you can absolutely sew combs into them. Just match your comb material compatibility with the wig cap, use pins or clips to secure positioning, and thread carefully through the weaving for proper customization and long-term durability.
How many combs should a wig have?
Most wigs need three to five combs for proper wig security. Your head size, wig density, and activity level determine the exact number.
Place combs at the temples, nape, and crown for balanced comfort on the wig cap.
Where should combs be positioned on the wig?
Think of comb placement like the foundation of a house—it determines everything that follows.
Position combs thoughtfully for best placement: one at each temple, one at the nape, guaranteeing secure attachment while matching your head shape, wig density, and hairstyle needs for total comfort throughout your wig-wearing experience.
Can I remove and reattach wig combs?
Yes, you can remove and reattach wig combs. Carefully cut the stitches to detach them, then assess the hairpiece for damage.
When reattaching, secure them using proper weaving techniques for lace front wigs and altered placement if needed.
Do wig combs work with sensitive scalps?
Wig combs can irritate sensitive scalps, but comb material and placement matter. Plastic combs tend to feel gentler than metal ones.
You can try positioning combs away from irritated areas, using fewer combs, or switching to alternative methods like wig caps or adhesive tape for a more comfortable wig-wearing experience.
Conclusion
Picture your wig locked in place, even when you toss your head back laughing or dash through a windy parking lot. That’s what happens when you master how to sew comb attachments with clean stitches and smart placement.
You’ve moved past factory guesswork and built a custom hold that bends to your routine, not the other way around. Every stitch you reinforce saves you from mid-day adjustments and gives you one less thing to worry about when you’re living your life.
- https://www.reddit.com/r/Barber/comments/bdgxm2/what_happened_to_metal_combs/
- https://maneuvermen.com/blogs/how-to-prevent-hair-loss/the-truth-about-metal-combs-you-never-realized
- https://allegrobeautystore.com/blogs/news/unlock-the-benefits-of-metal-combs-a-must-have-tool-for-healthier-hair
- https://smart.dhgate.com/metal-vs-plastic-hair-clips-are-metal-ones-actually-worth-the-hype/
- https://wowigs.eu/blog/find_your_wig_size

