This site is supported by our readers. We may earn a commission, at no cost to you, if you purchase through links.
It’s less intimidating than you think, start with killer fabric choices – drape and fiber content matter.
Accurate measurements are your foundation; think posture and undergarments.
Master cutting, marking (trust me, tailor’s chalk is your friend), and interfacing for a smooth start.
From precise darts to fabulous pleats, shaping is where your garment comes alive.
Don’t forget those finishing touches—seams and edges make all the difference.
Ready to discover more secrets?
Table Of Contents
- Key Takeaways
- Sewing Complex Garments
- Sewing Complex Garment Constructions
- Garment Construction Basics
- Sewing Machine Techniques
- Hand Sewing Techniques
- Shaping Garment Pieces
- Finishing Seams
- Assembling Garment Pieces
- Advanced Sewing Techniques
- Troubleshooting Sewing Issues
- Frequently Asked Questions (FAQs)
- Conclusion
Key Takeaways
- You’ll need to master fabric selection first – focus on drape, fiber content, and weight to ensure your complex garment behaves as intended during construction
- Your measurements must be precise – wear appropriate undergarments, stand straight, and record dimensions immediately to create an accurate foundation for your patterns
- You’re going to use multiple construction techniques – from darts and pleats for shaping to bound seams and invisible zippers for professional finishing touches
- You’ll save time by preventing common issues – use interfacing to prevent stretching, apply edge finishing to stop curling, and implement proper seam reinforcement techniques to avoid raveling
Sewing Complex Garments
You’ll master complex garment construction faster than you can say "walking foot" when you follow our step-by-step guide, packed with expert techniques for everything from bound seams to invisible zippers.
While sewing intricate pieces might seem as tricky as threading a needle in the dark, we’ll show you how to tackle challenging projects with confidence by breaking down each technique into manageable steps.
Fabric Selection
Starting with fabric selection can make or break your complex garment project.
Let’s explore the critical aspects of textile science and fiber analysis that’ll set you up for success.
Here’s what experienced sewists always check:
- Consider the fabric type‘s weight and drape – lightweight silks flow differently than structured wools
- Analyze fiber content for care requirements and durability
- Match your fabric’s stretch factor with your design needs
- Test color matching under different lighting conditions
Understanding the fabric selection process is essential for achieving the desired garment properties and overall quality.
Pattern Making
Ready to turn your fashion dreams into paper reality?
Modern pattern making combines traditional Block Drafting with digital tools for precise results.
You’ll need essential Drafting Tools to create your foundation blocks, which serve as a canvas for endless design possibilities.
Through Fabric Draping and pattern drafting techniques, you can transform a simple bodice into a jumpsuit.
Even beginners can master Pattern Grading with practice.
To achieve professional results, understanding pattern drafting techniques is essential for creating well-fitted garments.
Measuring Techniques
Your patterns only tell half the story – precise body measurements tell the rest.
For perfect-fitting garment construction methods, you’ll need more than just a tape measure.
Here are your measurement must-haves:
- Wear fitted clothing and typical undergarments while measuring
- Stand straight with feet slightly apart for accuracy
- Record measurements immediately in your digital app or notebook
Keep those measuring tools handy – your body proportions are your garment’s blueprint!
Sewing Complex Garment Constructions
Three key principles open the door to mastering complex garment constructions: precision, patience, and proper technique.
When you’re tackling intricate garment construction methods, understanding fabric grain and textile science becomes your secret weapon for achieving professional results.
Think of complex fabric manipulation like conducting an orchestra – every piece must move in harmony.
You’ll want to focus on sewing ergonomics to maintain control during those long sessions at the machine, while keeping your sewing notions within arm’s reach.
Perfect garment fitting comes from mastering dimensional folds and dynamic textures, so don’t rush through these steps.
By combining advanced construction techniques with careful attention to detail, you’ll transform flat fabric into stunning three-dimensional pieces.
Utilizing sewing patterns for clothing can greatly aid in achieving accurate and professional-looking results.
Remember, even pros started somewhere – the trick is practicing each technique until it becomes second nature, just like professional designers who turned this year’s wool competition entries into masterpieces.
Garment Construction Basics
You’ll find that mastering garment construction basics isn’t as tricky as assembling that Swedish furniture in your living room, especially when you understand the essential techniques of cutting, marking, and interfacing.
Just like building blocks create a strong foundation, these fundamental skills will help you construct complex garments that’ll make your friends wonder if you’ve secretly become a fashion designer.
Cutting Techniques
Let’s get your fabric cutting skills razor-sharp for complex garments.
Your best friend in cutting fabrics is a clean, flat surface, where you’ll use precision scissor techniques and rotary tools to slice through layers like butter.
Master beveling edges and notching methods by keeping your blades sharp and fabric stable.
Pro tip: For those tricky bias cuts that give your garments that dreamy drape, sandwich slippery fabrics between tissue paper.
Marking Tools
Now that you’ve mapped your fabric pieces, it’s time to make your mark!
For sewing complex garments, your marking toolkit should include water-soluble markers for dark fabrics, classic tailor’s chalk for light materials, and tracing wheels for transferring pattern details.
Fabric pens work wonders on knits, while tailor’s pencils give you precision control for garment construction techniques on delicate materials.
Think of these tools as your garment’s GPS—they’ll keep you perfectly on track.
When working with tailor’s chalk tools, having a variety of marking options is key to achieving professional results.
Interfacing Methods
Once you’ve marked your fabric, it’s time to strengthen it with interfacing.
Fusible webs work great for smoother fabrics, while sew-in types are perfect for delicate materials.
Choose stabilizer choices based on fabric backers, like woven for natural drapes or knit for stretchy garments.
Interface materials anchor your garment construction techniques—it’s the secret sauce for sewing complex garments with confidence.
Interface materials are crucial as they provide the necessary support and stability, making garment construction techniques more manageable.
Sewing Machine Techniques
Mastering sewing machine techniques is all about precision and knowing when to use the right stitch for the job.
Whether you’re stitching a durable seam or finishing raw edges, a straight, zigzag, or overlock stitch can be your best tool for tackling intricate garment constructions.
Straight Stitch
When it’s time to piece your fabric together, the straight stitch is your no-nonsense hero.
Keep your stitch length consistent—typically 2.5mm for most projects—and adjust thread tension to avoid puckering.
Align with the fabric grain for smooth seams, and don’t rush!
Controlled sewing speed and proper needle selection can mean the difference between polished garment construction and a frustrating mess.
For specialized tools and materials, consider exploring a straight stitch sewing product selection.
Zigzag Stitch
Zigzag stitch, your trusty sidekick in garment construction, isn’t just for show.
It’s a workhorse for sewing complex textiles, from fabric edge finishing to preventing unraveling.
Master zigzag stitching by adjusting these four key elements:
- Zigzag settings: Match the width and length to your fabric.
- Thread tension adjustment: Too loose? Loops. Too tight? Puckers.
- Stitch length control: Short and tight for strength, long and loose for stretch.
- Sewing speed management: Slow and steady wins the race, especially on curves.
Overlock Stitch
Beyond zigzag stitching, overlocking is your fabric’s best friend.
It whips together seam finishing and edge finishing, preventing fabric fray like a superhero.
Adjust your stitch tension and sewing speed to avoid thread breakage, especially with sewing complex textiles.
This keeps your garment construction plan on point, giving you ultimate control.
Hand Sewing Techniques
You’ll find that hand sewing techniques, while seemingly old-school, are essential for certain garment construction details, from basting to finishing.
Mastering these stitches, like the backstitch and slip stitch, adds a professional touch and can even be a relaxing break from your sewing machine’s hum.
Running Stitch
The running stitch is your go-to for quick, temporary fixes or gathering fabric.
It’s a simple up-and-down motion, like a bouncing ball.
Control your stitch length with your fingers, keeping them close together for tiny stitches.
For sewing garment structures, this basic stitch is key.
You can adjust the sewing speed and thread tension to suit the fabric grain and your skill level.
Needle selection matters, too: a sharp needle pierces easily, while a ballpoint needle slides between fabric fibers.
Backstitch
Backstitching is your secret weapon for reinforcing seams and securing stitches.
It gives you stitch control and guarantees your thread tension is on point, think of it as a superpower that adds strength and durability to your creations.
When you need to sew with precision, especially when sewing intricate details, mastering the backstitch is key.
Sewing garment structures with this technique might feel tricky at first, but with practice, it’ll become second nature, focus on keeping your backstitch length consistent for maximum fabric stability.
Check out garment sewing tutorials to level up your advanced sewing skills.
Slip Stitch
Slip stitching is a handy technique for blind hemming and fabric folding.
It’s like a secret weapon for seamless finishing, and you can use it to join two folded edges or for seam reinforcement.
Mastering slip stitches is key to sewing intricate details, focusing on stitch tension to avoid puckering.
This technique is a must-have in your garment sewing tutorials, especially when tackling advanced sewing skills for complex garment constructions.
Shaping Garment Pieces
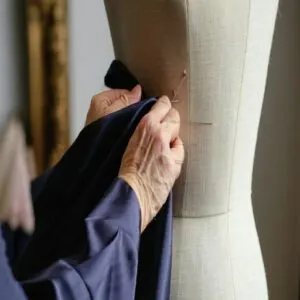
Creating a 3D shape from a flat piece of fabric is a magical part of sewing.
You’ll learn how to use darts, pleats, and gathering to shape garment pieces, giving them a perfect fit and a professional look.
Darts Construction
Darts are the secret weapon in your shaping arsenal.
They’re like magic folds that transform flat fabric into 3D masterpieces, guaranteeing your garments fit like a dream.
When placing darts, consider their direction—they should point in the direction of the area needing the most room.
This guarantees the fabric falls smoothly without puckers or bunching.
Remember, accurate marking and careful stitching are key to mastering this technique.
Always press darts downwards for a crisp, professional finish.
Understanding bust dart adjustments is vital for creating garments that fit perfectly around the bust area.
Pleating Techniques
Precise pleat folding transforms flat fabric.
Explore pleat styles from crisp knife pleats to tucked box pleats, shaping your garment with sewing folds.
Mastering pleating, a key shaping technique in garment construction, adds flair to folded hems.
Consider fabric tucking and various pleat styles to elevate your sewing garment components.
Accurate pleating guarantees your design takes shape.
Gathering Methods
Now that you’ve mastered pleating, let’s talk about fabric gathering, a technique that’s all about creating movement and texture.
It’s a fun way to add some flair to your garments and it’s super easy to do.
Here’s how:
- Mark the Fabric: Use a fabric marker to indicate the gathering stitches‘ starting and ending points.
- Set Your Machine: Select a long straight stitch and a loose tension setting.
- Stitch It: Sew along your marked lines, leaving long thread tails.
- Pull and Distribute: Gently pull the bobbin threads to gather the fabric, then distribute the fullness evenly.
- Secure It: Stitch in place to secure the gathers, then remove the gathering threads.
A simple technique with a big impact!
Finishing Seams
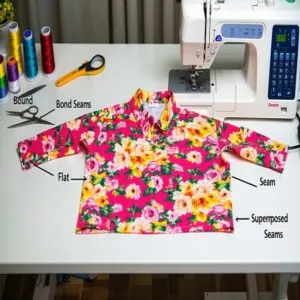
Finishing seams is a vital step in creating polished, durable garments. You’ll learn about bound, flat, and superimposed seams, and how to choose the right technique for your project.
Bound Seams
After shaping your garment, think about those raw edges.
Bound seams, a key part of seam finishing, are your secret weapon.
This sewing technique, perfect for sewing garment constructions and complex sewing projects, involves fabric wrapping and edge binding.
Imagine giving your seam a neat little hug with folded edges.
This provides seam reinforcement and a clean finish, taking your garment sewing tips to the next level.
Bound seams are a must-have in your sewing techniques toolbox.
Flat Seams
Flat seams are a staple in garment sewing, and for good reason.
They’re the go-to for a clean, crisp finish.
You’ll want to press these seams open and flat, and neaten them up with a technique like pinking or overcasting.
When you’re joining two pieces of fabric, make sure their edges meet up perfectly.
A cover stitch will keep everything in place, with multiple needles creating a sturdy seam.
It’s a straightforward process, but it’s key to getting that pro look.
Superimposed Seams
Superimposed seams are a go-to for joining fabric layers and adding structure to your garment.
You’ll want to focus on seam alignment, making sure the fabric layers sit neatly on top of each other.
Stitch density is key here: use a tighter stitch to reinforce the seam and prevent it from pulling apart.
Interfacing techniques can also add stability, especially for lightweight fabrics.
Remember, a superimposed seam is all about fabric layering done right, creating a strong and durable finish.
Assembling Garment Pieces
Now that you’ve mastered the basics of sewing and finished those seams like a pro, it’s time to move on to the fun part: assembling your garment pieces.
This section will cover how to sew those sleeves, attach collars, and insert zippers to bring your complex garment constructions to life.
Sewing Sleeves
Now that you’ve finished the seams, it’s time to tackle sleeves.
Choose the right sleeve type for your garment, whether it’s a set-in sleeve for a customized look or a raglan sleeve for comfort and movement.
Master the three main types: sleeves, each with a unique purpose, including set-in, raglan, and shirt sleeves.
Sew the sleeve inseam to create a tube, using gathering stitches for soft gathers.
Distribute these evenly and pin the sleeve to the armhole, matching notches.
Finish with hems, cuffs, or pleats for a pro look.
Attaching Collars
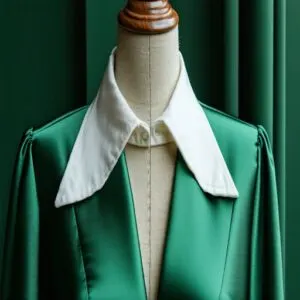
Attaching collars is a vital step in assembling your garment, and there are a few things to keep in mind to guarantee you get it just right.
The right collar style for your project depends on the style you’re going for, and collars come in various styles.
Here’s a quick rundown:
- Choose a collar style that complements your garment’s neckline finish.
- Consider using collar stays for a crisp, polished look.
- Pay attention to folded edges—a neat fold makes all the difference.
- Select the right interfacing to give your collar the perfect amount of structure.
- Practice your sewing techniques to attach the collar securely and neatly.
This process ensures that your collar is attached properly, contributing to the overall quality of your garment.
Inserting Zippers
Attaching a collar is a breeze compared to inserting zippers, but don’t worry, we’re here to support you.
Zippers can be a bit tricky, but with the right tools and techniques, you’ll be a pro in no time, and the key to success is precision and a bit of practice.
Let’s explore some expert tips for perfect zipper alignment and smooth sewing, and discover the ins and outs of zippers.
| Zipper Must-Haves | Description |
|---|---|
| Zipper Feet | Specialized presser feet designed for inserting zippers smoothly and accurately. |
| Zipper Tabs | Small, rectangular pieces of metal or plastic that secure the zipper in place. |
| Zipper Stoppers | Used to prevent the zipper slider from sliding off the teeth. |
| Zipper Catches | Small metal hooks that catch the zipper tab, keeping the zipper closed. |
| Invisible Zippers | A type of zipper designed to be hidden within a garment seam. |
Advanced Sewing Techniques
You’ve mastered the basics of sewing and are now ready to take on more complex projects.
This section will guide you through advanced sewing techniques, helping you refine your skills and tackle challenging garment constructions with confidence.
Sewing Scalloped Edges
You’ve assembled the pieces, now it’s time to finesse those edges.
Sewing scalloped edges is an advanced technique that adds a unique touch to your creations.
Planning is key: decide on scallop depth and length, then mark them out with a template, use bowls, mugs, or tin lids to map those curves.
Mark and stitch the scallops, then trim and press the fabric for a smooth edge, neaten the top to secure it.
Mastering hand stitching techniques can elevate your sewing skills and make a significant difference in the quality of your garment constructions.
With careful preparation, you’ll be sewing like a pro, creating flawless scalloped hems with ease.
Applying Bias Binding
Bias binding is a nifty way to finish edges and add a pop of color to your creations.
It involves using bias tape, a strip of fabric cut on the bias, to encase raw edges.
This method is perfect for curved or straight edges, giving a neat finish.
You’ll want to trim edges first, then sandwich the fabric between the tape, pinning as you go.
Finally, stitch along the folded edge, and you’re done.
For a professional look, understanding bias tape applications is essential to achieve flawless results.
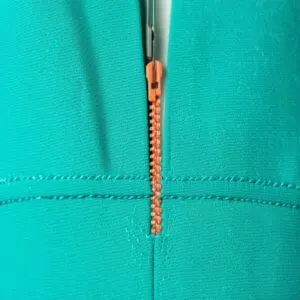
Sewing Invisible Zippers
So, you want to try your hand at sewing invisible zippers? It’s a game-changer for adding sleek, polished closures to your garments without the bulk of traditional zippers.
This foot is narrower and designed for stitching close to the zipper teeth. Carefully follow the sewing instructions and concealed zipper techniques.
Finish the zipper seam with a neat, hidden closure, and voilà! You’ve mastered the art of invisible zipper installation.
Troubleshooting Sewing Issues
Even the most experienced sewers encounter problems, and it’s important to know how to fix them.
In this section, we’ll tackle common issues like ravelling, stretching, and curling, providing you with the know-how to troubleshoot like a pro and guarantee your complex garment constructions turn out just right.
Fixing Ravelling
Those pesky threads are driving you nuts, but you can keep them in line.
Ravelling, or fraying, happens when threads along a fabric’s cut edge start to loosen and pull out.
To fix it, zigzag stitch along raw edges, serge, or use an overlock stitch to sew and finish in one go.
Seal seams with sealant, and trim with pinking shears to stop threads from wandering.
For extra security, apply iron-on tape binding to edges.
Preventing Stretching
Stretching fabric can be a real pain, especially when you’re going for that custom-fit look.
To prevent this, focus on fabric stability and stretch control.
First, choose a fabric with the right fiber content; natural fibers like cotton and linen have less stretch than synthetic ones.
Then, apply seam reinforcement techniques like staystitching and interfacing to stabilize seams and prevent stretching.
Finally, manage tension by adjusting your sewing machine settings and using the right presser foot for stretchy knit fabrics.
These tips will help you maintain fabric stability and achieve the precise results you’re after.
Correcting Curling
Curling fabric got you in a tizzy? Here’s how to smooth things over:
- Curl Prevention: Keep fabric stable with interfacing or staystitching.
- Fabric Stabilization: Use lightweight interfacing to calm unruly edges without adding bulk.
- Edge Finishing: Neaten raw edges with binding or overlocking to prevent fraying and curling.
These techniques are your secret weapons for flawless finishes.
Frequently Asked Questions (FAQs)
What are some techniques used in garment construction?
You’ve got quite the toolkit for bringing fabrics to life.
Sewing techniques for garments include straight stitching, zigzagging, and overlocking.
Hand sewing adds delicate details, while machines bring speed.
Pressing and ironing finish seams.
What is garment construction?
Garment construction is the process of turning fabric into a finished piece of clothing.
It involves cutting, marking, stitching, and shaping fabric according to a pattern to create a desired design.
How can one improve their sewing techniques?
Practice makes perfect, so stitch, stitch, and stitch some more.
Study tutorials, refine your skills, and don’t shy away from advanced techniques like scalloped edges and zippers.
Your sewing superpowers will thank you.
When is hand sewing used in garment construction?
Hand sewing is your go-to for delicate or intricate work. It’s perfect for those detailed touches that need a gentle touch, like stitching buttons or creating dainty hems.
Can I make my own clothes by sewing?
Like a butterfly emerging from its cocoon, you can transform fabric into beautiful custom clothing.
With basic sewing skills, you’ll design and create unique pieces that perfectly match your style and measurements.
How do you start a sewing project?
You’ll need to pick your fabric, grab a pattern that matches your skill level, and gather essential tools.
Next, wash your fabric, lay out pattern pieces carefully, and begin cutting accurately.
What is the most difficult garment to sew?
You’ll find wedding dresses are your Mount Everest of sewing.
They’re packed with intricate beading, delicate lace overlays, complex boning structures, and multiple fabric layers that demand surgical-level precision and patience.
What are the 8 stages of garment construction?
The eight stages of garment construction include prepping fabric, marking pieces, staystitching edges, assembling sections, working on darts and pleats, adding closures, stitching seams, and finishing details with a clean press.
This process encompasses a wide range of tasks that are all crucial for creating a well-made garment, from the initial preparation of the fabric to the final clean press.
Which is the correct order of garment construction process?
The order flows from design and pattern making to fabric preparation, cutting, marking, stitching main seams, adding details, inserting closures, and finally pressing.
You’ll follow this sequence for successful garment creation.
What are the three main methods of clothing construction?
Just as blueprints guide builders, you’ll use three core methods: flat construction (sewing flat pieces), draping (working on mannequins), and tailoring (precise shaping).
Each method’s unique like tools in your creative arsenal.
Conclusion
Whether you’re worried about tackling your first designer dress or an intricate wedding gown, learning how to sew complex garment constructions isn’t as intimidating as it seems.
With the right tools, proper techniques, and a patient mindset, you’ll master everything from bound seams to invisible zippers.
Remember, every expert started somewhere – take it step by step, practice the techniques shared here, and soon you’ll be creating stunning pieces that fit perfectly and last for years.
- https://emilylightly.com/2020/10/how-to-start-sewing-your-own-clothes/
- https://thesewingloftblog.com/20-tips-sewing-garments/
- https://www.textileschool.com/258/garment-construction-techniques/
- https://www.moodfabrics.com/blog/a-quick-guide-to-garment-construction-sewing/
- https://www.amazon.com/Illustrated-Guide-Sewing-Construction-Complete/dp/1565235096


