This site is supported by our readers. We may earn a commission, at no cost to you, if you purchase through links.
 Navigating the complexities of sewing spandex on a conventional machine can be daunting, but with the right techniques and tips, it’s a skill that can be mastered.
In this article, we’ll guide you through the process, starting with the right needles, threads, and feet for your machine.
We’ll also explore sewing spandex without and with a serger, as well as essential tips for working with this versatile fabric.
Whether you’re a beginner or an experienced sewer, these techniques are designed to enhance your sewing skills and help you unlock the secrets of sewing spandex.
Table Of Contents
- Key Takeaways
- How to Sew Lycra on a Conventional Machine?
- Sewing Machine Needles for Spandex
- Sewing Spandex Techniques
- Sewing Spandex Without a Serger
- Sewing Spandex With a Serger
- Social Media Engagement
- Preparation for Sewing Spandex
- Sewing Techniques for Spandex
- Sewing Spandex on a Conventional Machine
- Creative Potential of Spandex
- Essential Tips for Sewing With Spandex
- Frequently Asked Questions (FAQs)
- Conclusion
Key Takeaways
- Use stretch needles and polyester thread for durability and stretch.
- Sharp scissors ensure clean cuts and prevent fabric distortion.
- A Teflon foot reduces friction and helps navigate the complexities of sewing Lycra.
- Experiment with stitch length and serger machines for optimal results.
How to Sew Lycra on a Conventional Machine?
To sew lycra on a conventional machine, you need a ballpoint or stretch needle and a stretch stitch. You cannot use a straight stitch for sewing lycra, as it will break when stretched. If your machine has a stretch stitch, use it. Otherwise, you can try a zigzag stitch, but be sure not to stretch the lycra as you sew.
Sewing Machine Needles for Spandex
When sewing spandex, you’ll need to use a stretch needle to prevent the fabric from puckering or tearing. Polyester thread is also recommended, as it’s strong and durable and will help to keep your seams secure.
Stretch Needles
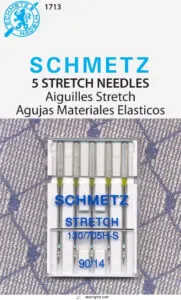
When sewing spandex, your choice of needle can make or break the seam’s integrity. Opt for stretch needles, designed to glide through Lycra with ease, preventing skipped stitches and fabric snags.
- Stretch Needles: Match to fabric weight for seamless sewing.
- Spandex Thread: Polyester for durability and stretch.
- Sharp Scissors: Precision cuts without fraying edges.
Thread
When sewing spandex, it’s crucial to choose the right thread. Polyester thread is recommended for its strength and colorfastness.
Adjust your thread tension to prevent puckering, and use a needle size appropriate for your fabric weight. Remember, needle point can affect the quality of your stitch, so choose carefully.
Thread color and strength should also be considered for your specific project. Sewing spandex with a regular sewing machine can be done, but it may require some experimentation to find the best settings.
Sharp Scissors
After threading your machine with the right polyester thread, you’ll need sharp scissors to slice through spandex like a hot knife through butter.
- Sharp scissors ensure clean cuts without a hitch.
- They prevent fabric distortion, keeping your lines true.
- Accurate cutting sets the stage for seamless sewing.
- Precise trimming means less hassle when facing seams.
- They’re a must-have for any home machine arsenal, complementing stretch stitches and your trusty walking foot.
Teflon Foot
Using a Teflon foot for sewing spandex is a game-changer. It reduces friction and helps navigate the complexities of sewing this ever-evolving fabric.
Maintenance is simple, just clean it after each use. Reviews are overwhelmingly positive, with users praising its ability to enhance their sewing experience. It’s not merely an accessory; it’s designed to unlock the secrets of the sewing world.
It’s advisable to pair it with a twin needle for added precision and wonder clips instead of pins to avoid fabric damage. Adjust your sewing machine pressure to a lighter setting, and you’ll be sewing spandex like a pro.
Sewing Spandex Techniques
To sew spandex successfully, it’s crucial to understand the techniques involved. Here are three key points to consider:
- Stretch Stitch: Use a stretch stitch, narrow zig-zag, or straight seam to sew spandex. A stretch stitch allows the fabric to stretch without breaking the thread, ensuring a strong and durable seam.
- Stitch Length: A shorter stitch length is recommended for durability. This means that the distance between each stitch will be smaller, which can help prevent the fabric from stretching out over time.
- Serger Machine or Coverstitch Machine: While you can sew spandex without a serger, using one can significantly improve your results. A serger machine creates professional-looking, stretchy stitches, while a coverstitch machine specializes in coverstitch options. A walking foot can also be helpful when sewing spandex panels, sewing curves and points, creating elastic hems, and binding edges.
Sewing Spandex Without a Serger
Sewing spandex without a serger can be a challenge, but with the right techniques, you can achieve professional-looking results.
- Stitch options: Choose from stretch stitch, narrow zig-zag, or straight seam for your spandex projects.
- Anchor stitch: Start your seams with an anchor stitch to ensure a strong and secure base.
- Wide zig-zag stitch: Finish your seams with a wide zig-zag stitch for added durability and a neat appearance.
- Stretch fabric: Always stretch your fabric as you sew to maintain its elasticity and prevent puckering.
- Coverstitch machine: If you don’t have a coverstitch machine, you can still achieve professional-looking hems using a 3-thread overlock option on your overlock machine.
- Stitch length: Adjust your stitch length to suit the specific requirements of your project, ensuring both strength and flexibility.
- Hemming: When hemming, use a straight stitch throat plate to guide your fabric and maintain even stitching.
Sewing Spandex With a Serger
When it comes to sewing spandex with a serger, there are a few key steps to follow for optimal results.
- Differential Feed: Set your differential feed to neutral, not a stretch stitch. This ensures that the fabric feeds evenly through the serger.
- Stitch Length: Use a medium stitch length for body seams. This provides enough stretch while maintaining the integrity of the fabric.
- Serger Stitch: Opt for a 4-thread flat serger stitch for body seams. This stitch is designed to work well with spandex and provides a professional finish.
- Overlock Option: For hemming, consider using a 3-thread overlock option. This stitch is suitable for hemming spandex and adds a neat finish to your project.
When sewing spandex with a serger, it’s essential to maintain the stretch throughout the seam. Stretch the fabric as you feed it through the serger, and hold the stretch consistently. If you need to release the stretch, stop the machine, adjust as needed, and then resume sewing while holding the stretch.
In addition to these steps, it’s also important to consider other factors when sewing spandex with a serger. For example, you may need to adjust the presser foot pressure, use a walking foot, or consider using a coverstitch machine or twin needle to mimic the coverstitch effect on non-coverstitch machines. It’s also advisable to practice sewing on scraps of spandex before starting your project to ensure you’re comfortable with the process.
Social Media Engagement
After mastering the serger for your spandex creations, it’s time to dive into the vibrant online community of sewing enthusiasts.
Social media isn’t just for scrolling; it’s a treasure trove for sharing projects, asking questions, and getting inspired. Imagine posting your latest spandex masterpiece and receiving a wave of support and tips.
Or perhaps you’re stuck on a tricky seam—throw out a question and watch the advice roll in. This digital sewing circle is your go-to for bouncing ideas, celebrating successes, and even commiserating over those oops moments.
So, snap a pic, tag your post, and let the virtual cheers fuel your next sewing adventure.
Preparation for Sewing Spandex
For optimal results when sewing spandex, you’ll need to prepare your machine and materials properly. Start by using a stretch needle to reduce friction and prevent skipped stitches.
Needles
When it comes to sewing spandex, choosing the right needles is crucial for optimal tension and seam quality.
- Stretch Needles: Use needles specifically designed for stretch fabrics, such as Schmetz Stretch Sewing Needles, which are available in various sizes for light, medium, and heavy weight knits.
- Thread: For best results, use polyester thread that stretches with the fabric while maintaining strength and colorfastness.
- Sharp Scissors: Use clean, sharp scissors to make smooth cuts without distorting the fabric.
Pins Vs Wonder Clips
When it comes to handling delicate fabrics like spandex, it’s crucial to be meticulous and choose the right tools to avoid fabric damage. In the realm of sewing, pins and wonder clips are two popular options for holding fabric in place. Both have their advantages and disadvantages, so let’s navigate the complexities of each to make an informed decision for your sewing project.
Pins are a traditional sewing tool that have been around for centuries. They come in various sizes and are designed to hold fabric together securely. Pins can be used for precise alignment of pattern markings and are especially useful when working with thicker fabrics. However, they do leave holes in the fabric, which can be undesirable for some projects. Additionally, pins can bend or break, and they can snag delicate fabrics, potentially causing runs.
On the other hand, wonder clips are a more recent addition to the sewing world. They’re designed to hold fabric together without leaving holes, making them an excellent choice for delicate fabrics like spandex. Wonder clips are also less likely to snag the fabric and are easier to remove before feeding the fabric under the presser foot. However, they can be bulkier than pins and may require more careful handling to avoid accidentally sewing over them.
In the heart of sewing spandex, it’s essential to consider the specific needs of your project. If you’re working with delicate fabrics and want to avoid pin holes, wonder clips might be the better choice. However, if you need precise alignment or are working with thicker fabrics, pins may be more suitable. Ultimately, it’s advisable to have both pins and wonder clips on hand, as they serve different purposes in the realm of sewing.
Sewing Machine Pressure
To ensure seam strength and prevent fabric distortion when sewing spandex, it’s essential to adjust the sewing machine pressure setting.
- Understand the Pressure Setting: The pressure setting on a sewing machine refers to the amount of force the presser foot exerts on the fabric when it’s in the down position. Too much pressure can inhibit the fabric’s movement, causing it to feed improperly, while too little pressure can cause the fabric to slip and slide, also affecting the feeding.
- Adjust the Pressure: Most sewing machines have a pressure adjustment feature, which can be found on the top of the machine above the needle area or on the end of the machine head. To adjust the pressure, you may need to refer to your machine’s owner’s manual for specific instructions.
- Consider the Fabric: The pressure setting varies depending on the type of fabric you’re sewing. For spandex, you may need to adjust the pressure to accommodate the fabric’s stretch and seam allowance. This can be done by increasing the pressure for thicker, bulky, or heavily textured spandex and decreasing the pressure for lighter, sheer fabrics.
- Test the Settings: Before sewing on the actual garment, test the stitch settings on a scrap of spandex to ensure the pressure is appropriate for the fabric’s stretch and seam strength.
Walking Foot
To sew spandex with a walking foot, ensure the tension is set correctly. Walking foot settings vary by brand and model, so consult your machine’s manual.
Different types of walking feet are available, each designed for specific tasks. Attachments can be purchased for various brand-specific walking feet.
Brands like Janome and Bernina offer walking foot options to navigate the complexities of sewing spandex.
Use a Serger or Overlock Machine
When it comes to sewing spandex, a serger or overlock machine can significantly improve your results. A serger is designed to handle stretchy fabrics like spandex, and it can trim, sew, and finish the raw edges of your fabric all at once. This can save you time and effort compared to using a conventional sewing machine.
To use a serger for sewing spandex, you’ll want to set the differential feed to a neutral setting. This will help ensure that the top and bottom layers of your fabric move at the same speed, preventing puckering or bunching. For body seams, a medium stitch length is recommended, while for hemming, a 3-thread overlock option can be used.
When working with spandex, it’s important to use a flatlock stitch. This type of stitch is designed to create a strong, stretchy seam that won’t unravel. Additionally, a rolled hem can be used to finish the edges of your spandex fabric, giving your project a professional look.
Investing in a serger or overlock machine can be a game-changer for your sewing projects, especially when working with spandex. While it may require some additional thread and space in your sewing area, the benefits of using a serger can outweigh the costs. With practice and patience, you’ll be able to create beautiful, durable seams that will last for years to come.
Coverstitch Machine
To achieve professional-looking results when sewing spandex, consider investing in a coverstitch machine. This type of machine is designed to handle stretchy fabrics and creates a decorative top cover stitch that enhances the appearance of your garments. When selecting a coverstitch machine, consider factors such as compatibility with spandex, ease of threading, differential feed capabilities, sturdy construction, and additional accessories to enhance functionality.
To get the best results from your coverstitch machine, follow these tips:
- Threading: Look for separate needle threaders and looper threading mechanisms for easy threading. Bright LED lights provide better visibility, making the machine more accessible.
- Stitch selection: Use a twin needle for a professional-looking double row of stitches on the hem of any project made out of stretch fabric.
- Differential feed: Adjust the feed dogs to prevent stretchy fabrics from getting stretched unevenly during stitching, which can result in wavy hems.
- Presser foot pressure: Adjust the foot’s pressure to a lighter (lower number) setting to allow the foot to glide across the fabric, especially when working with delicate spandex.
Twin Needle
To use a twin needle without a coverstitch machine, you’ll need to thread the machine with two spools of thread and a bobbin.
For thread compatibility, use a ballpoint needle designed for knits to avoid breaking the fabric.
Adjust the tension to prevent puckering and test the stitch settings on a scrap of fabric before sewing on the actual garment.
Some machines have a special button for twin-needle use, so check your manual for specific instructions.
For decorative stitch combinations, you can use a straight stitch with narrower decorative machine stitches to create interesting patterns.
Keep in mind that wide zigzag stitches may cause the needle to hit the presser foot and break.
Coverstitch Only Machines
Coverstitch-only machines are designed to create professional-looking, stretchy stitches that can enhance the appearance of your spandex creations. Investing in one of these machines can significantly improve your sewing results, offering a wide range of stitch options to suit various applications.
With a coverstitch machine, you can unlock the creative potential of spandex, ensuring your projects boast top-notch stitch quality and fabric durability. It’s not merely a machine; it’s a tool that underpins your journey towards mastering the art of sewing spandex.
Sewing Techniques for Spandex
When sewing spandex on a conventional machine, it’s crucial to adjust the stitch length to facilitate stitch removal and prevent puckering. Additionally, using a straight stitch throat plate prevents the fabric from diving into the bobbin area, ensuring a smoother sewing experience.
Stitch Length
To achieve the best results when sewing with spandex, it’s essential to understand the role of stitch length in your sewing techniques.
- Stitch Length and Fabric Tension: The stitch length you choose can affect the fabric tension. Shorter stitch lengths result in denser fabrics with reduced stretch and increased fabric stability, while longer stitch lengths create more open and flexible fabrics with enhanced drape and elasticity.
- Presser Foot Pressure: Adjusting the presser foot pressure can help prevent stretch fabric from traveling as you sew. Decreasing the pressure can help maintain the fabric’s original shape and reduce the likelihood of puckering.
- Needle Gauge: The needle gauge used in your sewing machine can also impact the stitch length. Using a needle with a larger gauge can result in a shorter stitch length, while a smaller gauge can produce a longer stitch.
By considering these factors and experimenting with different stitch lengths, you can find the optimal settings for your specific sewing project with spandex. Remember, the key to successful sewing with spandex is to be meticulous and adapt your techniques to the unique properties of this versatile fabric.
Straight Stitch Throat Plate
| After mastering stitch length, let’s dive into the world of throat plate maintenance. This unsung hero can make or break your sewing experience with spandex. A well-maintained throat plate ensures smooth fabric compatibility, optimal tension adjustment, and hassle-free bobbin winding. Remember, the right needle size is crucial for avoiding snags and achieving that flawless finish. | Feature | Benefit |
|---|---|---|
| Throat Plate Maintenance | Ensures smooth fabric feed | |
| Tension Adjustment | Prevents puckering and bunching | |
| Needle Size | Matches fabric thickness |
Sewing Spandex on a Conventional Machine
Test your stitch settings on a scrap of fabric before sewing on your actual garment. With practice, you’ll master the art of sewing spandex on a conventional machine.
Test Stitch Settings
Testing stitch settings is crucial when sewing spandex on a conventional machine. Adjust thread tension to prevent puckering, use a longer stitch length for easier removal, and ensure proper seam allowances.
Handle fabric carefully, and choose the right pattern for your project. Practice makes perfect, and investing in a serger or coverstitch machine can significantly improve your results.
Practice Makes Perfect
Practicing stitching techniques is crucial when sewing spandex on a conventional machine.
Start by mastering fabric preparation, such as holding the material taut and using the right needle and thread.
Experiment with seam finishing, like wide zig-zag stitches, and troubleshoot machine issues.
Adjust stitch length for durability and consider using a serger for professional results.
Invest in a Serger or Coverstitch Machine
Investing in a serger or coverstitch machine can significantly improve your spandex sewing experience. Sergers offer features like differential feed settings and 4-thread flat serger stitches, which can save you time and frustration, especially when dealing with complex spandex fabrics.
Coverstitch machines create professional-looking, stretchy stitches, allowing you to elevate your sewing game and unlock the secrets to mastering spandex sewing.
Consider these investments to take your spandex sewing to the next level.
Creative Potential of Spandex
Spandex is a versatile fabric that offers endless creative possibilities. Whether you’re looking to create spandex garments, accessories, homewares, athleticwear, or swimwear, the opportunities are endless.
- Experiment with Different Styles: Spandex can be tailored to create bespoke garments that are ever-evolving. You can design unique pieces that underpin your personal style, whether it’s a bold, eye-catching outfit or something more subtle and sophisticated.
- Explore Accessories: Spandex accessories can add a touch of elegance to any outfit. From bracelets and belts to bags and shoes, the possibilities are endless. You can even create your own spandex accessories, adding a personal touch to your wardrobe.
- Innovate with Homewares: Spandex homewares can add a touch of comfort and style to your living space. From cushion covers to table runners, spandex can be used to create unique, durable, and easy-to-clean items that are designed to enhance your home.
Essential Tips for Sewing With Spandex
Spandex is a delicate fabric that requires special care when sewing. To ensure your spandex garments last, wash them in cold water and air dry them to prevent damage.
Wash and Dry Spandex
Before you dive into stitching up your next masterpiece, remember to give your spandex a good pre-wash. Opt for a gentle hand wash or use the delicate cycle on your washing machine to keep those stretchy fabrics in tip-top shape.
And here’s a pro tip: skip the dryer and let your spandex air dry. This way, you’ll avoid any unwanted shrinkage or damage.
Use a Stretch Stitch
When sewing spandex, it’s crucial to use a stretch stitch to accommodate the fabric’s stretch and prevent puckering.
- Choose a stretch stitch, narrow zig-zag, or straight seam stitch pattern.
- Adjust needle size and thread tension to suit the fabric stretch.
- Stretch the fabric while sewing to ensure an even seam allowance.
- Test stitch settings on a scrap of fabric before sewing on the actual garment.
- Practice sewing with spandex to improve your technique.
By following these tips, you’ll be able to sew spandex with ease and achieve professional-looking results.
Don’t Overstretch When Cutting
When cutting spandex, it’s crucial not to overstretch the fabric. This can lead to misshapen patterns and inaccurate seam allowances. Proper storage, fabric pairing, pattern selection, and seam allowance are essential for successful spandex cutting.
Interfacing can also help maintain the fabric’s shape. Remember, a little patience goes a long way in the world of sewing spandex.
Use a Smaller Stitch Length
When sewing spandex, using a smaller stitch length is crucial for durability and a professional finish. Adjust your machine’s settings to ensure the right needle size, tension settings, and seam allowance.
Additionally, consider the presser foot you’re using to maintain control over the fabric.
Finish Seams
Finish seams with seam finishers like a zigzag stitch, overlock stitch, or coverstitch seam. A flatlock seam is also an option. Stretch the fabric as you sew close to the edge for a professional finish.
Frequently Asked Questions (FAQs)
Can I sew Lycra without a walking foot?
Yes, you can sew Lycra without a walking foot. However, using a walking foot can help keep the layers of Lycra from stretching out, which can be beneficial for creating more even stitching and preventing seam puckering.
If you don’t have a walking foot, you can still sew Lycra by adjusting the foot pressure of your sewing machine to a lighter setting. Another option is using a serger or overlock machine for professional-looking, stretchy seams.
Additionally, you can use a twin needle for a similar effect on non-coverstitch machines.
How do I prevent skipped stitches on Lycra?
To prevent skipped stitches when sewing Lycra on a conventional machine, consider the following tips:
- Use the right needle: Opt for a super stretch needle, which is specifically designed to minimize the risk of skipped stitches. These needles have a wider groove for the thread and a larger hole for the needle to pierce the fabric, ensuring a smoother sewing process.
- Adjust presser foot pressure: Loosen the presser foot pressure if you’re working with thin layers of stretchy fabrics like Lycra. This can help prevent the fabric from rising with the needle, which can cause skipped stitches.
- Test stitch settings: Before sewing on the actual garment, test your stitch settings on a scrap of fabric. This can help you identify any issues that may cause skipped stitches and make necessary adjustments.
- Use high-quality thread: Choose a high-quality thread that’s tight-woven and sleek. Cheaper threads may get caught on dense materials like Lycra, leading to skipped stitches.
- Check your machine: Ensure your sewing machine is threaded correctly and that the upper thread tension is right. Test the stitch on scrap pieces of your lingerie fabrics to adjust the tension accordingly.
- Use a walking foot or dual feeding system: These accessories can help the machine feed the fabric smoothly and evenly, reducing the risk of skipped stitches.
- Avoid overstretching: When cutting Lycra, don’t overstretch the fabric as this can cause skipped stitches.
- Use a stretch stitch: Opt for a stretch stitch, narrow zig-zag, or straight seam when sewing Lycra to ensure a better fit and reduce the risk of skipped stitches.
By following these tips, you can minimize the risk of skipped stitches when sewing Lycra on a conventional machine.
What is the best way to hem Lycra garments?
For hemming Lycra, dive in with a twin needle for a pro finish; it mimics a coverstitch, giving stretch without the wave.
How do I choose the right Lycra fabric for my project?
To choose the right Lycra fabric for your project, consider factors like weight, stretch, and colorfastness. Look for high-quality materials designed for sewing, such as those recommended in Group Remember, the best Lycra for your project depends on your specific needs and the desired outcome.
Can I mix Lycra with non-stretch fabrics in a garment?
Yes, you can blend Lycra with non-stretch fabrics in a garment, but it’s a balancing act. Think of it as pairing wine with cheese; the right match can elevate the whole experience.
Conclusion
Embarking on the journey to sew spandex on a conventional machine can seem daunting, but with the right tools and techniques, it’s a skill that can be mastered.
This article has guided you through the process, from selecting the appropriate needles and threads to exploring various sewing methods.
Whether you’re a beginner or an experienced sewer, these tips are designed to enhance your sewing skills and unlock the secrets of sewing spandex.

