This site is supported by our readers. We may earn a commission, at no cost to you, if you purchase through links.
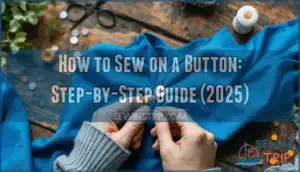 A button that pops off at the worst possible moment—right before an important meeting or while you’re rushing out the door—doesn’t have to derail your day. Learning how to sew on a button is one of those quick fixes that saves you time, money, and a lot of frustration.
You don’t need fancy skills or special tools, just a needle, some thread, and a few minutes. With a simple step-by-step approach, you’ll have that button back in place securely, and you’ll feel pretty accomplished too!
Table Of Contents
Key Takeaways
- You only need basic supplies—a needle, matching thread, scissors, and a replacement button—to complete a secure button repair in just a few minutes.
- Creating an anchor stitch and making six passes through the button holes with proper tension ensures your button stays firmly attached through regular wear.
- Adding a shank by wrapping thread beneath the button gives it breathing room and prevents fabric stress, which extends the life of your repair significantly.
- Choosing durable materials like polyester buttons and matching your thread color to your fabric makes your repair nearly invisible and long-lasting for everyday use.
How to Sew on a Button Step-by-Step
Sewing a button doesn’t have to feel overwhelming, even if you’ve never picked up a needle before! With the right supplies and a little know-how, you’ll be ready to tackle this handy skill in just a few minutes.
Let’s start by gathering what you need and setting yourself up for success.
Essential Tools and Materials
The good news is you don’t need a fancy toolkit to sew on a button—just a few simple supplies you probably already have lying around! A basic sewing kit should include a sharp needle (any hand-sewing needle works), thread that matches your fabric, and of course, your replacement button. That’s really it!
You might also want scissors and maybe a thimble if you’re working with thick fabric.
Choosing The Right Button and Thread
Once you’ve got your supplies, picking the right match matters more than you think! Start with button material—metal, polyester, and nylon buttons last the longest for everyday wear on shirt buttons and suit buttons. For your garment’s thread, choose 50-weight mercerized cotton for regular cotton or linen fabrics, or grab a cotton-polyester blend for stretch knits. Color matching is huge—it hides your repair by up to 80%!
And here’s something cool: sustainability trends are growing fast, so eco-friendly options like recycled plastics are popping up everywhere if that’s your thing. For daily reliability, consider durable polyester buttons for your garments.
Preparing Your Garment and Work Area
Before you stitch your first pass, take a minute to prep your fabric and clear off a flat surface—you’ll save yourself frustration (and tangled thread) down the line! Lay out your garment flat and inspect the fabric around the missing button for any tears.
Set up your workspace with good lighting conditions and organize your sewing kit—needle, thread, and button within easy reach. A clean, well-lit area makes everything smoother!
Threading The Needle and Securing Thread
Getting your thread ready is the foundation of a solid button repair. You’ll need to choose the right length, get that thread through the needle’s eye, and tie a secure knot to keep everything in place.
Let’s walk through each step so you can start sewing with confidence.
Selecting and Cutting Thread Length
You’ll want about 18 to 24 inches of thread—that’s roughly the length from your fingertips to your elbow—because anything longer turns into a tangled mess that’ll test your patience.
Use sharp scissors or a cutting tool from your sewing kit to snip cleanly, and opt for a thread type that matches your fabric’s weight to reduce waste and make it easier when you thread the needle.
Threading The Needle Efficiently
Holding the needle steady in one hand and the thread in the other, you can make this task a breeze by using a few simple tricks that’ll save you from squinting and frustration. Here’s how to thread a needle like a pro:
- Match thread thickness to needle eye size so the thread slips through without forcing.
- Use good lighting conditions to clearly see the needle’s eye.
- Try a threader tool with a steel loop if hand steadiness is a challenge.
Knotting The Thread for Security
A secure knot at the end of your thread is the foundation that keeps everything from unraveling before you’ve even started stitching. Try the simple overhand knot by wrapping thread around your finger, rolling it off, and pulling tight.
For extra security, many sewers prefer double-knotted thread or even a square knot—these knotting techniques make sure your securing thread stays put right where you need it.
Positioning and Attaching The Button
Now that your needle is threaded and ready to go, it’s time to get that button exactly where it belongs. You’ll mark the spot, anchor your thread firmly, and stitch through those holes with confidence.
Let’s walk through each step so your button stays put for the long haul.
Marking The Button Placement
Before you start stitching, you need to figure out exactly where that button should land—otherwise, you might end up with a wonky closure that doesn’t line up right! Step 1 is positioning the button with precise placement.
Button up the garment and mark the spot where the buttonhole meets the fabric—a pin or tailor’s chalk works great here. This alignment technique guarantees your button sits perfectly for a secure, professional finish before creating an anchor point.
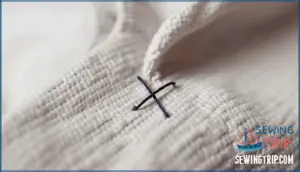
Anchoring The Thread With an “X” Stitch
Creating an anchor point is like building a foundation for your button—it’s the secret to keeping everything secure and centered so your hard work doesn’t come loose after a few wears!
To anchor X point with stitch strength, push your threaded needle up from the fabric’s back side where you marked the button placement, then create a small X-shaped stitch right there.
This attaching buttons to fabric technique provides fabric stability and prevents slippage by reinforcing buttons with proper thread tension before you even sew on a button!
Sewing Through The Button Holes Properly
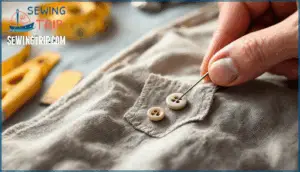
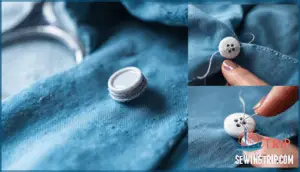
Now that you’ve got your anchor in place, it’s time to pass your needle up through one of the button’s holes, then down through another—this is where your button really starts to take shape!
When you’re sewing a button, make about six passes through the holes with steady thread tension and consistent needle angle. For a four-hole button, work diagonally or create parallel lines—both methods work great for attaching buttons to fabric securely!
Keeping The Button Steady While Sewing
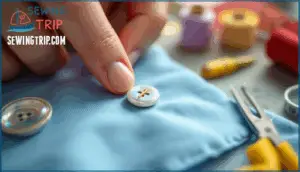
Your fingertip is your best friend here—press gently on the button’s center to keep it from shifting around while you stitch. This simple move keeps everything lined up perfectly!
Here’s what helps when you sew a button:
- Finger Placement: Rest your fingertip lightly on top while anchoring stitches below
- Button Stabilizers: A toothpick between holes creates perfect fabric tension spacing
- Consistent Stitching: Maintain the same needle angle with each pass to reinforce buttons evenly
- Smooth Rhythm: Hand sewing works best with steady, unhurried motions
- Check Often: Pause between passes to be certain your button stays straight and secure
Creating a Shank and Reinforcing The Button
Now that your button is firmly attached, it’s time to add the finishing touches that’ll keep it secure for the long haul. A shank gives your button breathing room, and reinforcing stitches make sure it won’t pop off at the worst possible moment.
Let’s walk through these two simple techniques that separate a quick fix from a professional-looking repair.
Using a Backing Button for Extra Strength
On heavy-duty fabrics like coats, button backing types work like an invisible support system. When sewing a button, place a small backing button on the inside to reinforce buttons against strain.
This clothing repair technique matters because button size and fabric thickness demand extra security. Hand sewing with alternative reinforcements prevents popping off, making preventative button care simple yet effective.
Having a sewing kit makes certain you’re prepared for basic clothing repair.
Reinforcing Stitches for Durability
Once you’ve got your backing in place, making multiple passes through those button holes is what keeps everything locked down for the long haul. Aim for six complete passes to build solid reinforcement patterns—this matters especially with fabric type and thread strength.
Each pass creates anchoring stitches that distribute tension evenly. When you’re finished sewing through the holes, wrap your thread around the shank several times before securing with a tight knot for maximum knot security!
Finishing Touches and Troubleshooting
You’re almost there! Now it’s time to finish strong and make sure your button stays put.
Let’s cover how to tie off your thread properly, check your work, and address any little hiccups along the way.
Tying Off The Thread Securely
After you’ve made six solid passes through those button holes, it’s time to lock everything in place so your hard work doesn’t unravel.
Flip your fabric over and tie off on the back side using two or three overhand knots right where the thread meets the fabric. This double-knotted thread approach gives you extra security! Trim excess thread close to the knot, leaving just a small tail.
Checking Button Stability
Before you snip and celebrate, give that button a quick test to make sure it’s not going anywhere! Gently tug on the button from different angles—it should feel firm, not wobbly. Check that your stitch count created solid passes through the holes and that the shank height allows comfortable movement without fabric wear at stress points.
If the button shifts or your thread type feels loose, add a few reinforcing stitches. A stable button means you’ve mastered attaching buttons successfully!
Quick Fixes for Common Mistakes
Even experienced sewers hit bumps when they sew on a button, but most fashion emergencies have simple fixes! If you spot frayed buttonholes, trim the loose threads and reinforce the area with tight zigzag stitches—this basic sewing technique boosts durability by 50%.
For common clothing repair guide issues, try these quick solutions:
- Uneven stitches: Re-thread your needle and keep stitch length at 2–3 mm for consistent tension.
- Misaligned buttons: Mark placement with chalk before sewing to reduce crooked placement by 60%.
- Loose buttons: Add reinforcing stitches and create a proper shank by wrapping thread beneath the button.
Fabric tears from ripped-out buttons need small patches behind the damaged spot for repairing clothes successfully!
Tips for Emergency Button Repairs
When a button pops off at the worst possible moment—right before a big meeting or during travel—you need fast fixes that actually work! Keep a travel sewing kit with you, or try quick thread substitutes like dental floss for emergency style fixes.
Public restroom repairs aren’t glamorous, but they’re lifesavers! For temporary fixes only, safety pins work as makeshift button options until proper repairing clothes happens later.
Frequently Asked Questions (FAQs)
How do you sew a buttonhole?
Sewing a buttonhole involves creating a reinforced opening in fabric where the button slides through.
You can make machine buttonholes using your sewing machine’s buttonhole function or hand-sewn buttonholes using basic sewing techniques with a buttonhole stitch, considering fabric type and proper buttonhole spacing.
How to mark the location for sewing buttons?
Surprisingly, the difference between a professional look and a wonky mistake often comes down to one thing: where you mark the button location.
Use fabric marking tools like chalk or washable pens to mark the spot on your garment, aligning it with existing buttonholes. Button size impact and consistent button spacing matter.
How do you put a button on a sewing machine?
You can sew on a button with a sewing machine using a machine button foot and selecting the zigzag stitch type. Adjust button size settings and fabric thickness considerations for automated button sewing. Follow step-by-step instructions in your manual for best results.
Do you need a professional to sew on a button?
You don’t need a professional to sew on a button. This basic sewing skill is something anyone can master with just a needle, thread, and a few minutes.
DIY clothing repair methods save time and money compared to professional clothing alteration services.
How do you sew a button step by step?
You’ll start by threading your needle and tying a secure knot.
Next, create an anchor X on the fabric, position your button, then pass the needle through the holes six times to attach it firmly.
What is the most secure way to sew on a button?
The strongest grip comes from multiple passes through the button holes—aim for six—plus creating a solid shank by wrapping thread beneath the button.
Double your thread for extra strength, anchor with a secure knot, and consider adding a small backing button on the inside for heavy-use garments.
How to sew on a button with one hole?
For single-hole buttons, thread your needle and knot the end. Anchor the thread with several stitches through that one hole, creating a strong shank by weaving thread beneath before securing on the back.
How to sew on a two hole button?
Two holes mean less needle work, which is great news! Follow the same button sewing guide: anchor with an X, pass your needle and thread through both holes six times, create your shank height by wrapping thread around the bridges, then tie off.
What is the easiest way to sew on a button?
The fastest method uses doubled thread and a simplified knotting technique with minimalist tools.
This basic sewing skill lets you master repairing clothing quickly—just thread your needle, anchor securely, and make six passes through the holes for a reliable finish.
How to sew back on a button?
Like finding the missing piece of a puzzle, repairing clothing through button reattachment restores both function and confidence.
Follow the sewing a button step-by-step guide: thread your needle, anchor with an "X" stitch, make six passes through button holes using matching thread color, create a shank, then tie off securely for proper reinforcement techniques.
Conclusion
A stitch in time really does save nine—and now you know exactly how to sew on a button when you need it most. You’ve learned the right way to thread a needle, position your button, and lock everything down securely.
This small skill gives you the confidence to manage wardrobe mishaps on your own, without scrambling for help. Next time a button goes rogue, you’ll fix it in minutes and feel pretty darn capable doing it!

