This site is supported by our readers. We may earn a commission, at no cost to you, if you purchase through links.
Start by choosing a beginner-friendly pattern with clear instructions. You’ll need to understand pattern symbols, grain lines, and notches—think of them as your sewing GPS.
Cut your pattern pieces carefully, then pin them to your fabric following the layout guide. Don’t skip the tissue-fitting step; it’s like a dress rehearsal for your garment.
Transfer all markings using tailor’s chalk or fabric markers. Follow the construction sequence step-by-step, pressing seams as you go.
The secret lies in reading between the lines of those cryptic pattern instructions.
Table Of Contents
- Key Takeaways
- Importance of Sewing Patterns
- Understanding Different Formats
- Elements of a Sewing Pattern
- Sizing and Pattern Levels
- Using Sewing Patterns
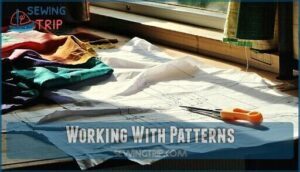
- Working With Patterns
- Pattern Details and Markings
- Pattern Preparation and Execution
- Navigating Pattern Complexity
- Types of Sewing Patterns
- Frequently Asked Questions (FAQs)
- Conclusion
Key Takeaways
- You’ll start strong by choosing beginner-friendly patterns with clear instructions and matching your fabric to the pattern’s recommendations—this prevents costly mistakes and builds your confidence.
- You can’t skip accurate body measurements when selecting pattern sizes, since pattern sizing differs from store-bought clothing and proper fit depends on comparing your measurements to the pattern’s size chart.
- You’ll achieve professional results by understanding pattern markings like grain lines, notches, and seam allowances—these symbols are your roadmap to properly cut and assemble your garment.
- You should practice with inexpensive fabric first and follow instructions step-by-step, since rushing through cutting or skipping the tissue-fitting stage often leads to frustrating mistakes that waste time and materials.
Importance of Sewing Patterns
Why struggle with guesswork when sewing patterns can transform your fabric adventures into professional masterpieces? These ingenious blueprints serve as your design foundation, eliminating the trial-and-error frustration that leaves beginners swimming in a sea of crooked seams and wonky hems.
Transform fabric chaos into professional masterpieces—sewing patterns are your blueprint to confidence and flawless results.
Sewing patterns deliver accurate garments every single time. They’re your secret weapon for achieving professional results without years of dressmaking school. Think of them as your personal sewing coach, whispering step-by-step guidance through every cut and stitch.
Beyond time saving benefits, patterns accelerate your skill development dramatically. You’ll master essential garment construction techniques while building confidence with each project. Pattern making teaches you to read fabric grain, understand seam allowances, and navigate complex construction methods. To guarantee proper alignment, always pay attention to grain line direction.
Whether you’re crafting a simple tote bag or tackling advanced dressmaking patterns, these templates provide the roadmap you need. They transform intimidating sewing techniques into manageable, enjoyable challenges that build your expertise systematically.
Understanding Different Formats
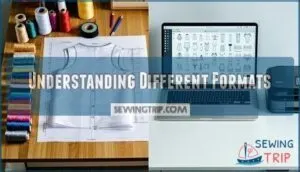
You’ll encounter sewing patterns in two main formats: traditional paper patterns that come folded in envelopes, and digital PDF patterns you download and print at home.
While paper patterns feel familiar and spread out easily on your cutting table, digital patterns offer instant access and won’t mysteriously disappear into that black hole where single socks go to hide, providing a significant advantage in terms of convenience.
Paper Patterns
Paper patterns bring a hands-on experience that many sewers treasure. These traditional tissue paper templates offer something you can’t get from a screen—the ability to physically manipulate, fold, and adjust your pattern pieces as you work.
When you’re ready to tackle pattern making with paper patterns, you’ll appreciate their tactile nature. You can spread them across your cutting table, pin them directly to fabric, and make quick adjustments with scissors and tape. Pattern storage becomes simple when you fold these lightweight templates back into their original envelopes.
Here’s what makes paper patterns special:
- Pattern weights hold pieces steady without pins, preventing tissue paper tears
- Altering paper patterns lets you customize fit before cutting expensive fabric
- Pattern durability improves when you trace onto sturdier paper for repeated use
- Pattern drafting feels more intuitive when drawing directly on physical templates
- Pattern fitting becomes easier through hands-on manipulation and quick mock-ups
Digital Patterns
Digital patterns offer incredible flexibility that paper can’t match.
You’ll download PDF files that require PDF assembly, often with layered options for different sizes. Check your printing scale carefully—mobile patterns sometimes don’t translate well to home printing.
For complex designs, consider largeformat printing at copy shops. Digital patternmaking software allows easy alterations, while scanning lets you digitize existing patterns.
The convenience of instant downloads and unlimited reprints makes digital patterns perfect for modern sewers.
Elements of a Sewing Pattern
Every sewing pattern comes with two essential components that’ll make or break your project: the pattern pieces themselves and the step-by-step instructions that guide you through construction.
Think of these elements as your roadmap and destination rolled into one—the pieces show you what to cut, while the instructions tell you exactly how to put it all together without losing your mind in the process, following a clear step-by-step approach to ensure a successful outcome, and ultimately reaching your destination.
Pieces
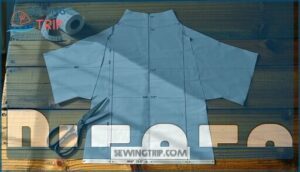
Pattern pieces are the building blocks of your sewing project—think of them as puzzle pieces that’ll create your finished garment.
Think of pattern pieces as your garment’s DNA—each one holds the secret to bringing your vision to life.
Each piece comes with specific markings you’ll need to decode for success, starting with Pattern Piece Identification by checking the piece number and name printed on each section.
Pay attention to Cutting Line Accuracy by following the solid outer lines precisely, and ensure Grainline Placement is marked with a double-ended arrow that must align with your fabric’s grain direction.
Look for notches—those little triangular cuts that help with Matching Seam Lines between pieces, and understand seam allowances (the space between cutting and stitching lines) to prevent frustrating fitting issues later.
Instructions
While pattern pieces show you what to cut, the real magic happens when you open those instruction booklets.
Think of sewing patterns instructions as your personal GPS through the project journey.
Quality patterns feature crystal-clear step sequencing with visual aids that make complex techniques feel manageable.
Look for beginner focus elements like detailed diagrams and troubleshooting tips.
Good instruction clarity turns intimidating sewing tutorials into confidence-building experiences.
Remember, even experienced sewists rely on well-written sewing tips to achieve professional results.
Sizing and Pattern Levels
You’ll find patterns labeled as beginner, intermediate, or advanced based on their complexity and the skills they require, just like video games have difficulty levels.
Choosing the right pattern size means taking accurate body measurements and comparing them to the pattern’s size chart, not your ready-to-wear clothing size, since pattern sizing often runs differently than store-bought clothes.
Beginner to Advanced
Through dedication and practice, you’ll climb the ladder of sewing expertise, where each rung represents greater pattern complexity and technique mastery.
Your skill progression naturally unfolds as you tackle increasingly challenging projects, building confidence with every successful creation.
Sewing patterns also include sizing charts to guarantee accurate garment fit.
Consider this roadmap for project selection:
- Beginner patterns: Simple shapes, straight seams, basic construction
- Intermediate designs: Curved seams, zippers, button holes, fitted garments
- Advanced projects: Complex tailoring, intricate details, professional finishing
- Expert level: Design innovation, pattern drafting, custom fitting techniques.
Each level teaches essential sewing tips while expanding your creative horizons.
Choosing The Right Size
Most sewers discover that choosing the right size isn’t about your clothing size—it’s about your actual body measurements.
Measure your bust, waist, and hips with a flexible tape, then compare these numbers to the pattern’s size chart accuracy. Don’t guess; precise measurements prevent fitting disasters later.
| Measurement | How to Measure | Common Mistakes |
|---|---|---|
| Bust | Around fullest part, keeping tape parallel to floor | Measuring over bulky clothing or too tight |
| Waist | At natural waistline where you bend sideways | Using clothing waist size instead of actual measurement |
| Hips | Around fullest part, usually 7-9 inches below waist | Measuring at hip bones instead of fullest curve |
| Ease Allowance | Check pattern’s finished measurements vs. body | Not accounting for design ease in loose-fitting garments |
| Muslin Fitting | Test fit with cheap fabric before cutting good fabric | Skipping this step and wasting expensive materials |
Using Sewing Patterns
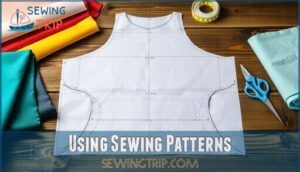
You’ve got your pattern picked out, and now it’s time to turn that pile of tissue paper into something you can actually wear—think of it as following a recipe, but instead of cookies, you’re making clothes.
The key is gathering your materials first and understanding how patterns work with fabric, because rushing into cutting without preparation is like trying to bake without measuring your ingredients.
Gathering Materials
Before diving into your sewing adventure, you’ll need the right tools and materials. Start with essential supplies: sewing scissors, measuring tape, ruler, and pattern paper.
Next, gather your fabric types based on your pattern’s requirements—cotton for beginners, knits for stretch projects. Don’t forget thread selection that matches your fabric, plus any special notions like zipper choices, button options, or elastic widths.
Consider specialized cutting implements for different fabric types. Having everything organized beforehand saves time and prevents those frustrating mid-project trips to the craft store when you’re in the zone.
Fabric Selection
Choosing fabric feels like selecting the perfect dance partner – it needs to move with your pattern, not against it. Your fabric choice determines whether your finished garment looks professional or homemade.
Start by checking your pattern’s fabric recommendations. These aren’t suggestions; they’re blueprints for success. Cotton works beautifully for beginners because it forgives mistakes and handles easily during fabric preparation.
Consider these essential factors when selecting your textile:
- Fabric Weight: Match lightweight fabrics to flowy designs, medium-weight for structured pieces
- Fiber Content: Natural fibers like cotton breathe well, while polyester resists wrinkles
- Print Scale: Large prints can overwhelm small garments; choose proportionally
- Drape Quality: Test how fabric falls – stiff materials won’t work for gathered designs
- Colorfastness: Pre-wash to prevent bleeding disasters later
Remember, expensive doesn’t always mean better. Consider the fabric’s key properties to guarantee project success. Focus on fabric types that suit your pattern’s needs and your skill level. Proper fabric handling starts with smart selection, setting you up for sewing success from the very beginning.
Seam Allowances
Once you’ve selected your fabric, understanding seam allowances becomes your next stepping stone to sewing success.
These extra fabric margins beyond your stitching line determine how your garment fits and finishes.
Most sewing patterns include seam allowances in their cutting instructions, but knowing different allowance types helps you adapt any project.
| Seam Type | Standard Width | When to Use | Special Notes |
|---|---|---|---|
| Straight Seams | 5/8 inch | Most garments | Industry standard for clothing |
| French Seams | 1/4 + 3/8 inch | Delicate fabrics | Creates enclosed, professional finish |
| Curved Seams | 3/8 inch | Armholes, necklines | Easier to clip and grade |
| Topstitched | 1/4 inch | Decorative edges | Visible stitching requires precision |
Mastering cornering techniques by trimming excess fabric at points, and remembering that grading seams prevents bulk in your finished piece, are crucial steps in the sewing process.
This attention to detail ensures a professional finish and enhances the overall quality of your garment.
Interpreting Seam Allowances
Reading seam allowances on sewing patterns isn’t rocket science, but it’s the foundation of professional-looking garments.
Your pattern instructions will clearly indicate seam allowance width, typically ranging from ⅜" to ⅝". Pay attention to pattern variations – some pieces might require different allowances for construction reasons.
- Check cutting instructions for specific seam allowance requirements before making your first cut
- Maintain consistent seams by following the marked guidelines on your sewing machine’s throat plate
- Plan for trimming allowances on curved seams to reduce bulk and achieve smooth finishes
Printing and Assembling PDF Patterns
Once you’ve mastered seam allowances, it’s time to tackle home printing your digital sewing patterns.
Start by checking your paper size settings—most patterns use standard 8.5×11 inches. Watch for scaling issues by printing the test square first; it should measure exactly one inch.
When tiling alignment goes wrong, you’ll end up with wonky cutting lines. Use pattern paper or regular copy paper, then store assembled patterns flat.
Trust me, your future self will thank you for neat pattern storage!
Copying Patterns
After you’ve printed your PDF patterns, you’ll often need copies for alterations or preservation.
Pattern duplication starts with quality tracing paper laid over your original.
Trace every line, notch, and pattern marking with steady hands—think of it as creating your sewing blueprint’s backup.
Pattern tracing protects your originals while enabling fearless alterations.
Scale copies up or down using grid methods, but remember the legal implications of sharing copyrighted designs.
Digital scanning offers modern pattern cutting solutions, letting you store traced patterns electronically for future projects.
Working With Patterns
Once you’ve selected your pattern and gathered your materials, it’s time to transform those tissue-thin pieces into a real garment—think of it as bringing a flat puzzle to life.
You’ll learn to make smart modifications, cut fabric like a pro, and follow instructions that sometimes feel like they’re written in secret code, but don’t worry, we’ll crack that code together.
Making Pattern Modifications
Pattern alterations transform basic templates into perfectly fitted garments that flatter your unique shape.
You’ll discover that small adjustments make huge differences in how clothes hang and feel.
- Fit Adjustments: Slash-and-spread for full bust corrections, overlap sections for smaller measurements
- Style Changes: Convert necklines, add sleeves, or extend shirt patterns into dresses
- Combining Patterns: Mix bodices with different skirts for custom designs
- Altering Darts: Resize width and length to accommodate your figure’s curves
Cutting Pattern Paper and Fabric
After adjusting your sewing patterns, you’re ready to make the first cuts that’ll bring your project to life. Think of cutting as the foundation – mess this up, and everything wobbles later.
Sharp scissors are your best friend here. Dull blades create jagged edges that’ll haunt you during assembly. Place pattern weights strategically to prevent shifting, then cut with confident, smooth strokes along the edges.
Here’s your cutting game plan:
- Align with fabric grain – Keep your pattern pieces straight with the fabric’s natural direction for proper drape
- Use proper cutting tools – Sharp fabric shears for clean lines, rotary cutters for straight edges
- Mark seam allowances – Transfer all markings before removing pattern paper
Fabric Cutting Plans and Layouts
Smart fabric layout transforms chaos into cutting success.
Think of it as pattern tetris—arranging pieces for maximum layout efficiency while maintaining proper grain alignment.
Your dressmakers shears will thank you for reducing fabric waste through strategic placement.
Follow the cutting order suggested in your pattern’s fabric shape cutting diagram, positioning each piece like puzzle pieces.
This methodical approach prevents costly mistakes and creates professional results.
Cutting on The Bias
Bias grain transforms ordinary fabric into flowing masterpieces with incredible drape and stretch.
When cutting techniques require diagonal placement at 45 degrees to the grainline, your sewing patterns gain elegant movement.
This pattern adjustment creates bias benefits like natural body-hugging curves and graceful swaying.
Position your pattern layout carefully on fabric layout, ensuring proper alignment for professional results.
Following Instructions
Reading sewing patterns is like following a recipe – skip one ingredient and your cake becomes a pancake.
Step clarification begins with understanding symbols before diving into the sewing process. Visual aids in pattern instructions make complex techniques digestible, so study those diagrams alongside text.
- Order of Operations: Follow each step sequentially to avoid costly mistakes
- Understanding Symbols: Master notches, grain lines, and markings before cutting
Avoiding mistakes means slowing down and checking twice.
Understanding basic blocks and slopers is also essential for pattern success. Your sewing guide becomes second nature with practice, transforming stepbystep instructions into muscle memory.
Pattern Details and Markings
You’ll notice that sewing patterns come covered with mysterious symbols and lines that might look like hieroglyphics at first glance, but they’re actually your roadmap to sewing success.
These markings tell you exactly where to cut, fold, match pieces together, and even which direction your fabric should face, so learning to read them is like deciphering a secret code that transforms confusing paper into a perfectly fitted garment.
This process allows you to understand the markings, which is crucial for achieving a well-made garment, and by doing so, you’ll be able to create a perfectly fitted garment with ease.
Grain Lines and Fabric Direction
Think of fabric grainlines as your roadmap to professional results. These printed arrows on sewing patterns show you exactly how to align each piece with your fabric’s natural weave.
The lengthwise grain runs parallel to the selvage, while crosswise grain goes perpendicular.
Always match the grainline arrow to your fabric’s lengthwise threads before cutting. This simple step prevents twisted seams and guarantees your finished garment hangs beautifully and maintains its intended shape.
Notches and Panel Matching
Your sewing patterns won’t cooperate without proper notch accuracy.
These tiny triangular marks aren’t decorative—they’re your roadmap to perfect panel alignment.
Single notches mark front pieces, while double notches indicate back sections, preventing you from sewing sleeves backward (trust me, we’ve all been there).
- Transfer all pattern markings to fabric before removing paper pieces
- Match corresponding notches when joining seams for proper fit
- Use small clips or pins to mark notch positions on curved seams
- Align notches first, then ease fabric between matching points for complex seams
- Check grainline direction before making any pattern adjustments to maintain shape
Circular Dots
When you spot those little circles on sewing patterns, you’re looking at your roadmap for precision.
These circular dots aren’t just decorative—they’re your secret weapon for professional results.
- Dart points showing exactly where fabric folds meet
- Pocket placement ensuring perfectly aligned pockets every time
- Zipper insertion points for smooth, straight installations
- Gathering dots creating even ruffles and pleats
- Snap positioning for secure, properly-spaced fastenings
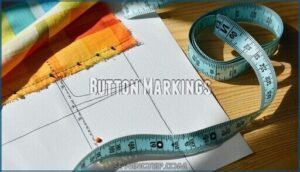
Button Markings
Those little X marks on your sewing patterns aren’t just decoration—they’re your roadmap to professional-looking buttons.
These markings guarantee Placement Accuracy and proper Spacing Guidelines for multiple buttons.
Use Marking Tools like chalk to transfer these symbols to your fabric, maintaining consistent seam allowance measurements.
Different Buttonhole Types require precise positioning, so Adapting Markings becomes vital for flawless results.
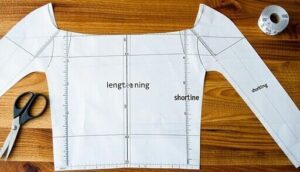
Lengthening and Shortening Lines
Pattern alteration becomes simple when you spot those helpful lengthening and shortening lines on your sewing patterns.
These marked lines show exactly where to make proportion adjustments without affecting the garment’s overall design.
When sewing pattern adjusting, cut along these lines and either overlap pieces for shortening or add paper strips for lengthening.
This technique maintains grainline impact and prevents distortion.
Always measure twice before making style modifications – measurement accuracy guarantees your alterations work perfectly every time.
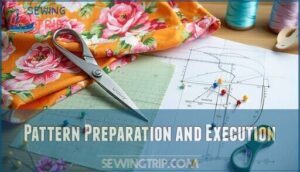
Pattern Preparation and Execution
You’ve studied your pattern pieces and markings—now it’s time to transform that pile of tissue paper into your dream garment through careful preparation and execution.
This stage requires sharp scissors, steady hands, and a bit of patience, because rushing through fabric cutting is like trying to unscramble an egg (nearly impossible and quite messy).
Cutting Pattern Pieces
Sharp cutting tools make all the difference when you’re ready to transform your sewing patterns into fabric pieces.
Position pattern weights strategically to prevent shifting, then follow the cutting line precisely—no shortcuts here.
Respect the fabric grain direction and use proper marking methods for notches and dots.
Remember, precision cutting now saves headaches later during assembly.
Layout Patterns
Your pattern’s dance with fabric begins with strategic placement. Think of it like Tetris – every piece needs its perfect spot for maximum fabric efficiency.
- Study the fabric grain like reading a roadmap
- Arrange pattern pieces for ideal layout variations
- Consider nap direction when working with directional fabrics
- Choose between folded or single layer cutting methods
- Trace sewing patterns onto fabric with precision
Smart pattern layout saves fabric, time, and your sanity during cutting.
Marking Fabric
Accurate markings bridge the gap between your sewing patterns and flawless construction.
You’ll transfer pattern markings using specialized marking tools like chalk, tracing paper, or fabric-safe pens.
Different fabric types require specific transfer methods—delicate silks need gentle approaches while sturdy denim handles bolder techniques.
Many sewers find it useful to shop for marking tools online.
| Marking Method | Best For |
|---|---|
| Chalk/Pencils | Temporary marks, most fabrics |
| Tracing Paper | Permanent transfer, detailed markings |
| Washable Pens | Easy marking removal, cotton blends |
Choosing Appropriate Patterns
Like picking the right dance partner, choosing the perfect sewing pattern requires matching your skill level with your ambitions.
Start with sewing patterns for beginners if you’re new—simple tops or basic skirts work wonderfully.
Consider your body shape when browsing sewing patterns for dresses, as some styles flatter different figures better.
Your fabric choice should align with the pattern’s recommendations, while project type depends on your style preference.
Don’t jump from beginner patterns straight to expert-level couture.
Master basic techniques first, then gradually tackle more complex sewing pattern selection challenges.
Selecting Fabric and Notions
Once you’ve chosen your pattern, fabric and notions become your project’s foundation. Think of fabric selection like dating—you need compatibility, not just attraction. Your pattern envelope lists recommended fabric types, yardage, and notions for good reason.
Here’s your fabric shopping checklist:
- Match fabric weight – Lightweight cottons for blouses, heavier denims for structured pieces
- Test drape and stretch – Hold fabric against yourself to see how it falls
- Consider color palettes – Choose hues that complement your wardrobe and skin tone
- Budget wisely – Quality fabric costs more but sews better and lasts longer
- Explore sustainable options – Organic cotton, linen, or deadstock fabrics reduce environmental impact
Don’t forget coordinating thread, interfacing, and hardware. Understanding fabric grain is essential for preventing twisting and ensuring a smooth drape. Following pattern recommendations prevents costly mistakes while you’re learning sewing patterns and developing your pattern cutting skills.
Learning Essential Skills
Building solid foundations starts with mastering core techniques before tackling complex sewing patterns.
You’ll discover that hand sewing complements machine operation beautifully—they’re like dance partners working together.
Practice basic stitches on scraps first, then graduate to seam finishes that’ll make your grandmother proud.
| Essential Skill | Practice Method | Why It Matters |
|---|---|---|
| Basic Stitches | Hand sew on scraps | Creates strong foundations |
| Fabric Identification | Touch different textures | Prevents costly mistakes |
| Seam Finishes | Test various techniques | Guarantees professional results |
Master these beginner sewing fundamentals, and you’ll transform from fumbling rookie to confident creator.
Navigating Pattern Complexity
When you’re browsing patterns online or in stores, you’ll quickly realize they’re not all created equal—some look deceptively simple but hide tricky construction details that can turn your weekend project into a month-long puzzle.
Learning to spot these complexity clues before you buy saves you from biting off more than you can chew, especially when you’re still building your sewing confidence.
This will help you avoid turning a simple project into a month-long puzzle.
Selecting Suitable Designs
Before diving into sewing patterns, consider your skill level honestly.
Choose patterns marked "beginner" or "easy" that match your body shape and style preference. Simple tops, basic skirts, and straight-seam dresses work perfectly for newcomers.
Your fabric choice should complement the project type you’ve selected. Remember, sewing patterns for beginners exist for good reason—they’ll build your confidence without overwhelming you, and help you create projects that match your style preference.
Identifying Pattern Complexity
Pattern difficulty isn’t rocket science, but it requires detective work.
Check the pattern envelope for construction techniques like zippers, buttonholes, or set-in sleeves—these bump up skill level requirements.
Count pattern pieces; more pieces usually mean greater complexity.
Look for fabric requirements and design elements like pleats or darts.
Beginner sewing patterns feature straightforward seams, while advanced sewing demands precision with curves and matching.
Your sewing skills should match the sewing pattern complexity before diving in, considering the need for detective work and understanding of complexity.
Choosing Garment Fastenings
Smart fastening choices can make or break your sewing patterns.
Button selection matters—match button weight to your fabric’s thickness.
Zipper types vary from invisible to exposed, so check your pattern’s zipper line carefully.
Hook closures work great for waistbands, while snap alternatives offer quick changes on kids’ garments.
Velcro options suit activewear perfectly.
Study button and buttonhole markings on your pattern before cutting.
Practice with sewing patterns for zippers on scraps first—you’ll thank yourself later when your garments look professionally finished.
Types of Sewing Patterns
You’ll encounter two main categories of sewing patterns: commercial patterns from big companies like Simplicity and McCall’s, and indie patterns from independent designers who often offer more unique styles and detailed instructions.
Think of commercial patterns as your reliable old friend who’s always there when you need them, while indie patterns are like that creative friend who introduces you to exciting new ideas you never knew existed, offering more unique styles.
Commercial Vs. Indie Patterns
Choosing between commercial and indie sewing patterns can feel overwhelming, but understanding their differences helps you make smarter decisions.
Commercial patterns offer standardized sizing and professional drafting, while indie designers provide unique aesthetics and detailed instructions that often surpass traditional options.
- Pattern Accessibility: Commercial patterns dominate fabric stores with frequent sales, while sewing patterns online from indie designers cost more but offer instant downloads
- Design Originality: Indie sewing designers create trendy, unique styles versus commercial patterns’ broader, traditional range
- Instruction Clarity: Top indie patterns feature photo-rich guides, though quality varies more than commercial brands’ consistent professional standards
- Community Support: Indie designers often provide active online communities and responsive customer service for troubleshooting
- Cost Comparison: Commercial patterns frequently go on sale for under $5, while indie patterns typically cost $10-20 without discounts
Benefits of Indie Patterns
Indie patterns offer unique designs that commercial brands often overlook, plus size inclusivity that actually fits real bodies.
You’ll get direct designer support when you’re stuck, community support from fellow sewists, and detailed instructions that don’t leave you guessing.
These sustainable sewing choices support small businesses while giving you access to innovative sewing pattern design and drafting techniques.
Pattern Sizing
Getting your pattern size right from the start saves you from sewing heartbreak later.
Size charts become your best friend here—they’re more reliable than the number on your jeans tag.
- Measure your bust, waist, and hips with a snug (not tight) tape measure
- Compare your body measurements to the pattern’s specific size charts
- Consider ease allowance when choosing between sizes for comfort
Custom sizing through grading rules helps achieve that perfect fit you’re after.
Before You Begin
Preparation makes the difference between sewing success and frustration.
Start with a skill assessment to match your abilities with the right project complexity. Your workspace setup should include proper lighting and a clear cutting surface.
Complete a tool inventory to verify you have essential items like measuring tape, ruler, and sharp scissors ready.
| Essential Step | Key Focus |
|---|---|
| Skill Assessment | Match project difficulty to your current abilities |
| Workspace Setup | Organize cutting surface and guarantee good lighting |
| Tool Inventory | Gather measuring tape, ruler, scissors, and pins |
| Fabric Knowledge | Understand fabric properties before cutting pattern paper |
Project planning prevents costly mistakes with expensive materials.
Pattern Insight and Precision
Successfully understanding your sewing pattern often separates beginners from confident sewers. You’ll master pattern symbols, grainlines explained markings, and notch matching techniques that guarantee professional results.
Pattern tracing requires attention to detail, while precision cutting demands steady hands and sharp tools. Accurate measurements matter at every step, from pattern drafting to final seam allowance calculations.
- Feel the satisfaction of perfectly aligned pattern pieces clicking together like puzzle pieces
- Experience the confidence boost when your notches match flawlessly on the first try
- Enjoy the pride of creating garments that fit like they were custom-made for you
- Celebrate those "aha!" moments when complex pattern cutting suddenly makes perfect sense
Support and Learning
Beyond mastering pattern mechanics, you’ll discover sewing pattern help through vibrant sewing communities and online tutorials.
These pattern resources offer sewing pattern solutions when you’re stuck. Skill development accelerates through mentorship programs where experienced sewers share wisdom.
Don’t fear mistakes—they’re stepping stones to expertise. Embrace sewing pattern learning; creativity flourishes through practice and community support.
| Learning Resource | Benefits | Emotional Impact |
|---|---|---|
| Online Communities | Real-time help, friendship bonds | Feel supported, never alone |
| Video Tutorials | Visual learning, replay ability | Build confidence through clarity |
| Local Classes | Hands-on guidance, instant feedback | Experience accomplishment together |
| Mentorship Programs | Personalized advice, skill acceleration | Gain wisdom from caring experts |
Frequently Asked Questions (FAQs)
Can You Make your own sewing patterns?
Picture yourself sketching the perfect dress silhouette on paper.
You can absolutely create your own sewing patterns.
Start with basic body measurements, draft simple shapes, or trace existing garments you love wearing.
How do I make a sewing pattern?
Start with accurate body measurements using a tape measure.
Draft your pattern on paper using basic blocks like bodice or skirt foundations.
Create test versions in muslin fabric first, then adjust for perfect fit.
What are sewing patterns?
Think of sewing patterns as your garment’s blueprint—they’re paper templates.
They show you exactly where to cut fabric pieces and how to assemble them into finished clothing, bags, or home décor items.
How do you read a sewing pattern?
Reading sewing patterns requires understanding symbols, markings, and instructions.
You’ll decode cutting layouts, seam allowances, notches, and grain lines.
Pattern pieces show construction details while instruction sheets guide assembly steps from start to finish, which involves understanding complete concepts.
How do I choose a sewing pattern?
Choose patterns based on your skill level, body measurements, and project goals.
Beginners should start with simple designs featuring straight seams.
Match the pattern’s finished measurements to your body size, not your clothing size, to ensure a proper fit with your body measurements.
Should you use a pattern for sewing?
You’ll definitely want to use a pattern for most sewing projects.
Patterns provide essential measurements, cutting guides, and construction steps that prevent costly mistakes and guarantee your finished garment actually fits properly.
How do you put patterns on fabric?
Lay your fabric flat on a cutting surface,
then place the pattern pieces on top following the grain line arrows.
Secure them with pins or pattern weights before tracing around edges with chalk.
Is sewing from a pattern hard?
Sewing from patterns isn’t hard once you understand the basics.
Start with simple projects like tote bags or pajama pants.
Take your time reading instructions, and don’t skip the practice round with cheap fabric first, to ensure you understand the process thoroughly.
How to follow sewing pattern instructions?
Don’t put the cart before the horse—read your pattern’s entire instruction sheet first. You’ll follow step-by-step directions, match notches, check seam allowances, and pin pieces carefully before cutting.
What are the four steps in a drafting pattern?
Creating your own pattern involves four essential steps: first, you’ll take accurate body measurements, then draft your basic block or sloper.
Adjust for proper fit, and finally add seam allowances before cutting.
Conclusion
Picture yourself holding up your finished garment—a tangible reward for mastering how to sew patterns.
You’ve conquered mysterious symbols, navigated grain lines like a pro, and transformed flat pattern pieces into something you’ll actually wear.
Remember, every expert seamstress started exactly where you’re now. Don’t expect perfection on your first try; even seasoned sewers occasionally mix up their right and left sleeve pieces.
Keep practicing, stay patient, and celebrate those small victories along the way.
- https://en.wikipedia.org/wiki/Pattern_(sewing)
- https://www.reddit.com/r/sewing/comments/rmggcj/resources_on_making_your_own_patterns/
- https://garbie.substack.com/p/what-does-every-sewing-pattern-have
- https://www.youtube.com/watch?v=UEG4lYc0DHs
- https://camimade.com/how-to-use-a-sewing-pattern-5-basic-things-to-know-about-sewing-patterns/

