This site is supported by our readers. We may earn a commission, at no cost to you, if you purchase through links.
To sew stretch pleather, you’ll need the right tools and materials, including a sharp rotary cutter, cutting mat, ruler, needle suitable for pleather thickness, polyester or nylon thread, leather shears, and marking chalk. Understand the properties of stretch pleather, such as its distinctive characteristics, difference from non-stretch fabrics, seam allowance, bias versus straight grain, and resilience.
Cut parallel to the fabric grain, use exact measurements, sharp scissors or rotary cutter, and marking tools that won’t harm the fabric. Set up your sewing machine with a stretch or ballpoint needle, walking or Teflon foot, adjusted stitch length and tension settings, narrower needle, and polyester thread.
Use appropriate needles and fusible interfacing for added support, and adjust topstitching techniques. Aim for a 5/8-inch seam allowance and use bias binding for a more flexible finish. Remember to test your marking tools on a scrap piece of fabric and press without damaging the pleather.
By following these steps, you’ll create stunning, durable projects that showcase your skills in sewing stretch pleather.
Table Of Contents
Key Takeaways
- Understand the properties of stretch pleather, including its resilience, seam allowance, bias versus straight grain, and fabric weight.
- Use sharp tools for cutting and marking, such as sharp scissors or a rotary cutter, and marking chalk that won’t harm the fabric.
- Set up your sewing machine with a stretch or ballpoint needle, walking or Teflon foot, and adjust stitch length and tension settings.
- Use appropriate needles and fusible interfacing for added support, and adjust topstitching techniques for a 5/8-inch seam allowance and bias binding.
How to Sew Stretch Pleather?
To sew stretch pleather, select the correct presser foot, such as a Non-Stick Zigzag Foot #52 or a Leather Roller Foot #55, depending on the resistance of the pleather. Use a size 100/16 or 110/18 needle, and stitch in one direction to avoid twisting the material.
Use a chalk marker to avoid bleeding through, and a rotary cutter and mat for cutting. For stretch pleather, you may need to adjust your stitch length to between 3.00mm – 4.00mm.
Additionally, you can use clips to hold the pleather pieces together instead of pins, and reduce the pressure between the presser foot and the throat plate.
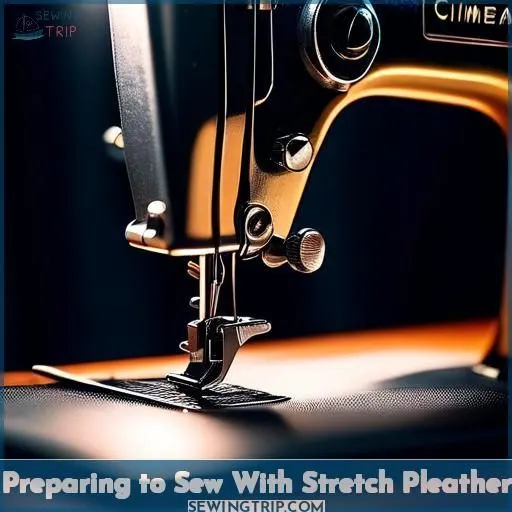
Preparing to Sew With Stretch Pleather
To successfully sew with stretch pleather, you’ll need the right tools and materials. Start by selecting a sharp rotary cutter, a cutting mat, and a ruler. Understand that stretch pleather has different properties than traditional leather, so you’ll need to adjust your techniques accordingly.
Selecting the Right Tools and Materials
To sew with stretch pleather, you’ll need the right tools and materials. Start with a needle size suitable for the thickness of your pleather, such as a size 14 or 16. Choose a thread type that won’t stretch or fray, like polyester or nylon. Use leather shears or a rotary cutter for clean cuts, and marking chalk for precise markings.
Understanding the Properties of Stretch Pleather
Before embarking on the realm of sewing with stretch pleather, it’s imperative to grasp its distinctive characteristics. In contrast to conventional leather, stretch pleather is a synthetic material that yields and molds to the contours of your body. It’s indispensable to discern between stretch and non-stretch fabrics, as well as the significance of seam allowance, bias versus straight grain, and fabric weight.
Stretch pleather is renowned for its resilience, rendering it a coveted choice for fashion and accessories. By acquainting yourself with these attributes, you’ll be better equipped to work with this versatile material.
Cutting and Marking Techniques
When cutting stretch pleather, it’s essential to use sharp tools for accuracy. For marking, choose techniques that won’t harm or leave lasting marks on your fabric.
Tips for Accurate Cutting
To guarantee precise cutting when working with stretch pleather, adhere to these suggestions:
- Consistently cut parallel to the fabric grain, as this will aid in preventing any stretching or distortion.
- Utilize measuring techniques to guarantee exact measurements, and take particular note of seam allowances.
- Equip yourself with sharp scissors and, if feasible, a rotary cutter for cleaner, more accurate cuts.
Safe and Effective Marking Methods
To make sure accurate and safe marking of your stretch pleather, there are several methods to pick from. Here’s a table to guide you through the options:
| Marking Tools | Benefits | Drawbacks |
|---|---|---|
| Tailor’s Chalk | Simple to use, rubs off easily, available in different colors | Can be messy, may leave residue on light fabrics |
| Water-soluble Markers | Good for dark fabrics, easy to see, can be washed off | May require washing fabric before use |
| Disappearing Ink Pens | No need to wash fabric, lines disappear on their own | May not last as long as desired |
| Chalk Pencils | Similar to tailor’s chalk, can be sharpened | Lines may be hard to see |
| Fabric Crayons | Good for dark fabrics, can be washed off | May require washing fabric before use |
Remember to always test your marking tool on a scrap piece of the same fabric first to make sure it doesn’t damage or leave any residue.
Sewing Machine Setup
To guarantee successful sewing with stretch pleather, you must select the suitable needle and presser foot for your sewing machine. Furthermore, modifying the stitch length and tension settings is essential for obtaining neat, expert seams.
Choosing the Correct Needle and Presser Foot
After mastering the cut, you’ll want your sewing machine to play nice with stretch pleather. Here’s how:
- Needle selection is key—opt for a stretch or ballpoint needle to dodge snags.
- Presser foot types matter; a walking or Teflon foot glides smoothly.
- Confirm fabric compatibility; the right duo enhances stitch quality and seam strength, paving the way for sewing success.
Adjusting Stitch Length and Tension
Fine-tuning stitch length and tension is imperative for successful sewing with stretch pleather. Begin by selecting the appropriate needle size and thread type for your endeavor. A narrower needle and polyester thread are advised.
Next, take into account the stitch density, which should be adjusted according to the stretch pleather’s thickness and the desired seam allowance.
Finally, adjust the presser foot pressure to guarantee consistent pressure on the fabric, preventing missed stitches and puckering. Use the table below to guide your adjustments.
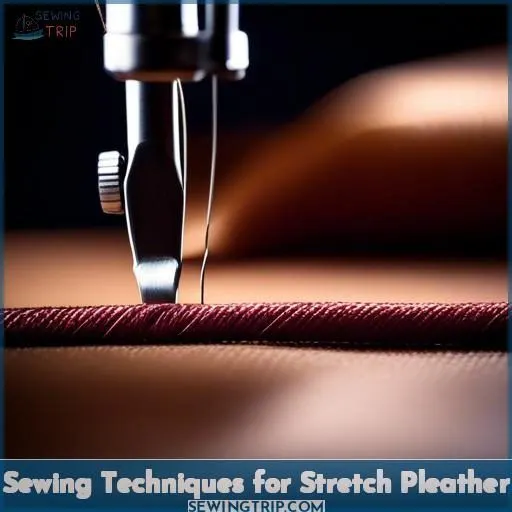
Sewing Techniques for Stretch Pleather
When sewing stretchy pleather, preventing skipped stitches and puckering is essential for a polished finish. You’ll also want to prioritize techniques that guarantee clean, polished seams, improving the overall appearance of your project.
Preventing Skipped Stitches and Puckering
To prevent skipped stitches and puckering when sewing with stretch pleather, follow these tips:
- Use the appropriate needle: Select a stretch needle designed for sewing stretch fabrics. These needles have a larger, more aggressive cutting tip that can handle the stretch and tension of the material.
- Consider interfacing alternatives: For added support and stability, use a fusible interfacing on the wrong side of the pleather. This can help prevent puckering and improve the overall appearance of your seams.
- Adjust topstitching techniques: When sewing with a walking foot or a presser foot with a small round hole, use a consistent stitch length and tension. This can help eliminate skipped stitches and ensure a clean, professional finish.
- Vary seam allowance: For stretch pleather, a 5/8-inch seam allowance is recommended. This allows for some stretch and movement in the material without causing puckering or bunching.
- Use bias binding techniques: For seams that require a more flexible finish, consider using a bias binding. This can help distribute the stretch evenly and prevent puckering or skipped stitches.
Achieving Clean, Professional Seams
To achieve clean, professional seams when working with stretch pleather, consider these techniques:
- Interfacing options: For seam allowances, use a lightweight, non-woven interfacing to provide stability and prevent puckering. Choose an interfacing that’s compatible with pleather and doesn’t leave residue or cause shrinkage.
- Seam allowances: Keep seam allowances consistent and accurate by using a ruler or measuring tape. This will make sure that your seams are even and the pleather pieces align properly.
- Topstitching techniques: Use a Teflon presser foot for topstitching to prevent the pleather from sticking to the foot and to achieve a smooth, clean finish. Consider using a walking foot for thicker fabrics to help feed the pleather through the machine.
- Decorative threads: Experiment with different decorative threads to add interest and texture to your seams. Polyester thread is a good choice for pleather, as it’s strong and resistant to wear.
- Bias binding: For a neat finish, use bias binding to cover raw edges. This can be particularly useful for curved seams, where it can help to prevent puckering.
Remember to test your settings and techniques on scraps before working on your project, and always follow the specific instructions provided by your sewing machine manufacturer for best results.
Finishing Touches
You’ll want to press your stretch pleather carefully to avoid melting or damage; use a press cloth and low heat as your safest bet. When adding hardware and embellishments, test on scraps first to make certain they attach cleanly without compromising the fabric.
Proper Pressing Without Damage
To press your stretch pleather without damaging it, always use a pressing cloth to protect the material from heat. When choosing between steam and dry iron, consider the fabric temperature. Test on scraps first to guarantee the right setting. Remember, patience is key when pressing stretch pleather to avoid puckering or burns.
Adding Hardware and Embellishments
Adding hardware and embellishments to your stretch pleather project is the perfect way to add a touch of sophistication and style. Here are some tips for adding studs, rivets, zippers, fringe, and crystals to your project:
- Studs and Rivets: To attach studs or rivets to your stretch pleather, use a strong adhesive like E-6000 Fabri-Fuse or a specialized adhesive for rhinestones. Apply a small amount of glue to the back of the stud or rivet and press it onto the fabric. Hold it in place for a few seconds to secure a firm bond. Allow the glue to dry completely before handling the area.
- Zippers: When installing a zipper on stretch pleather, use a walking foot or a knit foot on your sewing machine to help guide the fabric and prevent puckering. Sew the zipper onto the wrong side of the fabric, then press the seam flat before top-stitching the zipper pull to the right side of the fabric.
- Fringe: To add fringe to your stretch pleather, first decide on the length and style of fringe you want. Cut the fringe pieces to the desired length and width. Attach the fringe to the edge of the fabric using a strong adhesive or by sewing it on with a narrow zigzag stitch. Make sure to press the seam flat before top-stitching the fringe in place.
- Crystals: To add crystals to your stretch pleather, use a hotfix applicator tool or a household iron for the hotfix method, or glue the crystals on with a gem glue like Gem Tac for the non-hotfix method. Always use tools specifically designed for rhinestoning, such as a rhinestone picker, and apply the glue in small quantities with a syringe for precision.
Remember to always test your hardware and embellishments on a scrap piece of fabric before applying them to your project to guarantee the best results. Happy sewing!
Frequently Asked Questions (FAQs)
What type of needle should I use when sewing with pleather?
To sew with pleather, you should use a size 100/16 or 110/18 needle. These needles are larger than standard universal needles and are specifically designed for sewing on heavy fabrics like pleather. You can use either denim/jeans or regular/universal needles, but it’s recommended to use the larger needles for the best results.
Can I use pins when sewing with pleather?
You can use pins when sewing with pleather, but it’s not a universal rule. Some pleathers can be fused quite well, and you can use weft-insertion interfacing on some of them. If you can’t fuse, you can use glue-stick to attach a sew-in interfacing. Since pleather will stick to everything, you’ll want a Teflon or roller foot. A small piece of a teflon sheet over the feeders can help keep the pleather feeding.
Many people will tell you not to use pins, but you can pin within the seam allowances. On most pleathers, the pin holes disappear anyway. You can also pin together with paper clips if you want. If you’re concerned about making unnecessary holes, you can use double-sided tape to hold the pattern to the fabric or trace your pattern pieces onto the fabric using tailor’s chalk.
How do I avoid skipped stitches when sewing with pleather?
To avoid skipped stitches when sewing with pleather, you should consider the following tips:
- Use the correct needle: Switch to a brand new needle, preferably a topstitch needle, which has a longer and bigger eye, allowing the top thread to move freely and catch the bottom thread more easily.
- Adjust presser foot pressure: Increase the presser foot pressure to compact your layers and help the bottom thread catch. Increase it a little at a time to make sure your fabric still feeds evenly.
- Experiment with different presser feet: Try using a roller foot, a Teflon foot, or transparent tape on the bottom of your regular sewing machine foot to allow the fabric to move properly.
- Sew from the fabric (wrong side) whenever possible: If you must sew on the right side, place tissue paper on top of the fabric to help the machine feed the fabric properly.
- Test your sewing machine settings: Practice and test your sewing machine settings on scraps of the pleather fabric before starting your project.
What is the best way to mark my pieces when sewing with pleather?
To mark your pieces when sewing with pleather, use double-sided tape to hold the edges together. This method is effective for faux leather and vinyl, as it avoids the need for pins or chalk, which can leave permanent marks on the fabric.
How do I prevent pinholes when sewing with pleather?
To prevent pinholes when sewing with pleather, use binder clips or wonder clips instead of pins.
Conclusion
Imagine a seamless fusion of craftsmanship and innovation. That’s what you achieve when you conquer the art of sewing stretch pleather. With the appropriate tools, comprehension of pleather characteristics, and techniques customized for this distinctive fabric, you’ll create projects that are both visually captivating and resilient. So, don’t merely sew stretch pleather, but ascend to mastery.

