This site is supported by our readers. We may earn a commission, at no cost to you, if you purchase through links.
 You’ll transform your sewing from frustrating to fantastic by mastering a few key how to sewing tips that professionals swear by.
Start with sharp scissors, quality thread, and proper fabric preparation—these three elements alone prevent 80% of beginner headaches.
Choose the right needle for your fabric weight, test your stitches on scraps first, and never rush through cutting your pattern pieces.
Remember, your iron is as important as your sewing machine for crisp, professional results, and the secret pros know is that good preparation beats speed every time.
These fundamentals set the stage for the advanced techniques that’ll have you sewing like a seasoned expert, and with proper fabric preparation, you will achieve great results.
Table Of Contents
Key Takeaways
- You’ll prevent 80% of beginner headaches by starting with sharp scissors, quality thread, and proper fabric preparation before you even begin cutting
- You’ll achieve professional results by choosing the right needle for your fabric weight, testing stitches on scraps first, and never rushing through pattern cutting
- You’ll save hours of frustration by mastering your sewing machine’s thread tension, bobbin management, and regular maintenance schedule
- You’ll build confidence faster by starting with forgiving cotton fabrics and simple straight-seam projects like pillowcases before tackling complex techniques
Essential Sewing Tips
Starting with the right fabric makes all the difference between a project that comes together smoothly and one that fights you every step of the way.
You’ll save hours of frustration by learning these essential setup tips before you even thread your needle, which is a key step to ensure a project that comes together smoothly.
Choosing Right Fabric
You’ll set yourself up for success when you pick the right fabric for each project.
Understanding fiber content, fabric weight, and weave type transforms sewing textiles from mysterious materials into reliable partners that behave predictably under your needle.
Understanding fiber content transforms mysterious fabric into a predictable sewing partner.
Selecting the right fabric often depends on the project, so consider fabric weight for ideal drape.
- Test fabric drape by holding swatches—stiff fabrics work for structured pieces, flowing ones for gathered designs
- Check colorfastness with a damp cloth on fabric corners before cutting your main pieces
- Match fabric selection to your skill level—cotton wovens forgive mistakes better than slippery silks
Basic Sewing Tools
You’ll need quality sewing tools to transform fabric into finished projects.
Start with sharp Fabric Scissors dedicated solely to cutting material—never paper. Get Seam Rippers for fixing mistakes (trust me, you’ll use them).
Measuring Tools like rulers and tape measures guarantee accuracy, while Marking Tools help transfer pattern details.
Stock up on Hand Needles in various sizes for different fabrics and threads. Proper tools can improve cutting fabric precisely.
Setting Up Sewing Space
Good lighting transforms your sewing room into a productive workspace.
Position your cutting surface near a window for natural light, then add task lighting for detailed work.
Choose ergonomic seating that supports long sewing sessions.
Smart storage ideas keep sewing tools and notions organized within arm’s reach.
Proper sewing organization prevents frustration and boosts creativity in your dedicated space, ensuring a workspace that is both functional and conducive to productive work.
How to Sew Easily
Once you’ve got your basics down, making sewing feel effortless comes from smart shortcuts and choosing projects that won’t make you pull your hair out.
You’ll discover that starting with forgiving fabrics and simple patterns transforms your entire experience from frustrating to fun.
Here’s how to make sewing feel like second nature:
- Start with cotton fabrics – They’re stable, press well, and forgive mistakes better than slippery or stretchy materials
- Master straight seams first – Perfect your ¼-inch seam allowance before tackling curves or complicated techniques
- Choose patterns with minimal pieces – Fewer pattern pieces mean fewer opportunities for confusion and error
- Press as you go – A hot iron makes everything look professional, even if your stitching isn’t perfect yet
Quick projects like scrunchies, pillowcases, and tote bags build confidence without overwhelming you.
Understanding beginner sewing terminology is also essential for a smoother learning process.
These beginner tools and easy sewing techniques create momentum that’ll keep you motivated.
Remember, even seasoned sewers started with wobbly seams – the key is picking projects that set you up for success rather than frustration.
Sewing Machine Tips
Your sewing machine is your most important tool, so understanding how to use it properly will transform your sewing experience from frustrating to fantastic.
These machine tips cover everything from selecting the right thread to keeping your equipment running smoothly for years to come, which will help make your sewing experience fantastic.
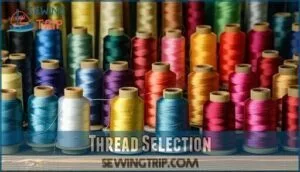
Thread Selection
All threads aren’t created equal—choosing the right one transforms your sewing from frustrating to fantastic.
Match thread types to fabric compatibility: polyester works for most projects, while cotton suits quilting and silk fabrics need silk thread.
Consider thread weight for needle pairing and always test color matching on scraps first.
Selecting the right thread, such as nylon for upholstery, is essential for project durability.
| Thread Type | Best For |
|---|---|
| All-purpose polyester | Most garments and crafts |
| Cotton thread | Quilting and natural fabrics |
| Silk thread | Delicate and luxury fabrics |
| Embroidery thread | Decorative stitching only |
| Specialty threads | Specific technical applications |
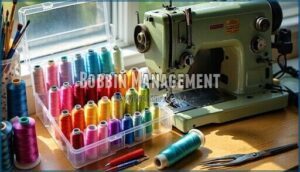
Bobbin Management
Wind your bobbin correctly and check thread compatibility before starting any project.
Proper bobbin tension prevents loose stitches and thread bunching that’ll ruin your work.
Store wound bobbins in cases to prevent tangling and dust buildup. Consider using specialized bobbin holders for ideal organization.
Keep several pre-wound bobbins ready for continuous sewing without interruption, ensuring you have a smooth workflow.
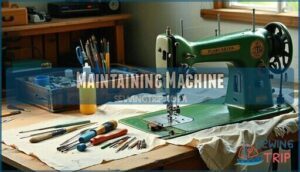
Maintaining Machine
Your sewing machine needs regular TLC to prevent costly repairs and frustrating breakdowns.
Clean lint buildup weekly, replace needles every 8 hours of stitching, and oil moving parts monthly using proper sewing machine oil.
Check tension adjustment regularly and clean feed dogs to maintain smooth fabric flow.
Don’t forget annual motor maintenance for peak performance!
Hand Sewing Techniques
Before you pick up a needle, you’ll want to master three fundamental hand sewing skills that’ll make every project smoother.
Threading your needle properly, tying secure knots, and maintaining straight stitches are the building blocks that separate frustrated beginners from confident sewers, utilizing these skills will help you become a more confident sewer.
Threading Needle
Threading your needle correctly saves frustration and sets you up for smooth stitching.
Cut thread at an angle for easier insertion, use proper lighting matters for visibility, and consider magnification options if needed.
Different needle types require specific threading techniques – universal needles work for most fabrics.
Threading tools like needle threaders help when fingers fumble.
Keep thread length manageable to prevent tangling during your sewing projects.
Tying Knots
A sturdy knot is your thread’s best friend when hand sewing.
Master these essential techniques to prevent frustrating thread slippage and guarantee professional-looking results.
Here are three vital knot tying tools for sewing success:
- Sharp scissors – Clean cuts prevent fraying that weakens knot strength
- Thimble – Protects fingers while securing seams with tight knots
- Good lighting – Helps you see when tying off threads properly
Practice these sewing basics daily to build confidence in your sewing instructions and sewing guide knowledge.
Sewing Straight Lines
Once you’ve got your knot down pat, keeping your stitches straight becomes your next challenge.
Practice makes perfect, so don’t worry if your first attempts look like a zigzag fence.
| Technique | Pro Tip |
|---|---|
| Seam Allowance Marking | Use a ruler to mark consistent spacing before you start |
| Fabric Guide Creation | Tape a straight edge to your work surface for reference |
| Stitch Length Control | Keep stitches uniform by counting to three between each one |
| Pressing Techniques | Iron fabric flat before sewing for easier straight lines |
| Guiding Tools Usage | Draw light pencil lines as temporary guides for beginners |
These sewing tips will transform wobbly seams into professional-looking straight seams, making your sewing machine tips seem less intimidating when you’re ready to upgrade from hand sewing for beginners.
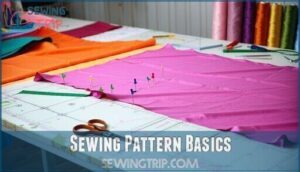
Sewing Pattern Basics
Mastering pattern basics transforms your sewing from guesswork into confident craftsmanship.
You’ll learn to read pattern markings like a pro and create precise cuts that make your finished projects look store-bought instead of homemade, which is a key aspect of craftsmanship.
Cutting Fabric
Sharp fabric shears are your best friend for precise cuts—dull blades create jagged edges that’ll haunt your finished project.
Pre-wash fabric to prevent shrinkage surprises, then lay it flat with grain alignment using pattern weights or pins.
Rotary cutters work wonders on cutting mats for slippery materials, while traditional fabric shears handle most sewing supplies beautifully, making them a great tool for precise cuts.
Sewing Seams
Once you’ve cut your fabric pieces, it’s time to join them together with seams.
Start with straight seams using a consistent seam allowance—typically 5/8 inch for garments.
Practice sewing straight lines on scrap fabric first.
Different seam types serve various purposes: French seams prevent fraying, while flat-fell seams add durability.
Master these fundamentals before tackling curved seams or reinforcing corners.
Common Sewing Mistakes
Even experienced sewers make mistakes that can ruin a project or waste hours of work.
Learning to spot and avoid the most common errors—like incorrect thread tension, sloppy fabric cutting, and uneven seams—will save you time, frustration, and fabric, by recognizing and preventing these issues, such as uneven seams.
Incorrect Thread Tension
Thread tension problems can turn your perfect seams into a tangled mess faster than you can say "sewing disaster." These issues plague every beginner, but they’re totally fixable with the right approach.
Here’s your tension troubleshooting checklist:
- Re-thread your sewing machine with the presser foot up to engage tension dials properly
- Test on fabric scraps using contrasting thread colors to spot which thread needs adjusting tension
- Check fabric compatibility – lightweight materials need gentler settings than heavy fabrics
- Start with mid-range settings (4-5) for balanced stitching on most projects
- Replace poor-quality thread that creates drag and disrupts your sewing solutions
When your stitches look like bird’s nests underneath or the bobbin thread shows on top, you’ve got classic tension issues. Addressing this often requires adjusting tension dial settings for ideal results. Don’t panic – these sewing problems have simple sewing solutions that’ll get you back on track.
Improper Fabric Cutting
Beyond thread tension troubles, improper fabric cutting creates lasting problems you’ll notice throughout your project.
Always align your fabric grain with pattern pieces—ignoring grain alignment leads to twisted seams and poor drape.
Use sharp scissors dedicated only to fabric cutting, and never rush the process.
Pattern matching saves fabric waste and guarantees professional results. Take time measuring twice before cutting once.
Inconsistent Seaming
Wobbly seams can make your project look homemade in all the wrong ways.
Your seam allowance should stay consistent throughout—use your sewing machine’s seam guides or mark your fabric with a ruler.
Check your stitch length settings and make certain your presser foot applies even pressure.
The wrong needle type for your fabric can cause uneven fabric feed, creating those frustrating zigzag seams that scream "beginner mistake.
Sewing Safety Precautions
Safety comes first in your sewing journey, and a few smart precautions will keep you stitching happily for years to come.
You’ll protect yourself from cuts, electrical hazards, and eye strain with simple habits that become second nature once you establish them, and this will help you maintain a safe environment for years to come.
Handling Sharp Objects
Sharp objects are your sewing companions, but they demand respect.
Always pass scissors handle-first to others and store them closed. Use a pin cushion or magnetic holder to corral pins—stepping on a loose one isn’t fun!
Keep needles in their original packaging when not in use. Craft knives should have safety guards engaged.
Remember, sharp tools work better than dull ones, requiring less force and reducing slip accidents, and it’s crucial to handle them with care.
Avoiding Electrical Shock
Your sewing machine needs proper electrical safety to prevent dangerous shocks.
Always inspect power cords for fraying or damage before plugging in your machine.
Here’s your electrical safety checklist:
- Use surge protectors to shield your machine from power spikes
- Check outlet safety by ensuring proper grounding practices are followed
- Keep water hazards away from electrical components during sewing machine maintenance
Following these sewing tips and tricks protects both you and your equipment during sewing tutorials.
Preventing Eye Strain
After hours hunched over your machine, tired eyes can turn simple stitches into crooked disasters.
Proper lighting prevents squinting—position a bright lamp directly over your work area.
Take screen breaks every 20 minutes to rest your vision.
Set up an ergonomic setup with your work at eye level.
Try simple eye exercises like focusing far and near.
Schedule regular checkups with your eye doctor.
These sewing tips and tricks keep your vision sharp for years of comfortable stitching.
Sewing Project Ideas
Once you’ve mastered basic sewing skills, it’s time to put them into practice with real projects that’ll build your confidence.
Starting with simple beginner projects and gradually working up to more complex pieces helps you develop your technique without getting overwhelmed by tricky details.
Beginner Projects
Now that you’ve mastered safe practices, let’s tackle your first sewing project! Start with Simple Skirts using elastic waistbands—they’re forgiving and require no zippers.
Try Easy Dresses like pillowcase styles or Quick Accessories such as scrunchies and headbands.
Fabric Pouches make perfect beginner sewing projects, teaching straight seams while creating useful items. Simple sewing projects like fabric koozies make great gifts.
These beginner projects build confidence through easy sewing techniques.
Intermediate Projects
Ready to level up your sewing skills? Intermediate projects bridge the gap between basic stitches and professional-quality creations.
You’ll tackle zipper insertion, pattern adjustment, and garment fitting while mastering fabric manipulation techniques that transform simple materials into polished pieces.
- Pleated skirts that teach dart shaping and specialty fabric handling
- Lined pouches with zippers for closure installation practice
- Fitted blouses requiring precise garment fitting and advanced sewing techniques
- Japanese-style square bags combining modern aesthetics with structured construction
- Gathered tier skirts blending contemporary style with intermediate sewing skills
Advanced Projects
After tackling intermediate skills, you’re ready for advanced sewing projects that challenge your growing expertise.
Tailoring techniques become your playground here—think structured blazers requiring complex seams and precise pattern alterations.
Couture sewing methods like hand-sewn buttonholes and fabric manipulation techniques elevate your craft.
These expert tutorials demand patience, but you’ll create professional-quality garments that showcase true sewing mastery.
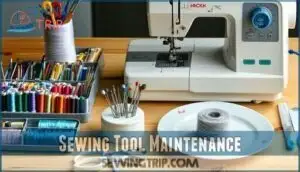
Sewing Tool Maintenance
Your sewing tools work hard for you, so they deserve proper care to stay sharp and reliable.
Well-maintained scissors, needles, and other equipment will make your projects smoother and help your tools last for years.
Cleaning Scissors
After finishing your latest sewing project, don’t just toss your precision scissors back in the sewing kit.
Keep those sewing scissors sharp by using them for fabric only—no paper or pins.
For cleaning methods, wipe blades with a dry cloth, and if sticky, a dab of rubbing alcohol helps.
Always dry scissors completely, and steel wool pin cushions keep them extra smooth!
Sharpening Needles
Dull needles drag through fabric and create uneven stitches, but you can’t actually sharpen sewing needles effectively.
Steel wool serves as an excellent needle sharpening tool – store your needles in it between projects.
You can find steel wool needles for this purpose.
When needle threading becomes difficult or fabric snags increase, replace the needle entirely.
Quality needle material determines longevity, so invest wisely for better sewing results, using steel wool to keep points sharp longer.
Storing Sewing Tools
Proper storage keeps your sewing tools sharp and organized for years. You’ll work faster when everything has its place, plus you’ll avoid losing expensive notions in cluttered drawers.
A great way to enhance organization is by using a 3-tier rolling cart.
- Toolbox Organizers – Use compartmented cases for small sewing notions like buttons, pins, and bobbins
- Pegboard Systems – Mount magnetic strips and thread racks on walls to maximize your sewing room space
- Portable Storage – Keep traveling kits organized with compact containers for sewing tools and materials
Advanced Sewing Techniques
Once you’ve mastered the basics, it’s time to tackle techniques that’ll make your projects look professional.
These advanced skills—like working with elastic, sewing smooth curves, and adding decorative embellishments—will transform your sewing from beginner attempts into polished creations that impress everyone.
Working With Elastic
Working with elastic transforms garments from basic to brilliant, but choosing wrong elastic types can spell disaster.
Master tension settings first—use zigzag stitch at 2.5mm width for knitted elastic, creating perfect elasticwaist waistbands.
Pre-stretch elastic prevents post-wash shrinkage nightmares.
Pin at quarters for even distribution, overlap ends by 6mm, and remember: casing methods work best for braided varieties while direct attachment suits knitted types.
Sewing Curves
Mastering curves transforms flat fabric into three-dimensional garments.
These sewing hacks help you tackle tricky curved seams like a pro, creating professional results every time you sew.
- Clipping Curves: Make small cuts perpendicular to seam allowances on concave curves to prevent puckering
- Grading Seams: Trim seam allowances to different lengths, reducing bulk in curved areas
- Facing Curves: Use bias binding or curved facings to finish necklines and armholes smoothly
- Dart Manipulation: Adjust darts strategically to shape fabric around body curves naturally
Creating Embellishments
Beyond perfecting curves, embellishments transform ordinary projects into stunning masterpieces.
You’ll add personality through fabric appliqués, beadwork basics, and embroidery stitches.
Ribbon accents and lace insertion create elegant touches, while decorative sewing crafts showcase your creativity.
| Embellishment Type | Best For |
|---|---|
| Fabric Appliqués | Quilts, clothing |
| Embroidery | Pillowcases, shirts |
| Ribbon accents | Headbands, bags |
| Beadwork | Evening wear |
| Ruffles | Skirts, curtains |
Frequently Asked Questions (FAQs)
What is the first thing a beginner should sew?
Start with a simple pillowcase – it’s forgiving, uses basic straight seams, and you’ll actually use the result. Scrunchies work too if you’re feeling ambitious!
What is fagoting in sewing?
You’ll laugh, but fagoting isn’t about bundling sticks for your fireplace.
It’s a decorative hand-sewing technique that creates an open, lacy pattern between two fabric pieces using decorative stitches to join them together.
Is sewing a talent or skill?
Sewing’s definitely a skill you can learn and master with practice.
While some people might’ve natural hand-eye coordination or spatial awareness that gives them a head start, anyone can develop excellent sewing abilities through dedication and repetition.
What’s the hardest thing to sew?
Like climbing Everest in stilettos, custom jackets test every skill you’ve got.
You’ll wrestle with interfacing, buttonholes, lapels, and precise fit adjustments that’ll make your head spin faster than your machine.
How do you fix skipped stitches permanently?
Check your needle first – a dull, bent, or wrong-size needle causes most skipped stitches.
Replace it, then adjust thread tension and verify you’re using the correct needle type for your fabric weight.
What causes fabric to pucker while sewing?
Picture trying to iron a wrinkled shirt with too much heat—the fabric bunches and warps instead of smoothing out.
Fabric puckers when you’re pulling it through the machine, using incorrect tension settings, or choosing the wrong needle size for your material type, which can lead to a poor sewing experience and damaged fabric.
How do you sew stretchy fabrics successfully?
Use a ballpoint needle, stretch the fabric gently as you sew, and choose a zigzag or stretch stitch.
Don’t pull the fabric—let the machine’s feed dogs do the work naturally.
When should you use interfacing in projects?
Don’t put all your eggs in one basket when choosing interfacing.
You’ll need it for collars, cuffs, button bands, and waistbands to prevent stretching and add structure.
It’s your fabric’s best friend!
How do you match patterns at seams?
Matching patterns at seams requires careful planning and pinning. Align pattern lines perfectly before cutting, then pin seams with patterns matched exactly. Baste first, then stitch slowly for professional-looking results.
Conclusion
Remember Sarah, a new quilter who jumped straight into making a king-size quilt without testing her machine settings?
Three hours and countless thread breaks later, she wished she’d followed basic preparation steps.
These how to sewing tips transform overwhelming projects into enjoyable experiences.
You’ll discover that mastering fundamentals—from proper fabric preparation to machine maintenance—creates the foundation for every successful project.
With these 70 professional secrets, you’re ready to tackle any sewing challenge with confidence.
- https://stephaniejan.com/my-top-10-tips-for-garment-sewing/
- https://vtechworks.lib.vt.edu/bitstream/handle/10919/101389/LD5655.V855_1966.T656.pdf
- https://www.sailrite.com/Top-10-Best-Sewing-Tips-for-Beginners
- https://quiltlizzyayden.com/blogs/quilt-lizzy-ayden-blog/common-sewing-mistakes-and-how-to-avoid-them
- https://www.mygoldenthimble.com/12-sewing-mistakes-you-dont-know-you-are-making-and-how-to-fix-them/

