This site is supported by our readers. We may earn a commission, at no cost to you, if you purchase through links.
Secure your masterpiece in a hoop (imagine it’s your canvas on an easel) to keep everything snug. Gently lift those pesky jump stitches with tweezers and snip them as close to the fabric as you can—like giving your embroidery a fresh haircut, but without the awkward bangs!
Remember to check for any sneaky threads hiding in plain sight. You’ve got this! Want to master the art of perfecting your embroidery? Just wait till you see what’s next!
Table Of Contents
- Key Takeaways
- What Are Jump Stitches in Embroidery?
- Essential Tools for Trimming Jump Stitches
- Preparing Your Workspace for Jump Stitch Removal
- Step-by-step Guide to Trimming Jump Stitches
- Techniques for Handling Different Thread Types
- Preventing Damage While Trimming Jump Stitches
- Automating Jump Stitch Removal With Software
- Tips for Minimizing Jump Stitches in Designs
- Frequently Asked Questions (FAQs)
- Conclusion
Key Takeaways
- Grab your sharpest pair of embroidery scissors and some trusty tweezers to give those jump stitches a "haircut," snipping them close to the fabric while keeping everything else intact.
- Work in a well-lit area to spot those sneaky jump stitches and set up your tools like a mini operating room – within reach to avoid a wild goose chase when you need them most.
- Consider using embroidery software as your digital assistant to automate the tedious process of jump stitch removal, saving time and effort while still having the option for manual touch-ups to perfect your masterpiece.
- Optimize your stitch sequences and incorporate tie-in and tie-off stitches to minimize jump stitches from the start, making your embroidery projects cleaner and more professional-looking.
What Are Jump Stitches in Embroidery?
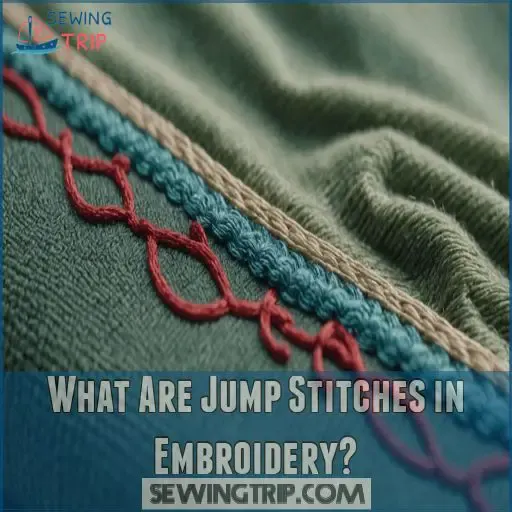
If you’ve ever peeked behind your embroidery hoop and spotted those pesky threads jumping from one design element to another, you’ve encountered jump stitches.
These long, loose threads might seem like a nuisance, but they play a key role in creating your beautiful embroidered designs.
Today, we’ll show you how to tame them like a pro.
Definition and Purpose of Jump Stitches
Ever wondered about those pesky threads between embroidery elements?
They’re called jump stitches, and they’re the unsung heroes of your designs.
These long stitches connect separate parts of your embroidery, acting like bridges between islands of stitches.
While they’re not part of the final look, jump stitches serve a key purpose: they allow your machine to "jump" from one area to another without breaking the thread.
How Jump Stitches Are Formed
You’ve learned what jump stitches are, but how do they actually form?
Picture your embroidery machine as a busy bee, buzzing from one design element to another.
As it finishes stitching one part, it needs to move to the next. Instead of cutting the thread, it "jumps" across the fabric, leaving a loose thread behind.
This jumping action is what creates those pesky jump stitches you’ll need to trim later.
Common Occurrences in Embroidery Designs
Jump stitches are the embroidery world’s party crashers, showing up uninvited in your designs.
They’re especially fond of popping up in these scenarios:
- Between distinct design elements
- In intricate patterns with multiple color changes
- Around text or small details
- In designs with poor digitizing
You’ll often spot these thread-hoppers in complex designs, like that giraffe with its mane of tiny stitches. It’s like playing "Where’s Waldo?" but with threads!
Impact on the Final Embroidered Product
The hidden culprits of your embroidery woes might just be those pesky jump stitches. They’re not just a nuisance; they can seriously impact your final product.
Excessive jumps can lead to puckering, making your design look less than stellar . This can be a significant issue, affecting the overall appearance of your embroidery.
Plus, they’re a real time-sink, forcing you to trim them manually. It’s like playing whack-a-mole with threads! But fear not, we’ll show you how to tame these thread-hopping troublemakers.
Essential Tools for Trimming Jump Stitches
Ready to tackle those pesky jump stitches? You’ll need the right tools in your embroidery arsenal to make quick work of trimming and removing them like a pro.
Small, Sharp Embroidery Scissors
Three essential tools top every embroiderer’s list, but small, sharp scissors are the unsung heroes of jump stitch removal. You’ll want a pair that feels like an extension of your hand, ready to snip those pesky threads with surgical precision.
- Stainless steel blades for durability and rust resistance
- Extra-fine, precise cutting edges for close trimming
- Spring-action wing design for comfortable, ambidextrous use
- Lifetime warranty from reputable brands like ToolTron
Remember, your scissors are your trusty sidekick in the battle against jump stitches!
Curved-tip Scissors for Precision Cutting
Wielding curved-tip scissors, you’ll feel like a precision embroidery ninja.
These nifty tools are your secret weapon for trimming jump stitches with ease.
The curved tips allow you to get up close and personal with your embroidery, snipping those pesky threads without fear of damaging your masterpiece (Source).
They’re especially handy for trimming stabilizers and tackling appliqué projects, making your life a whole lot easier (Source).
Tweezers for Lifting and Holding Threads
Tweezers are your secret weapon for taming those pesky jump stitches. While curved scissors make the cut, tweezers give you the finesse to lift and hold threads with precision. You’ll feel like a surgeon performing delicate embroidery operations!
- Use pointy-tipped tweezers for grabbing fine threads
- Opt for wider, flat-tipped tweezers for thicker embroidery floss
- Try reverse-action tweezers to maintain grip without constant pressure
"If you’re worried about putting your hands near the needle, use tweezers to hold each leaf," advises one expert.
Magnifying Glass for Detailed Work
You’ve got your tweezers ready, but sometimes those pesky jump stitches can still be hard to spot.
That’s where a magnifying glass comes in handy! It’s a game-changer for detailed work, helping you see those tiny threads with crystal-clear precision.
No more squinting or eye strain – you’ll be able to zoom in on your embroidery like a pro. Plus, it’s perfect for hand sewing too.
Lint Roller for Cleaning Trimmed Threads
Ever wondered how to banish those pesky trimmed threads after tackling jump stitches? Enter the humble lint roller – your new best friend in embroidery cleanup! This handy tool effortlessly collects loose threads, leaving your work pristine.
When dealing with particularly stubborn threads, using a seam ripper technique can also be helpful in gently removing stitches. By combining these methods, you can achieve a flawless finish.
- Quickly removes stray threads
- Prevents loose fibers from getting caught in future stitches
- Gentle on delicate fabrics
- Perfect for large areas or intricate designs
- Doubles as a general fabric cleaner
Preparing Your Workspace for Jump Stitch Removal
You’re ready to tackle those pesky jump stitches, but hold up – let’s set the stage for success first.
A well-prepared workspace is your secret weapon for smooth, efficient jump stitch removal, so let’s get you set up like a pro.
Selecting a Well-lit Area
For trimming jump stitches, lighting is your best friend. Set up shop in a spot with plenty of natural light streaming in.
If that’s not an option, invest in a good task lamp to banish those pesky shadows.
You’ll want to avoid glare too – it’s like trying to thread a needle while wearing sunglasses! Aim for that sweet spot of brightness to keep your eyes happy.
Your stitches will be tidy if you maintain the right amount of light, and remember keep your eyes happy.
Organizing Tools Within Easy Reach
After setting up your well-lit workspace, it’s time to get your tools in order.
Think of your sewing area as a mini operating room – you’ll want everything within arm’s reach .
Arrange your scissors, tweezers, and magnifying glass on a small tray or magnetic strip near your work surface.
This setup will save you time and frustration, allowing you to focus on the delicate task of trimming those pesky jump stitches like a pro.
Securing the Embroidered Item
Now that your tools are within arm’s reach, let’s secure your embroidered masterpiece.
Proper hoop tension is key – you want it drum-tight, but not so much that you’re warping the fabric.
For lightweight or sheer materials, consider turning off automatic jump stitch trimming. This gives you more control and helps prevent visible knots on the front.
Remember, a well-secured project is half the battle won.
Proper hoop tension is essential for a successful project.
Cleaning the Embroidery Surface
The cleanliness of your embroidery surface can make or break your jump stitch removal game.
Before you start removing stitches with those scissors, give your workspace a once-over. Here’s your pre-trimming checklist:
- Grab a lint roller to remove pesky fuzz that can get in the way of your seam ripper alternatives.
- Dust off your fabric with a soft brush
- Use a fabric-safe cleaner for any stubborn spots
- Brush off any loose threads or debris
- Give it a final once-over with a clean, dry cloth
Step-by-step Guide to Trimming Jump Stitches
Ready to tackle those pesky jump stitches?
You’re about to become a pro at trimming them with this step-by-step guide that’ll have your embroidery looking sleek and polished in no time.
Identifying Jump Stitches in the Design
Spotting jump stitches can feel like a treasure hunt in your embroidery design. You’ll need keen eyes to identify these pesky thread connections.
Let’s break down the key factors that’ll help you become a jump stitch detective:
| Factor | Easy to Spot | Hard to Spot |
|---|---|---|
| Stitch Density | Low | High |
| Design Complexity | Simple | Intricate |
| Thread Color | Contrasting | Matching |
Remember, jump stitches are those long threads that "jump" between separate design elements. They’re not part of the final design and lay on top of the fabric.
Lifting the Thread With Tweezers
Grab your trusty tweezers – ladies’ eyebrow tweezers work like a charm (Source).
Gently pinch the jump stitch between the tips, lifting it away from the fabric. Keep a steady hand and maintain just enough tension to raise the thread without pulling on surrounding stitches.
For those pesky long jumps, you might need to lift from multiple points.
Patience is key – you’re on your way to embroidery perfection!
Cutting Close to the Fabric Surface
Now comes the important moment: cutting those pesky jump stitches.
With your trusty scissors in hand, position the blades as close to the fabric surface as possible without nicking it.
Gently squeeze the scissors, letting their sharp edges do the work.
Remember, you’re aiming for that sweet spot where the thread meets the fabric, like performing delicate surgery on your embroidery – precision is key, requiring great sharp edges.
Removing Trimmed Threads
After you’ve snipped those pesky jump stitches, it’s time for a little cleanup.
Grab your trusty lint roller and give your embroidery a once-over to capture any loose threads . For those hard-to-reach spots, tweezers are your best friend.
Don’t forget to flip your work over and tidy up the back too – it’s like giving your embroidery a secret makeover!
Remember, a clean embroidery is a happy embroidery.
Checking for Missed Jump Stitches
You’ve snipped those pesky jump stitches, but the job’s not over yet! It’s time for a thorough once-over to catch any sneaky strays. Here’s how to become a jump stitch detective:
- Find a bright spot and give your work a backside check
- Use a magnifying glass for close inspection of tricky areas
- Gently tug on stitches to reveal any loose threads
Remember, proper thread tension is key to avoiding missed stitches in the future . Happy hunting!
Techniques for Handling Different Thread Types
You’ve mastered the basics of jump stitch trimming, but different thread types can throw a wrench in your embroidery plans.
Let’s explore how to tackle thick threads, manage slippery ones, and conquer those tricky metallic threads – all while keeping your sanity intact.
Trimming Thick Embroidery Threads
Thick embroidery threads can be a bit stubborn when it comes to trimming jump stitches. Don’t fret!
Grab your sharpest scissors and a steady hand. When cutting, hold the thread taut to prevent fraying.
A thread conditioner can be your best friend here, making thick threads more manageable and less likely to unravel.
Patience is key – take your time to make sure you get a clean cut without damaging your beautiful work.
Managing Delicate or Slippery Threads
Managing delicate or slippery threads can be as tricky as trying to tame a greased pig. But don’t worry, you’ve got this.
For those finicky fabrics, try stiffening them with a gelatin solution . This nifty trick keeps your fabric from slipping off-grain without turning it into a board.
Thread tension is key. Adjust your machine settings and use a teflon foot to prevent dragging.
With practice, you’ll be handling those slippery customers like a pro.
Dealing With Metallic or Specialty Threads
Metallic threads can be as slippery as a greased pig at a county fair!
To tame these shiny troublemakers, switch to a 90/14 Topstitch or Metallic needle.
This’ll help prevent fraying and keep your stitches looking sharp.
When trimming jump stitches, use a light touch and sharp scissors to avoid snagging.
Take your time and you’ll end up with a dazzling, professional-looking embroidery piece.
Adjusting Technique for Different Fabric Types
Fabrics come in all shapes and sizes, just like your favorite wardrobe!
When trimming jump stitches, you’ll need to adjust your technique based on the fabric type.
- Light and sheer fabrics: Use extra caution to avoid visible knots
- Stretchy fabrics: Trim with fabric relaxed to prevent puckering
- Dense weaves: Apply gentle pressure to separate threads
- Delicate materials: Consider leaving tiny jumps untrimmed
Remember, practice makes perfect! Don’t be afraid to experiment on scrap fabric first.
Preventing Damage While Trimming Jump Stitches
You’ve mastered the basics of jump stitch trimming, but now it’s time to level up your skills and prevent any accidental damage.
In this section, we’ll reveal expert techniques to keep your fabric intact, protect surrounding stitches, and maintain perfect tension.
Even when working with delicate materials.
Avoiding Accidental Cuts to the Fabric
If you’re trimming jump stitches, you’ve got to keep your wits about you to avoid accidentally nicking the fabric.
Think of it like performing surgery on your embroidery – precision is key!
Maintain proper fabric tension in your embroidery hoop and use scissors with sharp, fine tips.
Keep an eye on thread thickness and stitch length, adjusting your technique accordingly. Slow and steady wins the race in this delicate operation, requiring precision.
Protecting Surrounding Stitches
Protecting surrounding stitches is like walking on eggshells in your embroidery project. You’ve got to be as careful as a cat in a china shop!
- Use specialized tools like the Sidehopper Jump Stitch Scissors
- Pinch and snip with precision, avoiding nearby threads
- Employ a magnifying glass for intricate work
Remember, your goal is to trim without disrupting the masterpiece you’ve created. It’s all about finesse and a steady hand!
Maintaining Tension in the Embroidery
With a steady hand, you’ll keep your embroidery taut as a drum while trimming those pesky jump stitches. Remember, maintaining proper hoop tension is key to preventing fabric stretch and ensuring thread consistency.
Keep an eye on stitch density and use a sharp needle to avoid snagging. Think of it like walking a tightrope – balance is everything.
Your goal? Smooth, professional-looking embroidery that’ll make your crafting buddies green with envy.
Handling Delicate or Sheer Fabrics
Delicate fabrics need extra TLC when trimming jump stitches.
You’re walking a tightrope between perfection and disaster!
For sheer or lightweight materials, steady your hand and take a deep breath.
Use the smallest scissors you can find and work slowly.
A magnifying glass is your new best friend here.
Remember, it’s better to leave a tiny bit than risk a snag.
If you’re feeling nervous, practice on scrap fabric first to avoid a snag.
Automating Jump Stitch Removal With Software
You’ve trimmed countless jump stitches by hand, but what if there was an easier way?
Let’s explore how embroidery software can automate the tedious task of jump stitch removal, saving you time and frustration while ensuring a polished finish for your projects.
Choosing Appropriate Embroidery Software
Embroidery software can be your secret weapon in the battle against pesky jump stitches.
When choosing the right software for your needs, consider these four key factors:
- User-friendly interface
- Compatibility with your machine
- Robust jump stitch removal features
- Positive user reviews
Don’t let your budget dictate your choice entirely – sometimes investing a bit more can save you hours of frustration down the line. Remember, the best software is the one you’ll actually use!
Setting Jump Stitch Removal Parameters
Now that you’ve chosen your software, let’s set those jump stitch parameters! It’s like teaching your digital assistant to be your personal thread trimmer. You’ll want to think about factors like stitch density, trim length, and thread types.
| Parameter | Low Setting | Medium Setting | High Setting | Best For |
|---|---|---|---|---|
| Trim Length | 0.3mm | 0.5mm | 0.8mm | Delicate/Thick Threads |
| Stitch Density | 2 st/mm | 3 st/mm | 4 st/mm | Simple/Complex Designs |
| Thread Type | Thin | Medium | Thick | Various Fabrics |
Remember, these settings are like seasoning – adjust to taste!
Previewing and Adjusting Automated Results
The proof is in the pudding when it comes to automated jump stitch removal. After setting up your software, it’s time to see the results in action.
- Run a test stitch-out on scrap fabric
- Examine the design closely for any missed jumps
- Adjust your settings if needed
Remember, even the best software isn’t perfect. You might need to tweak things a bit to get that silky-smooth finish you’re after. It’s like fine-tuning a guitar – a little patience goes a long way!
Combining Software and Manual Trimming Techniques
Scissors in hand, you’re ready to tackle those pesky jump stitches. But wait! Before you snip away, consider combining software automation with your manual skills for the best results.
| Software Advantages | Manual Benefits | Combined Workflow |
|---|---|---|
| Saves time | Precision control | Pre-trim with software |
| Handles bulk work | Adapts to fabrics | Manually touch up |
| Consistent results | Artistic touch | Review automated cuts |
| Auto tie-offs | Handles exceptions | Trim missed jumps |
| Reduces fatigue | Cost-effective | Optimize for efficiency |
By blending tech with your personal touch, you’ll achieve embroidery mastery in no time!
Tips for Minimizing Jump Stitches in Designs
You’ve mastered trimming jump stitches, but what if you could minimize them from the start?
Let’s explore some clever tricks to reduce jump stitches in your embroidery designs, making your life easier and your finished projects even more polished.
Optimizing Stitch Sequences
You’ve got stitch sequence optimization for reducing jumps down to an art.
Imagine this: 1. Group objects of the same color together.
- Start with less complex areas, moving to elaborate ones.
Utilize software tools for thread efficiency in your design layout. Strategically plan stitch paths for minimized jumps.
It’s like choreographing a dance—smooth and efficient.
Incorporating Tie-in and Tie-off Stitches
Incorporate tie-in and tie-off stitches to minimize jump stitches.
Start and end your threads securely by tying small knots or weaving them under existing stitches on the back.
This prevents loose ends from showing through to the front and keeps your embroidery looking neat and professional. It’s a simple trick that makes a big difference!
Adjusting Design Elements to Reduce Jumps
Ever wonder how adjusting design elements can transform your embroidery?
Shrink large areas and decrease stitch density to cut down on jump stitches. Adjust letter spacing for smoother changes or minimize color changes to keep thread type consistent.
Imagine the freedom of a cleaner design, like tidying up your digital closet and finding unexpected space!
Using Software Features for Jump Stitch Reduction
Embroidery software is a treasure chest for reducing jump stitches during design optimization.
By rearranging stitch sequences cleverly, you can minimize those pesky jumps and save trimming time.
Imagine letting software do the heavy lifting, enabling more creative freedom in your projects.
Cut down on chaos and embrace streamlined stitching with these powerful software features.
Frequently Asked Questions (FAQs)
Should I trim jump stitches?
Trimming jump stitches in knitting isn’t typically necessary.
In embroidery, they can be snipped for a cleaner look. Just be careful not to damage your project—think of it as giving a haircut!
How to remove jump stitches?
Grab a pair of sharp, curved-tip scissors or embroidery nippers to snip jump stitches close to the fabric.
Consider using a Snag Nab-It tool for pulling stubborn threads to the back, creating a polished look.
How do you trim a jump stitch?
Don’t sweat it, friend – trimming those pesky jump stitches is a breeze!
Just grab your trusty embroidery snips and carefully snip ’em close to the fabric.
No more loose threads messing up your masterpiece!
How do you make a jump stitch?
It seems you’re curious about a jump stitch, often mistaken in knitting for a jewelry technique.
In knitting, "jump stitch" isn’t a recognized term.
Maybe you meant "stitch marker" aids ? They simplify pattern tracking.
Should you cut jump stitches?
You shouldn’t cut jump stitches in knitting; instead, unpick to the point below the mistake and rework from there for a seamless fix.
This makes your project look neat and professional.
How do you fix jumping stitches?
Tackling troublesome jump stitches takes tenacity and a trusty crochet hook.
Slip, slide, and stitch your way back up to precision.
Undo the oops, liberate those loops, and soon you’ll be knitting nirvana.
How to get rid of jump stitches in embroidery?
To eliminate jump stitches, grab tiny nippers or curved scissors.
Snip them close for a clean finish.
Consider pulling them to the project’s back with a Snag Nab-It tool, making your embroidery look polished.
What does jump stitch trim mean?
Imagine jump stitch trim as a magic trick for embroidery—your machine performs sleight of hand, snipping excess threads between design elements automatically.
This feature saves you time and hassle, ensuring cleaner, polished designs .
How can jump stitches affect embroidery stability?
Jump stitches can mess with embroidery stability by causing thread tension issues, fabric distortion, or misalignment.
Clipping them helps keep designs neat and reduces the risk of puckering or shifting during embroidery.
Snip wisely!
What digitizing techniques reduce jump stitches?
Stitch order is key – group objects by color to minimize thread changes.
Utilize run stitches to connect distant areas, rather than jump stitches that require tedious trimming.
Plan your digitizing carefully for a clean, professional finish.
When should I disable automatic jump stitch trimming?
Turn off automatic jump stitch trimming for lightweight or sheer fabrics to avoid visible knots on the front.
This gives you a cleaner finish by manually tying knots, offering both finesse and control over your embroidery projects.
Which fabrics are most affected by jump stitches?
It’s no surprise that delicate fabrics like silk, chiffon, and organza get more affected by jump stitches.
Their fine threads can easily catch, causing unsightly loops, so handle with care and attention to detail to manage these sneaky nuisances.
How precise must trimming tools be for effectiveness?
Your trimming tools need sharp precision to snip jump stitches cleanly.
They should be tools like micro tips that get right in those tiny spaces without leaving stray threads.
The right cut makes the difference between neat and tangled.
Conclusion
Imagine every jump stitch as a hidden thread in the intricate tapestry of your embroidery journey.
With these 8 expert tips, you’ll master every step of trimming jump stitches and removing them easily, ensuring your designs are flawless.
Embrace the dance of scissors and thread, and allow your artistic flair to shine.
Remember, each trimmed stitch brings you closer to perfection, blending precision with creativity.
Now, venture forth and craft with confidence, free from pesky jump stitches!

