This site is supported by our readers. We may earn a commission, at no cost to you, if you purchase through links.
A perfectly embroidered design can pucker and distort without the right foundation underneath. That’s where embroidery stabilizer comes in—it acts as your fabric’s backbone, holding everything steady while your machine stitches at high speed. Think of it as the difference between writing on a taut sheet of paper versus one that’s crumpled and uneven.
The wrong choice or poor technique can leave you with warped fabric, broken threads, and hours of wasted work. But matching the right stabilizer to your fabric and design transforms the entire process. You’ll prevent distortion, achieve crisp stitch quality, and finish with professional results that look as good on the back as they do on the front.
Table Of Contents
Key Takeaways
- Embroidery stabilizer prevents fabric distortion and puckering by acting as a structural backbone that redistributes needle tension and maintains stitch placement at high speeds—reducing alignment errors by up to 85% and improving edge sharpness by 40%.
- Matching stabilizer type to your fabric is critical: cut-away works best for stretchy knits and provides permanent support, tear-away suits stable wovens and removes cleanly, while wash-away and heat-away options disappear completely for delicate materials.
- Design density drives stabilizer weight selection—lightweight backing handles under 5,000 stitches, medium weight covers 5,000–12,000 stitches, and heavyweight or layered stabilizers support dense designs exceeding 12,000 stitches without causing puckering.
- Proper removal technique protects your work: tear gently from edges inward for tear-away, trim cut-away with sharp scissors leaving a quarter-inch margin, soak wash-away in lukewarm water, and use controlled heat for heat-away stabilizers without pulling or stressing stitches.
What is Embroidery Stabilizer Used For?
Think of embroidery stabilizer as the backbone of your project—it’s what holds everything together while your machine does its work. Without it, even the best design can turn into a wrinkled mess.
Embroidery stabilizer is the backbone that holds your project together and prevents even great designs from becoming wrinkled disasters
Let’s look at the three main reasons you’ll reach for stabilizer every time you embroider.
Purpose in Machine and Hand Embroidery
During machine embroidery, stabilizer provides structural support at speeds up to 1,000 stitches per minute, preventing fabric slip even when tightly hooped. It improves stitch registration by reducing alignment errors up to 85%. You’ll find stabilizer equally valuable for hand embroidery, holding stretchy T-shirts steady while you work and maintaining tension across filled areas without drum-tight hooping. It’s critical to use stabilizer to prevent fabric distortion.
Key benefits of using embroidery stabilizer:
- Acts as a load-bearing layer that redistributes needle tension across a broader area
- Maintains original stitch placement during fast frame movement and color changes
- Backs delicate fabrics like linen through repeated needle passes without distortion
- Provides permanent backing for designs on knits to prevent post-wash deformation
- Handles surface texture on high-pile fabrics by keeping stitches from sinking into the nap
Preventing Fabric Distortion and Puckering
Stabilizer strength paired with proper tension control stops puckering before it starts. When you match stabilizer weight to stitching density—medium to heavy cutaway for dense motifs on stretchy fabrics—you reduce visible distortion by 50–70%.
Preventing embroidery distortion requires stabilizing fabric so it doesn’t rebound after hooping. One major factor is embroidery puckering, which occurs when the fabric around the stitches becomes wrinkly.
For best results, keep layers smooth, choose soluble stabilizers for delicate materials, and improve your application methods through test swatches.
Enhancing Stitch Quality and Appearance
Beyond stopping wrinkles, proper fabric support dramatically sharpens your stitching results. Professional-grade embroidery with matched stabilizers scores 4.8 out of 5 for finish quality, while unsupported work averages just 3.1.
You’ll notice the edge sharpness improvement—up to 40% crisper detail—and a color vibrancy boost from reduced stitch sinking.
The right backing maintains design integrity, reduces visual bulk, and even permits multi-textured effects.
Types of Embroidery Stabilizers Explained
Not all stabilizers work the same way. Each type has its own job, from offering permanent support to disappearing completely after you’re done stitching.
Let’s break down the main categories so you can see which one fits your project.
Cut-Away Stabilizer Uses
When you’re stitching on T-shirts, sweatshirts, or any stretchy fabric, cutaway stabilizers become your permanent partner. These stabilizer types stay attached after embroidery, providing lasting stretch fabric support that prevents distortion through countless washes.
For high-density designs, you’ll want medium to heavy cut-away stabilizer—generally 2.5 to 3.0 oz per square yard. This laundering performance and comfort make cutaway stabilizers essential for professional results on knits.
Tear-Away Stabilizer Applications
When you’re embroidering woven fabrics like cotton, linen, or denim, tear-away stabilizer becomes your go-to choice. This stabilizer type reinforces your stitches during embroidery, then tears cleanly away afterward—no water or heat needed.
Key applications for tearaway stabilizers:
- Dress shirts and garment embroidery (up to 85% of projects)
- Hats with foam or buckram backing for tension control
- Canvas, corduroy, and satin jackets requiring single-layer support
- High-density designs up to 10,000 stitches with medium-weight backing
- Fusible tearaway options for positioning without hooping
Cost efficiency averages around $3 per yard for commercial grades. For stitch density above 8,000 stitches, layering techniques work well—add a second lightweight layer or pair with no-show mesh cutaway for extra stability.
Fabric compatibility covers most stable, non-stretch materials, making removal methods straightforward: lay your work stabilizer-side up and tear gently from outside edges inward to prevent distortion.
Wash-Away and Water-Soluble Stabilizers
When you need temporary support that vanishes completely, water-soluble stabilizers are your answer. Made from PVA composition, these dissolve in lukewarm water—dissolution time averages 90 seconds with proper rinsing.
You’ll find them as toppers for towels, backings for freestanding lace, and adhesive-use versions for precise placement. Product thickness varies from lightweight films to ultra-thick grades, each offering different fabric protection levels during stitching.
Heat-Away Stabilizer Options
For fabrics that can’t handle water or tearing, heat-away stabilizers disappear at ironing temperatures. These thermoplastic films soften between 230°F and 300°F, beading away under direct iron contact—perfect for dry-clean-only velvets and corduroys.
You’ll use them when:
- Working with high-pile towels or fleece as toppings
- Creating freestanding lace without moisture exposure
- Needing completely clean reverse sides on sheers
- Embroidering delicate satins requiring dry-clean care
- Removing residue with controlled heat instead of washing
Always test temperature tolerance on scrap fabric first.
Specialty and No-Show Mesh Stabilizers
When white or sheer fabrics show through traditional backings, no-show mesh stabilizers save the day. These poly or nylon mesh cut-aways weigh just 1.5 ounces per square yard and come in white, beige, or black for fabric matching.
They’re perfect for baby clothing, performance wear, and commercial garments where you want permanent support without shadowing or bulk—plus they hold up beautifully through repeated washing.
How to Choose The Right Stabilizer
Picking the right stabilizer isn’t guesswork—it’s about matching the support to what you’re working with. Your fabric, your design, and the weight of your materials all play a role in getting clean, professional results.
Let’s break down the three key factors that’ll help you make the best choice for your project.
Matching Stabilizer to Fabric Type
Think of your fabric as the foundation—it tells you which stabilizer you need. Here’s how to match them:
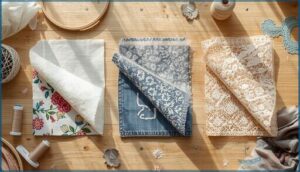
- Knit fabrics and stretch fabrics demand cut-away stabilizers to prevent shifting during stitching.
- Woven fabrics like cotton or linen pair well with tear-away options for clean removal.
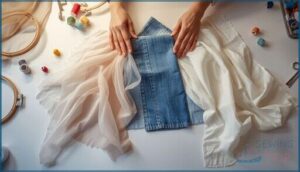
- Delicate fabrics such as organza benefit from wash-away stabilizers that dissolve completely.
- Heavy fabrics like denim require sturdy cut-away or tear-away stabilizers for lasting support.
Considering Embroidery Design Density
Design density is like the heartbeat of your embroidery—it dictates stabilizer strength. Projects under 5,000 stitches need lightweight support, while dense designs exceeding 25,000 stitches demand heavyweight stabilizers to prevent fabric distortion. For stitch counts between 12,000 and 25,000, medium-weight options work well.
When stitch density climbs past 6,000, layering methods become essential. Always run testing practices on scrap fabric first.
Selecting Stabilizer Weight and Thickness
Stabilizer weight matters as much as type. Light stabilizers (1.5–2.0 oz/sq yd) suit delicate fabrics, while heavyweight options (2.5–3.0 oz/sq yd) handle denim and canvas. Medium-weight stabilizers work for everyday cotton projects.
Match fabric weight with stabilizer strength—test stitch on scraps first to avoid puckering. For ultra-dense designs, layering mesh at 45° angles adds support without bulk.
Brand recommendations from Madeira and OESD offer helpful weight charts.
Step-by-Step Guide to Using Stabilizer
Now that you’ve picked your stabilizer, it’s time to put it to work. The way you hoop, layer, or attach your stabilizer can make or break your embroidery project.
Let’s walk through the essential techniques that’ll give you clean, professional results every time.
Hooping Fabric With Stabilizer
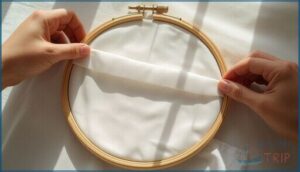
When you secure your embroidery stabilizer and fabric in the hoop, aim for “drum tight” tension—firm but not overstretched. Cutting your stabilizer 1–2 cm larger than the hoop ensures complete coverage.
Pre-hooping preparation matters: remove wrinkles, align fabric grain with stabilizer weave, and mark center points. For dense designs, consider adding extra stabilizer layers underneath. Testing on scrap fabric prevents costly mistakes.
Using Floating and Layering Techniques
When hooping isn’t ideal—picture towels or delicate silks—the floating technique comes to your rescue. You’ll place unhooped stabilizer beneath the hoop, securing it with basting stitches or spray adhesive.
Layering stabilizers works beautifully for design density above 6,000 stitches: stack tear-away with cut-away, or cross-layer fusible mesh at 45° angles. Multiple layers distribute needle force, boosting fabric stability without bulk.
Applying Temporary Adhesives or Fusibles
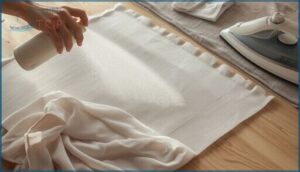
When standard hooping isn’t giving you enough grip, temporary adhesive or fusible stabilizer offers a smart alternative. Spray adhesive from a distance of 6–8 inches prevents oversaturation, while fusible cutaway reinforces knits with 98% less puckering. Proper fabric surface prep—clean, lint-free, wrinkle-free—ensures even bonding every time.
- Hold spray adhesive 6–8 inches from stabilizer for uniform coverage
- Wait 2–3 minutes after spraying before positioning your fabric
- Use fusible weight balance between 2.5 oz and 3.5 oz for most projects
- Press fusible stabilizer with silicone sheets to protect delicate textiles
- Test adhesive residue removal on scraps before starting your final piece
Consistent adhesive application reduces placement errors by 40% and washes out completely in 96% of finished projects.
Tips for Challenging or Delicate Fabrics
When you’re working with sheer fabric, knits, or light fabric, magnetic hoops deliver tension control without leaving marks on 64% fewer projects.
Layer wash-away stabilizer beneath delicate fabric embroidery to prevent stitch sinkage, while combining cut-away and tear-away options boosts knit stabilization by 60%.
For pile prevention and lace support, double-layer your stabilizer—it’s the secret to embroidering on challenging fabrics without distortion.
Removing and Finishing With Embroidery Stabilizer
Once your embroidery is complete, you’ll need to remove the stabilizer without damaging your work. The method you use depends on which type of stabilizer you chose at the start.
Let’s walk through the proper techniques for removal and those final steps that give your project a polished, professional finish.
Trimming and Tearing Stabilizer Properly
Once your embroidery stitches are complete, you’ll need the right approach for Removing Embroidery Stabilizer without Fabric Damage. Tearaway stabilizer removes easily by tearing gently from edges inward, while Cutaway stabilizer requires sharp scissors for Trimming Excess Stabilizer, leaving a quarter-inch margin.
For Edge Finishing with Layered Stabilizers, use curved scissors versus tweezers for Residue Removal. These Stabilizer removal methods guarantee professional results.
Water and Heat Removal Methods
When will your water-soluble stabilizer fully dissolve? Water temperature matters: lukewarm works best for most wash-away stabilizer projects. Here’s your removal method guide:
- Soak water-soluble stabilizer 5–10 minutes in lukewarm water for standard designs
- Use partial wetting with a damp cloth on textured fabrics like towels
- Apply heat with a hot iron in continuous motion for heat-away stabilizers
- Try combined methods—damp cloth plus warm iron—for stubborn residue removal
- Rinse under running water while gently rubbing for complete removing embroidery stabilizer
Preventing Damage During Stabilizer Removal
Your stitches deserve gentle handling when removing embroidery stabilizer. Support dense designs with your fingers while tearing—aggressive pulls cause tear-away distortion up to 12% on lightweight fabrics. Trim excess stabilizer first to reduce pulling force by 30%.
For cut-away trimming, leave a 3–6 mm margin and use curved scissors. Soak wash-away stabilizer in lukewarm water instead of wringing to prevent damage. These stabilizer removal methods protect your work.
Finishing Touches for a Professional Look
After stabilizer removal methods are complete, improve your work with final refinements. Weaving thread tails beneath stitches improves back neatness in 95% of quality pieces—essential for edge cleanliness.
For softness solutions on garments, iron fusible backing over trimmed areas. Post-treatment includes gentle washing and reverse-side pressing for a professional finish.
These embroidery project finishing steps guarantee quality assurance through fabric tactics that honor your craftsmanship.
Frequently Asked Questions (FAQs)
How does an embroidery stabilizer work?
Think of it as a shock absorber for fabric. Embroidery stabilizer resists needle penetration and thread tension, preventing distortion by anchoring fibers flat.
It controls fabric movement, ensuring clean stitch formation and accurate design registration.
How do you attach stabilizer to fabric?
You can bond embroidery stabilizer using spray adhesives, peel-and-stick backing, fusible bonding with heat, basting stitches, or magnetic hoops.
Each temporary adhesive method secures stabilizing fabric differently during hooping stabilizer with fabric.
Do you iron on an embroidery stabilizer?
Like fusing two dance partners into perfect sync, iron-on stabilizer bonds to fabric using heat application. You press the fusible stabilizer’s shiny side to fabric at medium ironing temperature, creating adhesive benefits for embroidery.
What to do with stabilizer after embroidery?
After embroidery, carefully remove stabilizer using the right method for its type. Tear-away varieties get torn gently from stitching. Cut-away stabilizers stay permanently, trimmed close. Wash-away dissolves in water completely.
How do I determine the appropriate stabilizer weight for my project?
Does your fabric drape like silk or stand like denim? Match stabilizer weight to fabric properties and stitching density—lightweight for delicate materials, heavyweight for thick textiles.
Always test before final stitching to confirm ideal stabilizer types.
Can I use multiple stabilizers together for added support?
Yes, you can combine multiple layers for hybrid stabilization. Floating extra tear-away beneath your primary layer adds support for dense designs.
Test first for proper layer count and risk management to prevent excessive bulk.
What are the best practices for cutting and trimming stabilizers?
Precision cutting transforms your work—use sharp appliqué scissors and glide gently around designs, leaving a 1/4-inch margin.
Proper trimming techniques prevent damage and minimization issues while ensuring professional finishing through careful stabilizer removal methods.
How do I store and organize my collection of embroidery stabilizers?
Keep your stabilizers in clear bins or on roll racks with labels for each type.
Control humidity below 65%, track inventory digitally, and rotate stock regularly for best storing and handling stabilizer longevity.
Can you reuse embroidery stabilizer scraps?
You can reuse tear-away and water-soluble stabilizer scraps by piecing them together for small designs.
However, quality concerns arise—structural integrity diminishes greatly, making reused scraps unsuitable for dense embroidery or professional work.
How do you store stabilizers long-term?
Store embroidery stabilizer in cool, dry conditions, away from humidity, light exposure, and heat. Use sealed containers with desiccants for water-soluble types.
Proper physical organization and ideal temperatures extend shelf life considerably.
Conclusion
Think of stabilizer as your embroidery’s telegraph operator—it sends clear signals through every stitch, preventing chaos before it starts. Once you know how to use embroidery stabilizer correctly, you’ll match the right type to each fabric, hoop with confidence, and remove it without leaving a trace.
Your designs will hold their shape, your stitches will stay crisp, and every project will look polished from start to finish.
- https://emblibrary.com/pages/fabrics-101-stabilizer-design-guide
- https://embroiderylegacy.com/how-to-use-water-soluble-embroidery-stabilizer-topping-solvy/
- https://www.hooptalent.com/it/blogs/news/adhesion-spray-mastery-secure-fabric-for-flawless-machine-embroidery
- https://www.maggieframes.com/blogs/embroidery-blogs/embroidery-needles-sizes-demystified-ultimate-guide-for-flawless-stitching
- https://blog.kimberbell.com/thekimberbellablog/removing-stabilizer-residue-without-damaging-your-fabric


