This site is supported by our readers. We may earn a commission, at no cost to you, if you purchase through links.
 Learning how to use tear away stabilizer in sewing transforms your embroidery from amateur to professional.
First, choose the right weight for your fabric—lighter stabilizers for delicate materials, heavier ones for thick fabrics.
Place the stabilizer behind your fabric, then hoop both together or float the fabric over a hooped stabilizer.
After stitching, carefully tear away excess stabilizer by pulling in short sections rather than long strips, always tear away from the stitching line, not across it, to prevent fabric distortion and thread breakage.
The secret lies in knowing which stabilizer works best for different stitch densities and fabric combinations.
Table Of Contents
Key Takeaways
- Choose the right weight for your fabric – You’ll need lighter stabilizers for delicate materials like silk and heavier ones for thick fabrics like denim to prevent puckering and distortion.
- Always tear away from the stitching line, not across it – You should pull in short sections rather than long strips to prevent fabric damage and thread breakage.
- Place stabilizer behind your fabric before hooping – You can either hoop both together or float the fabric over a hooped stabilizer, depending on your project’s needs.
- Don’t worry about small remnants left behind – You don’t need to remove every piece of stabilizer, since leftover bits will soften with washing and won’t affect your embroidery’s quality.
What is Tear Away Stabilizer?
When you’re starting an embroidery project, tear away stabilizer acts as your fabric’s temporary backbone.
This embroidery stabilizer is crafted from synthetic or natural fiber composition, designed to support your material during stitching, then tear cleanly away afterward.
Think of it as training wheels for your fabric – providing essential support when your material can’t handle dense stitch patterns alone.
Different stabilizer grades offer varying strength levels, from lightweight options for delicate designs to heavyweight versions for stitch-heavy projects.
Common uses include cotton t-shirts, towels, canvas bags, and other non-stretch woven fabrics.
The sewing stabilizer types range from basic tear-away to fusible versions that iron directly onto your material.
Most fabric stabilizers today feature acid-free composition with minimal environmental impact.
Quality brands like Sulky and Pellon offer reliable options that won’t leave residue or cause skin irritation.
The beauty of tear away stabilizer lies in its simplicity – it’s the most affordable stabilizer for sewing, making it perfect for beginners learning proper technique.
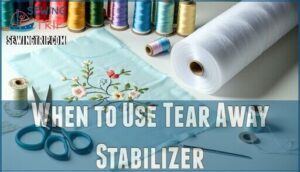
When to Use Tear Away Stabilizer
Now that you understand what tear away stabilizer is, knowing when to reach for this embroidery stabilizer becomes your next step toward professional results.
You’ll want this fabric stabilizer when working with specific fabric types and project requirements.
Here’s when tear away stabilizer shines:
- Woven fabrics like cotton, linen, and canvas that won’t stretch during stitching
- Medium to heavy fabrics including denim, twill, and duck cloth that need temporary support
- Low to medium stitch count designs under 15,000 stitches where permanent backing isn’t necessary
- Garments requiring easy care since you’ll remove the stabilizer completely after embroidery
- Projects with slippery materials like silk or satin that slide around during hooping
- Dense design areas where you need extra support but don’t want permanent stiffness
- Home décor items like pillows and table runners where comfort matters more than structure
Think of tear away stabilizer as your temporary helper—it supports your fabric during the embroidery process, then disappears when you’re done.
This makes it perfect for project types where you want the finished piece to feel natural and flexible, especially for garment care considerations.
Choosing The Right Tear Away Stabilizer
Selecting the right tear away stabilizer can make or break your embroidery project, so you’ll want to match the stabilizer weight to your fabric type and stitch count.
You’ll also need to decide between hooping your stabilizer with the fabric or floating it underneath, then plan your removal strategy to avoid those pesky remnants that can irritate sensitive skin.
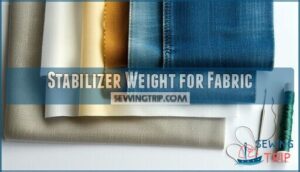
Stabilizer Weight for Fabric
Matching your fabric type with the right stabilizer weight prevents embroidery headaches.
Light weight stabilizer works perfectly for thin cotton and silk, while medium-weight handles denim and canvas.
Heavy fabrics need heavyweight stabilizer to avoid puckering.
Consider stitch density too—designs exceeding 25,000 stitches require extra support.
Weight guidelines aren’t suggestions; they’re your roadmap to professional results. The right choice depends on design density and fabric.
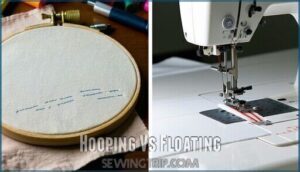
Hooping Vs Floating
Hooping benefits include maximum stability for your tear away stabilizer and fabric, preventing movement during intricate designs.
These are, in fact, distinct embroidery methods, which work best for specific projects, with hooping suitable for precise embroidery work.
Floating benefits work best for bulky items like towels or hats that resist traditional hooping, and it is used to prevent fabric damage on delicate materials.
Consider project suitability and stabilizer adhesion when deciding between these hoop embroidery techniques.
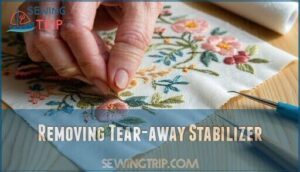
Removing Tear-away Stabilizer
After stitching, removing tear away stabilizer requires a gentle touch to protect your embroidery.
Support stitches with one hand while tearing stabilizer away with the other, working stabilizer-side up on a flat surface. Use tweezers and needles for intricate areas, and try a lint roller for stubborn bits.
Different projects may call for specialized stabilizer options to achieve the best results.
Partial removal is fine—residual itchiness from leftover pieces softens with washing, creating minimal long-term effects with a specialized stabilizer.
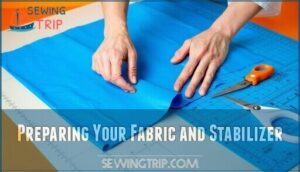
Preparing Your Fabric and Stabilizer
Proper fabric pre-treatment sets the foundation for successful embroidery results.
Start by prewashing your fabric if it’s prone to shrinkage, then press it smooth to eliminate wrinkles.
Cut both your fabric and tear away stabilizer pieces at least two inches larger than your embroidery hoop for easier handling.
When cutting stabilizer, verify the fibers run straight to prevent tearing issues during removal.
For stabilizer placement, position the embroidery stabilizer on the fabric’s wrong side, using fabric stabilizer with adhesive backing if your design requires precise marking placement.
Consider layering techniques for dense designs—multiple lightweight layers often work better than one heavy piece, providing superior stabilizer adhesion without bulk.
Hooping and Aligning Your Fabric
Once your fabric and stabilizer are ready, the hooping process becomes your foundation for embroidery success. Think of it like framing a picture—you want everything perfectly positioned before you start.
Start by selecting the right hoop size for your embroidery area, ensuring your stabilizer extends at least two inches beyond all edges. Place the stabilizer in the bottom hoop first, smoothing out wrinkles with your hands. Position your fabric on top, using alignment tools or grid-marked stabilizers for centering designs accurately.
Perfect hooping is like framing a masterpiece—everything must align before the magic begins.
Adjust fabric tension carefully—it should feel like a drum, firm but not stretched. Too loose creates puckers, while overtightening causes distortion. Test the bounce by gently tapping the center.
- Check that your stabilizer placement covers the entire embroidery area plus margins
- Use gentle, even pressure when tightening to maintain hoop stability
- Keep fabric grain straight to prevent shifting during stitching
- Mark your design center with removable chalk for perfect alignment
- Test tension by lightly tapping—properly hooped fabric sounds crisp
Proper hooping sets you up for professional results every time, ensuring that your embroidery projects turn out with the desired quality, and it is crucial for achieving embroidery success.
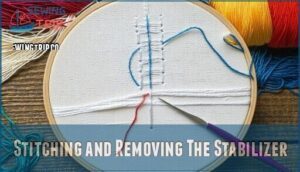
Stitching and Removing The Stabilizer
Success hinges on mastering both the stitching process and tear away stabilizer removal.
Start your embroidery with proper needle considerations, choosing a sharp point for dense designs and ballpoint for knits.
Monitor stitch density throughout, as heavy designs may require layering stabilizer for extra support.
When stitching completes, let the magic happen—removal time.
Use removal tools like tweezers or small scissors to carefully tear away the stabilizer along stitch lines.
Work slowly to avoid fabric damage.
For stubborn bits, removal techniques include gentle brushing or using a lint roller for residue removal.
Understanding fabric weight considerations is essential for selecting the right stabilizer.
Don’t worry if small pieces remain; they’ll soften with washing and won’t affect your beautiful embroidery work.
Frequently Asked Questions (FAQs)
Can you use tear away stabilizer for embroidery?
Yes, you can absolutely use tear-away stabilizer for embroidery.
It’s perfect for non-stretch fabrics like cotton and linen, providing temporary support that tears away cleanly after stitching, leaving your embroidered design crisp and professional.
What is a tear away stabilizer?
Don’t think tear away stabilizers are just for professionals – they’re your embroidery safety net! These temporary backings support fabric during stitching, then tear off cleanly along stitch lines afterward.
What is a tearaway stabilizer?
Tearaway stabilizer is a temporary backing material you place behind fabric during embroidery.
It provides support to prevent puckering and fabric distortion, then tears away easily along stitch lines when you’re finished.
Can you use a tear-away stabilizer on a float?
Floats aren’t suitable for tear-away stabilizers since they’re designed for water use. The stabilizer would dissolve or weaken when wet, compromising your embroidery’s integrity and appearance.
How do you remove tearaway stabilizer?
Gently tear the stabilizer away from your finished embroidery, pulling along the stitch lines. Use tweezers or needles to remove stubborn bits from detailed areas without damaging your work.
How do you use tear away stabilizer?
Place tear away stabilizer behind your fabric before hooping.
Choose weight based on design complexity: lightweight for simple designs, heavyweight for dense stitching.
Remove by gently tearing away excess stabilizer after embroidery completion, using the weight based on the design’s needs, and ensuring to handle the stabilizer with care.
What fabrics should you use tear away stabilizer on?
Surprisingly, you’ll find tear-away stabilizers work best with non-stretch fabrics like cotton, linen, and canvas.
They’re perfect for woven materials that won’t distort when you tear away the stabilizer after embroidering.
Do you have to remove tear away stabilizer?
You don’t have to remove tear-away stabilizer completely, but you should remove most of it. Leaving remnants can cause itchiness and discomfort, especially on garments touching sensitive skin areas.
Can tear away stabilizer damage delicate fabrics?
Ironically, tear-away stabilizer can harm delicate fabrics if you’re too aggressive.
The tearing motion might stretch or distort fragile materials like silk or chiffon.
You’ll want gentler removal techniques or consider fusible options instead.
How many layers of stabilizer should I use?
Use two layers for heavyweight fabrics, heavy stitch counts, or designs exceeding 20,000 stitches. One layer works fine for lightweight fabrics and simpler designs under 8,000 stitches.
Conclusion
Don’t worry about your first embroidery projects looking messy—mastering how to use tear away stabilizer in sewing quickly elevates your work to professional standards.
You’ve learned the fundamentals of selecting proper weights, hooping techniques, and removal methods that prevent fabric damage.
Remember, tearing in short sections away from stitch lines protects your hard work.
With practice, you’ll confidently choose the right stabilizer for any project, creating clean, polished embroidery every time.
- https://hatchembroidery.com/resources/blog/taking-the-headache-out-of-embroidery-stabilizers
- https://omlembroidery.com/cutaway-vs-tearaway-stabilizer-explained/
- https://blog.kimberbell.com/thekimberbellablog/the-complete-guide-to-embroidery-stabilizers
- https://babylock.com/tear-away-firm-stabilizer
- https://art.illinois.edu/about/resources-for-current-students/facilities/digital-labs/tutorials-templates/tutorial-choosing-an-embroidery-stabilizer/

