This site is supported by our readers. We may earn a commission, at no cost to you, if you purchase through links.
It can be tricky to select the most suitable type with so many options available.
This guide will teach you about the different types of interfacing, how to match them to your fabric, and the best techniques for application.
Table Of Contents
- Key Takeaways
- Understanding Different Types of Interfacing
- Matching Interfacing to Fabric Weight
- Woven, Non-Woven, and Knit Interfacing
- Fusible and Sew-in Interfacing Applications
- Interfacing Weaves and Uses
- Choosing the Right Interfacing Weight
- Applying Fusible Interfacing Successfully
- Tips for Working With Sew-in Interfacing
- Intermediate Guide: Interfacing for Various Fabrics
- Frequently Asked Questions (FAQs)
- Conclusion
Key Takeaways
- Interfacing is like a secret weapon, adding structure and shape to your sewing projects.
- There are a few types to choose from, like woven, non-woven, and knit, each with its own superpower.
- Matching the weight of your interfacing to your fabric is key—you don’t want one to overpower the other.
- fusible interfacing is great for a quick stick, but sew-in interfacing gives you more control and is perfect for delicate fabrics.
Understanding Different Types of Interfacing
Interfacing is a versatile tool for any sewing enthusiast, offering structure, shape, and support to your creations. There are several types of interfacing, each with unique characteristics and applications. Let’s explore the different styles to enhance your sewing projects.
Woven interfacing, as the name suggests, is constructed like woven fabric and requires attention to the grainline. It’s ideal for medium to heavyweight fabrics or delicate materials that need some extra body, such as silk.
Non-woven interfacing, on the other hand, lacks a grainline and feels more like paper. This type can be cut in any direction, making it versatile and suitable for crafts, accessories, and home projects.
Knit interfacing is designed with stretch in mind, offering crosswise stretch and minimal lengthwise stretch. It’s perfect for knit fabrics and lightweight woven materials with drape, ensuring your projects move with you.
Fusible interfacing is a convenient option, featuring glue dots that adhere permanently to your fabric with heat and steam. No sewing required!
These are just a few of the key types of interfacing available, each with its own unique uses and benefits.
Matching Interfacing to Fabric Weight
Matching the weight of your interfacing to the weight of your fabric is important for achieving the desired stability and support in your sewing projects. Here are some guidelines to help you make the right choice:
- As a general rule, select interfacing with a similar weight to your fabric. This helps to make sure that the two layers work harmoniously without one overpowering the other.
- When working with lightweight fabrics like rayon or cotton, opt for lightweight, flexible interfacing. This subtle structure won’t add bulk.
- For outerwear, consider medium-weight interfacing for extra body and stability.
- Match the weight of knit fabric to the interfacing. This maintains the stretch and drape of knits while adding support.
Woven, Non-Woven, and Knit Interfacing
When choosing between woven, non-woven, and knit interfacing, think about the grain direction, fabric drape, and the specific needs of your project. Woven interfacing is constructed similarly to woven fabric, requiring attention to the grainline. It’s ideal for medium to heavyweight fabrics or delicate fabrics that need extra body, such as silk. Non-woven interfacing, on the other hand, is made of bonded or felted fibers and lacks a grainline. It feels more like paper and can be cut in any direction, but it’s less durable than woven interfacing, especially after washing. This type is best suited for crafts, bags, accessories, and home projects. Knit interfacing offers crosswise stretch and minimal lengthwise stretch, making it perfect for knit fabrics and lightweight woven fabrics with stretch and drape, like rayon. Remember to consider the direction of the greatest stretch when cutting knit interfacing.
In terms of weight comparison, always match the weight of the interfacing to the weight of your fabric. Select an interfacing with a similar or slightly lighter weight and less drape than your fabric. For lightweight fabrics, opt for lightweight, flexible interfacing, and for outerwear, medium-weight interfacing can provide that extra structure.
As for sewing tips, when working with woven or knit interfacing, pay attention to the grainline when cutting. Trim seam allowances to reduce bulk, and for small pieces like collars and waistbands, it’s best to interface before cutting the fabric.
Fusible and Sew-in Interfacing Applications
Now that you know the basics of interfacing types, let’s look at the pros and cons of fusible and sew-in interfacing applications.
- Fusible interfacing is great for a quick and easy way to add structure, perfect for projects needing a crisp, clean finish. But it can be tricky—one wrong move and you might end up with a sticky mess.
- Sew-in interfacing gives you more control and is ideal for delicate fabrics that can’t take the heat. It’s a bit more work, but it’s a safer option if you’re worried about damaging your fabric.
- Fusible interfacing is your go-to for projects that require a smooth, seamless finish, like collars and cuffs. It’s a quick way to add stability without any extra bulk.
- Sew-in interfacing shines when you need to add structure to curved areas of your garment. It’s more forgiving and can be manipulated to fit the shape you need.
Interfacing Weaves and Uses
Interfacing weaves play a big part in deciding the right type of interfacing for your project. The three main types of weaves are non-woven, woven, and knit.
Non-woven interfacing is the most common type and is suitable for a wide range of uses. It has a paper-like texture and can be cut in any direction since it lacks a grainline. This type of interfacing is ideal for crafts, bags, and accessories.
Woven interfacing, on the other hand, is constructed like a woven fabric and requires attention to the grainline. It’s perfect for medium to heavyweight fabrics or delicate fabrics like sheer fabric that need additional body.
Knit interfacing is designed for stretch fabrics. It offers crosswise stretch and minimal lengthwise stretch, making it ideal for knits and lightweight woven fabrics with drape and stretch.
Additionally, there are two types of interfacing based on their application methods: fusible and sew-in. Fusible interfacing has glue dots on one side that adhere permanently to the fabric with heat and steam. Sew-in interfacing, also known as non-fusible interfacing, is used for fabrics sensitive to heat and requires basting stitches to attach it to the fabric.
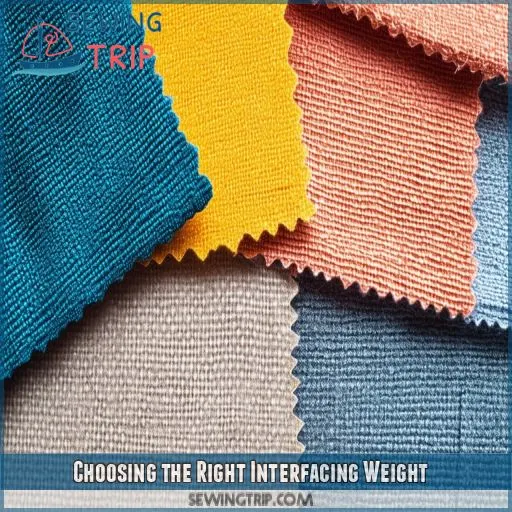
Choosing the Right Interfacing Weight
Choosing the right interfacing weight is important for a seamless finish. You’ll want to match the weight of your interfacing to the weight of your fabric, opting for interfacing that’s similar or slightly lighter, with less drape.
Match Fabric Weights
Choosing the right interfacing weight is important to get the results you want in your fabric sewing projects.
You’ll want to match the weight of the interfacing to the weight of your fabric.
This will help your project keep its shape and structure without feeling too bulky or stiff.
As a general rule of thumb, select an interfacing that’s similar in weight or slightly lighter than your fabric.
This will provide the necessary support without overwhelming the fabric.
For example, if you’re working with lightweight fabrics like rayon or cotton, opt for a lightweight, flexible interfacing.
On the other hand, if you’re creating outerwear, a medium-weight interfacing can provide that extra structure and stability.
Project Considerations
When selecting interfacing, consider your project goals. Do you need interfacing for a garment or a sewing project like a bag? For garments, match the interfacing weight to the fabric. For bags, consider fusible fleece for added structure.
Application Techniques
Choosing the right interfacing weight is key for a seamless finish. Match the interfacing weight to your fabric—select a similar or slightly lighter weight with less drape. For lightweight fabrics, opt for lightweight, flexible interfacing. Medium-weight interfacing adds structure to outerwear.
Applying Fusible Interfacing Successfully
To apply fusible interfacing successfully, you need to identify the adhesive side, which is usually slightly bobbly and shiny.
Cut your pattern pieces, ensuring you match the grain if you’re using woven interfacing.
Place your main fabric wrong side up on the ironing board, then place the interfacing on top, adhesive side down.
Cover with a damp press cloth and press with a hot iron for 15 seconds.
Allow the fabric to cool completely before moving it, ensuring a strong adhesion.
This technique is essential for achieving a professional look in your garment sewing projects by adding structure and shape to your fabric.
Tips for Working With Sew-in Interfacing
Sew-in interfacing is a great option for fabrics that are sensitive to heat or have a crinkly texture. Here are some tips to help you work with this type of interfacing:
- Basting: Sew-in interfacing requires basting stitches to secure it to the fabric. You can use a contrasting thread colour to make it easier to remove the stitches later.
- Stitches: When basting, use longer stitches (3-4 per inch) to make removal easier.
- Seams: Sew close to the seam lines, especially for curved seams, to avoid bulk and create a smooth finish.
- Edges: Trim the seam allowances to reduce bulk, especially in areas with multiple layers or seams.
- Bulk: For quilting or projects with multiple layers, consider using a lighter-weight sew-in interfacing to minimise bulk.
Intermediate Guide: Interfacing for Various Fabrics
Now that you’ve mastered the basics of sew-in interfacing, let’s get into the specifics of choosing and applying interfacing for various fabrics. This knowledge will help you tackle a diverse range of projects with confidence and precision.
When selecting interfacing for a particular fabric, consider the weight, stretch, and grain of both the fabric and the interfacing. Here’s a quick overview:
| Fabric Type | Recommended Interfacing |
|---|---|
| Lightweight Fabrics (e.g., Cotton Batiste) | Featherweight or lightweight interfacing |
| Medium-weight Fabrics | Medium-weight interfacing |
| Heavyweight Fabrics (e.g., Jacket Construction) | Heavyweight interfacing |
For fabrics with stretch, like knits, select a knit interfacing to make sure the garment maintains its flexibility. Pay attention to the grain, especially when working with woven and knit fabrics. Always follow the manufacturer’s instructions and test on a scrap of fabric first to make sure you get the desired outcome.
Frequently Asked Questions (FAQs)
What are the different types of interfacing?
Interfacing is a tool in your arsenal, each with unique properties to suit different fabrics and projects. The main types are woven, non-woven, and knit, with variations like fusible, non-fusible, and stretch.
How do I know which interfacing to use?
When choosing interfacing, consider whether you need non-woven, woven, or knit interfacing, and whether you need sew-in or fusible interfacing. Also, make sure you match the weight of your fabric to the weight of your interfacing.
What is interfacing and its types?
Interfacing: the unsung hero of garments and gadgets.
Interfacing is an additional layer inside garments to add structure and shape. It comes in two types: fusible or sew-in, three weaves: non-woven, woven, and knit, and different weights: light, medium, and heavy.
Is pellon the same as interfacing?
Yes, Pellon is a brand that sells interfacing products. They offer a range of fusible and sew-in interfacings, including lightweight, mediumweight, and heavyweight options.
Whats the difference between fusible and sew-in interfacing?
Fusible interfacing has an adhesive side that sticks to fabric with heat and steam. Sew-in interfacing is held in place by stitches, acting as an extra layer of fabric. Fusible interfacing is easier for beginners.
Do I need to pre-wash interfacing?
It depends. Interfacing doesn’t need to be pre-washed if it’s made of 100% synthetic fibers. However, if it contains natural fibers, it should be pre-shrunk to prevent bubbling or rippling.
How do I match interfacing weight to fabric weight?
Select interfacing with a similar or slightly lighter weight than your fabric. For lightweight fabrics, choose lightweight interfacing. For medium-weight fabrics, use medium-weight interfacing.
Can I use dark interfacing on light fabrics?
Why would you want to ruin a perfectly good light fabric with dark interfacing?" Jokes aside, it’s not recommended to use dark interfacing on light fabrics as it may show through. Stick to white or light-coloured interfacing for your light fabrics.
Whats the easiest interfacing for beginners?
As a beginner, fusible interfacing is the easiest to use. It has an adhesive on one side that bonds with fabric when heated. It’s suitable for most uses, but avoid textured, heat-sensitive, or loosely woven fabrics.
Conclusion
Selecting the right interfacing for your sewing project is essential for a polished finish.
With this guide, you now know the interfacing types and applications, from woven to non-woven, fusible to sew-in, and how to match them to your fabric.
You’re equipped with the knowledge to elevate your sewing projects, ensuring they look and feel their best.

