This site is supported by our readers. We may earn a commission, at no cost to you, if you purchase through links.
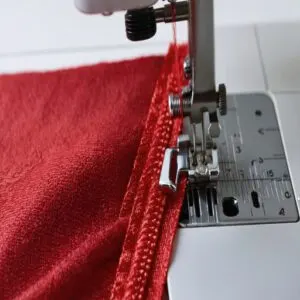 To ace advanced invisible zipper insertion, start by pre-treating your fabric—wash, press, and stabilize with lightweight interfacing along the seam.
Measure your zipper length accurately, adding an extra inch, and mark placement with chalk. Cut carefully, ensuring clean edges.
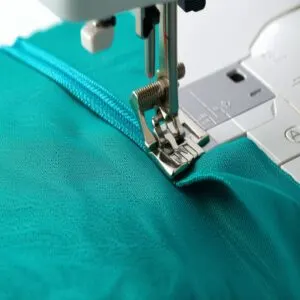
Attach an invisible zipper foot and align the zipper coil face down along the seam. Stitch close to the teeth using small, precise stitches. Secure the ends firmly and inspect for alignment and smooth movement.
Troubleshoot issues like puckering with stabilizer or adjust stitch length for stretch fabrics. Want to master lapped zippers or alternative techniques? There’s more to discover!
Table Of Contents
- Key Takeaways
- Preparing Fabric and Zipper
- Invisible Zipper Foot Basics
- Sewing Invisible Zipper
- Hand Sewing Invisible Zipper
- Finishing Raw Edges
- Troubleshooting Common Issues
- Alternative Sewing Methods
- Sewing on Stretchy Fabric
- Advanced Sewing Techniques
- Perfecting The Finish
- Frequently Asked Questions (FAQs)
- Conclusion
Key Takeaways
- Pre-treat fabric by washing, pressing, and adding lightweight interfacing along the seam to ensure stability and avoid distortion.
- Use an invisible zipper foot to stitch close to the teeth, rolling them outward for precise, seamless results.
- Mark zipper placement with chalk or a fabric marker and align the zipper coil carefully with the seam allowance to guarantee accuracy and a clean finish.
- Troubleshoot common issues like misalignment and puckering by adjusting your stitch length, stabilizing fabric with interfacing, and inspecting alignment before sewing.
Preparing Fabric and Zipper
Start by measuring the zipper length and marking its placement on your fabric to guarantee accuracy.
Then, pre-treat and cut the fabric, preparing it with finished edges and lightweight interfacing along the seam line for a smooth zipper insertion.
Measuring Zipper Length
To get the perfect zipper sizing, measure your garment’s seam and match it to the zipper length.
Add an extra inch to the zipper if cutting is needed.
Precision cutting guarantees clean edges, while leaving enough seam allowance supports smooth invisible zipper insertion.
For detailed guidance, explore available zipper length measuring products.
Accurate length calculation matters—too short or too long complicates the zipper installation process.
Keep it precise!
Marking Zipper Placement
Once you’ve measured the zipper length, it’s time for precise Fabric Marking.
Use chalk or a fabric marker to draw Placement Guides where the zipper will sit.
Verify Zipper Alignment by marking straight lines aligned with the Seam Allowance.
For specific zipper fabrics, explore available mark zipper fabric options.
Accurate Measurement here guarantees a seamless invisible zipper installation, anchoring all your invisible zipper techniques for a flawless concealed zipper sewing finish.
Cutting Fabric
Before cutting, double-check your markings and verify that the fabric grain aligns properly.
Use sharp fabric shears or cutting tools for clean edges, avoiding cutting errors.
Proper fabric preparation is essential for success, as detailed in this guide to cutting fabric.
Leave adequate seam allowances for flawless invisible zipper techniques.
For delicate fabrics, pair fabric preparation with lightweight interfacing to avoid stretching.
Precise cuts are key to seamless sewing and perfect zipper insertion later.
Pre-treating Fabric
Before sewing, fabric preparation stops problems later.
Pre-treating fabric guarantees no surprises like shrinkage or distortion.
Wash and iron based on its fiber blend and weave type.
Match the thread count when choosing stabilizers or interfacing.
Understanding prewash fabric techniques is essential for a successful sewing project.
This includes considering the type of fabric and its potential for shrinkage.
- Prevent fabric shrinkage by prewashing delicate fabrics.
- Test interfacing on scraps for compatibility.
- Iron seams carefully to protect seam allowances and maintain fabric integrity.
Invisible Zipper Foot Basics
Mastering the invisible zipper foot is your first step to a flawless zipper application.
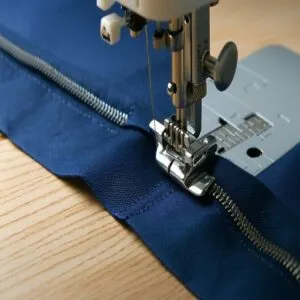
This specialized attachment makes zipper insertion a breeze by guiding the teeth into grooves, ensuring precise stitching.
Before anything, check the sewing machine feet guide to attach the zipper foot properly.
Foot adjustment is vital—ensure the grooves align perfectly with the zipper teeth for smooth sewing.
For perfect zipper alignment, position the zipper coil face down along the seam allowance.
Keep stitch control and tension management front of mind.
Use a straight stitch, aiming for a sleek, nearly invisible finish.
Fabric guidance matters, too—roll the zipper teeth slightly away from the tape as you sew to get as close as possible.
These zipper insertion tips create professional results.
Sewing Invisible Zipper
To sew an invisible zipper, start by aligning the zipper teeth with the fabric’s seam allowance and securing it in place.
Use a zipper foot to stitch close to the teeth, ensuring smooth and precise placement.
Threading The Zipper
Before sewing, verify your zipper is open and placed correctly.
Use your invisible zipper foot to slide the teeth into the zipper guides.
Roll the teeth away and adjust thread tension for smooth sewing.
Maintain steady sewing speed, aligning perfectly with the markings.
This step in the invisible zipper tutorial sets up flawless zipper alignment, minimizing fabric fray.
Aligning Zipper Teeth
Aligning zipper teeth is key to a smooth invisible zipper application.
Follow these steps for perfect placement:
- Match the teeth to the fabric grain for seamless alignment.
- Pin the zipper coil into the seam allowance accurately to avoid skewed placement.
- Roll the teeth outward gently for easier stitching with the invisible zipper foot.
Precision here guarantees a flawless hidden zipper tutorial.
Stitching The Zipper
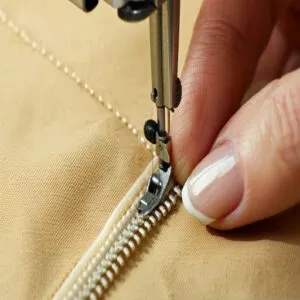
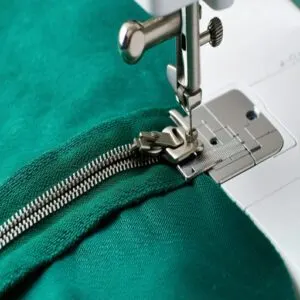
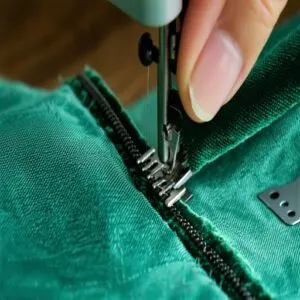
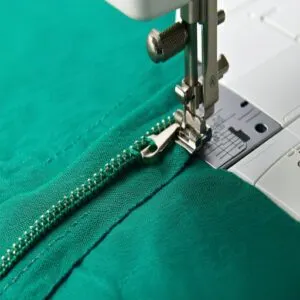
Use an invisible zipper foot to stitch close to the zipper teeth, rolling them out gently as you sew.
Adjust stitch length to 2.5mm for clean, precise lines, and maintain fabric grain alignment and uphold zipper tension control throughout.
Match thread color perfectly, reinforcing seams for durability, and this advanced sewing tutorial guarantees flawless invisible zipper application with professional results.
Securing Zipper Ends
To secure the zipper ends, stitch firmly at the base near the zipper stopper.
Use small, precise stitches for durability.
Add reinforcement by sewing across the zipper anchors, ensuring no gaps.
The invisible zipper foot helps maintain clean lines during this step.
Proper end reinforcement prevents unraveling and improves the zipper installation.
Inspect thoroughly, ensuring smooth movement and seamless results.
Hand Sewing Invisible Zipper
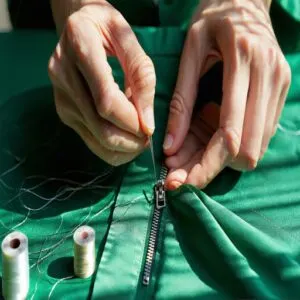
Hand sewing an invisible zipper gives you precise control over placement and stitch accuracy.
Learn how to use basting, diagonal stitches, short prick stitches, and backstitches to create a seamless, professional finish.
Basting Stitches
Before stitching with your invisible zipper foot, baste the zipper in place for fabric stability and stitch placement.
Hand sew long, temporary basting stitches down each side, ensuring proper alignment, and focus on thread tension and needle control to prevent puckering.
This step anchors the zipper, making sewing techniques smoother in this sewing tutorial advanced for perfecting invisible zipper insertion.
Diagonal Stitches
Diagonal stitches offer precise control when hand sewing an invisible zipper.
Work at a slight stitch angle and keep fabric tension even to avoid puckering, use strong thread and match your sewing speed to maintain consistent stitch density.
Pin the zipper securely, then stitch carefully along the seam allowance.
This technique guarantees a clean, sturdy invisible zipper insertion.
Short Prick Stitches
Short prick stitches are perfect for invisible zipper sewing, offering control over stitch tension and density.
With about 1/16-inch prick length, these stitches subtly interact with fabric without showing.
Focus on thread choice to match fabric type and guarantee smooth movement.
Use consistent spacing for seamless results, keeping the zipper discreet while mastering invisible zipper insertion with precision.
Backstitch
Once your short prick stitches secure the zipper, switch to a backstitch for firm, lasting support.
Keep thread tension even and the backstitch length small for a clean, stable result.
Focus on sewing speed to control fabric stability, especially near the edges.
This method guarantees your invisible zipper sewing holds up seamlessly, adding polish to your zipper insertion.
Finishing Raw Edges
Finishing raw edges is essential to prevent fraying and give your garment a polished look. Use a serger, zig-zag stitch, or binding method to secure the fabric edges neatly.
Serger Finish
For a clean, professional finish after invisible zipper insertion, try a serger finish.
It trims fabric while sealing edges with overlock stitching, preventing fraying.
Adjust your serger threads to match the fabric.
This edge finishing technique complements advanced sewing and guarantees long-lasting seams.
Seam sealing with a serger keeps your invisible zipper sewing crisp, durable, and polished.
Zig-zag Finish
To zig-zag finish raw edges after invisible zipper insertion, set the stitch density and thread tension carefully for clean seams.
A fabric stabilizer prevents stretching while sewing, and run the stitch along seam edges for seam reinforcement.
For precise results, align fabric under the needle evenly, this simple edge binding adds durability, complementing couture sewing techniques in your invisible zipper insertion tutorial.
Binding Finish
Binding raw edges gives your project a professional touch.
Try using bias tape for a clean finish.
- Cut bias tape slightly longer than the seam.
- Fold tape over the fabric’s raw edge, enclosing it fully.
- Sew close to the edge using an invisible zipper foot for precision.
- Press folded hems flat for a seamless look.
Perfect edge finishing elevates advanced sewing techniques and provides a clean finish!
Troubleshooting Common Issues
If your zipper isn’t lining up or the fabric looks puckered, it’s time to fine-tune your technique.
Learn how to identify and fix common issues like misalignment, uneven stitching, and distortion for a smoother finish.
Zipper Misalignment
Alignment issues can cause fabric distortion and teeth mismatch, making your invisible zipper look anything but invisible.
To avoid zipper skew, carefully pin the zipper along the seam, guaranteeing the teeth align perfectly, and use the zipper installation guide markers for accuracy.
Don’t rush—check for seam unevenness before stitching, as a precise setup guarantees a smooth zipper installation and flawless finish.
Uneven Stitching
Uneven stitching can ruin seam consistency, especially with invisible zippers.
Double-check tension control on your machine—loose tension causes gaps, while tight tension distorts fabric.
Watch for stitch variation, ensuring uniform length.
Always use high-quality thread for smoother results.
Align the fabric carefully, avoiding distortion.
Practice on scraps before tackling advanced sewing projects to master this sewing hack.
To achieve professional results, understanding proper thread tension is essential for preventing common sewing errors.
Fabric Puckering
Fabric puckering happens when fabric tension is uneven or seam stability is off.
Common puckering causes include skipping fabric relaxation steps or ignoring texture issues.
For smooth results, press the fabric lightly before starting your invisible zipper insertion tutorial.
Use interfacing to stabilize seams, and adjust your stitch length to suit the fabric.
These sewing hacks offer seamless invisible zipper troubleshooting.
Alternative Sewing Methods
You can use a regular zipper foot or a standard zig-zag foot to sew an invisible zipper if you don’t have a specialized foot.
Adjust the stitch width and position the needle carefully to sew close to the zipper teeth for a clean finish.
Regular Zipper Foot
If you don’t have an invisible zipper foot, a regular zipper foot works too.
For precise results, focus on Zipper Alignment and Foot Adjustment.
Position the zipper coil carefully, keeping close for clean Stitch Control.
Maintain steady Tension Management for smooth stitching.
Preparing the zipper properly, as detailed in this invisible zipper insertion tutorial, involves pressing the teeth away from the tape before attaching it to the fabric.
This method uses the zipper edge as your guide—simple and effective for advanced invisible zipper insertion.
Standard Zig-zag Presser Foot
A standard zig-zag presser foot can substitute for an invisible zipper foot in this sewing tutorial.
For precise Zipper Alignment, make certain the sewing machine’s Foot Adjustment allows the needle to stitch near the zipper teeth.
Maintain Stitch Control and Tension Management for a smooth finish.
A sewing machine presser feet guide offers detailed information on various presser feet and their uses.
Use Fabric Guidance to prevent shifting, guaranteeing your invisible zipper blends seamlessly into the seam.
Sewing on Stretchy Fabric
When sewing on stretchy fabric, stabilizing the seam is essential to prevent distortion. Use lightweight interfacing and adjust your stitch length to maintain smooth, professional results.
Adjusting Stitch Length
To master stitch control when sewing stretchy fabric, adjust your sewing machine’s stitch length to 2.5 mm.
Balance thread tension carefully, as too tight can distort fabric stretch.
Pre-washing and drying stretchy fabrics is essential, as outlined in this beginner’s stretch fabric guide.
Maintain steady sewing speed for smooth lines, and use the right needle size to avoid skipped stitches, following these professional sewing tips for a flawless invisible zipper finish in your sewing tutorial results.
Using Interfacing
Stabilizing stretchy fabric for an invisible zipper isn’t tricky if you fuse interfacing along the seam.
It prevents stretching, guaranteeing smooth sewing. Choosing the right interfacing guarantees professional results, and you can learn more about this at interfacing selection best practices.
- Interfacing types: Lightweight for delicate fabrics, medium for sturdier ones.
- Fabric stability: Prevents puckering.
- Seam reinforcement: Adds strength.
- Zipper support: Keeps alignment intact.
- Interfacing techniques: Iron-on is quick; sew-in offers flexibility.
Perfect this step for flawless garment construction!
Advanced Sewing Techniques
Mastering advanced sewing techniques will help you achieve flawless invisible zipper results. Learn how to create a professional finish with lapped zippers and precise cutting methods.
Lapped Zipper
Lapped zippers offer a polished, professional look, perfect for garments needing subtle detail.
Verify proper Zipper Alignment by positioning the Zipper Coils under a single Lapped Edge, keeping precise Seam Allowance.
Maintaining Fabric Tension is key for smooth stitching.
Follow the steps below:
| Step | Tools | Technique | Tips |
|---|---|---|---|
| Mark Placement | Chalk, Ruler | Precision is critical | Avoid over-marking fabric |
| Align Zipper | Pins, Zipper Foot | Match fabric and coils | Check zipper movement |
| Sew Edges | Regular Foot | 2.5mm straight stitch | Make certain of even stitch length |
| Press Seam | Iron | Low heat only | Avoid distorting fabric |
Cutting Invisible Zipper
If you’ve mastered the lapped zipper, tackling zipper length for an invisible zipper is next.
Use sharp cutting tools to trim excess length, ensuring precise seam allowance.
Keep zipper alignment spot-on by positioning teeth within the invisible zipper foot grooves.
Fabric cutting must mirror marked lines, keeping the DIY invisible zipper functional.
Remember, careful adjustments lead to flawless sewing hacks and are essential for a successful project, especially when working with an invisible zipper.
Perfecting The Finish
Press your seams carefully to guarantee they lie flat and smooth, eliminating bulk.
Inspect your work closely for imperfections, like uneven stitching or misaligned teeth, and correct them for a polished appearance.
Pressing Seams
Pressing seams properly sets the stage for a polished finish.
Here’s how:
- Adjust heat control on your iron to suit the fabric.
- Align seam allowances flat before ironing to avoid wrinkles.
- Smooth fabric lightly with consistent pressure for crisp edges.
- Avoid puckering by using proper ironing techniques.
A well-pressed seam keeps your invisible zipper flawless.
Inspecting for Imperfections
Inspect the zipper alignment carefully by running the invisible zipper up and down.
Look for fabric distortion around the seam.
Check the seam quality—uneven stitching or loose threads can ruin the finish.
Test thread tension and stitch consistency along the zipper closure.
A flawless insertion tutorial demands smooth operation and clean lines.
Your invisible zipper foot guarantees precision every time.
Frequently Asked Questions (FAQs)
How do you insert an invisible zipper?
Think of it like opening a hidden door—place the zipper face down, align teeth with the seam, pin securely, and sew with an invisible zipper foot.
Press seams open, ensuring smooth, seamless movement.
What is an invisible zipper?
An invisible zipper is a hidden closure designed to blend seamlessly into a seam.
Its teeth are on the underside, creating a clean, polished look—perfect for garments where you want discretion and elegance.
How to attach an invisible zipper to a sewing machine?
Position your sewing machine’s invisible zipper foot, ensuring the grooves align with the zipper’s teeth.
Open the zipper and place the tape under the foot, rolling teeth outward.
Lower the presser foot to secure.
How do you make a zipper pull invisible?
Over 80% of professional garments feature invisible zippers.
To conceal the pull, align it with the zipper teeth, tuck it under the seam tape, and guarantee your stitching secures both for a flawless finish.
Can you sew an invisible ZIP?
You absolutely can sew an invisible zip.
Start by aligning the zipper teeth with the fabric’s seam allowance, use an invisible zipper foot, and stitch close to the teeth for that seamless, professional finish.
How do you sew an invisible zipper down?
Imagine the zipper as a secret path—place it face down along the seam.
Pin securely, then use an invisible zipper foot to sew close to the teeth.
Align edges evenly for a flawless, hidden finish.
How to sew an invisible zipper on curve?
Curve sewing demands precision.
Mark the curve’s seam allowance, baste the zipper tape carefully along the curve, ensuring smooth alignment.
Use an invisible zipper foot, sew slowly, and check for puckering as you go.
Can invisible zippers be shortened securely?
You can shorten invisible zippers securely by stitching across the desired length a few times, then trimming the excess with scissors.
Make sure to melt the cut edges lightly with a lighter to prevent fraying.
What fabric types are incompatible with invisible zippers?
Not every fabric plays nice with invisible zippers.
They have specific requirements to function smoothly.
Bulky knits, heavy denim, or textured fabrics like sequins fight precision.
Avoid sheer, delicate fabrics too, unless reinforced.
They buckle, pucker, or expose the zipper—never the pro look you want.
How to match zipper colors with patterned fabric?
Match the zipper color to the fabric’s dominant hue or a less busy background color.
For complex patterns, choose a neutral tone from the design, creating balance without clashing or overpowering your fabric’s aesthetic.
Conclusion
Mastering advanced invisible zipper insertion doesn’t have to be intimidating.
With careful preparation, the right tools, and attention to detail, you’ll achieve smooth, professional results every time.
Follow this invisible zipper insertion tutorial advanced guide to perfect fabric prep, precise stitching, and troubleshooting techniques.
Remember, small adjustments like interfacing or stitch length can make a big difference, especially on tricky fabrics.
Practice consistently, inspect your work, and soon, invisible zippers will feel like second nature.
- https://byhandlondon.com/blogs/by-hand-london/11628353-inserting-an-invisible-zipper-the-definitive-tutorial
- https://www.craftsy.com/post/how-to-sew-an-invisible-zipper
- https://oliverands.com/community/blog/2020/11/how-to-insert-an-invisible-zipper.html
- https://blog.seamwork.com/tutorials-tips-tricks/tutorial-installing-an-invisible-zipper/
- https://siemachtsewingblog.com/2023/03/how-to-sew-an-invisible-zipper/

