This site is supported by our readers. We may earn a commission, at no cost to you, if you purchase through links.
Your first quilt deserves better than bunched fabric and wavy seams. Machine quilting transforms three separate layers into a unified masterpiece, but only when you’ve got the right approach.
The difference between a quilt that lies flat and one that puckles? It’s not luck—it’s technique. Most beginners jump straight to stitching without understanding how their machine actually works with the quilt sandwich.
You’ll need specific feet for different designs, a strategy for managing bulk, and the confidence to move beyond basic straight lines. Once you master the fundamentals, you can create texture and dimension that rivals any hand-quilted heirloom.
Table Of Contents
Key Takeaways
- Machine quilting success starts with proper preparation: a well-secured quilt sandwich (backing, batting, and quilt top), the right presser foot for your design, and starting from the center outward to prevent puckering and maintain even alignment.
- Essential tools transform your results: a walking foot feeds layers evenly for straight lines, a free motion quilting foot enables curves and custom designs, quality cotton thread prevents breakage, and curved safety pins make basting faster without shifting fabric.
- Master three core techniques to build your skills: straight line quilting creates clean modern texture with parallel stitches, stitch-in-the-ditch invisibly secures seams, and free motion quilting unlocks creative designs like pebbles, swirls, and meandering patterns.
- Practice beats perfection every time—your first quilt won’t be flawless, but each stitch builds the confidence and muscle memory you need to create professional-looking texture and artistry in future projects.
Essential Tools for Machine Quilting
You don’t need a fancy studio to start machine quilting—just a few key tools to set yourself up for success.
Start with a reliable sewing machine that can handle larger projects, and you’ll have the foundation for years of creative quilting ahead.
The right equipment makes all the difference between fighting your fabric and enjoying the creative process. Let’s walk through what you’ll actually use every time you quilt.
The right equipment transforms quilting from a frustrating fight with fabric into an enjoyable creative process
Sewing Machine With Quilting Foot
Your sewing machine, paired with the right quilting foot, is your ticket to creative freedom! A walking foot keeps layers moving together for straight line quilting, while a free motion quilting foot gives you complete control over curves and custom designs.
- Walking Foot: Feeds top and bottom layers evenly to prevent shifting during machine quilting
- Free Motion Quilting Foot: Lowers feed dogs so you can move fabric freely in any direction
- Quarter Inch Piecing Foot: Maintains consistent seam allowances for precise patchwork blocks
Adjust your machine tension and quilting speed as you experiment with different foot types and thread selection! For even more tips on achieving professional results, explore these specialized presser feet benefits.
Rotary Cutter and Ruler
Your rotary cutter anatomy matters—the circular blade spins to slice through multiple fabric layers cleanly when you maintain sharp blade maintenance and follow cutting safety practices.
Pair it with a clear acrylic ruler for precision that transforms fabric preparation from tedious to seamless! Together, these quilting tools and supplies create the foundation for accurate ruler precision.
Combine them with a self-healing mat selection, and you’ll master quilting techniques with confidence. For more insights on effective rotary cutting, explore these essential rotary cutter safety precautions.
High-Quality Cotton Thread
Thread Fiber choices matter more than you might think! Premium cotton blends—often 100 percent cotton or cotton polyester blends with mercerization for extra shine—resist breakage while keeping stitches smooth.
Look for colorfast dyes to prevent bleeding on light fabrics, and enjoy lint reduction that keeps your sewing machine running cleanly. Quality thread transforms fabric preparation into confident machine quilting!
Quilt Sandwich Basics
A quilt sandwich stacks three layers: backing fabric on the bottom, batting in the middle, and your quilt top on top. Choose backing at least four inches larger than your top to allow for shifting during basting.
Proper layering prevents puckering and maintains even quilt tension throughout your project!
Quilting Gloves and Marking Tools
Glove materials like breathable nylon-spandex blends keep your hands cool while grippy fingertips give you the fabric grip you need for quilting accuracy. Pair them with marking tools—chalk pencils, water-soluble marking pens, or a hera marker for crease guides.
- Machingers-style quilting gloves offer anti-slip control on each finger
- Chalk pencils brush away easily after stitching
- Water-soluble pens disappear with a damp cloth
- Hera markers indent lines without ink residue
- A guide bar attached to your foot creates straight-line precision
Tool maintenance is simple: machine wash gloves to preserve grip, and replace worn marker tips for consistent lines.
Preparing Your Quilt for Machine Quilting
Getting your quilt ready for machine quilting is where the magic really starts to happen!
The prep work makes all the difference between smooth sailing and frustrating puckers.
Let’s walk through the key steps you’ll need to master before you start stitching.
Layering Backing, Batting, and Quilt Top
Building your quilt sandwich is like creating a beautiful layer cake—precision matters! Start by spreading your backing fabric right side down on a flat surface, smoothing out wrinkles.
Secure the layers with measuring tapes for crafters that double as quilting guides, keeping everything perfectly aligned as you pin.
Next, center your batting on top, ensuring it extends beyond all edges. Finally, place your quilt top right side up, carefully aligning all three layers for perfect fabric preparation and layer alignment.
Securing The Quilt Sandwich
Your quilt sandwich needs a rock-solid hold before you start stitching! Choose your basting method: safety pins spaced every 6 to 8 inches work beautifully for sandwich stability, or try basting spray for a quick fabric adhesive option.
These basting techniques keep your quilt top, batting, and backing from shifting during quilting. Smart pin management means placing them parallel to future quilting lines!
Marking Quilting Lines and Patterns
Your marked lines become the roadmap to gorgeous quilting designs! Precise Marking Tools like a Hera Marker or water-soluble pen make Pattern Transfer seamless, while your trusty Ruler ensures Line Visibility across every inch of Fabric Preparation.
Choose your approach for Marking Quilting Lines based on your Quilting Patterns:
- Straight lines: Use painter’s tape as Quilting Guides
- Echo quilting: Mark parallel lines at fixed distances
- Free motion: Transfer stenciled Quilting Designs with pounce powder
- Dark fabrics: Select high-contrast markers for visibility
- Temporary marks: Heat-erasable pens vanish with warmth
Rolling or Bunching The Quilt for Machine Fit
Your machine’s throat space won’t magically expand, so you’ll need smart Quilt Rolling Tips and Bunching Techniques to tame that bulky Quilt Sandwich.
Roll the quilt tightly—keeping depth between 6 and 12 inches—then feed the center section through first while maintaining even Fabric Tension.
This Quilt Layering strategy prevents puckering during Free Motion Quilting and helps you control Machine Feed Rates without wrestling yards of fabric.
Basic Machine Quilting Techniques
Once you’ve prepped your quilt sandwich, it’s time to actually start stitching.
These foundational techniques will give you the control and confidence you need to tackle any project.
Let’s walk through the essential methods every beginner should master first.
Straight Line Quilting
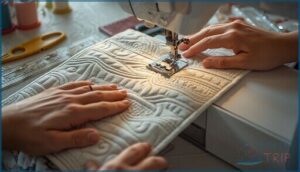
Straight line quilting gives you crisp, modern texture across your quilt. You’ll run parallel stitches, usually spaced 1/4 to 1 inch apart, using grid patterns to keep quilt alignment precise.
A walking foot helps manage fabric tension while your quilting rulers maintain consistent spacing. Set your stitch regulation between 2.0 and 3.0 millimeters, and work from the center outward for best results.
Stitch-in-the-Ditch Method
When you want invisible stitches that anchor your quilt layers, stitch in the ditch is your go-to move.
You’ll guide your walking foot right along those seam lines, tucking thread into the fabric valley where blocks meet. Keep your stitch length around 2.5 millimeters and feed slowly for perfect seam alignment—this ditch quilting technique locks quilt stability without stealing the show.
Starting in The Middle and Working Outwards
Once you’ve mastered stitch in the ditch, you’re ready to tackle the quilt sandwich from the geometric center outward.
Center start tips include marking a small cross at the midpoint, then using your walking foot to create radiating motifs in evenly spaced rings. This approach handles middle tension beautifully, preventing fabric shift during quilt expansion while keeping your edges clean for later edge finishing with free motion quilting or machine quilting techniques.
Locking Stitches and Rotating The Quilt
Now that you’re stitching outward from center, thread management becomes your next frontier. Locking Techniques secure each seam end with three to four quick backstitches—preventing unraveling without bulk.
Quilt Rotation matters just as much: turn your Quilt Sandwich at corners to keep Stitch Security tight and your wrists happy. These Quilting Techniques and Tips transform your Sewing Machine into a precision tool for Machine Quilting Techniques and Free Motion Quilting success!
Creative Quilting Designs and Patterns
Once you’ve mastered the basics, it’s time to explore designs that bring your quilt to life. These patterns range from flowing curves to geometric shapes, each adding unique texture and visual interest to your work.
Let’s look at some popular designs that work beautifully for both beginners and experienced quilters.
Curved Lines and Loopy Meander
Ready to master flowing designs? Curved lines and loopy meander bring beautiful machine quilting to life through free motion quilting techniques. You’ll create continuous loops without retracing stitches, developing quilting rhythm as you go.
FMQ lets you explore curve variations—from gentle sweeps to tighter bends—while stitch control keeps your tension balanced. Varying loop sizes adds texture, and even spacing prevents puckering across your quilt.
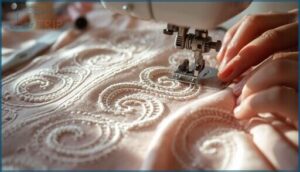
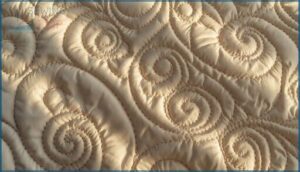
Pebbles, Swirls, and Circles
These classic machine quilting designs reveal rich texture! Pebbles start as tight 1/8 to 3/8-inch circles, building organic allover quilting with varied density.
Swirl flow mimics water currents—expanding from a central curl outward. Circle spacing creates ringed patterns, perfect for free motion quilting or guided stitching.
Motif blending lets you mix pebbles, swirls, and circles for dimensional quilting patterns that catch light beautifully!
Orange Peel and Square Meander
Orange Peel Patterns and Square Meander Designs blend curved stitching with geometric quilting for stunning machine quilting designs. This hybrid creates rich quilting texture that alternates soft curves with crisp angles.
- Orange peels form rounded, interlocking motifs across your quilt
- Square meander flows in continuous right-angle loops
- Alternating patterns prevents repetitive intersections
- Test blocks help you perfect spacing before quilting
Practice transforms these quilting techniques into confident free motion quilting!
Using Walking Foot Vs. Free Motion Quilting
Your choice of foot shapes your entire quilting experience!
Walking foot excels at straight lines and stitch-in-the-ditch because it feeds layers evenly, keeping tension management simple.
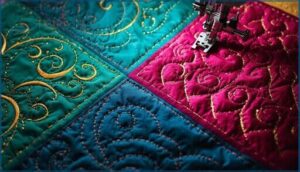
Free motion quilting unlocks swirls and custom curves by letting you control fabric handling and quilting speed yourself. Both quilting techniques deserve practice on your sewing machine—master each for complete stitch control!
Top 7 Products for Machine Quilting Success
Having the right tools makes all the difference when you’re learning machine quilting. You don’t need a huge collection to get started, but investing in a few quality essentials will save you frustration and help your projects turn out beautifully.
Here are seven products that’ll set you up for success and make the whole process more enjoyable.
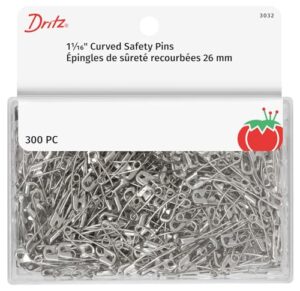
1. Dritz Curved Safety Pins For Quilting
Basting your quilt sandwich doesn’t have to feel like wrestling a bear! Dritz curved safety pins make this essential step so much easier. These nickel-plated beauties glide through your quilt’s three layers without shifting everything around.
The curved design follows your fabric’s natural contours, and at just over 1 inch long, they’re perfect for most projects. You’ll get 300 pins in a reusable container—plenty to secure even larger quilts. They’re rust-resistant too, so they’ll last through countless quilting adventures!
| Best For | Quilters who want an easier way to baste large projects without shifting fabric layers around. |
|---|---|
| Primary Material | Nickel-plated steel |
| Brand | Generic |
| Color | Nickel |
| Primary Use | Quilt basting |
| Quantity/Size | 300 pins |
| Weight | Not specified |
| Additional Features |
|
- Curved design glides through quilt layers smoothly without bunching or shifting
- Pack of 300 pins gives you plenty for large quilts, stored in a handy reusable box
- Nickel-plated steel resists rust and holds up through many projects
- Some users found the 1-inch size too short for thicker quilts
- A few customers received pins with dull or damaged points that needed sharpening
- Can be stiff to open and close, which might be tough if you have weaker hand strength
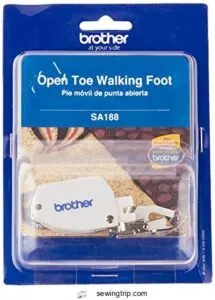
2. Brother Open Toe Walking Foot
Want to keep those quilt layers from shifting while you sew? The Brother Open Toe Walking Foot is your new best friend! This genuine metal foot feeds both fabric layers together in perfect sync, preventing that annoying fabric creep during quilting.
The open toe design lets you see exactly where you’re stitching—super helpful when following quilting lines. It’s built for low-shank Brother machines and tackles thick quilt sandwiches like a champ.
Whether you’re tackling straight lines or gentle curves, this foot delivers consistent, professional results every time!
| Best For | Quilters and sewers working with multiple fabric layers, slippery materials, or thick fabrics like denim who need precise feeding and visibility while stitching. |
|---|---|
| Primary Material | Metal |
| Brand | Brother |
| Color | Silverwhite |
| Primary Use | Machine quilting |
| Quantity/Size | Single foot |
| Weight | 2.89 ounces |
| Additional Features |
|
- Open toe design gives you a clear view of your stitching line, making it easier to follow quilting patterns and decorative work
- Heavy-duty metal construction handles thick quilt sandwiches and multiple fabric layers without breaking a sweat
- Built-in even feeding system prevents fabric shifting and puckering, especially helpful on slippery fabrics or when matching plaids
- Doesn’t include a quilting bar, so you’ll need to buy that separately if you want evenly spaced quilting lines
- May need occasional lubrication to keep it running smoothly—some units arrive a bit dry from the factory
- Watch out for counterfeits, especially at suspiciously low prices—stick with authorized sellers to get the genuine Brother product
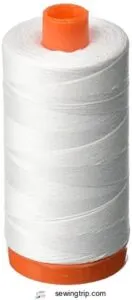
3. Aurifil Cotton Thread
Thread quality can make or break your machine quilting project. That’s where Aurifil Cotton Thread shines! Made from 100% long staple Egyptian cotton, this 50-weight thread glides through your machine without leaving lint behind.
The 1,422-yard spool gives you plenty for large projects, and its strength means fewer frustrating breaks mid-quilt. Plus, the colorfast dyes won’t fade after washing. Yes, it costs more than budget thread, but your beautiful stitches will prove it’s worth every penny!
| Best For | Quilters and embroidery enthusiasts who want premium, low-lint thread that won’t fade and can handle long projects without constant spool changes. |
|---|---|
| Primary Material | 100% Cotton |
| Brand | Aurifil |
| Color | White |
| Primary Use | Quilting & embroidery |
| Quantity/Size | 1422 yards |
| Weight | 1.46 ounces |
| Additional Features |
|
- Made from 100% long staple Egyptian cotton that runs smoothly with minimal lint
- Large 1,422-yard spool means less interruption on big quilting projects
- Colorfast dyes keep your work looking fresh even after multiple washes
- Higher price point compared to budget thread options
- Large spool size may not fit on some traditional sewing machines
- Occasional thread breaks can still happen despite overall strength
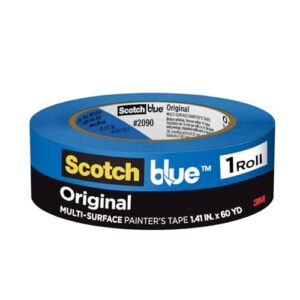
4. Scotchblue Multi Surface Painters Tape
Here’s a trick that’ll change your straight-line quilting game: ScotchBlue Multi-Surface Painters Tape. This crepe paper tape works beautifully as a guide for perfectly spaced lines.
Just press it firmly along your quilting path, stitch alongside it, and peel it away—no sticky residue left behind. The 60-yard roll gives you plenty for marking grids and geometric patterns across your entire quilt top.
| Best For | Quilters who want perfectly straight, evenly spaced stitching lines without the hassle of marking fabric or dealing with sticky residue. |
|---|---|
| Primary Material | Crepe paper |
| Brand | ScotchBlue |
| Color | Blue |
| Primary Use | Surface protection |
| Quantity/Size | 60 yards |
| Weight | Not specified |
| Additional Features |
|
- Stays put for up to 14 days, so you can work on your quilt over multiple sessions without reapplying
- Removes cleanly without leaving gunk on your fabric, which is huge for keeping your quilt looking professional
- The 60-yard roll gives you tons of tape for marking entire quilt tops with grids or geometric designs
- Might not give you razor-sharp lines if you’re going for super precise graphic quilting work
- Can sometimes bleed under the edge if you don’t press it down really well before stitching
- Not designed for heavy-duty use, so it might not hold up if you’re working with thick batting or multiple layers
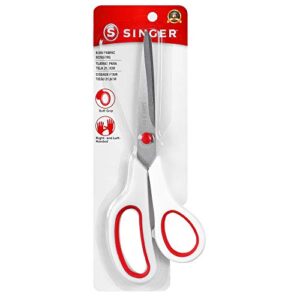
5. Singer Fabric Scissors
Precise cuts make all the difference when you’re trimming blocks or squaring up your quilt top. Singer fabric scissors with 8.5-inch stainless steel blades give you clean, accurate cuts through multiple fabric layers without wobbling.
The rubberized comfort grip reduces hand fatigue during long cutting sessions, and they work equally well for right- or left-handed quilters. These rust-resistant blades hold their edge beautifully with regular use—just remember to keep them dedicated to fabric only!
| Best For | Quilters and sewers who need reliable fabric scissors for trimming blocks, squaring up quilt tops, and cutting through multiple fabric layers with precision. |
|---|---|
| Primary Material | Stainless steel |
| Brand | SINGER |
| Color | Red & White |
| Primary Use | Fabric cutting |
| Quantity/Size | 8.5 inches |
| Weight | 0.8 ounces |
| Additional Features |
|
- Stainless steel blades are rust-resistant and hold their edge well with regular use
- Rubberized comfort grip reduces hand fatigue during extended cutting sessions
- Works for both right- and left-handed users, making them accessible for the whole family
- Performance drops off when cutting near the top of the blades or tackling large projects
- Not ideal for detailed or precise cutting work
- Some users found them less durable than expected from the SINGER brand
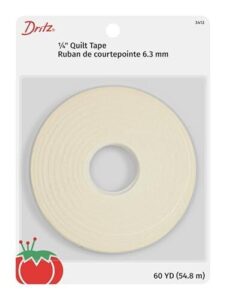
6. Dritz Quilters Tape
Beyond sharp scissors, you need a reliable way to keep your seam allowances straight. Dritz Quilters Tape is your secret weapon for accurate stitching! This narrow 1/4-inch adhesive guide sticks right to your fabric, creating temporary lines that keep your machine stitching perfectly aligned.
It’s a lifesaver when working with small patchwork pieces or maintaining consistent seam allowances. The tape peels away cleanly without leaving residue on cotton fabrics, and at 30 yards per roll, you’ll have plenty for multiple projects!
| Best For | Quilters and sewers who need a simple, visual guide to maintain consistent 1/4-inch seam allowances without marking fabric. |
|---|---|
| Primary Material | Polyethylene |
| Brand | Dritz |
| Color | Multicolor |
| Primary Use | Stitch guiding |
| Quantity/Size | 60 yards |
| Weight | Not specified |
| Additional Features |
|
- Creates a physical guide right on your fabric for perfectly straight, evenly spaced stitching
- Removes cleanly without leaving residue or damaging fabric
- Works great for multiple sewing tasks like quilting, basting, and zipper installation
- Loses adhesive strength after just a few uses, so it’s not reusable long-term
- Shouldn’t be left on fabric for more than 24 hours or sewn through directly
- Can’t be ironed over, which limits placement options during projects
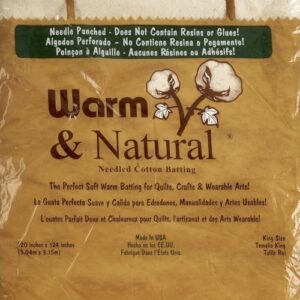
7. Warm And Natural Cotton Batting
Now that your seam allowances are straight, let’s talk about what goes inside your quilt! Warm and Natural Cotton Batting gives your projects that soft, traditional drape without excessive puffiness.
This needle-punched batting won’t shift or tear during machine quilting, and you can space your stitches up to 10 inches apart. Made from natural cotton fibers, it’s breathable and lightweight—perfect for both beginners and experienced quilters.
Just remember it may shrink up to 3% in cold water, so plan accordingly!
| Best For | Quilters looking for a lightweight, natural batting that won’t shift during stitching and offers traditional drape without excessive puffiness. |
|---|---|
| Primary Material | Cotton |
| Brand | Fairfield |
| Color | Ivory |
| Primary Use | Quilt batting |
| Quantity/Size | 120″ x 124″ |
| Weight | 2.95 pounds |
| Additional Features |
|
- Needle-punched construction prevents tearing and shifting, making it reliable for both hand and machine quilting
- Allows flexible quilting spacing up to 10 inches apart, giving you more creative freedom
- Made from breathable natural cotton that provides warmth without feeling heavy or bulky
- Can shrink up to 5% in warm water, so you’ll need to account for that in your measurements
- Requires careful pinning on both fabric sides to prevent puckering or slipping during sewing
- Some users report it’s thinner than they expected, which might not suit projects needing more loft
Frequently Asked Questions (FAQs)
What is the golden rule in quilting?
The golden rule guides your design choices through harmony and proportion, often using ratios near 1 to 618 for borders and blocks, helping your quilt feel naturally balanced instead of random.
What are the 3 different techniques used in quilting?
Three core techniques shape your quilting journey: straight line quilting creates clean parallel grids, free motion lets you stitch flowing curves and textures, and stitch-in-the-ditch quietly secures layers along seams.
What is the best machine setting for quilting?
Set your stitch length between 0 and 0 millimeters for standard quilting. Use mid-range tension around 4 to 5, and adjust by half increments after testing on a scrap sandwich first!
Do you start in the middle when machine quilting?
Starting in the middle helps keep your quilt’s center stable and reduces bulk as you work outward.
Many quilters prefer this method because it prevents shifting and maintains even alignment throughout.
The Quilting Is finished…?
When you’ve stitched your final line, you’re just halfway there.
Next comes binding those edges and securing all three layers so your quilt stays beautiful through years of snuggling and washing.
Do you backstitch when machine quilting?
Backstitching secures your quilting lines so they won’t unravel.
A short reverse stitch at the start and finish locks everything in place—or you can use your machine’s built-in lock stitch feature.
How to keep fabric from puckering when machine quilting?
Ever notice fabric bunching under your needle?
Balance your tension at 0-5 mm, use a walking foot, baste securely, and quilt from the center outward to keep everything smooth and flat!
What tension should I use for machine quilting?
Most machines work best at mid-range tension settings. Start there, then test on a scrap sandwich. Adjust slightly higher if your stitches look loose or loop on the back!
What are the methods of machine quilting?
The right tool in the right hand makes all the difference.
You’ll choose between straight-line quilting for clean modern looks, stitch-in-the-ditch to hide seams, or free-motion quilting for creative freedom and flowing designs.
What is the best stitch for machine quilting?
A straight stitch with your walking foot works best for machine quilting. It creates clean, even lines that hold your layers securely without adding bulk, giving you professional results every time.
Conclusion
Practice makes perfect, and machine quilting techniques are no exception. You’ve got the tools, the prep strategy, and a handful of creative designs to bring your vision to life.
Don’t let fear of mistakes hold you back—every quilter starts somewhere, and your first stitches are just the beginning. Roll that quilt sandwich through your machine with confidence. The texture and artistry you’ll create are worth every moment spent learning.

