This site is supported by our readers. We may earn a commission, at no cost to you, if you purchase through links.

You’re in the right place. This DIY guide will walk you through crafting a men’s T-shirt sewing pattern, so you can create custom, comfy tees with ease.
From choosing the right fabric to assembling the pattern pieces, we’ll cover everything you need to know to master the perfect fit.
Let’s get started on your new go-to T-shirt pattern!
Table Of Contents
Key Takeaways
- Fabric is key: Jersey cotton for the body and rib fabric for the neck binding give a comfy, classic T-shirt.
- Creating a pattern: Trace a well-fitting T-shirt for a custom pattern, focusing on the outline and armhole stitching.
- Sewing machine setup: Use a ballpoint needle, straight stitch, and adjust the tension for smooth seams.
- Online community support: Join Facebook groups, reach out to the WBM team, and share projects for tips and inspiration.
Choosing the Right Fabric
Choosing the right fabric is key to crafting a comfy, long-lasting T-shirt. You’ll want to select a fabric that’s stretchy, breathable, and easy to work with.
Jersey Cotton for the Body
Choosing the right fabric for your DIY men’s T-shirt is super important. Jersey cotton is a fantastic choice for the body of your shirt. Here’s why:
- Comfort: Jersey cotton is soft, breathable, and lightweight, making it super comfy for everyday wear.
- Stretch: This fabric has a natural stretch, which is perfect for a T-shirt. It’ll move with you, ensuring comfort during any activity.
- Sewing Ease: Jersey cotton is beginner-friendly. It’s easy to work with, and its stretch makes it forgiving if your sewing lines aren’t perfectly straight.
- Durability: Cotton is known for its durability, so your T-shirt will last through multiple washes and wears.
- Variety: You’ll find a rainbow of color options and fun prints available in jersey cotton, so you can create a unique look.
Rib Fabric for Neck Binding
Let’s talk about that rib fabric for neck binding.
You’ll want to choose a rib fabric that has good stretch and recovery.
This is important because it needs to stretch over your head but then snap back into place to keep that neckline nice and snug.
Think of it like a hug for your neck—firm but not too tight!
Mid-Weight Jersey Cotton for Comfort
Choosing the right fabric is key when you’re making your own men’s T-shirt. For the ultimate comfort, go for mid-weight jersey cotton. It’s a great all-rounder: stretchy, breathable, and a breeze to sew. This fabric falls nicely and keeps its shape, making it perfect for a classic T-shirt that you’ll want to wear again and again.
Selecting Fabric for Stretch and Fit
Picking the right fabric for your DIY men’s T-shirt is super important.
You’ll want a fabric with some stretch for a comfy fit.
Go for a medium-weight knit or jersey fabric with at least 30% stretch.
This will give your T-shirt that perfect balance of structure and flexibility.
It’s all about finding that sweet spot of stretch and comfort for your project.
Tips for Working With Jersey Fabric
Now that you’ve chosen your jersey fabric, it’s time to get into some tips for working with this stretchy knit. Here are some pointers to keep in mind:
- Use a ballpoint needle: This type of needle is designed for knit fabrics and will help you avoid snags and runs in your fabric.
- Go slow and steady: Sewing with jersey fabric can be a bit tricky due to its stretch. Take your time and go slow, especially when sewing seams.
- Finish seams with a twin needle: A twin needle creates a professional-looking finish and also adds stretch to your seams, which is essential for a comfortable T-shirt.
Creating a Men’s T-Shirt Pattern
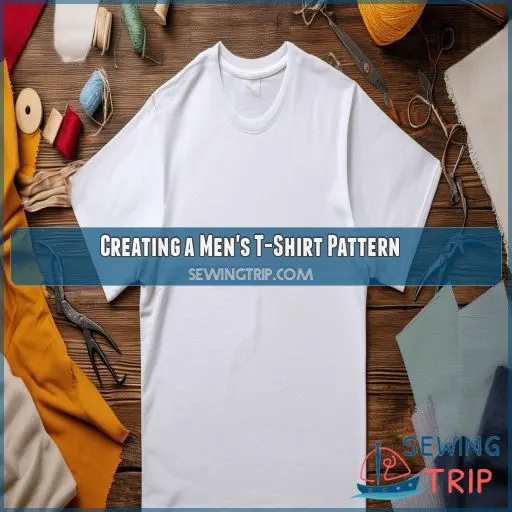
Now that you’ve picked the perfect fabric, it’s time to create your men’s T-shirt pattern. In this section, you’ll learn how to use a well-fitting T-shirt as a guide to create a custom pattern that’s made just for your body.
Using a Well-Fitting T-Shirt as a Guide
Let’s get started with creating your very own men’s T-shirt pattern. This section will show you how to use a well-fitting T-shirt as a guide to crafting your custom pattern.
| Creating the T-Shirt Pattern | Step | Instruction | Visual |
|---|---|---|---|
| 1 | Place your well-fitting T-shirt on a flat surface. Grab a large piece of paper and trace the outline of the T-shirt, excluding the arms. | Imagine drawing an outline of your favourite T-shirt, capturing its unique shape and style. | |
| 2 | Fold the arms of the T-shirt upwards and trace the stitching line, connecting the arm to the body. | Visualise this step as drawing the roadmap for your T-shirt’s journey from a flat pattern to a three-dimensional garment. | |
| 3 | Cut out the traced shape to create the back pattern piece. | Think of this as the foundation for your custom T-shirt, ready to be transformed into a wearable masterpiece. | |
| 4 | Use the back pattern piece as a guide to create the front pattern piece, making any necessary adjustments to the neckline. | Now, you’re tailoring the pattern to your preferences, ensuring your T-shirt will fit like a dream. |
With these simple steps, you’ve created the blueprint for your men’s T-shirt, and you’re well on your way to becoming a sewing superstar!
Tracing the Outline Onto Paper
To create your own men’s T-shirt pattern, grab a well-fitting T-shirt and a large roll of plain paper. Place the T-shirt flat and trace the outline onto the paper, excluding the arms. This simple step is the foundation for crafting a custom T-shirt pattern that fits you perfectly.
Creating the Back Pattern Piece
Now it’s time to create the back pattern piece for your men’s T-shirt. This is where your DIY skills really come into play! You’ll be using the outline you traced onto your paper as a guide.
Fold and Trace the Arm Stitching Line
Take your well-fitting T-shirt and fold the arms up, revealing the stitching line that connects the arm to the body. Carefully trace this line onto your paper. This simple trick gives you an accurate guide for creating the armhole of your T-shirt pattern.
Cut Out the Traced Shape
Using sharp scissors or a craft knife, cut along the traced outline. This will give you the back pattern piece for your T-shirt. It’s starting to take shape!
Adjusting the Neckline for a Perfect Fit
Now it’s time to adjust the neckline for a perfect fit. This is a really important step to make sure your T-shirt has the right shape and style. You don’t want it too tight or too loose, so take your time to get it just right.
Here’s a tip: when adjusting the neckline, consider the overall size and fit of the T-shirt. You don’t want to go too crazy and end up with a neckline that’s too deep or too wide. A good rule of thumb is to aim for a neckline that’s slightly smaller than you think you need. You can always trim a little more fabric if needed, but you can’t add it back once it’s cut!
Cutting Out the T-Shirt Pieces Accurately
Now it’s time to cut out the t-shirt pieces accurately. Here’s a step-by-step guide:
- Find a spacious, flat surface to work on. It’s important that your fabric is smooth and free of any wrinkles or distortions that could affect your cutting accuracy.
- Place the paper pattern pieces on top of your fabric, aligning the stretch of the jersey fabric across the width of the t-shirt. Imagine creating a canvas for your masterpiece.
- Secure the pattern pieces in place. You can use heavy books or sewing weights for this step. It’s like creating a still life for your fabric painting.
- Trace the edges of the pattern pieces with tailor’s chalk. Be gentle and precise—no tugging or pulling on the fabric. Think of it like drawing the outline for your artwork.
Sewing the T-Shirt Together
Now it’s time to assemble your T-shirt. We’ll guide you through the process of setting up your sewing machine and stitching the pieces together, from sewing the shoulder seams to attaching the sleeves and finishing the neckline and hem.
Setting Up the Sewing Machine
Setting up your sewing machine is like prepping your secret weapon for battle. It’s time to get that bad boy ready for some serious stitching action.
Here’s the lowdown:
- Stitch Length: Set your machine to a straight stitch with a length of around 1 centimeter. This is the sweet spot for sewing most knits and will give you a nice, secure seam.
- Needle and Thread: Go for a ballpoint needle, which is designed to glide through knit fabrics without damaging the fibers. As for thread, match the color to your fabric for a sleek finish.
- Bobbin Tension and Foot Pressure: Adjust these settings if needed. You want the stitch tension to be even on both sides of the fabric.
Sewing Shoulder Seams and Side Seams
Now it’s time to start sewing your T-shirt together! With your sewing machine set to a straight stitch, you’ll sew the shoulder seams first. Grab the front and back pieces and stitch ’em up, leaving that neckline open.
Then, move on to the side seams. Remember to keep that seam allowance consistent (around 1 cm) and check your sewing tension and stitch length as you go.
You’re on a roll now!
Attaching Sleeves to Armholes
Now that the shoulder and side seams are sewn, it’s time to attach the sleeves to the armholes. This step is all about precision and alignment to get a smooth and comfortable fit.
Here’s the lowdown:
- Sleeve Placement: Pin the sleeve to the armhole, right sides together. Match the center point of the sleeve cap to the shoulder seam. Smooth the sleeve cap into the armhole, easing it in place without stretching.
- Sewing the Sleeve Seam: Starting at the underarm, sew along the sleeve seam, maintaining consistent tension. Sew in the direction of the shoulder seam, stopping about 1 centimeter before the seam.
- Checking Sleeve Alignment: Before moving on, double-check that the sleeve is evenly distributed around the armhole. Adjust as needed to avoid puckering or bunching.
- Finishing the Seam: Sew the remaining seam, connecting the sleeve to the armhole. Press the seam allowance toward the sleeve, and you’re good to go!
Finishing the Neckline and Hem
Now that your T-shirt is starting to take shape, it’s time to focus on the neckline and hem. These finishing touches are really important to achieving a polished look. So, let’s get into the process of sewing these areas with precision.
First, you’ll want to set your sewing machine to a straight stitch. Sew along the neckline, approximately 1 centimeter from the edge, to secure the fabric. Then, move on to the sleeves and sew the side seams, as well as the bottom seam of the T-shirt.
Tips for Sewing Stretch Fabric
When sewing stretch fabric, it’s important to use a ballpoint needle. This type of needle is designed to sew through knit fabrics without damaging the fabric’s stretch.
You’ll also want to use a straight stitch and sew approximately 1 centimeter from the edges.
Sew the shoulder seams first, then attach the sleeves to the armholes, making sure to align the center point of the sleeve with the shoulder seam.
Working With PDF Sewing Patterns
Sewing patterns have gone digital, and PDFs are the new norm. Working with these digital patterns can be a breeze if you know the ins and outs. Let’s get into the details of downloading, printing, and assembling these patterns to set you up for sewing success.
Downloading and Printing the Pattern
Let’s get down to the basics of downloading and printing your men’s t-shirt pattern.
First, you’ll want to grab those PDF files and save them to your computer. It’s a good idea to create a dedicated folder for your sewing projects, so you can stay organized and easily find your patterns.
Once you’ve unzipped the files, you’re ready to print.
Make sure your printer is set to "Actual Size" or "100% Scale" to make sure the pattern prints correctly.
Assembling the Pattern Pieces
- Tape the pages together using clear tape.
- Make sure the lines and markings align perfectly for accurate cutting and sewing.
- Get excited because you’re one step closer to sewing your own T-shirt!
Using Adobe Reader for Printing Preferences
Now that you’ve assembled the pattern pieces, it’s time to focus on printing preferences. For this, you’ll want to use Adobe Reader—a trusty companion for any sewing enthusiast. Adobe Reader gives you the power to adjust paper size and orientation, ensuring your pattern prints exactly as it should. It’s like having a personal printing assistant!
With Adobe Reader, you can also say goodbye to the frustration of mismatched lines and markings. It’s all about precision and control, so you can print with confidence. Time to embrace the joy of printing preferences!
Ensuring Accuracy With Clear Tape
When taping your pattern together, accuracy is key. Use clear tape to carefully join the pages, ensuring the lines and markings align perfectly. It’s like putting together a puzzle, but with the added challenge of precision. Take your time and double-check your work. A wonky pattern now means a wonky T-shirt later, and no one wants that!
Tips for Printing and Assembling Patterns
Now, let’s talk about printing and assembling your pattern. This is where the fun begins!
First off, you’ll want to download and save the pattern files to your computer. It’s important to unzip the files and have them ready for printing. Remember, you only need to print the specific size(s) you plan to sew.
When it comes to printing, make sure your printer is set to "Actual Size" or "100% Scale." This makes sure the pattern prints at the correct size, and your T-shirt will fit just right. No one wants a wonky-sized tee!
Once you’ve printed the pattern, it’s time to assemble the pieces. Clear tape is your friend here. Carefully tape the pages together, making sure the lines and markings align perfectly. It’s like putting together a puzzle, but with a fashion-forward purpose!
If you’re feeling a bit tech-savvy, use Adobe Reader to adjust paper size and orientation before printing. This way, you can make sure everything is just right and avoid any wonkiness.
Additional Tips and Support
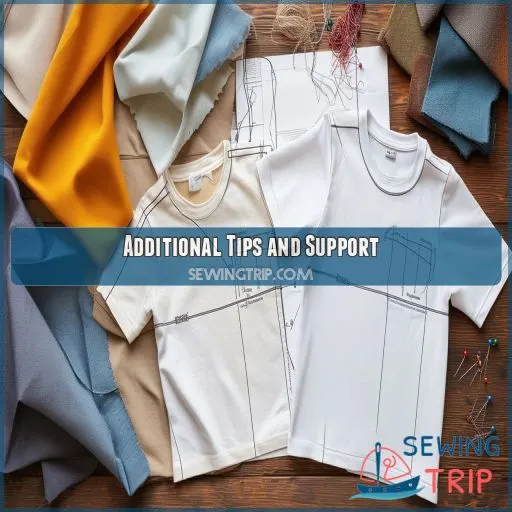
Whether you’re a sewing newbie or a pro, you’ll find these additional tips and tricks for crafting your own men’s T-shirt pattern super helpful. From choosing the right fabric to getting community support, you’ll have everything you need.
Skill Level and Fabric Choice
Whether you’re a sewing newbie or a pro, crafting a men’s T-shirt is doable. Sewing a T-shirt is a great project for beginners, and with the right fabric choices, you can create a comfy and stylish garment.
For the body of the T-shirt, you can opt for jersey fabric, which is stretchy and comfortable. Rib fabric is ideal for the neck binding, giving your T-shirt that classic, snug finish.
Joining the Facebook Community for Support
Sewing projects can be a fun adventure, but sometimes you need a little extra support. That’s where the Facebook community comes in!
Join the Facebook Community for Sewing Support:
- Log in to your Facebook account.
- Search for groups related to sewing projects, like "Sewing for Ambitious Beginners" or "Sewing Peaceful Creations."
- Request to join the group and introduce yourself to the community.
The community is a great place to ask questions, share progress, and get inspired by other members’ creations. It’s like having your very own sewing circle at your fingertips!
Contacting the WBM-Team for Assistance
If you’re ever in a bind, the WBM-team is just a message away. They’re a friendly bunch, ready to lend a hand and get you back on track. So, don’t hesitate to reach out if you need a little extra help or some expert advice. They’re always happy to assist, ensuring your sewing journey is a smooth and enjoyable one.
Sharing Completed Projects on Social Media
Now that you’ve crafted your T-shirt, it’s time to show it off! Share your creation on social media and join the vibrant online sewing community. This is a great way to connect with other sewers, showcase your skills, and gain inspiration for future projects.
Use hashtags like #sewing, #menswear, and #DIY to reach a wider audience and find your tribe. Don’t forget to tag the pattern creator for a chance to be featured and to join online sewing groups to share your experience and inspire others to create their own unique T-shirts.
Fabric Usage Charts and Printing Guides
The Sage Tee pattern has a handy chart to help you figure out how much fabric you need. This helps you buy the right amount for your size, so you don’t waste fabric and save some money.
Here are a few extra tips for printing and fabric usage:
- Printing guides are included with the pattern for both A4 and Letter-sized paper.
- The pattern also includes a large-format A0 PDF file for copy shop printing if you’d prefer.
- When choosing fabric, go for medium-weight knits or jerseys with at least 30% stretch.
- If you’re using a patterned fabric, consider the fabric repeat and buy extra if needed to match the pattern.
- Pre-shrink your fabric before cutting to avoid any surprises later!
Frequently Asked Questions (FAQs)
What type of needle is best for sewing a T-shirt?
A ballpoint needle is the best choice for sewing a T-shirt. The blunt tip slides between the threads, preventing damage to the fabric. You can also use a twin needle for visible stitching.
Can I use a sewing machine to sew a T-shirt?
Yes, you can use a sewing machine to sew a T-shirt. You’ll want to use a straight stitch, and sew about 1 cm from the edges. Sew slowly to make sure it’s neat.
What is the best way to cut jersey fabric for a T-shirt?
When cutting jersey fabric, it’s key not to stretch it. Lay it flat, single or double-layered, and place your pattern. Make sure the fabric doesn’t hang over the table’s edge. Pin your pattern and cut with scissors, or use paper weights and a rotary cutter.
How do I know if my T-shirt pattern is the right size?
Check the size chart for detailed measurements. Go by your largest measurement. If your bust is a size 12 but your waist is a size 14, go with size Use the lines as a guide if your T-shirt has a pattern.
How do I attach the sleeves to the armholes?
Sewing sleeves to armholes can be tricky. The key is to pin the sleeve to the armhole, ensuring the correct sides of the fabric face each other. Sew a straight stitch, then cut excess threads. Stitch side and sleeve seams separately.
Conclusion
You’ve got the skills to craft your own men’s T-shirt sewing pattern.
You’re confident in creating custom, comfy tees with ease.
You know how to choose the right fabrics, create and adjust patterns, and sew it all together.
You’re familiar with working with PDF patterns and know where to go for extra support.
Get ready to rock your DIY tees with style and comfort!


