This site is supported by our readers. We may earn a commission, at no cost to you, if you purchase through links.
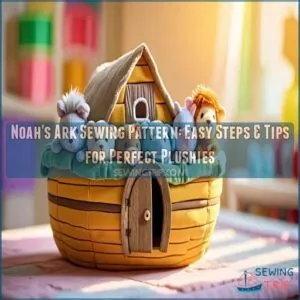
 Want to sew your own Noah’s Ark? It’s easier than you think!
Finding a good Noah’s Ark sewing pattern is the first step.
You’ll need quality 100% cotton fabric, coordinating thread, and stuffing.
Think of it like building a tiny, cuddly world.
Precise cutting and careful stitching are key – remember, those animals need a sturdy ark!
Don’t worry if you’re a beginner; we’ve got simple, step-by-step instructions.
Plus, we’ll share some pro tips to make your animals extra adorable…and maybe even teach them to sing!
Table Of Contents
Key Takeaways
- You’ll need quality 100% cotton fabric, coordinating thread, and fiberfill for a durable and cuddly Noah’s Ark project.
- Precise cutting and careful stitching are essential for a sturdy and adorable finish, especially for beginner sewing enthusiasts.
- The project can be completed in about 1-2 hours, making it a quick and easy task that’s perfect for beginners.
- Personalize your project with monogrammed initials or fabric paint to create a unique and cherished keepsake.
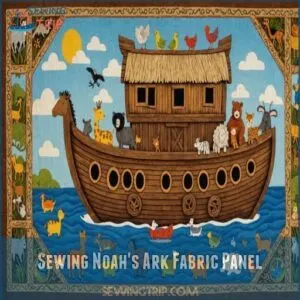
Sewing Noah’s Ark Fabric Panel
Let’s get started on sewing your Noah’s Ark fabric panel, a charming project that’s perfect for beginners.
With just a needle, some thread, and a little patience, you’ll have a delightful creation ready in no time, just try not to get overboard with the fiberfill!
Required Notions for The Project
To sail through your Noah’s Ark sewing project, gather these essentials: a fabric panel, coordinating thread, and fiberfill for that plush feel.
You can easily find a variety of Noah’s Ark panels online at stores like Noah’s Ark panel shop.
Don’t forget a trusty hand sewing needle and rotary cutter. Whether you’re a beginner or an old hand
Tips for Sewing The Ark and Animals
Tackle your Noah’s Ark sewing project with some handy tips!
Grab a rotary cutter for precise cutting and an edge stitch foot for neat pocket edges.
For the fabric panels, make sure you choose quality fabric for durability to guarantee your ark lasts through countless play sessions.
Remember to notch corners to avoid puckering; overstuffing can make your ark look a bit too puffy.
With the right fabric options like silk satin for a luxurious look or cotton for everyday comfort, your beginner sewing journey becomes a delightful adventure with fabric panels, especially when learning how to sew kimono!
Estimated Sewing Time and Difficulty Level
So, you’ve sewn those adorable animals? Great! Now, let’s talk about the time commitment.
This beginner-friendly Noah’s Ark sewing pattern is a breeze! You’re looking at:
- A project duration of roughly 1-2 hours.
- A skill level perfect for easy sewing.
- A difficulty rating that’s super low.
It’s a fun, quick sewing project, even for beginner sewing!
Classes and Workshops for Sewing Noah’s Ark
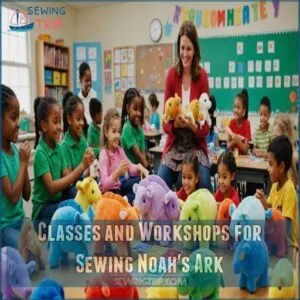
Imagine diving into sewing classes designed just for crafting Noah’s Ark plushies!
It’s like letting your inner artist shine with a needle and thread.
You can also find a variety of Noah’s Ark sewing products online at the Noah’s Ark Sewing Workshop.
By incorporating fun and engaging activities, like letting kids choose their own projects encouraging kids to sew, kids classes make learning fun, turning fabric panels into playful projects.
They’ll love pie
Choosing The Right Fabric and Notions
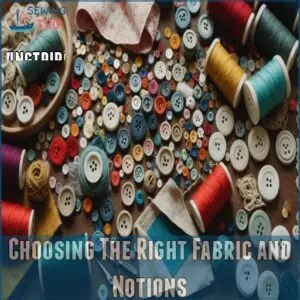
When you’re picking out materials for your Noah’s Ark project, 100% cotton fabric is a must for durability and a soft touch.
Pair it with coordinating thread and the right amount of fiberfill, and you’ll have a plushie that’s both cuddly and sturdy, ready to sail through any adventure!
Importance of 100% Cotton Fabric
When choosing fabric for your Noah’s Ark sewing pattern, no material beats 100% cotton.
You can find a variety of suitable cotton fabric for plushies to work with.
It’s as soft as a bunny’s ear, incredibly durable, and easy to care for.
Perfect for beginners, cotton breathes well, so your plushies stay fresh.
Selecting Coordinating Thread and Fiberfill
Naturally, picking 100% cotton fabric sets the stage, but thread color choices and fiberfill density make it sing.
Choose threads that match your fabric for a polished look.
As for fiberfill, go for the right density—too much can plump up like a marshmallow.
Use a sewing machine and finish with a ladder stitch for perfect plushies.
Step-by-Step Sewing Instructions
You’ve got your cotton fabric and notions ready, so let’s jump into the sewing instructions. This is where the real fun begins, creating that huggable toy from your Noah’s Ark sewing pattern.
For smooth results, prewash and iron your fabric before cutting, just like when you sew a dress from scratch.
Grab your scissors, and follow these steps:
- Cut all patterns: Carefully cut along the
Frequently Asked Questions (FAQs)
Can you use Noah’s Ark in a sewing room?
Imagine your sewing room as an ocean.
Yes, you can have Noah’s Ark sailing through it!
The fabric panel doubles as decoration or a toy, adding creativity and whimsy to your creative haven.
Who makes Noah’s Ark Critter pattern?
The Noah’s Ark Critter pattern often comes from well-known fabric design companies, offering everything needed for playful projects.
You can create charming crafts easily, even if you’re just starting out with sewing or looking for fun family activities.
What is a Noah’s Ark coloring page?
Back in the day, coloring pages were the cat’s pajamas.
A Noah’s Ark coloring page lets you express creativity by filling outlines of the ark, animals, and biblical scenes with vibrant colors.
It’s fun and educational.
How to make Noah’s Ark?
Start by cutting the pattern pieces.
Then fold and stitch the ark’s top edge.
Pin and stitch pocket pieces.
Then sew ark pieces, leaving gaps for stuffing.
Finally, fill and close using a ladder stitch.
Happy crafting!
What is Noah’s Ark by Stacy IEST Hsu for Moda?
Isn’t it ironic how a piece of fabric can spark creativity?
Noah’s Ark by Stacy Iest Hsu for Moda is a delightful cotton panel.
With simple fabric crafts like felt heart brooches and fabric flowers, kids can create beautiful and fun designs. It features adorable ark and animal motifs, making sewing projects fun and beginner-friendly.
How do you HEMM a Ark pocket?
Fold the pocket’s top edge, press it, then stitch it down.
You could use a neat edge stitch for a professional look.
Don’t forget to leave a gap for turning and stuffing!
It’s easier than you think.
Does Etsy offer free shipping?
Have you ever wondered if Etsy offers free shipping?
Sellers set their own shipping policies, so it varies.
Some provide free shipping on certain products or orders that meet a minimum spend, like an online treasure hunt!
How do I personalize items on Etsy?
To personalize items on Etsy, start by checking the seller’s customization options on the product page.
Provide your specific details, like initials or colors, in the "Add personalization" box during checkout.
Reach out to the seller for questions!
Does shopping on Etsy help support small businesses?
Etsy’s platform is home to over 3 million active sellers, many being small business owners.
Shopping there directly supports independent creatives.
It’s like coffee with a friend where you end up helping their dreams grow.
Are the products on Etsy handmade?
On Etsy, you’ll find a treasure trove of handmade goodies, crafted with love and creativity by artisans worldwide.
While some items might be vintage or crafted from unique supplies, many are lovingly handmade just for you.
How to maintain the Noahs ark toy after use?
Keep your Noah’s Ark toy looking shipshape by gently hand washing it with mild detergent, using cold water, and air drying.
Spot clean stains promptly, and occasionally fluff it to keep the stuffing evenly distributed, avoiding overstuffing.
Best stitching techniques for sewing animal figurines?
Stitching animal figurines is a fun task!
Use a ladder stitch for a clean finish, clipping and notching curves to prevent puckering.
Gradually stuff with fiberfill, ensuring it’s fluffy but not overstuffed, for huggable charm.
Can the ark be machine washed?
Nah, it’s best to hand-wash your ark. Machine washing could shrink it or damage the stuffing. Gentle hand washing and air drying is the way to go, my friend!
How to personalize the Noahs ark project?
Imagine your Noah’s Ark panel as a blank canvas, waiting for your creative flair.
Add monogrammed initials or colorful fabric paint to make it uniquely yours.
Personal touches turn a simple project into a cherished keepsake.
Ideal age for kids to use the ark toy?
The Noah’s Ark toy is perfect for kids aged three and up.
It’s a great way for little adventurers to engage with storytelling and imaginative play, giving their creativity wings while also being a huggable companion.
Conclusion
Picture yourself as the captain of your own Noah’s Ark sewing adventure.
You’ve got the tools and tricks to make those plush animals as soft as clouds and the ark as sturdy as a sailor’s handshake.
With this Noah’s Ark sewing pattern, you’ll craft a scene worthy of a nursery shelf or grandkid’s arms.
Stitch by stitch, you’re creating memories wrapped in fabric, and before long, your hands will tell the tales of your sewing journey.


