This site is supported by our readers. We may earn a commission, at no cost to you, if you purchase through links.
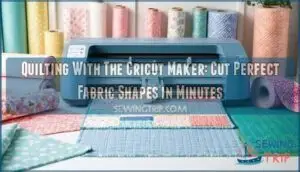
You load your fabric, pick a pattern, and the machine handles the precision cuts—no more tiring scissors or wobbly lines.
The rotary blade glides through cotton, felt, or even denim, so your pieces always fit together like puzzle parts meant to be.
You can also create quilt labels, appliqué shapes, and even stencils for free-motion quilting, all from one device.
If accuracy and time-saving tools are what you seek, quilting with the Cricut Maker might just become your new favorite trick in the fabric arts toolbox.
Curious what else it can do, with its ability to provide precision cuts?
Table Of Contents
Key Takeaways
- You’ll save time and effort by using the Cricut Maker for quilting, as it makes cutting fabric shapes easy and precise, allowing you to focus on the creative aspects of your project.
- The Cricut Maker can cut various fabrics, including cotton, fleece, and denim, and you can cut up to 2 layers of fabric at once, making it a versatile tool for your quilting needs.
- To get the most out of your Cricut Maker, you’ll need to choose the right blade, stabilize your fabric, and ensure proper mat adhesion, which will help you achieve accurate cuts and professional-looking results.
- With the Cricut Maker, you’ll have access to a range of quilting patterns, supplies, and fabric selection tips, and you can use the machine to create custom quilt labels, appliqué shapes, and stencils for free-motion quilting, giving you endless possibilities for your quilting projects.
Cricut Maker Basics
You’ll discover the Cricut Maker transforms quilting by cutting precise fabric shapes in minutes instead of hours.
Experience precision cutting that transforms hours of tedious fabric work into minutes of effortless creativity.
This smart cutting machine handles everything from basic squares to intricate applique pieces with professional accuracy, making it a valuable tool for quilting projects that require precision.
Cutting Fabric Shapes
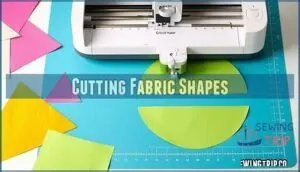
You’ll master cutting fabric shapes with the Cricut Maker by choosing the right blade, stabilizing fabric, and ensuring mat adhesion for precise cuts and pattern accuracy, making Cricut quilting a breeze with its design space and various quilting patterns.
Many users enjoy Cricut Maker products for quilting.
Cutting Quilt Squares and Shapes
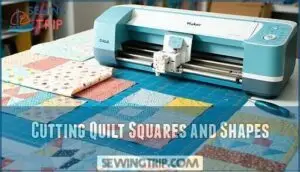
You’ll find the Cricut Maker is a great rotary cutter alternative, helping you overcome accuracy challenges and reduce fabric waste.
Use a cutting mat and select the right blade for precise quilt squares and shapes, making it easier to create quilting patterns and templates in Cricut Design Space.
Cutting Applique Fabric
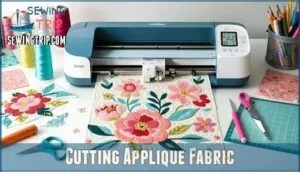
You’re cutting quilt squares, now let’s move to applique fabric.
- Applique fabric types
- Cricut blade settings
- Stabilizer usage
- Applique design tips
Many crafters source Cricut brand materials for best results, especially when cutting intricate shapes with your Cricut machine in Design Space.
Print and Cut Fabric Quilt Labels
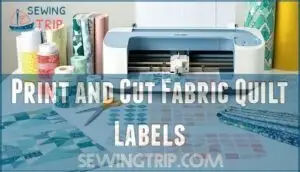
You use your Cricut machine for fabric cutting, creating custom labels with Label Design Software and Inkjet Fabric Sheets.
You explore Label Attachment Methods and Personalization Options for unique quilting projects.
Making Cricut crafts and fabric crafts easier with custom label shapes.
Quilting Techniques
You’re now exploring quilting techniques with the Cricut Maker, which enables you to cut perfect fabric shapes in minutes.
By using the Cricut Maker, you can create cutting templates, add sewing lines, and cut stippling or free-motion stencils with ease and precision, utilizing the machine’s capability to make perfect fabric shapes.
Cut Stippling or Free-Motion Stencils
You’ll explore Stippling Design Options and Stencil Material Choices with Cricut crafts, utilizing Cricut Stippling Settings for precise quilting templates.
You’ll also consider Free-Motion Alternatives for unique quilting designs, ensuring Stencil Reusability for future Cricut tutorials and tips.
Mastering this technique involves understanding thread tension management for superior results, which is a key part of Cricut crafts.
Creating Cutting Templates
You’re creating quilting templates with your Cricut Maker, considering template design, material compatibility, and storage for your fabric projects.
Utilizing Cricut tutorials and tips for quilting, ensuring template durability for future use.
Adding Sewing Lines or FMQ Lines
You’re adding sewing lines or FMQ lines with your Cricut Maker.
Consider these tips:
- Stitch Placement
- Line Density
- Thread Choice
- Tension Adjustment
- Stabilizer Usage for smooth quilting results, enhancing your freemotion quilting skills with Cricut tips and quilting techniques.
Cricut Quilt Patterns
You’re about to explore the realm of Cricut quilt patterns, where you can create perfect fabric shapes in minutes.
With the Cricut Maker, you’ll have access to various quilt patterns, supplies, and fabric selection tips to help you get started on your quilting project.
Supplies for Cricut Quilting
Successfully gathering your quilting supplies makes the difference between smooth sailing and frustrating roadblocks.
You’ll need cutting mats to protect surfaces, rotary cutters for precise edges, and acrylic rulers for straight lines.
Marking tools help transfer patterns, while understanding fabric types guarantees proper blade selection.
The Cricut Maker allows for precise fabric cutting, saving valuable time and effort.
| Essential Quilting Tools | Cricut-Specific Supplies |
|---|---|
| Cutting mats (18" x 24") | Pink fabric cutting mat |
| Rotary cutter with sharp blades | Rotary blade for Cricut |
| Acrylic rulers (6" x 24") | Brayer tool for adhesion |
| Marking tools (washable pens) | Weeding tools for precision |
Cricut Maker Quilt Patterns
The Cricut Design Space offers 31 pre-programmed quilt designs that streamline your quilting journey.
Transform your quilting with 31 ready-to-use patterns that cut hours from every project.
These patterns range from simple to complex, giving you flexibility in Pattern Customization and Pattern Complexity based on your skill level.
Popular quilting patterns include:
- Modern Plus Quilt – perfect for quilting for beginners
- Lattice Quilt – showcases intricate fabric patterns
- Half Square Quilt – ideal for exploring quilting tools
These Designer Collaborations reflect current Pattern Trends while ensuring proper Pattern Licensing for your projects.
Fabric Selection for Quilting
When selecting quilting fabrics for your Cricut Maker projects, fabric weight matters most. Choose 100% cotton with medium weight for clean cuts.
Pre-washing prevents shrinkage later. Mix high-contrast fabrics and varied print scales for visual interest.
To guarantee a cohesive look, consider using pre-curated fabric collections. Consider fiber content and color palettes that complement your design.
Quality quilting materials guarantee professional results.
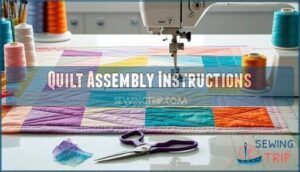
Quilt Assembly Instructions
Now you’ll put all your perfectly cut fabric pieces together to create your quilt, following each step for a neat, strong finish.
Use the precise shapes from your Cricut Maker to lay out, sew, and assemble your blocks, making sure your seams line up for a clean result.
Pick The Pattern and Fabric
Before you enter the exciting world of quilting with your Cricut Maker, you’ll need to choose the perfect pattern and fabric combination. Pattern complexity should match your skill level, while fabric compatibility guarantees smooth cutting.
- Read the entire pattern before starting to understand each step
- Print cutting instructions for easy reference during assembly
- Choose charm packs with 5-inch squares for beginner-friendly projects
- Plan your pressing sequence based on pattern recommendations
- Label fabric pieces to stay organized throughout the process
Before layering, it’s important to prepare your backing fabric, and you can use taping techniques to keep it taut. Consider color palettes that complement your space and allow for scale adjustment if needed. Personalization options let you customize quilting designs to reflect your style, making each project uniquely yours.
Cut Fabric With Cricut Maker
Fire up your Cricut Maker and load the fabric mat with proper adhesion. Select appropriate Cricut blade types for your fabric weight.
Upload your quilt pattern into Design Space, adjusting pattern size as needed. Use stabilizer for delicate fabrics when cutting intricate shapes.
For intricate designs, consider using a FabricGrip cutting mat to stabilize the material. The machine handles precise cuts effortlessly, making quilting techniques accessible for fabric crafting projects, with the Cricut Maker being a key tool for delicate fabrics.
Lay Out Cut Fabrics and Prep for Sewing
Once your Cricut Maker finishes cutting, organize your fabric pieces by color or pattern. Proper fabric organization saves time and prevents mistakes during assembly.
Follow these essential steps:
- Sort pieces by block – Group matching squares together
- Check seam allowance – Verify consistent ¼-inch margins
- Apply pressing techniques – Press seams flat before sewing
- Use pinning methods – Secure pieces with quilting pins
Consider basting options like spray adhesive for slippery quilting fabric on cutting mats.
Sew Squares Together
Now you’ll piece your quilt blocks together using proper quilting techniques.
Start with consistent seam allowance and press seams for accuracy. Chain piecing saves time when sewing multiple blocks. Focus on square alignment for professional results.
| Technique | Description |
|---|---|
| Seam Allowance | Maintain consistent ¼-inch seams throughout |
| Nesting Seams | Press seams in opposite directions for flat intersections |
| Chain Piecing | Sew multiple pieces continuously without cutting thread |
| Pressing Techniques | Press seams to darker fabric or as pattern indicates |
| Square Alignment | Match corners and edges precisely before sewing |
Create The Quilt Sandwich
Quilt assembly is about stacking the deck—backing fabric, batting, and your quilt top—all squared up just right for a neat finish.
Here’s how you do it:
- Smooth the backing, then the batting—choose wisely!
- Place the quilt top, lining up edges.
- Check layer alignment and sandwich size.
- Secure with your preferred basting method.
Ready for machine quilting!
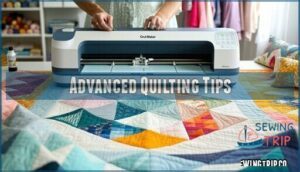
Advanced Quilting Tips
You’re now ready to take your quilting skills to the next level with advanced techniques.
As you explore these tips, you’ll learn how to improve your precision, handle fabric with ease, and save time using the Cricut Maker’s features.
Precision and Technique
Achieving quilting precision starts with understanding your tools. The Cricut Maker delivers consistent cutting that eliminates human error, but technique matters.
The Cricut Maker has several advantages over traditional methods, as shown in the following table:
| Traditional Method | Cricut Maker Advantage |
|---|---|
| Hand-cut fabric pieces vary slightly | Consistent cutting creates uniform pieces |
| Rotary cutting requires steady hands | Quilting machine precision eliminates wobbles |
| Measuring twice still yields errors | Accurate seams from digital templates |
Mastering fabric manipulation is crucial, and it starts with securing material properly before cutting. Pressing techniques become essential after cutting—press seams, don’t iron them. Perfect points depend on accurate measurements and consistent cutting patterns.
For smooth stitching, consider the walking foot benefits when working with multiple layers, as it enhances quilting machine precision and leads to accurate seams.
Fabric Handling and Shadow Prevention
Smart handling prevents fabric disasters that ruin your quilting dreams.
Pre-washing fabrics eliminates bleeding and shrinkage issues. Choose lightfast fabrics to prevent discoloration over time.
Here’s your fabric safety checklist:
- Test for bleeding – Wet fabric corners before cutting
- Press seams correctly – Never drag the iron across delicate pieces
- Select proper batting – Match weight to prevent shadowing through light fabrics
Quality batting choice stops fabric discoloration and seam pressing becomes effortless with proper technique.
Time-Saving Features With Cricut Maker
Modern quilting technology transforms your workflow with cutting automation that handles precise measurements instantly.
The Cricut Maker 3 operates twice as fast while maintaining accuracy, letting you focus on creativity instead of tedious cutting tasks.
Smart Materials enable matless cutting up to 12 feet long, perfect for fabric optimization and seamless pattern customization.
This quilting innovation streamlines project efficiency through quilting software integration and reliable quilting hardware performance.
Design Capabilities With Cricut Maker
Design Space transforms your quilting experience through Pattern Customization and SVG Import capabilities.
This quilting software lets you create personalized quilting designs by manipulating digital patterns.
The Digitalization Process streamlines Fabric Manipulation, turning traditional quilting technology into quilting innovation.
You’ll craft unique projects that reflect your creative vision effortlessly.
Frequently Asked Questions (FAQs)
Can you use a Cricut for quilting?
You can use a Cricut for quilting, streamlining fabric cutting with precision and efficiency, perfect for beginners and experienced quilters alike, saving time and effort.
How many layers of fabric can the Cricut Maker cut?
Imagine cutting fabric with ease, you can cut up to 2 layers of fabric with the Cricut Maker, making quilting projects more efficient and fun for you.
What is the thickest material you can put in a Cricut Maker?
You can cut materials up to 4 mm thick with the Cricut Maker, including fabric, leather, and paper, using its rotary blade and other tools for precise cuts.
What fabric can the Cricut Maker cut?
Verily, you’ll discover the Cricut Maker can cut various fabrics, including cotton, fleece, and canvas, with ease and precision, making it a versatile tool.
Can I use cotton fabric with Cricut Maker?
You can cut cotton fabric with the Cricut Maker, it’s a suitable material, allowing for precise cuts and various quilting projects with ease and accuracy always.
How to maintain Cricut Maker cutting mat?
Clean and store your Cricut Maker cutting mat properly, you’ll regularly wipe it down, dry it, and replace it when worn, ensuring peak performance and longevity for your projects.
Are Cricut quilting tools beginner friendly?
You’ll find Cricut quilting tools are beginner-friendly, offering ease of use, precision, and versatility to enhance your quilting experience with minimal effort and maximum creativity.
Can I cut multiple fabrics at once?
You can cut multiple fabrics at once with the right tools, streamlining your quilting process and saving time, which is especially helpful for large or complex projects.
Is Cricut Maker compatible with all fabrics?
You can use the Cricut Maker with various fabrics, including cotton, fleece, and denim, but compatibility depends on the fabric’s thickness and texture.
Conclusion
What’s holding you back from perfect quilts?
You’re now equipped to try quilting with the Cricut Maker, cutting perfect fabric shapes in minutes.
With its precision cuts, you’ll save time and effort, making quilting with the Cricut Maker your new go-to technique for creating beautiful quilts.
- https://www.diaryofaquilter.com/cutting-fabric-for-quilt-blocks-with-the-cricut-maker/
- https://seekatesew.com/10-ways-to-use-the-cricut-maker-for-quilting/
- https://www.heatherhandmade.com/cricut-maker-quilt-patterns/
- https://www.youtube.com/watch?v=HhBWgEf1ubc
- https://cricut.com/blog/introducing-the-cricut-block-of-the-month-quilt/

