This site is supported by our readers. We may earn a commission, at no cost to you, if you purchase through links.
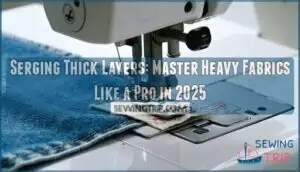
Switch to heavy-duty needles and polyester thread that won’t snap under pressure. Lower your presser foot pressure so the fabric flows smoothly instead of fighting against you.
Start with looser tension settings than you’d use for lightweight materials. Your differential feed should sit around 1.5 to prevent stretching.
Most sewers skip the test run, but a quick sample on scraps saves hours of frustration. The real magic happens when you master these fundamentals and discover advanced techniques.
Table Of Contents
Key Takeaways
- Adjust your serger’s settings for thick materials – Lower the presser foot pressure to 1-2, increase the stitch length to 3-4mm, widen the stitch width, and use heavy-duty 90/14 needles with polyester thread that won’t snap under pressure.
- Start with proper tension settings – Set all tension dials to 4 as your baseline, then adjust individual threads based on results – looped stitches mean they are too loose, and tight stitches mean you’ve cranked it too high.
- Test on fabric scraps before starting your project – This prevents hours of frustration and lets you perfect your blade clearance, tension balance, and stitch settings without ruining your actual materials.
- Use the right tools for bulky seams – Clearance plates or alternatives like popsicle sticks help thick layers glide smoothly through your serger, and proper seam pressing with steam creates professional-quality results.
How to Serge Thick Fabric
When you’re working with thick fabrics like denim or canvas, your serger needs the right adjustments to handle the extra bulk without jamming or breaking needles.
Think of your serger as a powerful engine – it needs the right fuel and tuning to tackle heavy-duty fabric mountains.
You’ll want to lower your presser foot pressure, increase stitch length and width, and switch to heavier needles that can punch through multiple layers smoothly.
This will ensure that your serger can handle the thick fabrics without any issues, and you can achieve a professional finish on your projects.
Blade Adjustments
Getting your blade adjustments right makes all the difference when serging thick layers.
Start by checking your owner’s manual for blade locking options – locked blades might disable your stitch length dial until released. Lower your presser foot pressure to settings 1-2, allowing thick fabrics to glide smoothly. Avoid exceeding your cutting blade’s width capacity to prevent overwhelming the cutter.
Proper setup may require fine-tuning blade position.
Here’s your essential blade spacing checkpoint:
- Position your knife at its highest setting – this creates ideal blade spacing for bulkier materials to pass through without jamming or bunching.
Needle and Thread Selection
Your needle and thread selection makes or breaks thick fabric projects.
Match needle sizes to your material – use 90/14 needles for heavy fabrics and overlock needles for versatility.
Thread weights matter too – lower numbers mean thicker threads that handle multiple layers better.
Choose polyester or nylon threads for durability through friction.
Test different needle types like quilting or industrial needles on scraps.
The right needle and thread combination prevents breakage and creates professional results every time.
Stitch Length and Width
When serging thick layers, your stitch settings need room to breathe. Think of it like adjusting your stride when walking through deep snow – you need longer steps and a wider path.
Start by increasing your stitch length to 3-4mm for ideal length on heavy materials. Thick fabrics need extra space between stitches to prevent bunching and guarantee proper thread penetration.
Next, widen your stitch width to accommodate the fabric thickness without overwhelming your serger’s cutting mechanism. Testing scraps before diving into your project saves time and frustration.
Run a sample through your machine to check if the seam width handles your material’s bulk effectively. These serger settings prevent jams that occur when multiple layers fight for space under your presser foot.
Remember, thick fabrics demand patience and proper adjustments – your machine will thank you with perfect seams every time. This approach ensures that you achieve professional-looking results with minimal effort, using your serger to its full potential with proper thread penetration and ideal length.
Presser Foot Pressure
When working with heavy materials, your serger’s presser foot pressure controls how fabric moves through the machine.
Too much pressure crushes thick layers and causes needle damage.
Too little lets fabric bunch up.
Adjusting presser foot guarantees smooth fabric feed.
- Lower pressure settings (1-2) work best for thick fabrics
- Test ideal pressure on scraps before starting your project
- Watch for smooth fabric movement without bunching
- Avoid crushing layers that could break needles
- Balance pressure for clean topstitching results
- Adjust gradually until serging thick layers feels effortless
Setting The Correct Tension
Getting your serger’s tension right makes the difference between professional-looking seams and frustrating tangles when working with thick fabrics.
You’ll need to adjust each thread individually since heavy materials require different tension settings than regular fabric to create balanced, flexible stitches.
Signs of Improper Tension
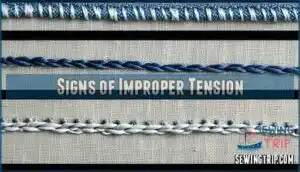
Your serger’s trying to tell you something when those stitches go haywire. Think of tension like Goldilocks – it needs to be just right, not too loose or too tight.
When thread tension runs too loose, you’ll spot looped stitches dancing across your fabric like tiny question marks. Too tight, and you’re dealing with thread snapping or needle breaking – your machine’s cry for help.
| Sign | What You’ll See | Quick Fix |
|---|---|---|
| Looped Stitches | Threads form loose loops on fabric surface | Tighten tension dial gradually |
| Tight Threads | Fabric puckers, threads pull fabric together | Loosen tension settings |
| Skipped Stitches | Missing stitches create gaps in seam | Reduce thread tension |
| Thread Breaks | Threads snap during sewing | Lower tension dial immediately |
| Uneven Seams | One side looks different than the other | Adjust individual thread tensions |
Skipped stitches often mean the tension’s strangling your threads, preventing proper stitch formation. Test these tension settings on scraps before tackling your actual project to avoid thread breaks and ensure a smooth sewing experience with the right tension settings.
Starting Tension Settings
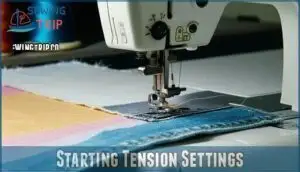
Getting your initial tension right sets the foundation for perfect serging thick layers. Most sergers work best when you start all tension dials at setting 4 – this gives you a balanced baseline for thread tension adjustments. Think of it as your home base before fine-tuning. Balanced tension guarantees the looper threads meet at the fabric edge without extending or puckering.
Here’s your starting checklist for tension settings:
- Set all tension dials to 4 – creates balanced thread placement across thick fabrics
- Check thread weight compatibility – heavier threads need slightly looser initial tension
- Test scrap fabric first – always verify tension balance before starting your project
- Adjust differential feed – helps prevent fabric stretching during initial setup
- Note your settings – record successful combinations for future thick fabric projects
Adjusting Individual Threads
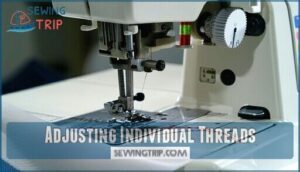
Each thread acts like a team player in your serging game.
When you spot looped stitches, that thread’s tension is too loose. Tight stitches mean you’ve cranked it too high.
Use thread color as your guide – adjust only the problematic thread’s dial.
Perfect tension balance happens when all four threads work together, creating smooth seams that won’t pull apart on thick layers.
Managing Layers and Seams
When you’re serging thick fabrics, bulky seams can cause your machine to struggle and create uneven stitches.
You’ll need the right tools and techniques to keep those heavy layers moving smoothly through your serger without jamming or breaking needles.
Clearance Plates
Think of clearance plates as your fabric’s best friend when serging thick layers. These simple tools slide under bulky seams, creating smooth passage through your heavy duty serger.
You’ll level fabric perfectly, preventing bunching and skipped stitches. Don’t have a clearance plate? Try plate alternatives like clean popsicle sticks or thin cardboard.
Just remember damage prevention – avoid sewing into these substitutes. You can find serger related products online.
This technique improvement makes the difference between wrestling with thick fabrics and gliding through them like butter, which is a significant improvement in serging.
Pressing Seams
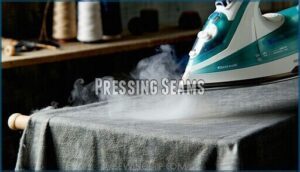
The finishing touch that transforms amateur serging into professional results? Proper seam pressing with a hot steam iron.
Set your iron to the wool setting for most heavy fabrics, activating steam to penetrate those stubborn fibers. Press along each seam line to encourage the fabric back into shape, creating crisp seam flattening that screams quality craftsmanship. Tailor’s hams aid in shaping garments.
Here’s what makes pressing seams truly shine:
- Use protective cloths between iron and delicate surfaces to prevent scorching
- Apply diagonal trimming to reduce bulk where seams intersect
- Consider interfacing usage for added structure in problem areas
- Try bias binding techniques for curved seam finishing
- Check for tucked threads and trim them for clean results.
Master fabric pressing, and you’ll elevate every serging thick layers project.
Choosing a Serger for Thick Fabric
Your serger choice makes the difference between struggling with thick fabrics and smoothly handling heavy materials like denim or canvas.
The right serger transforms thick fabric nightmares into effortless professional results.
Look for models with strong motors, adjustable presser foot pressure, and easy tension controls that’ll handle multiple layers without breaking needles or skipping stitches, utilizing easy tension controls for optimal performance.
User-Friendly Models
When you’re tackling serging thick layers for the first time, choosing the right machine makes all the difference.
The Brother 1034D stands out among user-friendly serger models with its easy threading system and intuitive controls that won’t leave you scratching your head.
This lightweight design machine handles multiple fabric layers without overwhelming beginners with complex settings.
The Juki MO654DE offers similar beginner features, including clear tension dials and straightforward operation that builds your confidence quickly.
Some sergers also offer color-coded thread guides to further simplify the threading process.
These portable sergers eliminate the guesswork that intimidates newcomers, making your journey into heavy fabric serging much smoother, and you’ll spend more time perfecting your technique and less time fighting with confusing controls.
Flexibility and Customization
Like a master chef adjusting recipes for different ingredients, you need a serger that adapts to your creative serging projects.
The best machines offer complete control over every aspect of your stitching experience.
Look for these flexibility features when choosing your serger:
- Adjustable stitch settings – Control length and width for perfect seams on any fabric thickness
- Variable presser foot pressure – Fine-tune pressure to match your project adaptations needs
- Multiple decorative stitches – Expand beyond basic seaming with creative finishing options
- Thread thickness compatibility – Handle everything from delicate silk to heavy-duty threads seamlessly
Helpful Serger Accessories
You don’t need to struggle with thick fabrics when you have the right accessories for your serger.
The right presser feet and throat plates will transform your heavy fabric projects from frustrating battles into smooth, professional results.
Specialty Presser Feet
Specialty presser feet transform your serger into a powerhouse for thick fabrics.
These game-changing attachments guide heavy materials smoothly while preventing common issues like fabric slipping or uneven feeding. A Walking Foot grips multiple layers evenly, while a Blind Hem foot creates invisible finishes on bulky hems. A walking foot serger can substantially improve fabric handling.
- Walking Foot – Your secret weapon for wrestling stubborn thick layers
- Gathering Foot – Creates perfect ruffles without wrestling fabric by hand
- Piping Foot – Makes professional-looking trim on heavy upholstery projects effortless
Choose the right specialty presser feet and watch your thick fabric projects go from frustrating to fantastic.
Throat Plates
Beyond specialty presser feet, your serger’s throat plate plays a huge role when handling thick fabrics. Think of it as the foundation that supports your fabric layers as they glide through your overlock machine.
The right throat plate prevents fabric from diving into gaps or creating uneven fabric edge finishing. Sergers also excel at finishing raw edges, making them ideal for thick materials that fray easily.
| Throat Plate Materials | Best For |
|---|---|
| Metal plates | Heavy denim, canvas |
| Plastic inserts | Delicate thick fabrics |
| Custom cardboard | Emergency clearance plate |
| Aftermarket throat plates | Specialized applications |
| Standard plates | Medium-weight materials |
Proper plate installation tips guarantee smooth serging every time.
Frequently Asked Questions (FAQs)
How do you sew through thick layers of fabric?
You’ll need heavier needles, thicker thread, and longer stitches.
Lower your presser foot pressure, use clips instead of pins, and sew slowly.
A walking foot helps feed thick layers evenly through your machine.
What is the best serger for thick fabrics?
Sure, any serger can handle thick fabric if you adjust settings right.
The Brother 1034D excels with thick materials thanks to its powerful motor and easy tension adjustments, making it perfect for beginners tackling heavy projects.
What tension should I use for thick fabric?
Start with all tension dials at 4, then adjust individually.
You’ll need to loosen tension for thicker threads and fabrics.
Test on scraps first – tight stitches mean too much tension, loops mean too little.
What is the best stitch setting for thick fabric?
Like threading a needle with rope, thick fabrics need wider, longer stitches to breathe.
Use stitch width at second-widest setting and increase length to 5mm.
You’ll prevent jamming while creating strong, flexible seams.
Can sergers handle leather and vinyl materials?
Most sergers can handle leather and vinyl, but you’ll need heavy-duty needles, strong thread, and adjusted settings.
Test first on scraps, use a leather needle, and sew slowly to avoid damaging these tough materials.
How do you prevent fabric puckering on curves?
Reduce your serger’s presser foot pressure and slow down around curves.
Use your hands to gently guide fabric through bends while maintaining steady tension.
Test stitch settings on scraps first to perfect your technique.
What causes thread to bunch underneath thick fabric?
Thread bunching underneath thick fabric happens when your tension’s too tight or you’re feeding fabric too fast.
Loosen your tension settings, slow down your sewing speed, and check that you’re using the right needle size for your fabric weight to address the issue of thread bunching.
Should you pre-wash thick fabrics before serging?
Seventy percent of fabric shrinkage occurs during the first wash.
You should absolutely pre-wash thick fabrics before serging to prevent size changes, color bleeding, and uneven seams that’ll ruin your finished project completely. Uneven seams are a problem.
How do you serge thick fabric without cutting?
You’ll need to disengage your serger’s cutting blades before feeding thick fabric through.
Check your manual for the blade lock mechanism, then adjust stitch width and length to accommodate the extra bulk.
Conclusion
Ready to conquer denim, canvas, and upholstery like never before? You’ve learned the essential techniques for serging thick layers successfully.
Remember to adjust your blade clearance, choose heavy-duty needles, and fine-tune your tension settings. Don’t skip the test runs on fabric scraps—they’ll save you time and frustration.
With practice, you’ll handle multiple layers smoothly and create professional-quality seams. Your serger can tackle any heavyweight project when you apply these proven methods consistently.
- https://en.wikipedia.org/wiki/Overlock
- https://threadsmonthly.ck.page/
- https://www.justanswer.com/small-appliance/pllyh-cannot-thick-fabric-babylock.html
- http://www.makeithandmade.com/2012/08/perfecting-sergeroverlocker-tension.html
- https://www.allieolson.com/blogs/blog/four-tips-for-serging-bulky-knit-fabrics

