This site is supported by our readers. We may earn a commission, at no cost to you, if you purchase through links.
Your first time threading a sewing machine can feel like solving a puzzle with invisible pieces. The bobbin refuses to wind, the thread tangles in places you didn’t know existed, and that innocent-looking tension dial suddenly seems designed to confuse you.
But here’s the truth: once you understand the basic setup and threading sequence, your machine transforms from a frustrating mystery into a reliable creative partner. The difference between struggling through every project and sewing with confidence comes down to mastering a handful of foundational steps—steps that take just minutes to learn but will serve you for every garment, repair, and craft project ahead.
Table Of Contents
Key Takeaways
- Master the threading sequence and basic setup steps first—these foundational skills transform your sewing machine from a confusing puzzle into a reliable tool you’ll use confidently on every project.
- Proper bobbin winding and insertion prevents most common sewing problems, so always wind at moderate speed to 90% capacity and listen for the click that confirms correct seating in the bobbin case.
- Your workspace setup matters as much as threading technique—place your machine on a stable surface, connect the foot pedal securely, and maintain 12 inches of clearance to prevent fabric snags and safety issues.
- Start every project by testing stitch settings on scrap fabric, adjusting thread tension between 3-5 for standard materials, and practicing speed control with gentle foot pedal pressure before cutting into your actual fabric.
Setting Up Your Sewing Machine
Before you thread a single stitch, you need to get your machine ready to work. A proper setup makes everything easier and keeps you safe while you’re learning.
Start by following a detailed electronic sewing machine tutorial to walk you through each step of the initial setup process.
Here’s how to prepare your machine and workspace before you start sewing.
Once everything’s set up, take a moment to learn your sewing machine’s parts and functions so you can work confidently and efficiently.
Placing The Machine on a Sturdy Surface
Before you power on your sewing machine, place it on a flat table that won’t wobble during operation. A stable surface is essential for machine setup and safety—it keeps your workspace secure and prevents the machine from drifting mid-stitch.
Pairing your flat surface with proper sewing ergonomics ensures your body stays comfortable through every project.
Add a vibration-absorbing pad underneath for vibration control, and position the machine away from edges so you have full access to the sewing bed.
A quiet operation setup combines these elements to minimize noise while keeping your workspace comfortable and functional.
Connecting The Power and Foot Pedal
Once your machine sits secure, locate the power cord and plug it into a grounded electrical outlet—most machines run on standard 110 to 120 volt supply. Next, connect the foot pedal to its dedicated port on the front or side of your machine.
Follow these steps for safe Sewing Machine Setup:
- Make certain the pedal plug seats completely to avoid intermittent responses
- Turn on the machine’s power switch before testing the pedal
- Position the pedal on the floor where your foot rests comfortably
- Keep the pedal area clear of loose fabrics and clutter
- Use a surge protector if sharing an outlet with other devices
Check that the pedal cable isn’t pinched or bent—damage here causes control issues. Press the pedal lightly to test speed control before threading.
Selecting and Inserting The Correct Needle
With power and pedal ready, turn your attention to the needle—the heart of every stitch. Universal needles suit most beginner projects, handling woven and knit fabrics without fuss.
Match needle size to fabric weight: lighter cotton uses 60–80, while denim demands 90–100 for breakage prevention. Power off your machine, insert the needle fully until it stops, flat side facing back, then tighten firmly.
Preparing Your Sewing Area for Safety
With your needle secured, shift focus to safety—clear 12 inches around your sewing machine to prevent fabric snags and maintain work area clearance.
Position a bright lamp providing 50 lux over your workspace for ideal lighting options, then plug into a grounded outlet for electrical safety.
Store pins in magnetic bowls, organize sewing supplies within reach, and create an ergonomic setup that promotes proper posture during every sewing session.
Winding and Inserting The Bobbin
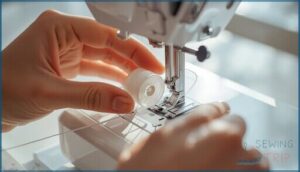
The bobbin holds the lower thread that works with your top thread to create each stitch.
If your bobbin thread tension is off, you might notice puckering or loose stitches—especially when working with stretchy fabrics.
Before you can sew, you’ll need to wind thread onto your bobbin and place it correctly inside your machine. Here’s how to prepare your bobbin from start to finish.
Placing The Thread Spool on The Spool Pin
Your very first step in bobbin winding starts with the spool pin—that upright metal post on top of your sewing machine. Here’s how to position your thread spool correctly:
- Slide your thread spool onto the spool pin with the thread unwinding from the front edge toward the thread guide.
- Add a spool cap or felt washer on top to prevent the spool from bouncing or spinning off during operation.
- Check spool pin alignment by ensuring the pin sits perpendicular to your machine surface for smooth thread flow.
Threading The Bobbin Winder and Engaging It
Once your thread spool sits securely, guide the thread through the winding thread guide—that small hook or slot near the bobbin winder on the machine’s right side.
Slide the thread end into the bobbin’s notch or groove, wrap it around twice, then push the winder spindle toward the stopper to engage. This locks the winding mechanism and temporarily disables your sewing function.
For more details about features that can improve winding, including automatic tension control advantages, check the latest industry resources.
Winding The Bobbin With Thread
Press your foot pedal gently to start winding at a moderate speed—rushing creates uneven bobbin thread tension.
Watch the thread layer evenly across the bobbin using proper thread winding techniques. Most sewing machines stop automatically when full, but you can release the pedal early if you notice wobbling.
Proper bobbin preparation means stopping at ninety percent capacity, then trimming the thread tail close to prevent tangles during threading.
For a step-by-step overview on inserting the bobbin, see this helpful guide to preparing the bobbin case.
Inserting The Wound Bobbin Into The Bobbin Case
Slide the bobbin into the case so the thread orientation unwinds counterclockwise—proper bobbin case alignment prevents skipped stitches and fabric snags during sewing machine operation.
Listen for a soft click confirming secure bobbin seating before closing the compartment. If you’re new to threading and bobbin management, these checks matter:
- Verify the bobbin case arm fits flush into the holder slot
- Confirm thread tail exits through the designated slit or notch
- Gently lift the case to verify tension adjustment holds it firm
- Pull both threads under the presser foot for correct needle placement
- Test on scrap fabric to catch issues before starting your project
Threading Your Sewing Machine
Threading your sewing machine might feel tricky at first, but once you follow the right path, it becomes second nature.
Your machine has specific guides and checkpoints that keep the thread flowing smoothly from spool to needle. Here’s how to thread your machine correctly, step by step.
Following Thread Guides and Tension Discs
Your thread’s journey through the machine isn’t random—it follows numbered guides and tension discs that keep everything running smoothly. Start by weaving the thread through each guide in order, making sure it’s fully seated between the tension discs.
This threading path optimization controls your stitch tension, preventing loops and skipped stitches while keeping bobbin thread management balanced throughout your project.
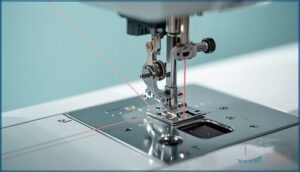
Threading The Take-up Lever and Needle
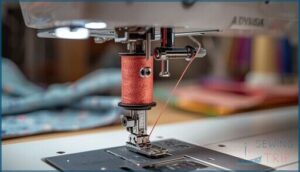
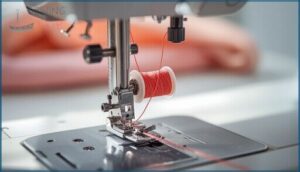
Once your thread reaches the take-up lever—that little hook that moves up and down—guide it through the lever’s eye from right to left, then down to the needle. Proper lever timing and needle alignment prevent threading issues and keep thread tension balanced.
- Thread the takeup lever smoothly to avoid catching or snagging on metal edges
- Insert thread through the needle eye from front to back, leaving a 4-inch tail
- Check that threading follows your machine’s guide marks for correct threading and bobbin management
Pulling Up The Bobbin Thread
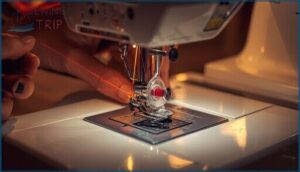
Now you’ll bring both threads together for proper machine thread balance. Hold the needle thread with your left hand and turn the handwheel toward you one full rotation—this creates thread loop formation as the needle picks up the bobbin thread.
Gently tug the needle thread control; a small bobbin thread loop appears through the needle plate. Pull it completely out, align both threads under the presser foot, and you’ve mastered threading and bobbin management for perfect bobbin thread tension.
Double-checking Threading Accuracy
Before starting any project, take thirty seconds to confirm your machine calibration. Run your finger along the entire thread path to feel for loose loops or gaps—this quick check catches threading errors before they affect stitch quality.
Examine your bobbin alignment in its case and gently tug both threads to test tension. These simple steps prevent frustration and guarantee your needle, bobbin, and sewing machine work together perfectly.
Selecting Stitches and Adjusting Settings
Now that your machine is threaded and ready, it’s time to tell it what to do. Your sewing machine won’t just automatically know how to stitch—you’ll need to select the right stitch type and adjust a few settings to match your fabric and project.
Here’s what you need to know to get your machine dialed in correctly.
Choosing The Straight Stitch for Beginners
The straight stitch is your foundation for nearly all sewing projects because it creates clean, secure seams on most fabrics with minimal effort.
You’ll find it labeled on your sewing machine’s stitch selector dial—often represented by a simple straight line or the number 1. This reliable stitch works beautifully for beginners tackling everything from cotton pillowcases to basic garment construction.
Setting Stitch Length and Width
Once you’ve selected your straight stitch, adjust the stitch length dial—usually set between 2.5 and 3.0 mm for medium fabric thickness. Width stays at zero for straight stitches.
These settings directly affect stitch quality and thread tension, so test on scrap fabric first. Shorter lengths work best for lightweight materials, while longer stitches suit heavier fabrics and control sewing speed better.
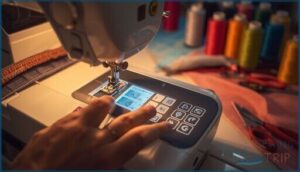
Using The Stitch Selector Dial or Buttons
Most sewing machines feature a stitch selector dial or buttons on the front panel—this controls your stitch pattern. Turn the dial to switch from straight to zigzag or decorative stitches, checking the machine’s labeled symbols for guidance.
Some models require a release button before changing settings. Always confirm your stitch selection matches your fabric before pressing the foot pedal to begin sewing.
Adjusting Thread Tension as Needed
Thread balance makes or breaks stitch quality. Locate the tension dial on your sewing machine—usually numbered 3 to 5 for standard fabrics.
If loops appear underneath your fabric, increase the tension adjustment by one number. If puckering or thread dots show on top, lower it slightly. Test each tension change on scrap fabric to guarantee sewing precision before tackling your actual project, building confidence with these sewing tips and tricks for beginners seeking fabric compatibility.
Basic Sewing Techniques for Beginners
Now that your machine is threaded and ready, it’s time to put your hands on the fabric and start sewing.
The techniques you’re about to learn form the foundation of every project you’ll ever make—from straight seams to smooth curves.
Master these basics, and you’ll build the confidence to tackle anything your sewing machine can do.
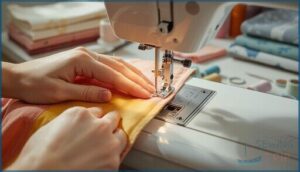
Lowering The Presser Foot and Positioning Fabric
Before any stitches form, you need to lower the presser foot and place your fabric correctly—this step sets the stage for everything that follows.
- Locate the presser foot lever on the right side near the needle area
- Stack your fabric layers evenly with edges matched before sliding them under
- Line up the raw edge with a seam guide marking on the needle plate
- Check that the foot covers the fabric completely from front to back
- Lower the lever firmly until the presser foot sits flat against the cloth
Sewing a Straight Line and Controlling Speed
Your foot pedal is the gas pedal of your sewing machine—light pressure gives you smooth, controlled speed that keeps your straight stitching accurate.
Press gently with the ball of your foot to start slowly, watching the fabric edge align with your seam guide markings.
Keep your hands lightly guiding the fabric without pushing, letting the feed dogs control movement while you focus on maintaining steady pedal technique and fabric guidance for perfect seam accuracy.
Securing Stitches With Backstitching
Think of backstitching as the safety lock on your seam—it prevents unraveling when fabric gets pulled or washed.
Press and hold your reverse sewing button, sew backward 2–4 stitches, then release and continue forward for stitch security.
This simple seam reinforcement technique creates locking stitches at each end, delivering essential backstitch benefits that keep beginner projects from falling apart at stress points.
Practicing Sewing Curves and Removing Pins Safely
Curves demand patience, but you’ll gain fabric control by slowing your sewing speed and watching the seam line instead of the needle.
Start with gentle curves on cotton scrap, keeping your needle down when pivoting for smooth turns. For needle safety, pull pins just before they reach the presser foot—never sew over them.
These curve sewing tips and pin removal habits protect both you and your sewing machine.
Top Sewing Tools and Machines for Beginners
You’ve learned the basics, and now it’s time to talk about the sewing tools that’ll make your sewing journey smoother. The right machine and accessories can be the difference between frustration and confidence as you practice your new skills.
Below, you’ll find beginner-friendly machines and essential tools that won’t break the bank but will give you everything you need to start stitching successfully.
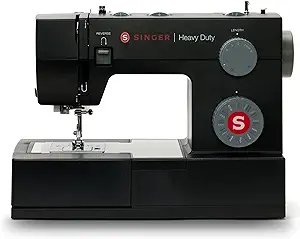
1. Singer Heavy Duty Sewing Machine
You’ll want a Singer Machine that can keep pace as your skills grow, and the Heavy Duty 4423 delivers with sewing speed up to 1,100 stitches per minute.
Its metal frame keeps the machine stable when you’re pushing through thick denim or multiple layers, while the top drop-in bobbin system with a clear cover lets you monitor thread levels mid-seam.
This workhorse manages sewing for beginners and ambitious projects alike, pairing straightforward machine sewing controls with the muscle to tackle heavier fabrics right out of the box.
| Best For | Sewers who want a reliable machine that handles everything from basic projects to thicker fabrics without slowing down. |
|---|---|
| Brand | SINGER |
| Material | Metal, Plastic |
| Color | Black |
| Primary Use | Sewing Machine |
| Skill Level | All Levels |
| Warranty | Limited |
| Additional Features |
|
- Speeds through projects at 1,100 stitches per minute, cutting your sewing time significantly
- Metal frame keeps things steady even when you’re working with heavy materials or long seams
- Clear bobbin cover lets you see when thread’s running low before you run into problems
- Struggles with really thick fabrics like heavy denim despite being marketed as “heavy duty”
- Can get loud during operation, which might bother you during long sewing sessions
- Bobbin jams pop up more often than you’d expect, especially with certain thread types
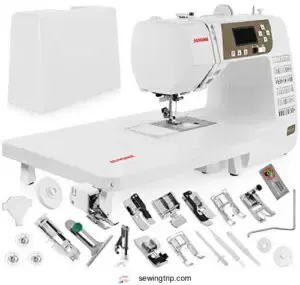
2. Janome Computerized Sewing Machine
A Janome Computerized Sewing Machine pairs beginner-friendly simplicity with room to grow, offering sixty built-in stitches and an LCD panel that shows your selected stitch and recommended settings as you work. The automatic needle threader saves time and frustration, while the top-loading bobbin system with a clear case makes bobbin management straightforward.
Sewing speed reaches eight hundred twenty stitches per minute, giving you control when you need precision and power when you’re confident. Regular sewing machine maintenance keeps thread tension smooth and your machine humming through every project.
| Best For | Beginners and intermediate sewers who want a versatile machine with automatic features that can handle everyday projects, quilting, and home décor without overwhelming complexity. |
|---|---|
| Brand | Janome |
| Material | Metal |
| Color | Tan |
| Primary Use | Sewing Machine |
| Skill Level | Beginner to Advanced |
| Warranty | Standard |
| Additional Features |
|
- Automatic needle threader and thread cutter eliminate tedious tasks and speed up your workflow
- 60 stitches and 6 buttonhole styles give you plenty of creative options as your skills develop
- Clear LCD panel and jam-proof bobbin system make setup and stitch selection straightforward, even if you’re new to sewing
- Maximum speed of 820 stitches per minute may feel slow for experienced sewers tackling large projects
- Thicker arm design can make hemming narrow pant legs or sleeves more challenging
- Not built for heavy-duty work with thick fabrics like denim or upholstery materials
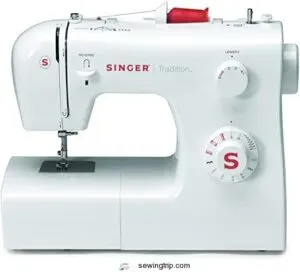
3. Singer Tradition Sewing Machine
The Singer Tradition Sewing Machine delivers ten built-in stitches and a straightforward bobbin system that makes sewing for beginners feel manageable right out of the box.
You’ll appreciate the adjustable stitch length and zigzag width, which give you control as your sewing projects expand beyond simple seams. Thread tension adjusts easily near the needle area, and the compact thirteen-pound body moves between workspaces without strain.
Regular sewing machine maintenance keeps this beginner-friendly workhorse ready for masks, repairs, and your first garment attempts.
| Best For | Beginners who want a straightforward, compact machine for basic sewing projects like simple garments, repairs, and crafts. |
|---|---|
| Brand | SINGER |
| Material | Metal |
| Color | White |
| Primary Use | Sewing Machine |
| Skill Level | Beginners |
| Warranty | Limited |
| Additional Features |
|
- Ten built-in stitches with adjustable length and width give you room to grow beyond basic seams
- Easy threading and bobbin system make setup quick, even if you’ve never used a sewing machine before
- Lightweight at 13 pounds, so you can easily move it or store it when not in use
- Some units have thread nesting issues that cause frustration during projects
- Quality control problems mean you might get a defective machine if you’re unlucky
- Not ideal for advanced sewing—you’ll outgrow it if you get serious about the hobby
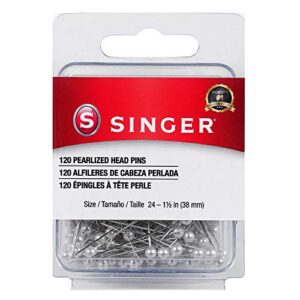
4. Singer Pearl Head Straight Pins
While a sewing machine takes care of the stitching, you’ll need the right pins to hold fabric layers in place before the needle even touches your project.
Singer Pearl Head Straight Pins feature nickel-plated steel shafts that resist rust and white pearl heads you can spot easily on patterned fabric. At 1.5 inches long, these pins secure seams without bending, though some beginners report fabric damage from dull tips.
Store them in a magnetic holder or cushion to reduce misplacement and protect your fingers during sewing lessons.
| Best For | Sewers who need reliable pins for holding fabric layers during basic sewing projects and crafts like boutonnieres or hijab pins. |
|---|---|
| Brand | SINGER |
| Material | Metal |
| Color | White |
| Primary Use | Sewing Pins |
| Skill Level | All Levels |
| Warranty | Standard |
| Additional Features |
|
- Nickel-plated steel resists rust and stays durable through multiple projects
- White pearl heads are easy to spot on busy fabrics and comfortable to grip
- 1.5-inch length works well for most standard sewing and craft applications
- Some pins arrive with dull or burred tips that can snag delicate fabrics
- May leave visible holes in certain materials like silk or thin cotton
- Packaging isn’t resealable, making storage and organization tricky
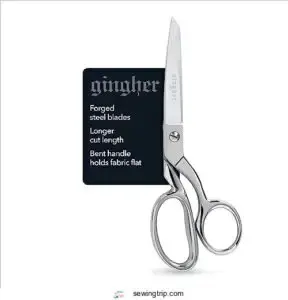
5. Gingher Stainless Steel Dressmaker Scissors
Clean cuts separate professional seams from frayed edges, which is why Gingher Stainless Steel Dressmaker Scissors belong in every beginner’s sewing supplies and tools. These eight-inch shears feature forged steel blades with a precision-ground knife edge that slices through multiple fabric layers during DIY sewing projects.
The bent handle design keeps material flat on your cutting table, improving sewing ergonomics and reducing wrist strain during pattern work. Reserve these scissors for fabric selection and cutting techniques only—paper dulls the edge quickly, requiring blade sharpening to restore their performance in sewing basics.
| Best For | Sewers who want professional-quality cuts on fabric and need durable scissors that’ll last through years of pattern work and seam trimming. |
|---|---|
| Brand | Gingher |
| Material | Stainless Steel |
| Color | Silver |
| Primary Use | Fabric Cutting |
| Skill Level | All Levels |
| Warranty | Lifetime |
| Additional Features |
|
- Knife-edge blades slice cleanly through multiple fabric layers without fraying
- Bent handle design keeps fabric flat while you cut, reducing hand strain
- Lifetime warranty backs up the premium construction
- Price is steep compared to basic sewing scissors
- Finger holes can feel slippery if your hands aren’t slightly moist
- Smaller size might feel cramped for people with larger hands
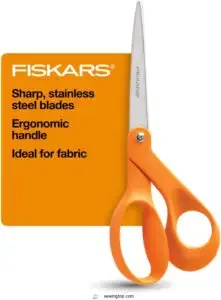
6. Fiskars Orange Handled Scissors
Bright orange grips make these Fiskars scissors easy to spot in your sewing supplies and tools, while precision-ground stainless steel blades cut through denim and quilting cotton without chewing fabric edges.
The ergonomic design reduces hand fatigue during long pattern-cutting sessions, and the bent grip keeps material flat against your table for accurate sewing techniques. Reserve them for fabric cutting only—paper ruins blade sharpness fast, requiring scissor maintenance to restore their performance.
At under ten dollars, they’re perfect sewing basics for beginners learning proper grip durability and cutting control.
| Best For | Sewers and crafters who need affordable, reliable fabric scissors that stay sharp through regular quilting and dressmaking projects. |
|---|---|
| Brand | Fiskars |
| Material | Stainless Steel |
| Color | Orange |
| Primary Use | Fabric Cutting |
| Skill Level | All Levels |
| Warranty | Lifetime |
| Additional Features |
|
- Precision-ground stainless steel blades cut cleanly through multiple fabric layers without fraying edges
- Bright orange handles are easy to locate in crowded craft spaces and sewing kits
- Ergonomic bent design keeps fabric flat during cutting and reduces hand strain on long projects
- Blades lose their edge quickly if used on paper or other non-fabric materials
- Made in China, which may be a concern for buyers preferring domestic manufacturing
- Requires dedicated fabric-only use and proper maintenance to preserve cutting performance
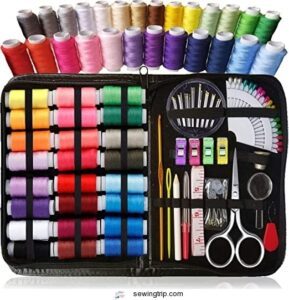
7. Artika Sewing Kit For Adults And Kids
Over 100 pieces fill this compact PU leather case—24 multicolor thread spools, 30 hand-sewing needles, embroidery scissors, a seam ripper, and a needle threader that make kit contents perfect for sewing emergencies on the road.
The zippered travel sewing organizer fits in your glove compartment or backpack, giving you quick fixes for popped buttons and loose hems without a sewing machine.
Beginners learning through sewing lessons and sewing tutorials will appreciate elastic loops that prevent thread tangles, while the included magnifying glass helps new sewers master portable sewing basics.
Kids need adult supervision with sharp tools.
| Best For | Sewers who need a portable kit for quick repairs on the go, whether you’re traveling, handling daily fixes, or teaching kids basic sewing skills. |
|---|---|
| Brand | ARTIKA |
| Material | Leather |
| Color | Multiple |
| Primary Use | Sewing Kit |
| Skill Level | Beginner to Intermediate |
| Warranty | Standard |
| Additional Features |
|
- Over 100 pieces in a compact leather case that fits easily in a backpack or glove compartment for emergencies
- Elastic loops keep thread organized and prevent tangles, plus includes helpful extras like a magnifying glass and needle threader
- Works well for beginners learning the basics and experienced sewers who need a travel-friendly backup kit
- Thread quality isn’t the highest and spools are smaller than standard size
- Scissors could be sharper and some users found overall item quality lower than expected
- Price point may feel high given the quality concerns some reviewers mentioned
Frequently Asked Questions (FAQs)
Can a beginner use a sewing machine?
Yes, you can absolutely use a sewing machine as a beginner. With proper setup, basic sewing lessons, and patient practice on simple beginner projects, you’ll quickly master sewing machine basics and build confidence.
How do I learn to sew on a sewing machine?
Start with sewing basics like threading your machine and winding the bobbin, then practice basic sewing techniques on scrap fabric to build confidence before tackling simple patterns.
How do you set up a sewing machine?
Getting your workspace ready means placing your sewing machine on a stable surface, connecting power and the foot pedal, inserting the proper needle, and ensuring thread tension settings are correct.
How to start a sewing project for a beginner?
Choose a simple project like a pillowcase or tote bag, select lightweight cotton fabric, and practice on scrap material first.
Familiarize yourself with your sewing machine’s basic functions before cutting your main fabric.
What do you need to start sewing for beginners?
Think of sewing basics like building blocks—you need a reliable sewing machine, sharp fabric scissors, all-purpose thread, universal needles, matching bobbins, straight pins, a seam ripper, measuring tape, and an iron for pressing seams flat.
How to start sewing?
Learning the sewing basics means mastering your sewing machine, selecting appropriate fabric and thread types, inserting the correct needle, and following sewing safety practices—these sewing tips build your foundation for confident weaving.
How to use a sewing machine for the first time?
Start by placing your sewing machine on a flat surface, connecting the power cord, and inserting a needle.
Thread the machine carefully, test on scrap fabric, and sew slowly to build control.
How do you sew step by step for beginners?
Before learning to sew, master machine setup—place it on a stable surface, thread correctly, and lower the presser foot.
Practice straight stitches on scrap fabric, adjusting thread tension until stitches look balanced.
Can I teach myself to use a sewing machine?
Yes, you can teach yourself using online tutorials, practice exercises, and sewing communities.
Master machine basics like threading and bobbin winding, then troubleshoot problems as you learn to sew independently at home.
How does a sewing machine work step by step?
Getting your machine humming along isn’t rocket science—it’s thread science.
Your sewing machine creates lockstitches by catching the upper thread around the bobbin thread, controlling tension and speed to form secure seams with proper stitch formation.
Conclusion
A single misthreaded needle can turn your entire project into a frustrating mess—but now you have the power to prevent that. These sewing for beginners machine instructions give you everything needed to set up confidently, thread accurately, and start stitching with control.
Your machine isn’t a mystery anymore; it’s a tool you understand. Practice each step until your hands move automatically, and soon you’ll wonder why threading ever seemed complicated at all.
- https://lindehobby.com/how-to-easily-adjust-sewing-machine-tension-for-perfect-stitches-1698/
- https://www.bsewinn.com/blogs/inspiration/sewing-machine-troubleshooting-guide
- https://www.the-littlest-thistle.com/thread-tension-guide/
- https://paigehandmade.com/sewing-machine-basics/tension
- https://www.threadsmagazine.com/2015/10/13/how-to-achieve-ideal-sewing-machine-thread-tension

