This site is supported by our readers. We may earn a commission, at no cost to you, if you purchase through links.

Clean lint from the bobbin area after every project, oil moving parts monthly, and change needles every 6-8 hours of sewing time.
Check thread tension regularly—loose creates bird’s nests underneath, while tight snaps threads mid-stitch. Remove the throat plate weekly to clear accumulated debris that causes skipped stitches and timing issues.
Store your machine covered in a dust-free environment between projects.
Professional servicing every 12-18 months keeps internal mechanisms aligned and catches problems before they escalate into expensive repairs that’ll have you questioning your hobby budget.
Table Of Contents
Key Takeaways
- Clean lint after every project – Remove debris from the bobbin area and feed dogs to prevent 70% of common machine problems, such as thread bunching and skipped stitches.
- Change needles every 6-8 hours of sewing – Fresh needles prevent fabric damage, thread breaks, and poor stitch quality that can ruin your projects.
- Oil moving parts monthly – Apply 1-3 drops of specialized sewing machine oil to designated points to keep mechanisms running smoothly and prevent costly repairs.
- Schedule professional servicing every 12-18 months – Annual tune-ups catch internal problems early and extend your machine’s lifespan, preventing expensive breakdowns.
Sewing Machine Basics
Understanding your sewing machine’s components helps you maintain it properly and avoid costly repairs.
Whether you own a basic mechanical model, an electronic machine with digital displays, or a computerized version with programmable patterns, knowing how the needle, bobbin, feed dogs, and presser foot work together creates better stitching results.
This understanding is crucial for achieving professional-looking stitches and extending the life of your machine, as it allows for proper maintenance and troubleshooting.
Machine Components
Understanding your sewing machine parts helps you tackle maintenance like a pro.
The needle function involves puncturing fabric while the bobbin mechanics create the bottom thread loop.
Thread tension keeps stitches balanced, while feed dogs move fabric forward and the presser foot holds everything steady.
These sewing machine components work together seamlessly, making needle replacement and bobbin maintenance essential for smooth operation.
Functionality Overview
Your sewing machine’s functionality centers on precise stitch formation through coordinated component action.
The needle punctures fabric while thread tension mechanisms balance upper and bobbin threads. Fabric feed occurs as feed dogs grip material, working alongside the presser foot to guide smooth movement.
Machine types – mechanical, electronic, and computerized – offer varying automation levels.
Understanding this synchronized process helps you tackle any sewing machine troubleshooting challenge and maintain peak sewing machine performance throughout your sewing machine maintenance project.
Types of Sewing Machines
Your choice of machine affects your sewing machine maintenance routine substantially.
Each type requires different care approaches to keep running smoothly.
- Mechanical Machines use manual controls and need basic cleaning plus regular oiling of moving parts.
- Electronic Machines feature digital displays requiring gentle cleaning around sensitive components.
- Computerized Machines offer advanced programming but need careful maintenance of complex internal systems.
Industrial Models demand heavy-duty care, while Domestic Models need gentler handling during sewing machine cleaning and oiling procedures.
Many users find that a versatile machine suits a range of sewing projects.
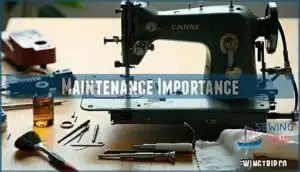
Maintenance Importance
Your sewing machine works hard for every project, but without proper maintenance, it’ll break down when you need it most.
Regular care prevents costly repairs, keeps your stitches looking professional, and helps your machine last for decades instead of years, ensuring your sewing machine remains in good condition with proper maintenance.
Preventing Breakdowns
Neglecting basic care turns your trusty stitching companion into an expensive paperweight. Regular cleaning removes lint buildup that clogs feed dogs and jams mechanisms. Proper lubrication keeps moving parts smooth, preventing costly repairs. Quality parts and smart usage habits extend your machine’s life substantially.
A few minutes of care beats hours of costly repairs.
| Prevention Method | Benefit |
|---|---|
| Regular Cleaning | Prevents 70% of common issues |
| Proper Lubrication | Reduces mechanical wear |
| Quality Parts | Minimizes breakdown frequency |
| Storage Practices | Protects from dust damage |
| Usage Habits | Extends overall lifespan |
Smart sewing machine maintenance pays dividends—a few minutes of care beats hours troubleshooting problems.
Improving Stitch Quality
Regular sewing machine maintenance dramatically improves your stitch quality by keeping every component working in harmony.
Clean feed dogs grip fabric evenly, while proper thread tension adjustment prevents loose or tight stitches.
Fresh needle condition paired with quality thread and correct stitch settings creates professional results.
When your machine runs smoothly, consistent fabric choice becomes easier to manage.
Regular maintenance helps in extending machine lifespan to ensure your equipment lasts longer and performs optimally.
Extending Machine Lifespan
Proper care acts like an insurance policy for your machine’s future.
Quality parts and regular servicing prevent costly replacements while protecting from elements that cause rust and damage.
Avoid overuse during marathon sewing sessions, and maintain consistent sewing machine maintenance frequency.
These sewing machine maintenance tips boost longevity substantially.
Smart storage and following sewing machine maintenance benefits guidelines keep your investment running for decades, ensuring your machine remains in good condition with proper care and regular servicing.
Cleaning Techniques
Proper cleaning techniques form the foundation of sewing machine maintenance, preventing lint buildup that causes 70% of common machine problems.
You’ll master three essential cleaning methods that keep your machine running smoothly and extend its lifespan substantially, which is a key aspect of sewing machine maintenance.
Removing Lint and Dust
Lint-accumulation battles plague every sewing machine, but you’ll win with the right approach.
After each sewing session, use a lint brush to sweep away debris from feed dogs and needle areas.
Clean your workspace regularly to prevent dust from settling into machine crevices.
For deep cleaning methods, remove the needle plate monthly and vacuum hard-to-reach spots.
Quality lint removal tools make this task effortless, keeping your machine running smoothly.
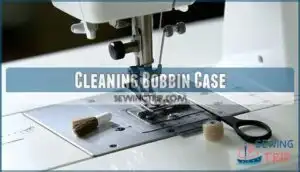
Cleaning Bobbin Case
You’ll find the bobbin case harbors surprising amounts of lint buildup and thread residue that directly affects your machine’s tension impact.
Remove the bobbin case carefully, then use cleaning tools like a small brush or tweezers to extract stubborn debris from corners.
Check for bobbin damage like cracks or rough edges while cleaning. This bobbin maintenance step prevents feed dog cleaning issues later and keeps your sewing machine cleaning tools working effectively during lint removal sessions.
Oiling Recommendations
Three essential principles guide effective sewing machine oiling. You’ll protect your investment by following manufacturer recommendations for oil types and lubrication frequency.
Modern plastic machines need less frequent oiling than all-metal models, but consistency matters more than timing. It’s vital to take into account the machine’s oiling frequency based on usage.
- Use only specialized sewing machine oil – household oils create harmful residue buildup
- Apply one drop per oiling point – excess oil attracts dust and stains fabric
- Oil after every 3-4 bobbin changes – or when you hear squeaking sounds
- Focus on metal-to-metal contact points – avoid plastic gears and electrical components
Oil and Lubrication
Your machine needs proper lubrication to keep all those moving parts working smoothly, just like your car engine.
You’ll want to oil specific points regularly, but don’t go overboard—too much oil attracts lint and creates a gummy mess that’ll slow things down.
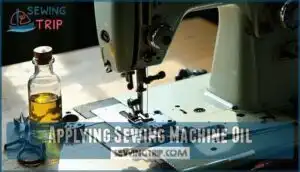
Applying Sewing Machine Oil
You’ll need specialized sewing machine oil for proper lubrication.
Apply one to three drops at designated points every 8-10 hours of use. Check your manual for specific locations and frequency guidelines.
| Oil Types | Application Points |
|---|---|
| Singer All-Purpose Oil | Moving joints, needle bar |
| White mineral oil | Feed dog mechanism, hook race |
| Machine-specific lubricant | Tension discs, bobbin case |
Use oiling tools like precision applicators to avoid waste. Clean excess oil immediately to prevent residue buildup that attracts dust and lint.
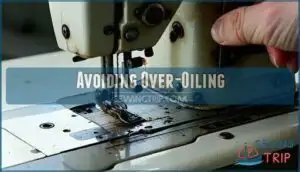
Avoiding Over-Oiling
With sewing machine lubrication, less is definitely more. Too much oil attracts dust and creates gumming effects that’ll slow your machine to a crawl.
- Apply 1-3 drops maximum per lubrication point – oil residue builds up quickly with excess amounts
- Use only sewing machine oil types – household oils leave sticky residue that damages mechanisms
- Follow manufacturer’s application frequency guidelines – over-oiling happens faster than you think
- Wipe away excess immediately – leftover oil collects lint and creates mechanical problems
- Monitor for correct amount by checking if parts move smoothly without oil pooling
Lubrication Points
Precision becomes your ally when targeting specific lubrication points on your machine.
Each drop counts—too little starves moving parts, while excess attracts lint and causes gumming.
Focus on manufacturer-recommended spots using high-quality synthetic lubricants for peak performance.
| Lubrication Point | Oiling Frequency |
|---|---|
| Hook race assembly | Every 8-10 hours |
| Needle bar mechanism | Monthly deep clean |
| Feed dog pivot points | Every major project |
| Tension disc springs | Quarterly maintenance |
| Motor bearings | Professional service only |
Needle Maintenance
Your sewing machine’s needle works harder than any other component, piercing fabric thousands of times per project.
Your machine’s hardest worker deserves fresh replacements every few hours of stitching.
Replace it every 8-10 hours of sewing to prevent skipped stitches, thread breaks, and fabric damage that can ruin your work.
Changing Needles
After proper oiling, you’ll want to replace your sewing machine needle regularly to maintain peak performance.
A dull or bent needle causes more problems than you’d think.
Here’s your needle replacement checklist:
- Change every 8-10 hours – Don’t let needle lifespan fool you into thinking "it looks fine"
- Check for bent needles – Even slight bends create skipped stitches and fabric snags
- Secure needle insertion – Push fully up into the needle clamp before tightening
- Match fabric weight – Heavy fabrics demand stronger needles for clean penetration
Proper needle care prevents thread breakage and guarantees smooth fabric feeding through your machine.
Consider this needle replacement guide for selecting the correct type.
Needle Types
Choosing the right needle types transforms your sewing experience from frustrating to fantastic.
Universal needles handle most fabrics with their slightly rounded needle point, while ball point needles prevent runs in knits.
Sharp microtex needles pierce dense fabrics cleanly. Specialty needles like jeans or leather varieties tackle tough materials.
Needle sizes range from delicate 60/8 to heavy-duty 110/18, matching fabric weight for ideal sewing machine maintenance.
Thread Management
Managing your threads correctly prevents most sewing headaches before they start.
Quality thread types like polyester or cotton work best, while cheap threads often cause breakage and tension issues.
Here’s your thread management checklist:
- Wind bobbins evenly – Uneven winding creates tension problems and thread bunching during stitching
- Match spool size to your machine – Wrong sizes cause feeding issues and affect sewing machine thread tension
- Store threads properly – Keep spools covered and away from sunlight to prevent weakening and breakage
Always use proper threading methods through each guide and tension disc.
Check your sewing machine bobbin regularly for nicks or damage.
When thread breakage occurs frequently, examine your threading path and needle condition.
Good sewing machine maintenance includes replacing old thread that’s become brittle or faded.
Tension Adjustment
You’ll need to check your sewing machine’s tension regularly to guarantee balanced, professional-looking stitches.
Thread tension that’s too tight or loose creates uneven seams and can cause thread breakage, skipped stitches, or unsightly bunching on your fabric, which affects the overall professional-looking quality of your work.
Checking Tension
Two contrasting thread colors reveal tension secrets instantly.
Thread your machine with different colored threads on top and bottom, then sew test fabric straight lines.
Balanced stitches show equal thread visibility on both fabric sides.
If one color dominates either surface, your tension dial needs adjustment.
This simple diagnostic method prevents sewing machine problems and guarantees consistent results through proper thread tension evaluation before starting any project, ensuring proper thread tension is key to success.
Adjusting Tension
After identifying tension issues with your test fabric, turn the tension dial gradually to make corrections.
For loops appearing underneath, increase the dial number clockwise. If puckering occurs on top, decrease tension counterclockwise.
Make small adjustments between each test stitch—dramatic changes create unpredictable sewing machine problems.
Always use thread colors that contrast with your test fabric to clearly see both upper and lower threads. This methodical approach guarantees balanced stitches and consistent results across all your projects.
Troubleshooting Tension
When tension problems persist, check for tension imbalance by testing different thread types on scrap fabric.
Bobbin problems often cause irregular stitches, so inspect the bobbin case for lint or damage.
Fabric influence affects thread tension, requiring adjustments between materials.
Test stitching reveals whether your sewing machine tension settings need fine-tuning for ideal results.
Maintaining the correct tension also relies on thread quality and type.
Common Machine Issues
Even the best-maintained sewing machines can develop problems that’ll stop your projects cold.
You’ll encounter three main culprits: thread bunching underneath your fabric, skipped stitches that leave gaps in your seams, and needles that snap mid-stitch.
Thread Bunching
Thread bunching happens when your upper thread creates messy nests beneath your fabric.
This frustrating problem stems from incorrect threading, tension imbalance, or bobbins issues.
Check your threading path first—you’ve likely missed a guide or tension disc.
Poor thread quality also causes tangles, while feed dog problems can worsen bunching.
Clean your bobbin case and rethread completely for quick fixes.
Skipped Stitches
Nothing’s more frustrating than watching your fabric crawl along while your machine skips stitches like a broken record.
Needle condition directly impacts stitch formation—dull or bent needles can’t properly catch bobbin thread.
Check your fabric type matches needle size, verify that thread quality isn’t compromised, and verify your presser foot pressure.
Timing issues require professional sewing machine maintenance to restore proper tension adjustment.
Needle Breakage
Broken needles can turn your favorite sewing project into a frustrating puzzle. Wrong needle types for fabric thickness, poor installation, or machine timing issues cause most breakages.
Don’t let a snapped needle derail your creativity.
- Needle Types: Match needle size to fabric weight – use heavy-duty needles for denim, ballpoint for knits
- Installation Errors: Insert needles fully with flat side facing back; loose needles break easily
- Fabric Thickness: Avoid forcing thick seams; use appropriate needle size or hand-turn flywheel over bulky areas
- Bent Needles: Replace immediately when needles show any bend – they’ll snap under pressure
- Machine Timing: Professional service needed if needles consistently hit bobbin case or needle plate
Troubleshooting Steps
When your sewing machine starts acting up, don’t panic—most problems have simple solutions you can tackle yourself.
Follow these systematic troubleshooting steps to get your machine back to creating perfect stitches in no time, with simple solutions that you can apply.
Resolving Thread Issues
When sewing machine tension goes haywire, you’ll spot thread breakage or thread bunching immediately.
Start by rethreading your entire machine—top thread first, then bobbin. Check for bobbin problems like tangled thread or debris.
Test tension balance on scrap fabric using different colored threads. If thread jamming persists, clean your tension discs and adjust gradually until stitches look even, ensuring a proper thread setup.
Fixing Skipped Stitches
Skipped stitches often happen when your needle dulls or bends. Replace it first – fresh needles solve most threading problems instantly.
Check that you’re using the right needle for your fabric choice; heavy denim needs stronger needles than cotton.
Inspect your feed dog for lint buildup that prevents smooth fabric movement.
For consistent stitches, consider using high-quality thread. If problems persist, timing adjustment by a professional might be necessary for proper sewing machine maintenance.
Repairing Machine Problems
Machine hiccups can leave you frustrated, but don’t panic.
Motor repair and electrical issues often require professional help, while belt slippage and timing adjustments need precision.
For sewing machine repair, start with basic sewing machine troubleshooting—check threading, clean feed dogs, and verify tension adjustment.
Part replacement might be necessary for worn components causing skipped stitches or other common sewing problems.
Maintenance Schedules
Your maintenance schedule should match how often you actually use your machine—there’s no point in daily cleaning if you only sew once a month.
Whether you’re stitching every day or just on weekends, following the right routine keeps your machine happy and your projects looking professional.
Daily Sewers
If you’re hitting the sewing machine daily, you’ll need a tight maintenance routine to keep things humming.
Think of it like brushing your teeth – skipping even one day lets problems build up fast.
Your daily tasks should include:
- Lint Removal after each session using a small brush to clear feed dogs and bobbin area
- Weekly Oiling of designated points following your manual’s recommendations
- Monthly Cleaning with a deep clean of removable parts and hidden debris spots.
This sewing machine maintenance routine prevents 70% of common issues while keeping your stitches looking professional.
Weekend Hobbyists
Weekend hobbyist maintenance strikes a sweet balance between daily upkeep and occasional care.
You’ll want bi-weekly oiling after completing projects, plus thorough project-based cleaning to remove accumulated lint.
Focus on hobbyist maintenance routines that fit your sewing schedule. Check tension discs weekly and inspect needles between sessions.
Storage solutions keep dust away when you’re not creating. Annual checkups guarantee your machine stays reliable for weekend adventures.
Occasional Sewers
For occasional sewers who stitch monthly projects, machine inspection and pre-use checks prevent surprises mid-project. Your sewing machine maintenance routine should adapt to infrequent usage patterns.
- Project Preparation: Inspect machine before each use, checking for dust buildup or stiff parts
- Storage Practices: Keep machine covered between projects to minimize dust accumulation
- Machine Inspection: Test run briefly without fabric to confirm smooth operation
- Sewing Machine Cleaning: Remove lint from bobbin area and feed dogs every 3 months
- Sewing Machine Oiling: Apply light lubrication quarterly, preventing oil from becoming sticky during storage periods
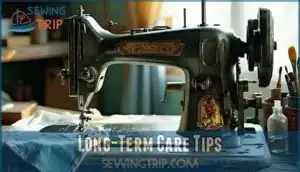
Long-Term Care Tips
Your sewing machine’s long-term health depends on consistent care and knowing when to call in the professionals.
Think of it like caring for your car – regular tune-ups prevent costly breakdowns and keep everything running smoothly for years to come, which is a key aspect of maintaining your machine’s health through consistent care.
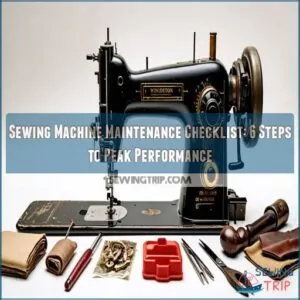
Using Maintenance Tools
Your sewing machine maintenance kit transforms routine care into precise work. Smart tool selection makes cleaning efficient and protects delicate components from damage during maintenance sessions.
| Tool Type | Best Material | Primary Use |
|---|---|---|
| Brush Types | Nylon bristles | Lint removal from feed dogs |
| Tweezers Use | Angled-tip metal | Thread tangle extraction |
| Cloth Materials | Microfiber | Scratch-free surface cleaning |
Quality Oil Applicators deliver precise lubrication without waste. Keep Screwdriver Tips matched to your machine’s hardware specifications for safe disassembly. Consider using a specialized cleaning brush for superior results.
Scheduling Professional Service
While your trusty maintenance tools keep your machine humming daily, professional sewing machine servicing provides deeper care.
Annual professional servicing catches problems you might miss and extends your machine’s life substantially.
Here’s what makes professional service worthwhile:
- Service Benefits – Technicians spot developing issues before they become costly breakdowns
- Finding Technicians – Look for authorized dealers who maintain warranties and use genuine parts
- Service Frequency – Daily users need servicing every six months; occasional sewers can wait two years
- Cost Factors – Basic service runs $75-$100, but prevents expensive emergency repairs
- DIY vs Pro – Professionals have specialized tools and training for internal adjustments you can’t safely perform
Adjusting Maintenance Frequency
Your maintenance frequency should match your usage patterns and fabric types.
Heavy cotton quilters need more frequent cleaning than occasional silk sewers. Machine age matters too – older models require stricter maintenance schedules.
Complex projects with multiple thread changes demand extra attention. Environmental factors like dust or pet hair also influence your sewing machine maintenance checklist.
Adjust cleaning frequency and oiling frequency accordingly, but never skip annual professional servicing.
Frequently Asked Questions (FAQs)
How often should a sewing machine be maintained?
Routine maintenance prevents 70% of common machine issues.
You should clean your machine after every 8 hours of use, removing lint from feed dogs and bobbin areas.
Oil moving parts monthly, and schedule professional servicing annually.
Why is sewing machine maintenance important?
Proper maintenance prevents costly breakdowns, extends your machine’s lifespan, and guarantees consistent stitch quality. Regular cleaning removes lint buildup that causes 70% of common issues like thread bunching and skipped stitches.
How to maintain a sewing machine?
Clean your machine after every project by removing lint from feed dogs and bobbin area.
Oil moving parts monthly following your manual’s specifications.
Change needles every 8-10 hours of use for peak performance.
What are the essential steps in sewing machine maintenance?
Your machine’s well-being depends on regular tender loving care. Clean lint after each session, oil moving parts monthly, change needles every eight hours, and check tension settings regularly.
Can a sewing machine break down?
Yes, you’ll encounter breakdowns without regular maintenance.
Lint buildup, worn needles, and poor lubrication cause thread bunching, skipped stitches, and motor problems.
However, consistent cleaning and oiling prevent most issues from developing.
How do you keep a sewing machine running?
Like a well-tuned engine, your sewing machine needs regular TLC to purr smoothly.
Clean lint after each project, oil moving parts monthly, change needles every 8-10 hours, and maintain proper thread tension for flawless stitches.
What is the most common problem for a sewing machine?
Thread bunching tops the list of sewing machine headaches, usually caused by lint buildup or incorrect threading.
You’ll also face skipped stitches and needle breakage frequently, but proper cleaning prevents most issues.
How much does it cost to have a sewing machine serviced?
Picture getting your wallet opened at the repair shop counter. Professional sewing machine service typically costs $75-$150, depending on your machine type and complexity, before replacement parts.
What warranty coverage protects sewing machine repairs?
Most manufacturers provide 25-year parts coverage and 1-2 years labor coverage. Refurbished machines typically get 90-day warranties, while extended warranties cover parts and labor beyond manufacturer terms.
How do weather conditions affect machine storage?
Humidity acts like a silent saboteur for your sewing machine. Store it in a dry, temperature-controlled environment to prevent rust, warping, and moisture damage to internal components.
Conclusion
Before smartphones turned us all into digital zombies, sewers knew their machines like blacksmiths knew their anvils.
Your sewing machine maintenance project doesn’t end with reading about techniques—it succeeds through consistent action.
Start with daily lint removal, establish weekly deep cleans, and schedule monthly oiling sessions.
Remember that prevention costs pennies while repairs cost dollars.
Your machine will reward proper care with decades of reliable stitching, making every maintenance minute a wise investment in your creative future.
- https://www.instructables.com/How-to-Service-a-Sewing-Machine/
- https://www.nationalquilterscircle.com/post/how-to-clean-and-maintain-your-sewing-machine-in-10-steps
- https://www.reddit.com/r/quilting/comments/1cnasvd/favorite_tools_for_cleaning_your_sewing_machine/
- https://www.youtube.com/watch?v=ejlfcOwFpFY
- https://scissortailquilting.com/tutorials-instruction/clean-maintain-sewing-machine-maintenance/

