This site is supported by our readers. We may earn a commission, at no cost to you, if you purchase through links.
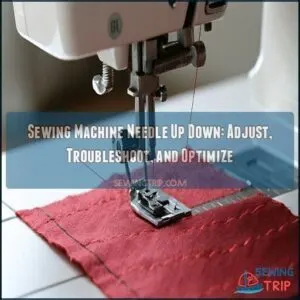
Most machines have a dedicated button or lever—check your manual for its exact location. Press once to raise or lower the needle, letting you stop with it either up (great for moving fabric) or down (ideal for sharp turns or tricky details).
If the needle isn’t cooperating, verify the machine’s powered, the button’s functioning, and there’s no jam. Feeling stuck (pun intended)? A maintenance check might help.
Mastering this feature turns frustration into finesse—because who doesn’t want professional results every time?
Table Of Contents
Key Takeaways
- You can use the needle up/down button to control the stopping position for precision during pivoting or fabric adjustments.
- Always check and adjust the needle position or height for specific fabric types to prevent skipped stitches or uneven seams.
- Regular maintenance, like cleaning, oiling, and inspecting the needle, ensures smooth sewing and prevents costly repairs.
- Manual controls like the handwheel or foot pedal offer precise adjustments when the automatic needle up/down feature isn’t used.
Needle Up Down Mechanism
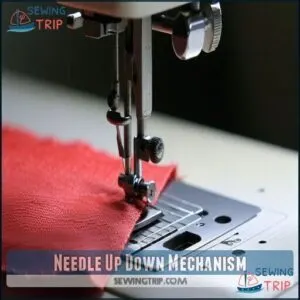
The needle up/down mechanism is a motorized system that controls the needle’s position with precision, either raising it out of the fabric or lowering it into place.
A motorized needle mechanism ensures precise control, smoothly raising or lowering the needle for effortless fabric handling and flawless stitching.
It integrates electronic controls and manual options, ensuring smooth operation for tasks like pivoting, stitching, or fabric adjustments, which is made possible by the precision of the system.
Motorized Mechanism Explained
The motorized mechanism in sewing machines guarantees precision and efficiency.
It integrates various motor types with sensor technology for seamless needle up/down movements.
Here’s how it works:
- Motors drive the needle’s motion, guaranteeing motorized precision.
- Sensors enable automatic needle stop at precise points.
- Electronic synchronization aligns movements with the sewing machine automation.
- Optimized power consumption balances performance and energy use to achieve efficiency.
The process ensures a smooth and automated sewing experience, leveraging technology for improved outcomes.
Electronic Control System Details
The electronic control system in sewing machines uses microprocessor control and sensor integration for motorized precision.
This automation allows features like automatic needle stop, ensuring the needle halts precisely in the up or down position.
With sewing machine electronics, customization options let you tailor automatic settings for your needs, making needle up/down adjustments seamless and enhancing overall sewing efficiency.
The use of automatic needle stop is a key feature that contributes to the precision and reliability of the sewing machine.
Needle Up Position Function
The needle up position lifts the needle completely out of the fabric, making fabric removal smoother and preventing stitching mishaps.
Lifting the needle up ensures seamless fabric removal, avoids stitching errors, and saves time during every sewing project.
This sewing machine functionality is a lifesaver for delicate fabrics and cornering ease.
The needle updown feature also saves time during repetitive tasks, ensuring precision and efficiency.
It’s one of those sewing machine features that simplifies your workflow effortlessly.
Needle Down Position Function
Stopping with the needle down locks your fabric in place, perfect for fabric pivoting or maintaining cornering precision.
This needle up/down feature secures stitches during seam starts and guarantees material holding while adjusting. It’s a lifesaver for intricate sewing machine features, like quilting or appliqué, where stitch security matters.
A common cause is a disengaged hand wheel. Use it to keep your work steady and flawless.
Manual Control Options Available
You’ve got plenty of manual control options for needle position control when sewing.
Whether you prefer the tactile feel of a handwheel for precision or the convenience of a foot pedal, each method offers flexibility.
Common options include:
- Handwheel Precision for fine adjustments.
- Button Control for quick changes.
- Lever Action for simplicity.
- Foot Pedal for seamless operation.
- Knee Lift for hands-free sewing.
Using Needle Up Down Feature
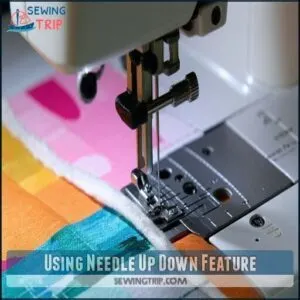
Mastering the needle up/down feature lets you control your sewing machine with greater accuracy and ease.
By understanding its settings and functions, you can guarantee smoother fabric handling and more precise stitching.
Locating The Control Button
Finding the needle position control button is straightforward with most sewing machine controls.
Check the control panel for labeled sewing machine buttons or symbols indicating needle position. If unsure, refer to the manual for button identification and feature activation guidance.
Some machines allow custom settings for automatic control, so familiarize yourself with these options to streamline your sewing process.
Understanding Default Settings
Once you’ve located the control button, understanding factory defaults is key.
Most sewing machine settings stop the needle in a preset position, often up. Beginner preferences might align with these, but reviewing the sewing machine user manual helps clarify automatic control and needle height adjustment.
Initial setup guarantees smooth operation, leaving room for future customization options as your skills grow.
The stitch length selectors are vital for different fabrics.
Adjusting Settings for Precision
To refine sewing precision, adjust your machine’s needle height and tension balance.
Check your sewing machine settings for stitch length and needle position options.
Align the pressure foot and feed dog properly to enhance stitch quality.
Needle height adjustment is key—refer to your manual for guidance.
Perfecting these tweaks guarantees smoother fabric handling and consistent, professional results.
Using Automatic Controls Effectively
Mastering automated precision begins with understanding your sewing machine’s electronic control system.
Use sensor calibration to guarantee programmed stops align with your needs, creating seamless hands-free sewing.
Activate the needle up/down feature for consistent needle position during pauses.
Customization benefits include setting your preferred needle stop position, enhancing control and efficiency.
This sewing machine feature activation simplifies intricate tasks beautifully.
Manual Positioning Techniques
Switching from automatic controls, manual positioning gives you hands-on precision. The handwheel is your best friend for controlled stitching and needle height adjustments.
Here’s how to master it:
- Turn the handwheel to set the needle position precisely.
- Use manual override for tricky fabric control.
- Check needle positioning for safety.
- Keep finger safety in mind.
- Practice for smooth fabric handling.
Needle Position Adjustment
Adjusting the needle’s position guarantees smooth stitching and prevents issues like skipped stitches or uneven seams.
By understanding how to modify needle height and bar alignment, you’ll achieve better precision and fabric control.
Zig Zag Capabilities Importance
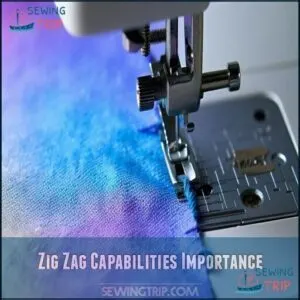
Understanding zigzag stitch uses starts with controlling needle movement.
Adjusting the needle position guarantees precision for decorative zigzag, stretch stitch zigzag, and buttonhole zigzag tasks.
Your sewing machine’s zigzag stitch width impacts fabric flexibility and design finesse.
Fine-tune settings for perfect results.
| Feature | Purpose | Benefit |
|---|---|---|
| Zigzag stitch width | Adjusts stitch breadth | Enhances flexibility |
| Needle position | Aligns needle precisely | Improves accuracy |
| Needle movement | Controls stitch patterns | Elevates creativity |
Presser Foot Guide Role
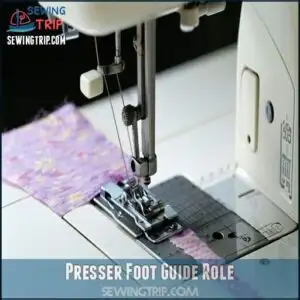
The presser foot guide plays a key role in fabric feed control, ensuring seam allowance accuracy and smooth needle movement.
Different foot guide types help manage decorative stitch guidance or specialty foot uses.
Align your fabric properly under the presser foot to maintain precision. This small adjustment can make your sewing machine’s needle position and stitching much more reliable and consistent.
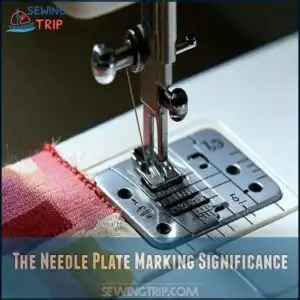
The Needle Plate Marking Significance
The needle plate markings on your sewing machine aren’t just decorative—they’re essential for precision.
These lines help maintain seam allowance, guide fabric smoothly, and guarantee measurement accuracy for stitch consistency.
- Align fabric edges with markings for straight seams.
- Use guides to adjust needle position for intricate stitching.
- Check plate compatibility with your sewing machine components for superior performance.
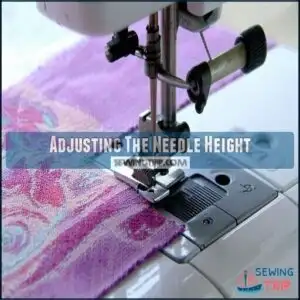
Adjusting The Needle Height
Fine-tuning needle height is key to handling fabric thickness and guaranteeing stitch quality.
Use your machine’s manual or electronic controls for precise needle adjustment.
Height customization helps avoid skipped stitches and fabric snags.
Always match needle position to your project’s needs, keeping needle compatibility in mind.
These sewing machine tips guarantee smooth sewing and better results with minimal frustration.
Proper adjustment guarantees optimal optimal stitch quality.
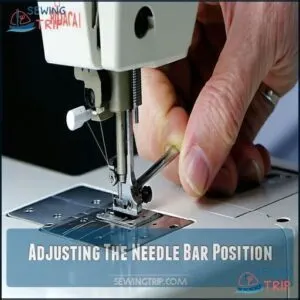
Adjusting The Needle Bar Position
Aligning the needle bar perfectly impacts both height and lateral needle movement, especially with thicker fabrics or specialized needle types.
Loosen the set screw carefully, adjust the needle bar alignment to avoid collisions with machine parts, and secure it tightly.
Regular sewing machine maintenance guarantees smooth needle position shifts, enhancing stitches, and precise needle adjustments also prevent damage and reduce the need for sewing machine repair, which is crucial for overall machine maintenance.
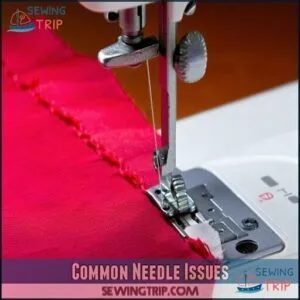
Common Needle Issues
When your sewing machine needle isn’t moving or seems off, it’s usually a sign of an underlying issue like misalignment or damage.
Understanding common problems, from bent needles to tension errors, can help you fix them quickly and keep sewing smoothly.
Needle Not Moving Causes
When your sewing machine’s needle isn’t moving, it’s typically linked to needle insertion issues, bent needles, a damaged bar, incorrect tension settings, or the bobbin-winding spindle being out of position.
Always check the needle position and verify the spindle isn’t engaged for winding.
Regular sewing machine troubleshooting and maintenance can keep these problems from slowing you down.
Bent or Damaged Needle Solutions
A damaged needle is a sewing machine’s nightmare, affecting stitches and fabric.
Follow these steps to fix it:
- Inspect the needle for bends, nicks, or burrs.
- Use the replacement guide in your manual for proper installation.
- Prevent damage by sewing with the correct needle type.
- Replacement sewing products are readily available.
- Dispose of damaged needles safely in a sharps container.
- Recheck needle position during troubleshooting.
Needle Bar Damage Repair
A bent needle bar disrupts stitches and fabric flow.
Before replacing the needle bar, check for misalignment using a dial gauge.
DIY needle bar repairs require loosening set screws or adjusting the shaft bushing.
Regular sewing machine repair and replacing needle parts prevent costly missteps.
Repair costs vary, often exceeding $100.
Always power off for safety during needle bar alignment.
Consider needle bar options when replacement is necessary, as it is a crucial step in maintaining or restoring your sewing machine’s performance, and replacing the needle bar can be a cost-effective solution.
Tension Settings Adjustment
When adjusting tension settings, consider fabric thickness, thread type, and stitch quality.
Start small—tighten or loosen bobbin tension and thread tension gradually.
Tension balance guarantees smooth stitch consistency, so watch for loops or puckering.
If stitch consistency falters, revisit sewing machine adjustments, like needle position and tension adjustment, to restore harmony.
A well-tuned machine sews like a dream.
Bobbin Winding Spindle Positioning
Understanding the bobbin winding spindle function keeps your sewing machine humming along smoothly.
If the spindle isn’t in the correct placement, you’ll face winding issues and uneven tension balance.
Check these:
- Verify that the spindle locks securely when engaged.
- Verify the thread guide is aligned to the bobbin.
- Confirm the needle position aligns for smooth winding.
Troubleshooting Needle Problems
When your sewing machine needle isn’t moving or behaving as it should, pinpointing the issue is essential to getting back on track.
By checking key factors like the position switch, stitch length, and thread tangles, you can quickly identify and resolve most problems.
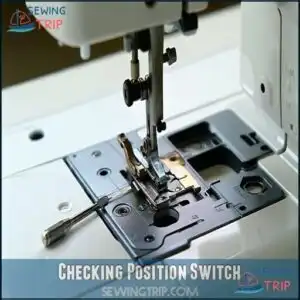
Checking Position Switch
The position switch controls your sewing machine’s needle position through its electronic control system.
Check switch functionality if your needle’s stuck or misplaced.
Position switch types vary, but switch malfunctions like sticking or improper clicks often call for testing or replacement options.
Inspect your sewing machine mechanisms carefully to guarantee smooth movement, and always prioritize safe handling while troubleshooting.
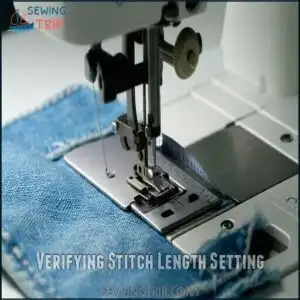
Verifying Stitch Length Setting
Regularly check your sewing machine settings to verify the stitch length setting.
The Stitch Length Guide aligns perfectly with Fabric Feed Control, impacting seam quality and consistent stitching.
Improper settings can disrupt sewing accuracy, causing length issues.
Adjust settings carefully for your project, ensuring precise needle position and smooth stitching.
Troubleshooting length problems keeps your sewing machine and creations running beautifully, which is crucial for maintaining overall seam quality and achieving consistent stitching.
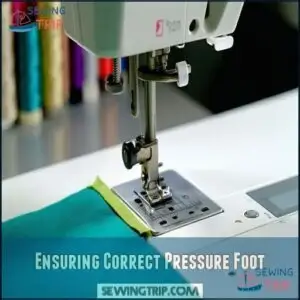
Ensuring Correct Pressure Foot
Make sure the presser foot matches your fabric type and sewing task.
A compatible foot improves fabric feed control, preventing foot slippage and stitch inconsistencies.
Use a foot compatibility guide to check suitability, especially for specialty feet like a zipper or quilting foot.
Proper foot pressure adjustment guarantees smooth stitching and keeps the needle position steady for seamless sewing machine performance.
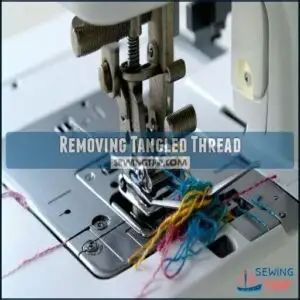
Removing Tangled Thread
A thread nest can halt your sewing machine mid-project.
First, cut excess thread, then remove the bobbin case for cleaning.
Clear the tension discs and access the hook system for thorough shuttle race maintenance.
Check the needle position to prevent needle thread breakage, which guarantees smooth sewing and avoids future tangling headaches.
Checking for Obstructions
As you inspect your sewing machine, check for anything blocking the needle path. Fabric buildup, thread snags, or lint accumulation might be lurking. Even small foreign objects around the needle position can cause trouble.
- Remove the needle to check for obstructions.
- Clean around the needle bar and feed dogs.
- Use a brush for lint buildup.
- Inspect moving parts for blockages to ensure smooth operation and prevent damage to your sewing machine, which can be caused by foreign objects.
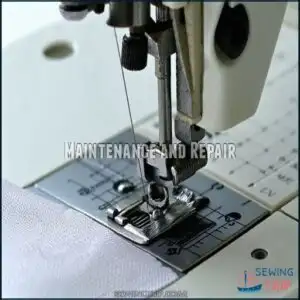
Maintenance and Repair
Keeping your sewing machine’s needle mechanism in top shape guarantees smooth operation and longer machine life.
Regular maintenance, like cleaning, oiling, and checking needle condition, prevents common problems and costly repairs.
Manual Needle Control Techniques
Mastering sewing needle control starts with the handwheel. For precise needle position adjustments, turn it gently.
Leverage button control for quick needle stop position changes, or use lever operation for incremental tweaks.
Some prefer foot pedal actions for hands-free manual override during sewing techniques. These methods guarantee flexibility, letting you adapt as needed for perfect stitching outcomes, ensuring perfect stitching.
Cleaning and Oiling The Machine
Regular cleaning and oiling prevent sewing machine problems, ensuring smooth operation. Focus on lubrication points outlined in your manual, using only recommended oil types.
Schedule cleaning frequency based on usage, and always remove residue like lint or dust beforehand. Preventative care extends your machine’s life.
Maintaining proper lubrication helps the needle position correctly, avoiding disruptions during sewing. Keep tools handy for consistent sewing machine maintenance and ensure you follow the guidelines for proper lubrication.
Checking Needle Condition
Keep your sewing machine running smoothly by checking the needle condition regularly.
Look out for these essentials:
- Needle Wear Signs: Check for bends or fatigue.
- Burrs and Eyes: Smoothness guarantees proper threading.
- Point Sharpness Test: Prevent fabric snags.
- Needle Type Matters: Match needle to fabric.
- Replacement Frequency: Change every 8-10 hours or earlier.
Using Gripping Pads or Finger Covers
Even with steady hands, preventing needle pricks is key to safe sewing.
Gripping pads and finger covers improve dexterity and offer enhanced safety, especially when adjusting needle position on your sewing machine.
For specialized applications, consider exploring options for sewing gripping pads.
Here’s a quick comparison:
| Grip Pad Types | Finger Cover Materials | Feature Benefits |
|---|---|---|
| Rubberized Pads | Silicone | Prevent slips |
| Textured Pads | Latex-Free | Improve grip |
| Adhesive Strips | Breathable Fabrics | Protect sensitive skin |
| Extra Thick Pads | Durable Rubber | Provide cushion |
| Non-Slip Materials | PVC | Support control |
The use of gripping pads and finger covers can significantly enhance the sewing experience by providing improved grip and reducing the risk of accidents.
Additional Sewing Machine Issues
When your sewing machine faces slow operation or jammed needles, it’s time to troubleshoot.
Check needle position regularly, and make manual adjustments if needed.
Inspect foot positioning, ensuring it aligns properly.
Regular changes of the needle prevent wear issues.
If problems persist, repair tangled threads or check for obstructions—it’s the secret to smooth sewing and fewer frustrations.
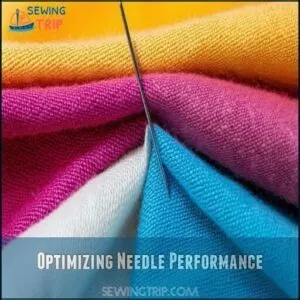
Optimizing Needle Performance
You can fine-tune your sewing machine’s needle performance by focusing on key adjustments like tension, timing, and threading.
Proper setup guarantees smooth stitching and prevents frustrating issues that could derail your next project, ensuring a successful outcome with proper adjustments.
Resetting Tension Settings
Tension settings directly affect stitch quality and fabric handling on your sewing machine.
Start by checking:
- Bobbin tension: Adjust the tiny screw on the bobbin case for balance.
- Thread tension: Use the tension dial, testing with scrap fabric to match stitch needs.
- Fabric type: Verify that tension suits the material—lighter fabrics need less, heavier types need more.
Replacing Bad Belt
When your sewing machine belt shows cracks or disintegration, it’s time for a replacement.
Check the belt material for wear, verify proper pulley alignment, and adjust belt tension for smooth motor speed.
Using replacement tools, remove the old belt carefully.
A snug fit prevents slippage, while loose belts affect performance.
Proper installation keeps your sewing machine running like clockwork!
Checking Timing and Adjustment
A poorly timed sewing machine can wreak havoc.
Inspect the timing belt for wear, ensuring smooth movement. Next, check hook timing issues with a focus on shuttle hook alignment.
Verify needle bar alignment matches feed dog synchronization and needle position. These fine adjustments prevent skipped stitches and snarls, keeping sewing machine troubleshooting minimal and stitches flawless.
Ensuring Proper Threading and Tension
Threading and tension go hand in hand for smooth stitching. Follow the threading order carefully, making certain the thread flows through tension discs and the needle without snags.
Check bobbin tension, too—misalignment causes skipped stitches or loops. Always use good thread quality, as cheap ones fray easily.
Test stitching confirms adjustments are spot-on before tackling delicate fabrics.
- Double-check threading paths.
- Inspect tension discs for debris.
- Use high-quality threads for durability.
- Adjust bobbin tension properly.
Verifying Presser Foot and Feed Dogs Positioning
Ensuring proper foot alignment and feed dog height is key to smooth fabric feeding.
Misaligned presser foot or poorly positioned feed dogs can cause stitching accuracy problems.
For quick checks, use this table:
| Issue | Cause | Solution | Tool Needed |
|---|---|---|---|
| Skipped Stitches | Misaligned presser foot | Reposition the foot | Screwdriver |
| Uneven Fabric Feeding | Low feed dog height | Adjust feed dogs | User Manual |
| Loose Stitches | Weak fabric manipulation pressure | Correct foot alignment | User Manual |
| Needle Breakage | Positioning issues | Verify needle position | Handwheel |
Fine-tune these for ideal pressure and smoother sewing. Selecting the correct foot, such as the walking foot benefits, can also greatly improve fabric handling.
Frequently Asked Questions (FAQs)
How to adjust needle position on a sewing machine?
Think of the needle as a baton in a precise dance.
To adjust its position, use the handwheel, needle position button, or pedal control, depending on your machine’s design, ensuring smooth movements and stitch alignment.
How do you stop a needle in a sewing machine?
To stop a sewing machine needle, simply release the foot pedal or turn off the machine.
For precise positioning, use the needle up/down button if available, or manually adjust it with the handwheel.
How do you change a needle on a sewing machine?
Ready for a quick fix?
First, turn off your machine.
Loosen the needle clamp screw, slide out the old needle, insert the new one flat side back, and tighten the screw securely.
You’re set!
What is the needle up/down button used for?
The needle up/down button lets you control the needle’s stopping position.
Use it to keep the needle in fabric for pivoting or raise it for easy adjustments—perfect for precision work like quilting or intricate stitching.
How does a sewing machine move a needle?
A sewing machine moves the needle using a motor connected to a crankshaft and gears.
These components create an up-and-down motion, controlled by electronics or manual controls, ensuring precision and seamless stitching through fabrics.
How does the needle up/down feature impact speed?
Did you know precise needle positioning can boost efficiency by up to 20% in intricate sewing?
The needle up/down feature saves time, keeps stitches consistent, and guarantees smoother fabric maneuvers, especially during detailed projects.
Can the needle up/down feature enhance stitch durability?
Proper control of needle position helps secure stitches firmly in place, especially at turning points or intricate areas.
It reduces skipped stitches, prevents loose ends, and guarantees durable, professional-looking results for your sewing projects, ensuring professional-looking outcomes.
Is it possible to disable this feature temporarily?
You can temporarily disable it by adjusting your machine’s settings or manually overriding with the handwheel.
Check the user manual for steps specific to your model, as features vary between brands and machines.
Are there specific fabrics requiring frequent needle adjustments?
When sewing delicate silks, stretchy knits, or dense fabrics like denim, you’ll often adjust the needle position.
These fabrics demand precision to prevent puckering, skipped stitches, or uneven seams—practice guarantees smooth, professional-looking results.
What safety tips apply when using this feature?
Always unplug the machine before making adjustments, and keep your fingers clear of the needle’s path.
Stay attentive to the needle’s position, especially during fabric pivots, to avoid accidental pricks or damage to materials. Always be mindful of the needle’s position to ensure safety and prevent damage.
Conclusion
Mastering the sewing machine needle up/down feature enhances your precision, sharpens your control, and simplifies complex sewing tasks.
From adjusting the needle height to troubleshooting jams, each step contributes to smoother stitching and professional results.
Regular maintenance, like cleaning, oiling, and checking the needle condition, keeps your machine functioning flawlessly.
By understanding this feature and addressing common issues, you’ll confidently handle any project with ease, ensuring your sewing machine needle up/down function works seamlessly every time.

