This site is supported by our readers. We may earn a commission, at no cost to you, if you purchase through links.
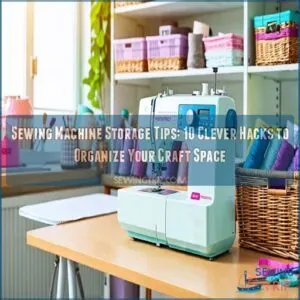
Get creative with sewing machine storage tips that’ll make Marie Kondo proud.
Upcycle cookie tins for notions, turn tackle boxes into thread havens, and stash in-progress projects in ziplock bags.
Feeling crafty? Sew a rope basket for catch-all storage.
Hide fabric in ottomans – it’s like a secret stash for your stash!
And who says the kitchen table can’t double as a sewing station?
With these tricks up your sleeve, you’ll be stitching up a storm in no time.
But wait, there’s more to unravel in this organizational tapestry…
Table Of Contents
- Key Takeaways
- Assessing Your Sewing Room
- Decluttering Your Sewing Room
- Choosing The Right Sewing Machine Storage
- Creating a Functional Sewing Space
- Optimizing Your Sewing Room for Efficiency
- Storing Your Sewing Machine and Accessories
- Tips for Storing Your Sewing Machine
- Utilizing Wall Space for Storage
- Creating Zones for Your Sewing Tools
- Maintaining Your Sewing Room Organization
- Frequently Asked Questions (FAQs)
- Conclusion
Key Takeaways
- For a clutter-free workspace, consider investing in a versatile sewing cabinet with an electric lifter, built-in storage, and a Sew Steady insert, such as the ones featured in the best sewing cabinets for home sewing station. Use built-in shelves or sewing cabinets to keep your machine organized and within easy reach.
- Repurpose everyday items like tackle boxes and cookie tins for threads and notions to maximize space effectively.
- Install pegboards and hooks to organize tools and make use of vertical space, freeing up your work area.
- Regularly clean and maintain your sewing machine to ensure it is always ready for your next project.
Assessing Your Sewing Room
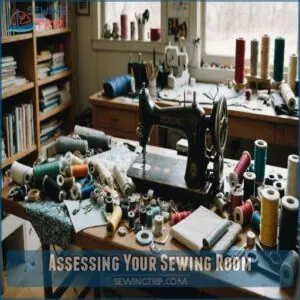
You’re about to turn your sewing room from chaos to crafty heaven. Take a good look at your space and stuff to figure out what’s working and what’s not.
Evaluating Your Sewing Machine Storage
Frustration breeds when your sewing machine’s hiding spot is a hot mess.
Let’s tidy up!
Consider investing in a sturdy sewing machine cabinet, such as the Sew Ready Comet Sewing Desk, to keep your workspace organized.
Here’s how to evaluate your current storage setup:
- Space: Is there enough room for your machine and accessories?
- Accessibility: Can you easily grab your machine when
Assessing Your Fabric Collection
Now that your sewing machine’s got a cozy home, let’s tackle that fabric mountain!
It’s time for a fabric inventory party.
Grab a cup of coffee and let’s dig in.
You’ll want to sort your stash by type, color, and size.
Here’s a handy guide to get you started:
| Fabric Type | Condition | Usage | Storage |
|---|---|---|---|
| Cotton | New | Quilts | Shelf |
| Silk | Vintage | Dresses | Drawer |
| Wool | Scraps | Crafts | Bin |
| Denim | Upcycled | Bags | Basket |
This fabric organization system will turn your sewing room into a well-oiled machine!
Considering Your Workspace
Your workspace can make or break your sewing mojo.
Take a good look around your sewing room.
Is it working for you?
Let’s figure out how to make it sing:
- Measure your space: Know your room’s dimensions to plan smart storage.
- Check your lighting: Good natural light is a sewist’s best friend.
- Make sure your workflow is smooth: Your machine, cutting area, and ironing station should be in harmony.
Remember, a well-organized space means more time for creativity and less time hunting for that missing bobbin!
Decluttering Your Sewing Room
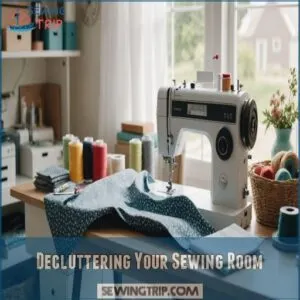
You’re about to turn your sewing room from chaos to calm. Let’s tackle the clutter and create a space where creativity can flourish without tripping over fabric piles.
Sorting and Donating Unwanted Items
Let’s tackle the mountain of sewing supplies you’ve been hoarding!
Start by identifying items you haven’t used in ages.
Sort through your notions, separating the must-haves from the "maybe somedays."
Be ruthless – if it’s broken or outdated, toss it.
Found usable items you don’t need?
Consider donating them to local schools or craft groups.
You’ll free up space and make someone’s day.
It’s a win-win for decluttering your sewing room!
Organizing Your Fabric Stash
Chaos reigns in your fabric stash? Time to tame that textile jungle!
Sort fabrics by color or type, then roll ’em onto cardboard tubes.
Stack these fabric ‘burritos’ on shelves for easy access.
For smaller cuts, fold neatly and store in clear bins.
Label everything – your future self will thank you.
Don’t forget to inventory your stash. You might discover hidden treasures or realize it’s time to curb that fabric-buying habit!
Purging Broken or Unused Tools
Now that you’ve tackled your fabric stash, it’s time to weed out those broken scissors and rusty needles, considering how to dispose of them safely.
Take stock of your sewing tools and be ruthless, learning more about proper sewing supply disposal.
You’ll feel like a weight’s been lifted off your shoulders.
Here’s a quick guide to purging:
- Rusty seam rippers with dull blades
- Bent
Choosing The Right Sewing Machine Storage
You’ve decluttered your sewing space, now let’s find the perfect home for your trusty machine.
Whether you’re a neat freak or a creative mess, there’s a storage solution that’ll make your sewing life easier and more fun.
Built-in Shelves and Drawers
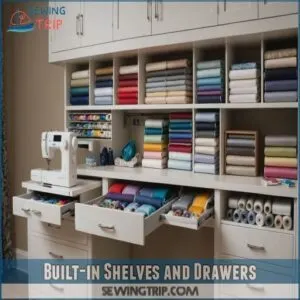
Built-in shelves and drawers are your sewing room’s secret weapon.
They’re like custom-fit puzzle pieces for your space.
You can design them to perfectly cradle your sewing machine when it’s not in use.
Maximize every inch by adding adjustable shelves for fabric stacks and pull-out drawers for notions.
It’s like giving your craft room a tailor-made suit – everything fits just right!
Wall-mounted Cabinets and Pegboards
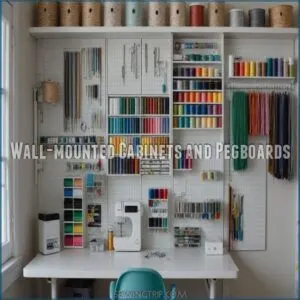
Wall-mounted cabinets and pegboards are game-changers for your sewing space.
They’re like a blank canvas for your storage dreams!
Customize your pegboard design with hooks and shelves to hang tools and fabric.
Got a spare wall?
Mount cabinets of various sizes for ultimate organization.
These sewing room storage ideas free up floor space and keep everything at eye level.
You’ll feel like a storage wizard with your supplies neatly displayed and easily accessible.
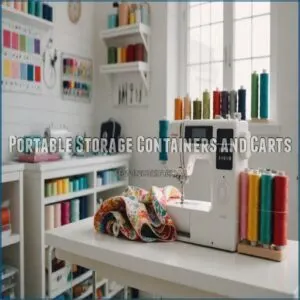
Portable Storage Containers and Carts
When you’re short on space, portable storage containers and carts are your best friends.
These rolling wonders come in all shapes and sizes, perfect for stashing your sewing machine and supplies.
For a more permanent solution, consider a dedicated sewing machine cabinet to keep your machine safe and organized.
You can wheel them away when you’re done.
Try clear containers for easy spotting.
Creating a Functional Sewing Space
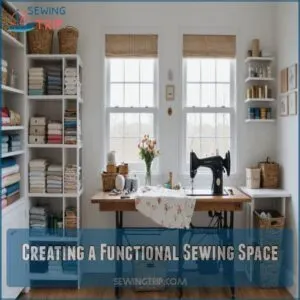
Your sewing space should work as hard as you do, so let’s make it shine.
You’ll love how a well-organized room boosts your creativity and keeps you stitching happily for hours.
Designating a Sewing Station
Your sewing station’s the heart of your craft kingdom.
Pick a spot with good light and easy power access.
Set up a sturdy table that fits your machine and gives you elbow room.
Don’t forget about storage – drawers or nearby shelves are lifesavers.
Position your chair for comfort; your back will thank you.
Remember, this space is all yours, so make it work for you!
Organizing Your Cutting and Ironing Areas
Now that you’ve got your sewing station set up, let’s tackle the cutting and ironing areas.
Place your cutting mat on a sturdy table near your sewing machine.
For ironing, find a spot close by but not too cramped.
Protect surfaces with heat-resistant mats.
Consider a fold-out ironing board to save space.
Multi-use furniture is your friend here – a cutting table that doubles as fabric storage? Genius!
Keep everything within arm’s reach for a smooth sewing flow.
Utilizing Vertical Space
Let’s reach for the sky with your sewing room storage! Wall-mounted shelves are your new best friends. They’ll keep your fabric stash and notions within arm’s reach.
Pegboard solutions? They’re like magic wands for organization. Hang tools, spools, and even your trusty scissors.
Don’t forget overhead storage and vertical cabinets – they’re lifesavers for bulky items.
Stackable bins are perfect for those odds and ends. You’ll feel like a storage wizard in no time!
Optimizing Your Sewing Room for Efficiency
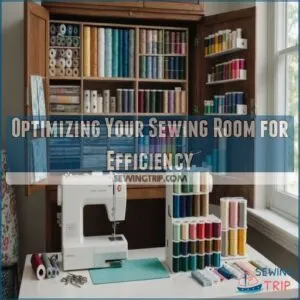
You can turn your sewing room into a productivity powerhouse with a few simple tweaks.
Let’s look at how to set up your space for maximum comfort and efficiency, so you can sew like a pro without breaking a sweat.
Positioning Your Sewing Machine for Comfort
After setting up your sewing station, it’s time to fine-tune your comfort zone.
Positioning your sewing machine correctly can make or break your crafting mojo.
Here’s how to nail it:
- Adjust your chair height so your elbows rest comfortably on the table.
- Place the foot pedal where your feet naturally fall.
- Angle task lighting to banish pesky shadows.
Remember, a well-positioned machine is like a good dance partner – it moves with you, not against you.
Investing in Ergonomic Furniture
Upgrade your sewing space with ergonomic furniture to boost comfort and productivity.
Consider investing in one of the best sewing tables that offer adjustable height and ample workspace, allowing you to work efficiently.
Adjust your chair height so your feet rest flat on the floor or a footrest.
Your desk should let your arms bend at 90 degrees when sewing.
Don’t skimp on back support – your spine will thank you later!
Remember, a
Maximizing Natural Light
Sunlight can be your secret weapon in crafting a dreamy sewing space.
Position your sewing machine near a window to harness natural lighting.
This setup brightens your workspace but also lifts your mood.
To make the most of sunlight:
- Hang sheer curtains to diffuse harsh rays
- Use light-colored walls to reflect brightness
- Place a mirror strategically to bounce light around
You’ll feel like you’re sewing on cloud nine!
Storing Your Sewing Machine and Accessories
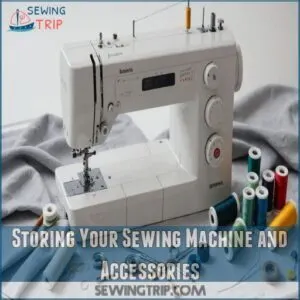
You’ve got your sewing machine, now let’s find it a cozy home.
With the right storage tricks, you’ll keep your trusty stitching companion and its sidekicks safe, clean, and ready for action.
Using Clear Storage Containers
Clear storage containers are your secret weapon for sewing room organization.
You’ll love how they let you see your supplies at a glance.
Choose various sizes to fit different items, from tiny buttons to bulky fabrics.
Consider investing in specialized sewing machine storage solutions for extra protection and security, such as those found on websites offering sewing machine storage products.
Stack ’em up to save
Labeling and Categorizing Your Supplies
Now that you’ve got your clear containers, let’s whip your supplies into shape!
Grab a label maker and go to town.
Color-code your storage bins for sewing notions, threads, and tools, considering essential sewing machine accessories like presser feet and bobbins to keep your projects running smoothly check out sewing machine accessories.
Create a quick inventory list to keep tabs on what you’ve got.
Your sewing room organization will be a
Implementing a Maintenance Routine
Stitch together a maintenance routine that includes regularly cleaning the bobbin case and checking for bobbin threading issues to keep your sewing machine purring.
Set up a cleaning schedule: dust weekly, oil monthly.
Change needles after every project to avoid snags.
Keep a toolkit handy for quick fixes.
Cover your machine when not in use to protect it from dust.
By giving your trusty sidekick some TLC, you’ll make sure it’s always ready to help you create magic.
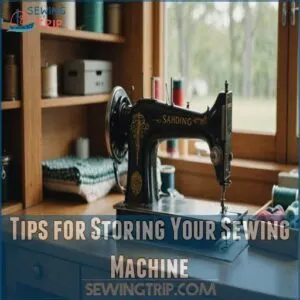
Tips for Storing Your Sewing Machine
You’ve got your sewing machine, now let’s keep it happy and dust-free. Proper storage protects your trusty stitching sidekick but also makes your sewing space a joy to work in.
Storing With The Needle Up or Down
You’ve got your sewing machine tucked away, but have you wondered about the needle position?
Here’s the scoop: storing with the needle up is your best bet.
It prevents fabric tension issues and keeps your bobbin thread happy.
Plus, you’ll dodge the bullet of accidental needle breakage.
It’s like giving your trusty machine a comfy pillow for its beauty sleep!
Protecting Your Machine From Dust
Dust is the archenemy of your trusty sewing companion.
To keep it at bay, try these nifty tricks:
- Drape a stylish dust cover over your machine when idle
- Store it in an airtight container for ultimate protection
- Use a custom-fitted machine cover for a snug fit
- Place silica gel packets nearby to absorb moisture
- Keep your sewing room well-ventilated to minimize dust buildup
These simple hacks will help your machine stay dust-free and ready for your next creative adventure!
Keeping Your Machine Clean and Well-Maintained
Keeping your sewing machine spick and span is a breeze! Give it a quick brush after each use.
Clean the bobbin case weekly to avoid lint build-up.
Oil moving parts monthly for smooth sailing.
Don’t forget to change needles regularly – they’re the unsung heroes of your stitching adventures.
With these simple habits, your trusty machine will purr like a kitten for years to come.
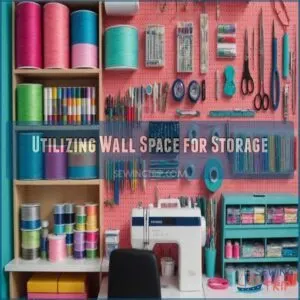
Utilizing Wall Space for Storage
Don’t let your walls go to waste for sewing machine storage. You can turn that blank space into a storage goldmine with pegboards, shelves, and magnetic boards.
Installing Pegboards and Hooks
Let’s turn that blank wall into a sewing superstar!
Installing a pegboard is like giving your tools their own backstage pass.
Pick a spot, grab your drill, and get ready for the ultimate sewing supply makeover.
Here’s how to rock your pegboard:
- Choose hooks that fit your gear, from tiny scissors to bulky rulers
- Group similar items together for a visual feast and easy access
- Get creative with pegboard designs – paint it, frame it, or add some bling!
Your sewing space will thank you for this organized masterpiece.
Using Wall-mounted Shelves and Cabinets
Make your sewing room more useful with wall-mounted shelves and cabinets.
They’re game-changers for maximizing space and keeping your tools in reach.
Mix and match open shelves for easy-grab items and closed cabinets for a clutter-free look.
Here’s a quick guide to get you started:
| Storage Type | Best For | DIY-Friendly? |
|---|---|---|
| Floating Shelves | Fabric Display | Yes |
| Pegboard Cabinets | Small Tools | Yes |
| Cubby Units | Project Supplies | Moderate |
Remember, there are many possibilities when it comes to wall storage.
Get creative and make your space work for you!
Creating a Magnetic Board for Metal Tools
Tired of losing your metal sewing tools?
A DIY magnetic board is your new best friend!
It’s a game-changer for sewing room organization.
Here’s how to make one:
- Get a metal sheet or old cookie tray
- Paint it to match your decor
- Attach strong magnets to the back
- Hang it on your wall
Now you’ve got a handy spot for scissors, needles, and pins.
It’s like your tools are defying gravity!
Creating Zones for Your Sewing Tools
You’ll love how easy sewing becomes when you create zones for your tools. Set up areas for marking tools, machine feet, and notions to save time and boost your creativity.
Organizing Marking Tools and Tube Turners
Tame the chaos of your marking tools and tube turners with smart storage solutions.
Grab a pegboard and hook up your chalk markers, fabric pens, and tube turners for easy access.
Use clear jars to sort smaller items by color or type.
Repurpose a cutlery tray for longer tools.
Stick magnetic strips on your wall to hold metal rulers and scissors.
You’ll breeze through projects with everything at your fingertips.
Designating a Spot for Sewing Machine Feet
Your sewing machine feet need a cozy home too.
Keep these little powerhouses organized and ready for action.
Consider investing in a magnetic sewing feet holder to keep your metal feet within arm’s reach.
Here’s how to create the perfect spot:
- Use a magnetic strip to keep metal feet within arm’s reach
- Invest in a clear
Implementing a System for Notions and Threads
Now that you’ve got your sewing machine feet in order, let’s tackle the chaos of notions and threads.
Imagine a world where you can find that perfect button or thread in seconds. It’s not a dream! With a smart system, you’ll be the master of your sewing domain.
Check out these nifty organization ideas:
| Storage Solution | Perfect For |
|---|---|
| Mason jars | Buttons, pins |
| Thread racks | Spools of thread |
| Tackle boxes | Small notions |
| Pegboards | Scissors, rulers |
Say goodbye to tangled threads and lost notions. You’ll feel like a sewing superhero with everything at your fingertips!
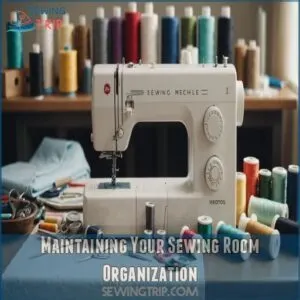
Maintaining Your Sewing Room Organization
You’ve organized your sewing room, but keeping it tidy is an ongoing task. Let’s explore some easy ways to maintain your neat space and make your crafting life a breeze.
Scheduling Regular Cleaning Sessions
Regular cleaning sessions are the secret sauce to a tidy sewing room.
Whip up a cleaning schedule that fits your crafting rhythm.
Set aside time each week to dust, vacuum, and wipe down surfaces.
Don’t forget your sewing machine – give it some TLC with proper maintenance.
Keep cleaning supplies handy for quick touch-ups.
A clean space boosts creativity and keeps your projects running smoothly.
It’s like giving your craft room a spa day!
Implementing a One In, One Out Policy
Keeping your sewing space tidy is like playing a game of Tetris.
As you clean, why not adopt a "one in, one out" rule?
For every new fabric or gadget you bring home, bid farewell to an old one.
This nifty trick keeps your inventory in check and your creative juices flowing.
It’s all about smart fabric rotation and setting realistic declutter goals.
You’ll thank yourself later when you’re not drowning in a sea of supplies!
Reviewing and Adjusting Your Storage Solutions
Your sewing room’s storage solutions should evolve with your craft.
Take a fresh look at your space every few months to optimize your storage solutions and consider implementing a modular furniture layout.
Are your go-to tools within reach, like having clear storage containers and labels for easy access and visual clarity, as discussed in sewing room organization ideas here.
Maybe that clever thread organizer isn’t working as you thought.
Don’t be afraid to shake
Frequently Asked Questions (FAQs)
How do I keep my sewing machine organized?
Tuck your sewing machine into a built-in shelf under your crafting table.
This keeps it handy yet out of sight.
Alternatively, use a dedicated cabinet with space for accessories, making your sewing zone neat and tidy.
How to store a sewing machine?
Stash your sewing machine in a built-in shelf under your crafting counter, a closet, or a nook.
These spots keep it out of sight and easy to grab, like finding candy in Grandma’s secret stash!
How do you keep a sewing machine clean?
Keep dust bunnies at bay by covering your machine when it’s not in use.
Wipe it down with a clean cloth regularly.
Don’t forget the lint brush for clearing out fuzzy bits around the bobbin area.
How should I store a sewing room?
Organize your sewing room! Use shelves and bins. Label everything. A tidy space boosts creativity. You’ll find what you need faster. It’s all about control and freedom!
How do you store a sewing machine on a shelf?
Imagine this: your sewing machine snug on a sturdy shelf.
Use adjustable shelves to fit your machine’s height and depth.
Add a cute basket for attachments.
This setup keeps everything handy and tidy.
Funny how things fit!
How to organize your sewing space?
Get started creating your dream sewing space by using pegboards for tool organization, rolling fabrics on boards, and storing threads by color.
Add bright lighting, comfy chairs, and designate distinct areas for cutting, sewing, and ironing.
What is the best way to store a sewing machine?
Ever wonder where your sewing machine should rest?
Snugly fit it in a built-in shelf under your crafting countertop.
This storage spot keeps it hidden yet handy, letting you easily slide it out when inspiration strikes!
Should I store my sewing machine with the needle up or down?
Always store your sewing machine with the needle up.
This keeps the needle from bending or breaking and prevents thread tangles.
Your machine will thank you with fewer problems and smoother sewing when you pull it out!
Where should I put my sewing machine?
Pop your sewing machine in a well-lit spot with easy outlet access.
A dedicated table or built-in shelf keeps it handy and tidy.
Just make sure there’s enough room to work your creative magic!
How do you put away a sewing machine?
Stash your sewing machine in a cool nook, maybe under a desk or on a sturdy shelf.
Keep it covered to dodge dust bunnies.
Make sure it’s easy to access for spontaneous creative bursts.
Safe, tucked away, but ready.
How to protect sewing machines from dust?
Keep your sewing machine protected from dust and debris with a custom cover made from cotton fabric and a flexible foam stabilizer, learn how to make one with these quilting patterns and tutorials. Keep your sewing machine covered! A simple cloth cover works wonders. Or, you could use a dedicated machine case. That’ll keep dust bunnies away!
Best storage solutions for small sewing spaces?
You can transform any corner into a sewing haven by using pegboards for tools, shelves for fabric, and a fold-out table.
This setup keeps your space neat, making it easier to jump right into your projects anytime!
Can sewing machines be stored vertically?
Storing your sewing machine vertically is possible, but you’ll need to make sure it’s secure and stable.
Keep it in a sturdy cabinet or shelf.
This setup saves space, just be cautious to avoid tipping over.
How often should I oil my stored machine?
To maintain your sewing machine’s performance, regular cleaning helps prevent lint buildup, which is especially important when storing it for extended periods. Oil your sewing machine about every three to six months if stored.
Regular oiling prevents parts from sticking and rusting.
This keeps your machine ready to roll when inspiration strikes, without hiccups or squeaks.
Ideal temperature and humidity for sewing machine storage?
Imagine your sewing machine feeling like an old computer struggling in a hot attic.
Keep the room around 65°F to 77°F and humidity between 40% and 60%.
This way, your machine stays happily ready to sew.
Conclusion
Remember, "A stitch in time saves nine."
When your sewing space is organized, every project feels smoother.
With these sewing machine storage tips, you’ll find it easier to keep track of your materials and tools.
Embrace clever hacks like using upcycled containers and vertical storage to reclaim your craft area.
Now, go ahead and set up that perfect sewing nook, and enjoy creating with less stress and more space.
You’ve got this, so let’s get sewing!
- https://www.msn.com/en-us/lifestyle/parenting/15-lost-skills-our-parents-mastered-but-millennials-rarely-use/ss-BB1nozNE
- https://www.bhg.com/decorating/storage/craft-room/sewing-room-organization-ideas/
- https://sewcanshe.com/tips-to-declutter-your-sewing-space/
- https://www.thelittlemushroomcap.com/revamping-sewing-space-the-ultimate-guide-to-organizing-your-sewing-room/

