This site is supported by our readers. We may earn a commission, at no cost to you, if you purchase through links.
Threading follows a specific sequence – raise that presser foot first to release tension, then follow your machine’s guides like breadcrumbs. Wind your bobbin properly by guiding thread through designated paths before gentle pedal pressure does the work.
Stitch settings aren’t mysterious – straight stitches handle basic seams while zigzag tackles stretchy materials. Prep your fabric by prewashing and ironing for professional results.
Master these fundamentals and you’ll discover troubleshooting tricks that transform common hiccups into minor speed bumps.
Table Of Contents
Key Takeaways
- Master your machine’s anatomy first – You’ll need to understand key components like the needle bar, bobbin case, tension disc, and presser foot before you can troubleshoot issues or tackle complex projects confidently.
- Follow proper threading sequence religiously – Always raise the presser foot first to release tension, then follow your machine’s thread guides in order, as incorrect threading causes most jams and stitch problems you’ll encounter.
- Start with forgiving fabrics and basic stitches – Practice on cotton, linen, or flannel using straight and zigzag stitches before attempting stretchy materials or decorative techniques that require advanced skills.
- Develop good maintenance habits early – Clean lint after every few projects, oil designated points regularly, and replace dull needles immediately to prevent costly repairs and keep your machine running smoothly.
Sewing Machine Basics and Setup
Getting started with your sewing machine doesn’t have to feel overwhelming once you understand the basics.
You’ll be amazed how quickly threading, winding bobbins, and adjusting settings become second nature with a little practice.
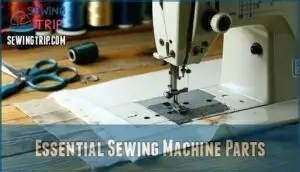
Essential Sewing Machine Parts
Before you tackle your first project, you’ll need to know your sewing machine like the back of your hand. Think of it as meeting your new creative partner – one that’s got more moving parts than a Swiss watch.
Your sewing machine isn’t just equipment—it’s your creative partner with endless possibilities
Here are the key components you’ll work with daily:
- Machine Frame – The sturdy body that houses all the mechanical magic
- Needle Bar – Moves your needle up and down with precision timing
- Bobbin Case – Holds the lower thread and creates those perfect lockstitches
- Tension Disc – Controls thread flow like a traffic cop directing fabric flow
Your Presser Foot acts as your fabric’s steady guide, while proper sewing machine maintenance keeps everything running smoothly. Understanding these sewing machine parts transforms confusing sewing machine operation into confident creativity.
Familiarizing yourself with sewing machine parts is essential for effective troubleshooting and maintenance.
How to Thread The Machine
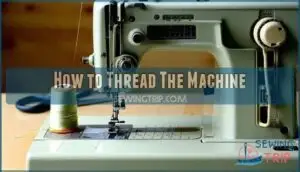
Threading your sewing machine correctly prevents frustrating tangles and guarantees smooth stitching.
Start by raising the presser foot to release thread tension. Follow your machine’s thread guides in order, passing thread through each guide and tension disc.
When reaching the needle, thread from front to back.
Proper needle threading and thread tension create the foundation for successful sewing techniques and avoid future sewing machine repair issues.
Understanding the correct thread tension settings is vital for achieving flawless stitching results and ensuring proper needle threading is in place for successful sewing techniques.
Winding and Inserting The Bobbin
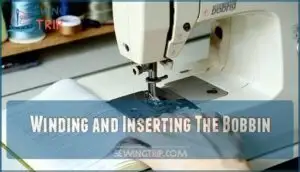
Winding your bobbin properly sets you up for smooth stitching. Your sewing machine makes this task simple once you know the steps.
- Pull bobbin thread through the small hole in your empty bobbin
- Place bobbin on the winding spindle and engage the mechanism
- Guide thread through designated thread guides to maintain proper tension
- Press your foot pedal gently – the bobbin cases will fill automatically
Stop winding when the bobbin feels full. Insert it into your bobbin case with thread feeding counterclockwise.
Adjusting Stitch Settings
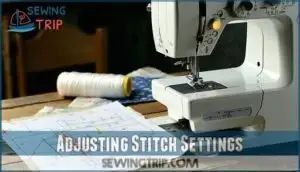
Now you’ll master stitch selection on your sewing machine.
Start with straight stitch for basic seams, then explore zigzag stitch for stretchy fabrics.
Adjust stitch length from short (reinforcement) to long (basting).
Control stitch width for decorative effects.
Thread tension affects stitch quality – too tight puckers fabric, too loose creates loops.
Match fabric settings to your material thickness for perfect results every time.
Prepping Fabric Before Sewing
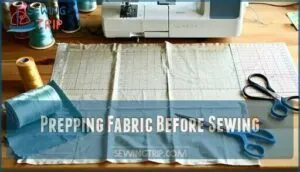
Before you start stitching, proper fabric preparation sets you up for success.
Always prewash cotton and other fabric types to prevent shrinkage later. Iron your fabric smooth and check grain alignment for straight cuts.
Sharp fabric cutting tools make clean edges. Choose quality thread that matches your fabric weight.
These fabric care steps prevent headaches and guarantee your finished project looks professional.
Operating Your Sewing Machine Safely
Once you’ve mastered the basics of threading and setup, it’s time to focus on safe operation techniques that’ll keep both you and your machine in great shape.
Proper safety habits from day one will prevent accidents and guarantee your sewing adventures stay fun and stress-free.
Powering on and Off
Before diving into sewing projects, you’ll need to master your machine’s Power Switch basics.
First, plug your sewing machine into a grounded outlet—Plug Safety matters for Machine Startup.
Locate the main power button, usually on the right side.
Follow the On Off Sequence: press once for on, hold briefly for off.
Most sewing machine reviews emphasize this simple Shut Down Procedure prevents motor damage.
These sewing basics form the foundation for all sewing tutorials and sewing for beginners courses.
Using The Presser Foot Correctly
Before you press that presser foot down, remember it’s your fabric’s best friend and worst enemy rolled into one.
Different Presser Foot Types handle various tasks – your standard foot works for basic stitches, while a zipper foot tackles tight spaces.
Adjust Foot Pressure based on fabric thickness; heavy materials need more pressure than delicate ones.
The presser foot provides essential Fabric Guidance and Stitch Regulation through proper Foot Attachment to your sewing machine.
Maintaining Proper Posture
Good posture saves your back from turning into a pretzel after long sewing sessions.
Sit in ergonomic chairs with solid back support to keep your spine happy.
Position your sewing machine at elbow height for proper neck alignment and body positioning.
Your feet should rest flat on the floor.
Think of it as setting up your command center for spinal health and sewing success.
Safety Tips for Beginners
Beyond good posture lies another layer of protection. Machine safety and user precautions form your first line of defense when sewing for beginners. These sewing safety practices prevent accidents and protect your investment.
Here are key safety tips for beginner sewing:
- Keep fingers away from the needle – Your fingertips aren’t meant to be part of your fabric handling technique
- Unplug before needle care – Thread management and maintenance require a powerless machine
- Never force stuck fabric – Gentle coaxing beats aggressive tugging every time
- Maintain clean workspace – Cluttered tables lead to tangled threads and frustrated sewists
Smart sewing tips include checking needle sharpness regularly and replacing dull ones immediately. Sharp needles create clean stitches while dull ones damage fabric. Keep your sewing machines well-maintained and your projects will thank you. Following proper sewing safety tips is essential for a safe and enjoyable sewing experience.
Common Sewing Machine Features Explained
You’ll discover your sewing machine has several clever features that make stitching easier once you know how they work.
These built-in helpers can save you time and frustration, turning what seems complicated into simple button presses and dial turns, making stitching easier with complete concepts.
Stitch Selection and Functions
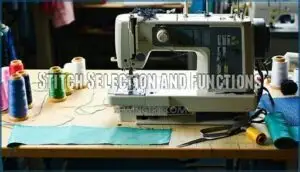
Your machine’s Stitch Types open doors to endless creativity. Most machines offer straight stitch for basic seams and zigzag stitch for stretch fabrics.
You’ll adjust Stitch Length from 0-4mm and control Thread Tension for perfect results. Fabric Settings and Sewing Speed work together—backstitch secures seams while slip stitch creates invisible hems.
Understanding the stitch length settings is essential for achieving professional results.
| Stitch Type | Best For | Length Setting |
|---|---|---|
| Straight Stitch | Seams, topstitching | 2.5mm |
| Zigzag Stitch | Stretch fabrics, edges | 2.5mm width |
| Backstitch | Stitch Securing | 1.5mm |
| Three-Step Zigzag | Elastic, mending | 2mm |
| Overlock | Professional edges | 3mm |
Using Built-in Needle Threaders
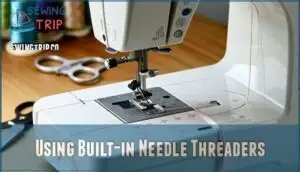
Many modern sewing machines include automatic needle threaders that save time and reduce eye strain. These handy features work by guiding your thread through the needle’s eye using a small hook mechanism.
Simply follow your machine’s threading sequence through the thread guides, then engage the threader. To do this correctly, remember to:
- Position thread behind the needle threader hook before activating
- Lower the presser foot to engage the threading mechanism properly
- Use appropriate needle size for your thread weight and fabric type
- Keep your sewing kit stocked with various needle types for different projects
- Practice with sewing tutorials for beginners to master this time-saving feature
Understanding needle threading tools is essential for ideal sewing performance. Remember that proper stitch tension depends on correct threading, so these threading tips become your best sewing hacks for consistent results.
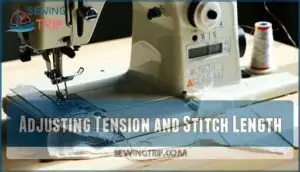
Adjusting Tension and Stitch Length
Perfect Tension Control starts with your sewing machine’s numbered dial—typically set between 4-5 for most fabrics.
When thread knots appear on top, lower the tension. Knots underneath? Raise it.
Stitch Regulation works similarly: 2-2.5mm handles everyday sewing, while delicate fabrics need shorter stitches.
Test adjustments on scraps first—your sewing kit isn’t complete without practice pieces for Machine Maintenance success.
Understanding proper tension settings is essential for achieving perfect stitches. You can find more information on solving tension issues on your sewing machine at tension settings, which is crucial for Perfect Tension Control.
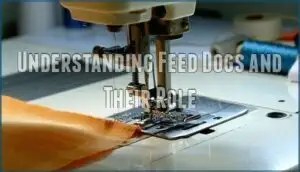
Understanding Feed Dogs and Their Role
Feed dogs grip your fabric and guide it through the sewing machine like tiny metal teeth.
You’ll find them beneath your presser foot, working silently to control Fabric Flow and Sewing Speed.
Here’s what makes Dog Teeth your best friend:
- Feed Dog Adjustment lets you control fabric movement direction
- Fabric Guidance keeps seams straight without fighting the material
- Machine Maintenance keeps these sewing tools running smoothly
Your sewing kit isn’t complete without understanding these hardworking helpers!
Troubleshooting Sewing Machine Issues
Even the best sewing machines can throw tantrums, leaving you staring at tangled thread or wonky stitches.
Don’t worry—most sewing hiccups have simple fixes that’ll get you back to creating in no time.
Fixing Thread Jams and Snags
Three critical steps solve most sewing troubles fast. First, power off your machine immediately when thread jams occur. Remove fabric gently without yanking to prevent needle damage.
Next, clip out tangled thread from both top and bobbin areas for proper Thread Removal. The sewing machine’s performance can be improved by understanding thread tension issues and taking corrective measures.
| Problem Source | Quick Fix |
|---|---|
| Incorrect threading | Rethread from scratch following manual sequence |
| Bent/dull needle | Replace needle immediately before continuing |
| Dirty bobbin case | Clean lint buildup with small brush |
Always check your bobbin placement and threading path for Jam Prevention and effective Snag Repair.
Resolving Tension Problems
Thread tension problems feel like wrestling with an invisible opponent. When your stitches look loose, puckered, or uneven, you’re likely dealing with tension imbalance.
Check your bobbin case first—improper bobbin threading causes most fabric tension issues. Then adjust your upper thread tension dial gradually.
Most sewing machines need tension between 3-5 for normal fabrics. Test on scrap fabric after each adjustment to nail the perfect stitch.
Dealing With Skipped Stitches
Skipped stitches happen when your needle doesn’t catch the bobbin thread. Check your needle first – a dull or bent needle causes most problems.
Wrong Needle Selection for your fabric creates gaps too. Heavy fabrics need stronger needles.
Adjust your Thread Tension if it’s too loose or tight. Sometimes changing Stitch Length helps the timing.
When Fabric Choice is stretchy, use a ballpoint needle for better Stitch Repair.
Cleaning and Oiling The Machine
After every few projects, your sewing machine craves some TLC—just like your favorite houseplant needs water.
Regular cleaning and oiling keeps your machine humming along smoothly and prevents costly repairs down the road.
- Remove lint with cleaning brushes after every 2-3 bobbin changes, especially when using fleece or flannel
- Apply 2-3 drops of machine oil to designated points following your manual’s lubrication tips
- Create maintenance schedules based on usage—heavy sewers need daily dust removal
- Use proper sewing tools like microfiber cloths and avoid canned air that pushes debris deeper
Maximizing Your Sewing Machine Experience
Once you’ve mastered the basics of sewing machine operation, you’ll want to explore the tools and techniques that transform your machine from a simple stitching device into a creative powerhouse.
The right accessories and practice projects can release your machine’s full potential while building the confidence you need for more ambitious sewing adventures.
Essential Tools and Accessories
Your sewing arsenal needs the right backup crew.
Essential sewing accessories include fabric scissors for clean cuts, measuring tape for accuracy, and thread cutters for quick snips.
Don’t forget sewing notions like pins and seam rippers.
A rotary cutter makes fabric prep faster, while an ironing board keeps everything crisp.
These sewing tools transform chaos into beautiful creations.
Having the right sewing machine accessories can greatly enhance your sewing experience with the help of sewing notions.
Practicing Basic Stitches
Now that you’ve got your tools ready, it’s time to master the fundamentals. Start with the straight stitch—it’s your bread and butter for seams and basic projects.
Practice drawing straight lines on scrap fabric, keeping your seam allowance steady. The backstitch works great for securing thread ends, while the running stitch zips through quick seams.
Try the slip stitch for invisible hems and the whipstitch for binding edges. These beginner sewing basics become second nature with repetition.
Understanding sewing basic stitches is essential for improving your overall sewing skills.
Exploring Beginner-Friendly Projects
Starting your sewing journey feels like opening a treasure chest of creative possibilities.
Choose projects that build confidence while teaching essential Sewing Basics through hands-on experience.
Perfect beginner sewing projects include:
- Tote bags – Practice straight seams with forgiving Fabric Choices like cotton canvas
- Pillowcases – Master French seams and hems in beginner-friendly sewing tutorials
- Simple scarves – Learn finishing techniques with minimal cutting required
- Cloth napkins – Perfect for practicing Beginner Patterns and exploring DIY Projects safely
These beginnerfriendly sewing options teach fundamental skills without overwhelming complexity, making your Crafting Tips journey enjoyable.
Accessing and Using Free PDF Patterns
Beyond your sewing machine manual lies a treasure trove of free sewing patterns waiting online.
Popular sites like Mood Sewciety offer hundreds of Pattern Downloads, while SewCanShe provides daily releases.
Print PDF Printing at actual size, assemble pages carefully, and you’ll access endless Project Customization possibilities for your next DIY sewing adventure.
Tips for Continued Sewing Success
Building sewing confidence comes from smart fabric choice and consistent project planning.
Join a sewing community for support and shared wisdom.
Start with beginner-friendly sewing patterns and tutorials that match your current skill level. Each completed project strengthens your foundation for bigger challenges ahead.
Remember, every expert was once a beginner who kept going, which is why consistent project planning and sewing community support are crucial.
Frequently Asked Questions (FAQs)
How do I replace a broken needle?
Like a compass needle pointing true north, your sewing machine needle must align perfectly.
Turn off your machine, raise the needle bar, loosen the needle clamp screw.
Remove the broken needle, and insert a new one with the flat side facing back.
What fabrics work best for beginners?
Cotton, linen, and flannel are your best friends when you’re learning to sew.
They’re forgiving, easy to work with, and won’t fight you every step of the way like slippery or stretchy fabrics will.
How often should I clean my machine?
You should clean your sewing machine after every 8-10 hours of use or monthly if you sew occasionally.
Regular cleaning prevents lint buildup, keeps stitches smooth, and extends your machine’s life substantially.
Can I sew leather with my machine?
Yes, you can sew leather with your machine, but you’ll need a heavy-duty needle and strong thread. Use a leather needle and adjust tension settings for best results.
Why does my thread keep breaking?
Thread snapping like a stubborn zipper? You’re likely using the wrong thread weight, threading incorrectly, or your needle’s too small. Check your tension settings too—they’re finicky.
Conclusion
Your sewing machine becomes a trusted companion once you master these essential skills from quality sewing machine user guides.
Threading, tensioning, and troubleshooting transform from mysteries into second nature.
Remember that even experienced sewists started with tangled thread and wonky stitches.
Keep your user manual handy, practice regularly, and don’t fear making mistakes – they’re just learning opportunities.
With patience and these fundamentals, you’ll create beautiful projects while building confidence at every seam.
- https://www.masterclass.com/articles/how-to-use-a-sewing-machine
- https://sewcutepatterns.com/blog/features-of-a-great-sewing-machine
- https://crazylittleprojects.com/how-to-use-sewing-machine/
- https://www.artisanstitch.co.uk/sewing-machine-features/
- https://www.vinyltechnology.com/blog/industrial-sewing-machine-features/

