This site is supported by our readers. We may earn a commission, at no cost to you, if you purchase through links.
Store-bought pants rarely fit right. The waist gapes, the legs bunch, or the rise sits awkwardly—because mass production can’t account for your unique proportions. Sewing pants yourself breaks that cycle entirely.
You choose the fabric weight and drape. You adjust the pattern to your exact measurements. You control every seam, dart, and finishing detail. The result? Pants that move with your body instead of against it.
Learning to construct pants from scratch takes patience and precision, but once you master the fundamentals—from accurate measuring to professional hemming—you’ll never settle for compromise fits again.
Table Of Contents
- Key Takeaways
- Benefits of Sewing Your Own Pants
- Essential Tools and Materials for Pants
- Selecting The Right Pants Pattern
- Preparing Fabric and Pattern Pieces
- Measuring and Fitting for Pants
- Step-by-Step Pants Construction
- Adding Features and Details
- Hemming and Finishing Techniques
- Caring for Your Handmade Pants
- Frequently Asked Questions (FAQs)
- Conclusion
Key Takeaways
- Sewing your own pants grants complete control over fit, fabric, and style details that store-bought options can never match—from adjusting patterns to your exact measurements to choosing sustainable materials that align with your values.
- Mastering pants construction accelerates your technical sewing skills faster than simpler projects because it demands precision in complex areas like crotch curves, waistband attachment, and reinforced seams.
- Success hinges on proper preparation—pre-washing fabric to prevent shrinkage, taking accurate body measurements in quarter-inch increments, and creating muslin test versions before cutting into final fabric.
- Professional finishing techniques like strategic pressing, proper hem depth (1-2.5 cm based on fabric weight), and seam reinforcement at stress points transform handmade pants from amateur projects into garments that rival ready-to-wear quality.
Benefits of Sewing Your Own Pants
Sewing your own pants puts you in the driver’s seat. You’re not settling for off-the-rack limitations anymore—you’re creating pieces that actually work for your body, your taste, and your skill set. If you’re new to this, learning how to sew loose pants is a great starting point since they’re forgiving to fit and comfortable to wear.
Sewing your own pants means creating pieces that actually work for your body instead of settling for off-the-rack limitations
Here’s what you gain when you cut that first pattern piece.
Achieving a Custom Fit
Freedom starts with a measuring tape and your own body measurements. Use a pants pattern that reflects your actual shape, not mass-market averages.
Make pattern adjustments for your waist and hips. Run muslin fittings to verify every detail before you cut your final fabric.
Master garment alterations and fit analysis—you’ll never settle for off-the-rack mediocrity again. This pants sewing guide puts you in control.
Expanding Fabric Choices
Store-bought pants lock you into whatever fabric blends the manufacturer chose. Sewing your own pants pattern breaks that monopoly.
Choose synthetic materials for quick-drying performance or natural fibers like linen for breathable summer trousers. Technical textiles add water resistance. Sustainable fabrics align with your values. Before cutting any fabric, use proper marking tools to trace your pattern accurately and avoid mistakes on expensive material.
Your fabric selection—from cotton-spandex stretch to wool blends—transforms basic sewing patterns and designs into pants that perform exactly how you need them to. Starting with beginner-friendly sewing lessons helps you understand how different fabrics behave and which patterns suit your skill level best.
Expressing Personal Style
Beyond fabric choices, fashion sewing lets you own your fashion expression. Custom details—contrast piping, unique topstitching, statement pockets—become your design signature.
You control style variations: high-rise or low-slung, wide-leg or tapered. DIY fashion means your personal silhouette isn’t dictated by retail trends.
Clothing creation through fashion design transforms basic sewing for beginners into wearable rebellion against cookie-cutter conformity. Before cutting into that vintage fabric, run a sewing pattern style modification check to ensure your rebel design actually fits your measurements.
Building Sewing Skills
Pants construction accelerates your sewing fundamentals faster than simpler projects. You’ll master fabric handling across inseams, practice thread management through reinforced seams, and nail seam finishing techniques that prevent fraying.
Sewing tutorials for pants cover essential sewing techniques—from precise crotch curves to waistband attachment—transforming sewing for beginners into confident makers. Each pair sharpens your sewing skills while building muscle memory for complex garment construction.
Essential Tools and Materials for Pants
Before you cut a single piece of fabric, you need the right gear in your corner. The tools and materials you choose will make or break your pants project—literally.
Let’s cover what belongs on your workbench so you can sew with confidence and precision.
Fabric Selection Tips
Your fabric selection determines whether your pants fit like a glove or fall flat. Choose medium-weight fabrics between 6 and 14 ounces per square yard—cotton twill, denim, or sustainable fabrics like linen work beautifully. Test colorfastness before cutting; bleeding dyes ruin seams.
Fiber blends with a touch of spandex add comfort and movement. Understanding textile science and fabric weight transforms your sewing techniques from guesswork into precision textile crafting with proper fabric and notions. Mastering fundamental sewing technique tips for neater results starts with proper pressing, which sets the foundation for accurate seam allowances and professional finishes.
Sewing Machine Requirements
With thicker fabrics like denim, motor power matters. You’ll need a machine that manages 12 to 18 stitches per inch for durable seams. Look for strong machine torque and a reliable feed mechanism—these sewing tools power through layers without stalling.
A walking foot accessory transforms your sewing techniques on tricky fabric. Master these sewing instructions, and your sewing tips translate into professional results every time.
Must-Have Notions and Supplies
Gather your arsenal: fabric scissors with stainless steel blades for clean cuts, a seam ripper when mistakes happen, and tailor’s chalk for marking notches.
You’ll also need safety pins, a measuring tape, and interfacing materials to stabilize your waistband. Add elastic if you’re building comfort into the design.
These sewing notions transform raw fabric into pants that fit like a glove.
Choosing Thread and Needles
Match your thread to your fabric’s soul. Polyester thread delivers seam durability for woven weights, while cotton glides beautifully on natural fibers.
Your sewing machine needle sizes matter: use 80/12 for medium fabrics, 100/16 for denim.
Thread colors should blend or contrast intentionally. These sewing tools and techniques determine whether your seams hold strong or unravel—choose wisely, and your pants will last.
Selecting The Right Pants Pattern
Your pattern is the blueprint for your pants, and choosing the right one sets you up for success from the start. Before you cut a single piece of fabric, you need to understand what type of pattern works for your skill level and body.
Here’s what to keep in mind when selecting a pattern that’ll fit like a glove.
Understanding Pattern Types
You’ll encounter three main pattern types when building your wardrobe arsenal. Commercial sewing patterns offer tested instructions and graded sizing—perfect for garment construction beginners. Custom sizing through pattern drafting lets you create templates from scratch, matching your exact measurements. Modified patterns blend both worlds: you transform existing designs through strategic alterations.
Each approach demands different fabric selection knowledge and sewing notions, so choose based on your current skill level.
Sizing and Measurement Guides
Your body measurements reveal pattern-making precision that transforms sizing charts from confusing grids into roadmaps. Master fit analysis with these measurement tools:
- Waist circumference – Measure at your natural waistline, not where your pants usually sit.
- Hip measurement – Capture the fullest part, usually 7-9 inches below your waist.
- Inseam length – Run tape from crotch to desired hemline.
- Rise measurement – Calculate front waist to back waist through the crotch.
Size conversion becomes straightforward when garment construction starts with accurate numbers.
Estimating Fabric Yardage
Fabric width dictates your yardage calculation—44-inch bolts need more than 60-inch rolls for identical patterns. Check your pattern envelope for specific recommendations, then add 5% extra for pre-washing shrinkage.
Pattern efficiency improves when you align fabric grain with piece layouts. Directional prints or stripes? Budget an additional half-yard.
Smart garment construction tips begin with accurate fabric selection before you cut.
Preparing Fabric and Pattern Pieces
Your fabric prep makes or breaks the final fit. Skip this stage and you’ll fight warped seams, puckered waistbands, and pants that shrink after the first wash.
Let’s walk through the essential steps that set you up for clean cuts and accurate construction.
Pre-Washing and Ironing Fabric
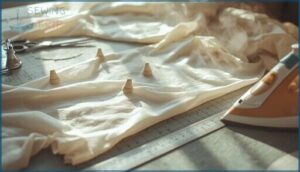
Pre-wash your fabric before you cut a single pattern piece. This essential step prevents fabric shrinkage and removes excess dye that could ruin your hard work. Think of it as insurance for your custom pants.
- Wash cotton and linen in warm water to pre-shrink fibers completely
- Test a small swatch first to check for colorfastness and dimensional changes
- Iron while slightly damp using steam pressing for ideal fabric relaxation
- Match heat settings to your textile’s fiber content to avoid scorching or damage
Laying Out and Pinning Patterns
Once your fabric is pressed and ready, it’s time to master pattern alignment. Line up the grain line with your fabric’s straight grain—use a ruler or clamped straightedge for precision. Pin along all edges perpendicular to the pattern, spacing them evenly.
Match notches carefully for seam accuracy. Transfer markings with tailors chalk or straight pins. This foundation determines whether your pants fit like a glove or miss the mark entirely.
Cutting Fabric Accurately
Now comes the make-or-break moment. Use a rotary cutter with steady pressure—scissors can shift fabric and ruin your grain line alignment. Keep your cutting mat flat and start from the pattern’s center. Cut slowly around curves and notches for accuracy.
- Position your clear acrylic ruler along straight edges to guide clean cuts
- Keep fingers away from the blade and work with deliberate, consistent strokes
- Check seam allowances after each major piece to catch errors early
Marking Notches and Darts
Precision matters here—notches guide seam alignment, darts sculpt your fabric to body contours. Use tailor’s chalk on wovens or water-soluble markers on pale fabrics.
Transfer V-shaped notches at shoulders and sides for pattern accuracy. Mark dart legs from tip to seam line with light strokes.
Test your marking tool on scrap first to avoid permanent stains that ruin garment making.
Measuring and Fitting for Pants
Getting the fit right is where your pants go from homemade to handmade. You can’t skip the measuring step if you want pants that actually fit your body, not some imaginary standard size.
Here’s how to nail your measurements, adjust your pattern, and test everything before you commit to your final fabric.
Taking Accurate Body Measurements
Your pants won’t fit like a glove without the right measurements. Use a flexible measuring tape and wear close-fitting undergarments. Measure bust, waist, hips, and inseam—record to the nearest quarter inch. Keep the tape parallel to the floor and maintain light tension.
These sewing calculations and fit analysis reveal proper garment sizing, giving you control over clothing construction and pattern making for custom pants.
Adjusting Patterns for Fit
Transformation awaits when you master pattern alteration and fit analysis. Lengthen or shorten along center front and center back lines to balance leg length.
Grade between sizes by blending dart and seam lines around hip and thigh. Add tissue allowances where body measurements exceed pattern dimensions.
Document every change on your sewing pattern—these notes ensure perfect pants making and clothing construction every time.
Fitting Muslins and Making Alterations
Think of a muslin fitting as your blueprint for success. Cut inexpensive fabric, stitch it together, and assess where adjustments are needed.
Take in or let out side seams, modify the crotch depth, and polish the waistband. Mark every alteration technique directly on your sewing pattern—this ensures sewing accuracy when you cut into your final fabric.
Fit adjustments now mean pants-making excellence later.
Step-by-Step Pants Construction
Now you’re ready to bring your fabric to life. This is where your pants take shape—from separate pieces to something you can actually wear.
You’ll work through three essential phases: seaming the legs, joining them together, and securing everything at the waist.
Sewing Inseams and Side Seams
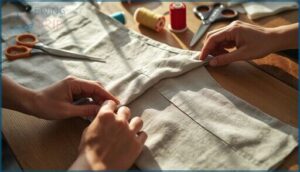
Strong seams hold everything together—literally. Start your pant leg assembly with side seams, stitching from waistband to hem using your sewing machine. Next, tackle inseam construction by sewing from crotch to hem on each leg.
Use a 1/4-inch seam allowance for consistent fit. Finish edges with zigzag stitching or overlocking to prevent fraying. Add staystitch near the top for crotch reinforcement and stability.
Assembling The Crotch and Legs
Align your front and back crotch curves with precision—notch matching ensures smooth leg construction without distortion. Pin the crotch seam carefully, then stitch along the curve.
For durability when you sew pants, use flat felled techniques or add seam reinforcement through topstitching. Press the curve immediately to set the shape and eliminate bulk.
Before tackling the waistband, trim seam allowances to reduce bunching under your body.
Attaching The Waistband
Now comes the waistband—your pants’ crowning anchor. Pin the interfaced waistband to the pant’s top edge, matching notches and center marks. Stitch along the seam allowance, then fold and press flat.
For elastic waistband styles, thread elastic through the casing using a safety pin.
Finish with topstitching techniques along the upper edge—this secures layers and adds that sharp, professional definition your handmade pants deserve.
Adding Features and Details
Now comes the fun part—making your pants truly yours. Pockets, closures, topstitching, and waistband finishes transform basic construction into something that fits your lifestyle.
Let’s walk through each detail so you can build pants that work exactly the way you want them to.
Creating Pockets
Pocket design transforms plain pants into functional art. Choose stable fabrics with low stretch for facings—interfacing prevents gaping and distortion. Reinforce pocket openings with bar tacks at stress points, then top-stitch for clean alignment.
Pocket placement should hit side seams at hip height for easy access. Edge finishing with zigzag stitches stops fraying cold.
Master these sewing techniques and your pockets won’t just hold keys—they’ll hold their shape forever.
Sewing Zippers or Button Flies
Zipper placement determines whether your fly construction sits flush or fights you. Use a zipper foot on your sewing machine and baste first—thread shifts catch you later.
Denim and twill demand coil zippers with seam reinforcement at stress points. Button flies? Cut a concealed placket with interfacing at the waistband.
Practice fabric handling on scraps before committing. Master these sewing techniques and tips, and your pants will close like they mean it.
Adding Cuffs or Decorative Topstitching
Cuffs lock in a hem with authority—fold once, press sharp, then stitch with a twin needle for parallel topstitching that won’t budge. Contrasting thread turns decorative seams into edge finishing that screams intention.
Use a longer stitch length along side seams or pocket yokes to add texture.
Master these stitch variations and your sewing techniques for beginners level up fast—cuff styles that fit like armor.
Installing Elastic or Drawstrings
With elastic or a drawstring, your waistband construction flexes to fit. Measure your waist plus ease, then create a casing with straight stitching top and bottom. Thread flat elastic through using a safety pin—flat elastic reduces bulk while knitted offers more stretch.
For drawstring pants, cut cord 1.5 times the waist circumference. Zigzag elastic ends together, topstitch the channel closed, and you’ve mastered casing techniques that adapt to any body.
Hemming and Finishing Techniques
The hem is where your hard work either shines or falls flat. Getting it right means measuring with precision, choosing the right stitch for your fabric, and pressing until it looks professionally finished.
Master these three techniques and your pants will fit like a glove from waist to ankle.
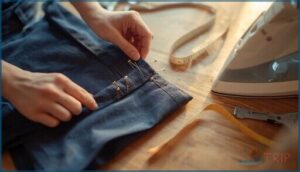
Measuring and Marking Hemlines
Accurate hemlines make the difference between baggy bottoms and pants that fit like a glove. After you sew pants, measuring with precision prevents uneven lengths that scream amateur. Pre-wash your fabric to avoid shrinkage surprises later.
- Check hem depth at side seam, center front, and center back—consistency matters for balance.
- Use tailor’s chalk or erasable marking tools to transfer measurements without permanent stains.
- Account for seam allowance—standard hems range from 1 to 2.5 cm depending on fabric weight and sewing techniques.
Sewing Professional Hems
Professional finishing elevates your sewing from DIY to designer-level. Choose hemming techniques that match your fabric selection—woven cottons thrive with a narrow double-fold hem, while knits demand twin-needle stitches for stretch.
Use your sewing machine’s blind hem foot for invisible seam finishing on structured trousers. Pin first, test on scraps, then sew with 2.5 mm stitch length. Add hem reinforcement on high-stress areas to prevent unraveling.
Pressing for a Crisp Finish
Heat transforms your handmade pants from homemade to haute couture. Master these ironing techniques and pressing tools during fabric preparation, and you’ll achieve crisp finish benefits that rival ready-to-wear. Sharp creases define professional sewing pants construction.
Press seams flat immediately after sewing—use a tailor’s ham for curved areas and a press cloth on delicate fabric. Apply steam with your iron, moving from center outward to avoid new creases.
Caring for Your Handmade Pants
You didn’t sew those pants just to watch them fall apart after three washes. Proper care keeps your handmade pieces looking sharp and fitting right for years to come.
Here’s how to wash, store, and maintain your custom pants so they stay as good as the day you finished that final hem.
Washing and Drying Guidelines
Your handmade pants deserve laundry tips that protect your hard work. Wash cotton in warm water to prevent fabric shrinkage, but switch to cold for denim and wool to preserve color.
Air drying beats tumble drying for most textile crafting basics—heat damages fibers fast. Synthetic blends tolerate low heat, though removing them promptly maintains shape.
These fiber care methods extend your clothing manufacturing triumph.
Ironing and Storing Pants
Press your pants while slightly damp—the fibers relax easier, letting you set sharp creases without fighting wrinkles. Use medium-to-high heat for cotton, lower for synthetics. Iron waistbands flat using a pressing cloth to avoid shine.
Hang by the waistband with smooth wooden hangers to prevent indentations. Store in cool, dry spaces with room to breathe—overcrowding crushes your careful sewing techniques and tips.
Repairing and Maintaining Seams
Check your seams every few wears—catching fraying early saves you hours later. Seam inspection reveals weak spots before they blow out completely.
For seam reinforcement and repair techniques, keep these essentials handy:
- Use a stitch ripper to remove damaged sections before resewing
- Match your thread selection to the original fabric weight
- Apply zigzag or stretch stitches on knits to preserve flexibility
- Press repaired seams flat with your sewing machine’s presser foot
- Add fusible interfacing behind weak waistband areas for extra strength
Proper thread and fabric fraying prevention means your sewing patterns stay wearable longer.
Frequently Asked Questions (FAQs)
How much fabric do I need for my size pants?
Here’s the rule of thumb: fabric yardage depends on your sewing pattern size, view, and fabric width. Standard woven pants generally require 5 to 5 yards on 45–60 inch fabric.
How do I make adjustments to the pants pattern for my body type?
Identify your proportions first. Measure hips, waist, and rise carefully. Add width where you’re curvier, subtract where you’re narrower. Adjust length at the knee or ankle.
Pattern alterations transform generic templates into garments that fit like a glove.
What are some tips for hemming pants to the perfect length?
Use a fabric chalk to mark your desired hemline while wearing the pants. Fold, press, and stitch the hem with a 5–2 cm seam allowance for a clean, accurate finish.
How do you fix twisted or puckered seams?
Remove the flawed seam and check your fabric grain alignment. Re-sew with adjusted tension, a larger needle, and proper presser foot pressure. Press flat with an iron to eliminate puckers.
What causes waistband to roll or fold down?
A stiff belt curling away from your body signals the same trouble: inadequate interfacing choices, excess fabric tension, or poor weaving create waistband instability.
Lightweight fabrics and insufficient edge reinforcement in elastic waistband construction invite rolling during wear.
Can you make pants without a pattern?
Yes, you can break free from commercial patterns entirely. Freehand cutting, drafting techniques, and muslin prototyping let you build custom-fit pants using body measurements—though expect adjustments to nail the perfect silhouette.
How do you match plaids or stripes perfectly?
Plaid alignment and stripe matching demand precision at every seam. Pin fabric orientation carefully, mark pattern repeats with chalk, and baste test sections first. Seam accuracy transforms your pants sewing from amateur to professional-grade work.
Whats the best way to reinforce stress points?
Want pants that last? Reinforce stress points with bartack stitches at pocket corners, add interfacing to high-stress zones, and use triple-stitching along seam intersections—these fabric stabilization moves prevent tears before they start.
Conclusion
Yes, sewing pants demands more time than grabbing a pair off the rack. But that investment pays you back in permanent freedom from ill-fitting waistbands and awkward inseams.
Each pair you construct sharpens your technical eye and deepens your understanding of garment architecture. You’re not just making clothes—you’re claiming control over how fabric shapes your silhouette.
Start with one solid pattern, master the fundamentals, and you’ll never accept mediocrity again.

