This site is supported by our readers. We may earn a commission, at no cost to you, if you purchase through links.
Your sewing machine hums with potential, but finding the right thread feels like a treasure hunt through chaos. Fabric bolts topple when you reach for scissors. Half-finished projects disappear into piles, and that perfect button you bought last month? Gone.
If your creative space feels more like a fabric explosion than an inspiring studio, you’re not alone—and you don’t need a mansion to fix it. Smart sewing room organization ideas transform cramped corners into efficient workspaces where everything has a home and you can actually find it.
The secret isn’t more square footage; it’s strategic systems that put your supplies at your fingertips and keep your creative momentum flowing.
Table Of Contents
Key Takeaways
- Smart storage systems like rolling fabric, clear bins, and wall-mounted thread holders can slash your supply retrieval time by 40-50% without requiring more square footage.
- Dividing your space into dedicated cutting, sewing, and pressing zones with proper lighting (1000-1500 lux) and ergonomic furniture boosts workflow efficiency by up to 30%.
- Vertical storage solutions including pegboards, floating shelves, and under-table organizers reclaim 30-40% of your floor space while keeping tools within arm’s reach.
- Color-coded labeling systems and transparent containers cut search time by 30-45%, transforming chaotic supply hunts into instant visual inventory checks.
Creative Sewing Room Organization Ideas
Your sewing room should work for you, not against you. When everything has a place and you can actually find what you need, creativity flows instead of frustration.
An organized sewing room unleashes creativity by eliminating the frustration of searching for misplaced tools and supplies
Here are six game-changing organization ideas that’ll transform your space from chaotic to completely functional.
Fabric Storage Systems and Folding Techniques
Your fabric collection deserves better than chaos. Smart fabric storage and organization techniques can slash retrieval time and reclaim precious space in your creative zone.
- Roll instead of fold – saves 25% more space and prevents deep-set wrinkles
- Install wall-mounted fabric shelves – boosts storage capacity by 35% in smaller rooms
- Sort by material type – 78% of sewers find their fabrics faster this way
- Use sturdy shelving – each shelf supports up to 55 pounds safely
- Store fabric scraps in storage bins using fold-and-roll methods – perfect for visual accessibility
Effective fabric management also involves using smart storage solutions to make the most of space.
Clear Bins and Labeled Containers
Clear bins transform sewing room organization by letting you spot what you need instantly—cutting search time by 40%. Label each container with what’s inside, and you’ll grab supplies 50% faster.
Choose durable, BPA-free bins with secure lids to protect your stash from dust. Stack them vertically to reclaim floor space, and watch your crafting storage solutions evolve into a system that actually works for you.
Effective storage solutions rely on proper sewing room organization to boost efficiency.
Wall-Mounted Thread and Ribbon Holders
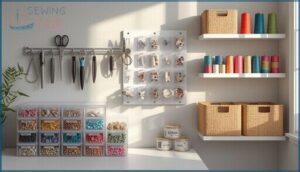
Wall-mounted thread and ribbon holders free up your workspace while keeping supplies visible and tangle-free. Install racks that accommodate up to 120 spools—some measure 15″ x 24″ with 1.5″ peg spacing—to handle growing collections.
Rotating designs boost accessibility for sewing notions organization, while ribbon organizers with 4″ cubbies prevent unwinding chaos.
This sewing room organization idea turns wall space into a functional command center for your creative arsenal.
Utilizing Vertical and Under-Furniture Space
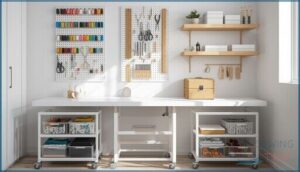
Think beyond horizontal surfaces—vertical shelves and under table storage can skyrocket your sewing space optimization by up to 40%. These space-saving storage solutions give you ergonomic design advantages: tools stay within arm’s reach while floor space opens up.
Install floating shelves, pegboards, or rolling carts beneath work surfaces. You’ll slash search time and reclaim serious real estate with these sewing room furniture ideas that work harder, not bigger.
Repurposing Dressers, Hutches, and Vintage Jars
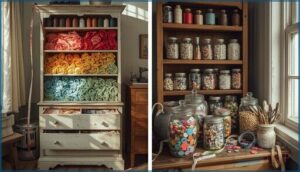
Got an old dresser collecting dust? Turn it into a powerhouse for sewing room organization through dresser upcycling—drawers hold up to 80 yards of fabric, sorted by color.
Hutch renovation adds 40% more storage for bulky supplies, while vintage glass jars keep 200 buttons visible and sorted.
This repurposing furniture approach slashes clutter, saves you $100-400, and gives your space that DIY home decor edge.
Organizing Small Items and Notions
Tackle boxes transform notion storage—transparent bins let you spot zippers and bobbins instantly. Magnetic strips hold scissors securely while pegboards with small item bins keep thread organizers and sewing caddies within arm’s reach.
Label each fabric basket by tool type for sewing supplies that stay sorted. Your sewing room organization transforms when sewing accessories storage matches how you actually work with thread storage and fabric storage at your fingertips.
Maximizing Sewing Room Layout and Workflow
Your sewing room layout can make or break your creative flow. When you position your tools and workstations strategically, you’ll spend less time hunting for supplies and more time actually sewing.
Here’s how to arrange your space so every project moves smoothly from start to finish.
Designated Work Zones for Cutting, Sewing, and Pressing
Dividing your sewing space into dedicated zones is the secret weapon that can boost your workflow efficiency by up to 30%. You’ll slash wasted time and make every project smoother when you implement smart zone layout planning:
- Cutting Station – Position a large, sturdy table away from your machine for precise fabric prep
- Sewing Workflow – Keep your machine, thread, and notions clustered together
- Pressing Area – Create a heat-safe zone with your iron and board ready to go
Ergonomic Furniture Arrangement
Your back shouldn’t pay the price for your passion. Investing in ergonomic chairs with lumbar support and adjustable desks transforms your sewing room organization from painful to powerful.
Position height-adjustable tables between 72–75 cm, add footrest options for stable posture, and choose chairs with swivel casters.
This sewing space optimization tip slashes discomfort while boosting your creative output—workspace optimization that actually works.
Efficient Traffic Flow and Accessibility
Think of your sewing room like a highway—traffic patterns dictate everything. Position your cutting table, sewing station, and pressing area in an L-shape to slash crossflow chaos by 30%.
Wide pathways (minimum 36 inches) between zones release accessibility features that matter.
This sewing space optimization tip transforms your sewing room layout from gridlock to glory, proving workspace optimization isn’t optional—it’s essential for serious creators.
Task Lighting for Productivity
Poor lighting sabotages your best stitches—that’s where LED lighting transforms everything. Install an adjustable task lamp delivering 1000-1500 lux directly over your machine for sewing visibility that crushes eye strain by 50%.
Quality LEDs (5000K-6500K) provide color accuracy you can’t fake, making thread matching simple.
This sewing space optimization tip proves proper sewing room design tips start with illumination, not just sewing studio organization aesthetics.
Creating a Dedicated Sewing Area
Once your lighting’s dialed in, carve out your permanent sewing station—67% of sewists see productivity surge when machines stay put. Even a 50-square-foot corner beats constant setup hassles that steal 35% of your creative time.
Your workspace layout needs three non-negotiables:
- 36 inches clearance around your table for comfortable movement
- Adjustable-height surfaces (28-36 inches) slashing strain by 40%
- Zone separation for cutting, pressing, and storage solutions boosting workflow speed 20%
Essential Organization Tips and DIY Solutions
You’ve nailed the layout and workflow—now it’s time to fine-tune the details that keep everything running smoothly.
The right organizing tricks can turn a functional space into one that actually works with you, not against you.
Here are some simple, DIY-friendly solutions that’ll help you find what you need when you need it.
Color Coding and Labeling Systems
Color Coding turns chaos into clarity—you’ll slash search time by 30% when you assign bright hues to fabric categories. Pair that with Label Systems, and you’ve got Storage Solutions that actually stick. Here’s your battle plan:
| Strategy | Impact |
|---|---|
| Color-coded bins | 45% clearer visual organization |
| Custom labels | 40% faster supply location |
| Consistent categories | 25% fewer placement errors |
These Productivity Tools create Organized Workflows that fuel your creativity, not frustration.
Using Pegboards and Hanging Organizers
Pegboard Installation unlocks game-changing Vertical Storage—you’ll reclaim 30-40% of your floor space instantly. Mount Custom Shelves between workstations, then add Hanging Organizers with pockets for patterns and threads.
Your Sewing Tool Organization becomes seamless when scissors and rulers hang at eye level. This Tool Storage approach slashes search time by 15-20 minutes per hour, keeping your Sewing Room Organization tight and your workflow unstoppable.
Magazine Holders and Shelf Storage Ideas
Magazine Holder Tips give you instant Vertical Organization—stash patterns upright, freeing 30% more shelf real estate. Grab cardboard versions, customize with fabric scraps, and you’ve got budget-friendly Storage Solutions that scream personality.
Pair them with adjustable Shelf Storage for your instruction sheets and magazines. This Space Saving combo cuts pattern-hunting time by 25%, keeping your Sewing Room Organization fierce and functional.
Storing Quilting Tools and Rulers for Easy Access
Wall racks slash ruler retrieval time by 35%, turning chaos into command. Mount those quilting accessories vertically and watch your Workspace Optimization skyrocket—you’ll reclaim 5–8 square feet instantly.
- Pegboards hold 20+ rulers while preventing that annoying 20% chip rate from drawer storage
- Clear acrylic bins cut misplaced-tool frustration by 67% with instant visual access
- Over-the-door organizers boost storage capacity 60% without stealing floor space
- Rolling carts shave 15% off task shift time for peak Sewing Efficiency
Organizing Patterns, Scrap Fabrics, and Work-in-Progress Projects
Tame your pattern chaos with three-ring binders holding 200+ envelopes, sorted by garment type. Slash WIP abandonment rates—25% of digital-tracked projects stall out—by dedicating clear project bags or file boxes to each item. Iron scraps before storage to cut future prep time by 45%, then sort by usable size.
| Organization Type | Best Method | Capacity | Time Saved |
|---|---|---|---|
| Sewing Pattern Storage | Waterproof pouches + digital catalog | 783 patterns | 60% faster retrieval |
| Scrap Fabric Sorting | Clear bins by size (1.5″–2.5″ strips) | Reduces space 50% | 45% prep reduction |
| Project Tracking | Mesh zipper bags per WIP | 40 active projects | 67% less confusion |
| Fabric Storage Systems | Upright folding by color | Dresser drawers | Instant visual scan |
Sewing Journals document your progress, while apps like Airtable track completion dates and boost accountability.
Top 5 Storage Products for Sewing Room Organization
You’ve got the strategies and layout nailed down—now let’s talk about the tools that make it all work. The right storage products can completely change how you organize your sewing space, turning chaos into a system that actually sticks.
Here are five game-changing products that’ll help you wrangle everything from threads to fabric scraps.
1. Jewelry Organizer Storage Roll Holder
You mightn’t think of jewelry organizers as sewing room storage, but here’s the secret weapon: rolling storage like BAGSMART’s 32-pocket holder transforms how you organize sewing notions.
These compact designs with transparent pockets keep beads, buttons, and small sewing accessories visible and untangled. The portable holders hang on doors or walls, claiming vertical space you’re probably wasting.
With 42 hooks and various compartment sizes, you’ll store everything from needles to ribbons in one foldable unit. It’s organization hacks meets practical magic for your sewing supplies.
2. Portable White Storage Utility Cart
Rolling utility carts are game-changers for sewing room organization—three tiers, 360-degree wheels, and you’re looking at mobile organization that follows you from cutting table to machine. These compact storage units (around 15″ wide, 30″ tall) hold thread storage, notions, and works-in-progress without eating floor space.
Cart assembly tips? Five minutes, no tools. The portable storage design keeps sewing supplies within arm’s reach, boosting workspace efficiency when you’re bouncing between tasks. Lock the wheels during focused work, roll them aside when projects multiply. That’s sewing room storage ideas that actually move with your workflow.
3. Reusable Mesh Zipper Storage Bags
These see-through warriors handle your chaos with mesh bag benefits that’ll blow your mind—24-pack PVC mesh zipper bags store fabric scraps, patterns, and notions while letting you spot what’s inside at a glance.
Storage hacks meet reality when zipper durability keeps sewing supplies corralled without the guesswork.
Organization tips from the pros? Group similar items, label if you’re feeling fancy, and stack them in drawers or shelves. Mesh zipper bags turn sewing room organization into a visual system that actually works for organizing sewing supplies without the storage solutions headache.
4. Gray Plastic Storage Baskets Set
Six gray plastic storage baskets turn chaos into control—this USA-made set with its wicker-look weave pattern brings storage solutions that actually breathe.
At 15″W x 12.25″D x 5.24″H, they’re your space optimization secret for sewing supply storage across shelves and countertops.
Basket arrangement gets real when you stack these cement-colored warriors to organize threads, patterns, and notions.
Organization tips that stick? Label edges, group by project type, and watch your sewing room organization ideas come alive.
These crafting storage heroes handle daily abuse while keeping your creative battlefield battle-ready.
5. Clear Glass Cookie Storage Jar
Clear glass storage jars with airtight lids transform button chaos into visible sewing notions heaven—spot every bobbin, snap, and safety pin without cracking open a single container.
These clear containers deliver that instant visual inventory you’ve been craving, cutting search time by 20% while keeping dust and moisture away from your precious sewing supplies.
At just 1 gallon, this jar organization powerhouse slots into any sewing room setup, proving storage solutions don’t need complexity—just transparency. Your organization hacks just got a serious upgrade.
Frequently Asked Questions (FAQs)
How to organize sewing room for kids?
Start with child-height work surfaces between 22-28 inches and clear bins for kid-friendly storage. Add pegboards for sewing supplies, designated safe zones for sharp tools, and ergonomic chairs—transforming any sewing room into a learning station.
Best lighting options for small sewing room?
Poor lighting drains your energy—but LED lighting transforms your sewing room design.
Choose task lighting with 5000K-6500K color temperature for natural light effects, boosting energy efficiency while optimizing your sewing space with focused, bright illumination.
How to make a sewing room portable?
Rolling carts and folding tables transform any corner into a functional workspace.
Pair compact storage solutions with travel cases and mini organizers to keep your portable sewing stations ready—perfect for moving projects wherever inspiration strikes.
How to integrate technology in sewing room?
Technology revolutionizes your sewing space through AI sewing machines detecting fabric types automatically, digital patterns eliminating paper clutter, IoT machines providing remote monitoring, automated cutting systems increasing precision, and smart storage apps tracking inventory efficiently.
Eco-friendly organization solutions for sewing rooms?
Go green with recycled plastic storage boxes, upcycled vintage jars, and repurposed fabric scraps.
Sustainable storage meets minimalist sewing—think bamboo organizers, natural baskets, and DIY pegboards that slash waste while maximizing your creative space.
How do I organize sewing machine attachments and feet?
Those little gadgets deserve their own home. Use small compartmentalized containers or pegboards to group machine accessories by function—zippers, hemming, quilting—so you’ll always grab what you need fast.
How can I prevent fabric from fading in storage?
Store your fabric collection in a cool, dark place away from direct sunlight to prevent UV damage.
Keep humidity between 30-50% using breathable cotton bags—never plastic—to protect color preservation and prevent fading.
Should I organize buttons by color or size?
Organize buttons by color if you tackle creative projects—you’ll match shades 28% faster.
Choose size for repairs and garment work, cutting selection time by 34%.
Hybrid systems work best for multipurpose sewing spaces.
How do I store large quilting hoops and frames?
Large quilting hoops and frames thrive on vertical racks or pegboard storage with wall mounts.
Try hanging storage bags with compartments or mobile cabinets—they’ll optimize your space while keeping frames accessible and protected from warping.
Conclusion
Your sewing room doesn’t have to be a battlefield where inspiration gets buried under clutter. With the right sewing room organization ideas, you’re building a creative command center—one where every tool answers when you call and projects flow instead of stall.
Start small: tackle one drawer, one wall, one chaotic corner. Each system you put in place reclaims time, space, and sanity. Your best work happens when chaos stops stealing your focus.


