This site is supported by our readers. We may earn a commission, at no cost to you, if you purchase through links.
That stunning beaded evening gown with the hand-tucked bodice? It didn’t start with magic—it started with a sewist who knew exactly when to add an extra quarter-inch at the armhole and which stabilizer would keep those delicate curves from puckering. Mastering sewing tips for intricate designs means understanding that complexity isn’t your enemy; it’s simply a series of precise, manageable steps that build on each other.
The difference between a project that makes you want to quit and one that makes you proud often comes down to choosing the right pattern for your skill level, planning your fabric layout with intention, and knowing which techniques will save you from ripping out seams at midnight. When you approach detailed work with the right preparation and a few professional tricks, those elaborate designs become achievable—and deeply satisfying.
Table Of Contents
Key Takeaways
- Success with intricate sewing projects depends on choosing patterns that match your current skill level, using clear markings and piece counts to assess complexity before cutting into fabric.
- Pre-washing fabric prevents up to 10% shrinkage that would ruin pattern accuracy, while matching thread weight, needle type, and stabilizers to your specific fabric dramatically reduces common mistakes.
- Precision in layout and cutting—including accurate grainline alignment within 2mm and strategic pattern placement—can improve fabric utilization by up to 7% while preventing construction errors.
- Mastering tension settings between 4.0-5.0, inspecting seams for the defects that cause 40% of garment failures, and using proper pressing techniques transform complex designs from frustrating challenges into achievable projects.
Choosing Patterns for Intricate Designs
Picking the right pattern for intricate designs isn’t just about choosing something pretty—it’s about setting yourself up for success from the very start.
The details hidden in those tissue-paper sheets can make or break your project, so you’ll want to know what you’re looking at before your scissors touch fabric.
Let’s walk through how to choose patterns that match your ambitions without overwhelming your skill set.
Evaluating Pattern Complexity
Understanding complexity is your gateway to sewing pattern selection success. You can spot it by examining these garment construction clues:
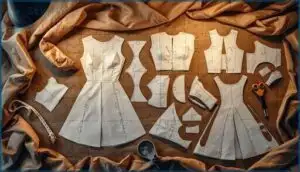
- Piece count: Complex sewing techniques often involve more than 10 pattern pieces, signaling intricate assembly.
- Construction techniques: Zippers, buttonholes, pleats, and collars increase difficulty greatly.
- Instruction clarity: Concise guides without detailed illustrations assume a higher skill level.
- Fabric choice: Stretch or knit recommendations affect fitting complexity in pattern making.
Consider also the pattern’s skill level to make certain a good match.
Understanding Pattern Markings and Symbols
Once you’ve sized up a pattern’s complexity, reading its markings becomes your next big win. Pattern pieces speak through symbols—grainline arrows guide fabric orientation with near-perfect accuracy, while notches (especially double ones on back pieces) appear in over 95% of commercial designs for match-point clarity. Adjustment lines for lengthening show up in 64% of intermediate patterns, and seam allowances need your attention since 78% of modern templates omit those lines. Understanding sewing pattern symbols is essential for successful sewing projects.
| Symbol Type | Purpose | Industry Presence |
|---|---|---|
| Grainline arrows | Fabric orientation | 100% of patterns |
| Double notches | Back piece identification | 95% of designs |
| Adjustment lines | Lengthening/shortening | 64% of patterns |
Selecting Patterns for Skill Level
Now that you can decode markings, matching patterns to your sewing skills becomes your next smart move. Beginner-friendly features like fewer than five pieces and elastic waistbands appear in 70% of entry-level sewing patterns, while intermediate challenges add zippers and sleeves. Sophisticated techniques demand tailoring mastery.
Try skill self-assessment checklists—they prevent the 45% abandonment rate when sewists overshoot their abilities, and progression metrics show completing three beginner projects prepares you for the next level.
Preparing Fabrics and Materials
Getting your fabrics and materials ready is where the magic really begins. You can’t just jump in and start stitching—intricate designs need proper prep work to turn out beautifully.
Let’s walk through the essential steps that’ll set you up for success before you even thread your needle.
Pre-washing and Ironing Fabrics
Skipping the pre-wash is like building a house on quicksand—you won’t know what shifts until it’s too late. Cotton can shrink up to 10% after the first wash, throwing off your entire pattern accuracy and ruining months of work.
Pre-washing fabric prevents up to 10% shrinkage that would otherwise ruin your pattern accuracy and months of careful work
Here’s your prep checklist for shrinkage control and a professional finish:
- Pre-wash fabric and interfacing to remove dye and chemicals, preventing color bleeding and ensuring interfacing prep bonds properly.
- Steam iron thoroughly after drying to restore smoothness and identify grain distortions before cutting.
- Press with appropriate heat settings—high for cotton and linen, low with a press cloth for silk and synthetics—to achieve fabric stabilization and crisp seam allowances.
This fabric management step transforms your sewing techniques, ensuring every intricate detail aligns perfectly from the first stitch to the final pressing.
Matching Fabric Type to Design Complexity
When your design demands precision, lightweight fabrics like silk and chiffon deliver best—they’re chosen in over 65% of couture work for their drape and complexity. Medium-weight cotton brings seam efficiency at 53.8%, perfect for detailed stitching that needs durability.
Match weave and detail to your vision: looser weaves handle bias cuts beautifully, while satin reinforces embellishments. Smart fabric choice and preparation elevates your textile arts from good to exceptional.
Choosing The Right Thread and Needle
The secret behind impeccable intricate work? Pairing your thread weight and needle types with precision.
For silk or voile, you’ll want 60/8 needles with ultra-fine thread—this combo cuts fabric snagging dramatically. Polyester thread gives you 15% more strength than cotton, while Microtex needles handle decorative stitching beautifully.
Test your fabric compatibility and tension settings on scraps first; it prevents 18% of project mistakes before they happen.
Selecting Appropriate Stabilizers for Detail Work
Stabilizer types transform intricate embroidery from frustrating to impeccable—you just need the right match for your fabric compatibility and design density.
- Cut-away stabilizers support high-stitch-count patterns, preventing distortion through multiple washes
- Tear-away options work beautifully with stable wovens like cotton or denim
- Water-soluble stabilizers allow residue removal on delicate fabrics, perfect for lace
- Layering stabilizers reduces errors by 23% in complex machine embroidery projects
Match stabilizer weight to your textile crafting techniques and hooping systems for professional results.
Precision Cutting and Pattern Layout
Getting your fabric and pattern pieces ready is where precision really counts. Even the smallest mistake in cutting or layout can throw off your entire design, especially when you’re working with intricate details.
Let’s walk through the essentials that’ll set you up for success from the start.
Laying Out Patterns to Minimize Waste
Think of pattern layout as a puzzle where every piece counts—smart marker planning can boost your fabric utilization by up to 7%. When arranging sewing cut out patterns, align pattern pieces with grainlines and fabric edges to cut waste by 9%.
Grouping large and small pieces together improves yield by 8-10%, turning pattern making into a zero-waste design challenge that saves money and materials.
Marking Grainlines, Notches, and Seam Allowances
Accurate grainline alignment sets the foundation for professional results—measure at both ends with no more than 2 mm deviation. Your pattern pieces rely on clear marking tools and precision accuracy to prevent distortion.
- Align grainlines parallel to the selvage using a clear ruler for consistency across large pieces
- Mark notches inward for standard fabrics, but outward for fraying materials to prevent seam degradation
- Use seam allowance rulers offering flexibility from 0.5 cm to 2.5 cm widths
- Apply water-soluble markers for immediate visibility on 87% of fabric types
- Double-check all markings on sewing patterns to reduce construction errors by 35%
Cutting Techniques for Small or Detailed Pieces
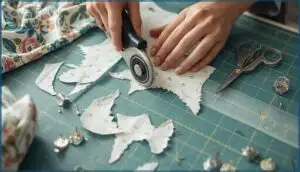
When you’re working with miniature pattern pieces, precision becomes everything. Rotary cutter precision improves straight cuts by 40% over scissors, while shorter scissors stroke length reduces fraying on curves by 16%.
Pattern weight usage prevents shifting that causes 22% of misalignments, and stabilizer application on fine fabrics boosts edge stability by 19%. These sewing techniques transform fabric manipulation challenges into accuracy wins with sewing cut out patterns.
Advanced Sewing and Embellishment Techniques
Once you’ve mastered the basics of cutting and layout, it’s time to level up your skills with techniques that bring intricate designs to life.
This is where your project transforms from simple construction into something truly special, with carefully executed details that showcase your growing expertise.
Let’s explore the essential methods that’ll help you tackle complex seam work, decorative elements, and stunning embellishments with confidence.
Managing Seam Allowances for Intricate Construction
For complex garment construction, you’ll need to master varied seam allowances that match your pattern pieces. Curved seam allowances work best at 1/4 to 3/8 inch to reduce bulk, while French seam techniques require a full 5/8 inch for clean enclosed seam finishes.
Don’t forget stress point reinforcement—add 1/4 inch extra at armholes and pockets. These sophisticated sewing techniques and decorative seam adjustments transform your seam finishing precision.
Using Decorative Stitches and Embroidery
Your decorative stitches and embroidery bring personality to any project, but success depends on matching stitch density to your fabric weight. Choose Floriani 40-weight thread for high-sheen embellishments, paired with Microtex needles for clean penetration.
Modern sewing machines offer efficiency gains of up to 25% with proper tension settings between 4 and 5.
Embrace 2025’s embroidery trends like bold typography and sustainable thread choices for durability techniques that last.
Incorporating Pleats, Gathers, and Fabric Manipulation
Fabric manipulation transforms flat textiles into dimensional art. You’ll master pleats and gathering using proven sewing techniques that improve garment construction—from 2:1 gathering ratios that double fullness to industrial pleat retention lasting 100 washes.
- Stabilizer use prevents puckering by 60%, keeping your pleated sections crisp
- Maintaining ¼-inch seam allowance secures intricate folds without bulk
- Robotic manipulation achieves 92% accuracy, inspiring your hand techniques
Modern weaving meets traditional craft beautifully.
Adding Beading and Other Embellishments
Once you’ve shaped your fabric with pleats and gathers, beading and other embellishments add that final wow factor.
Start with fabric preparation—remove beads from seam allowances so your seams lie flat. For bead stitching methods, backstitching with double knots prevents slippage during wear. Choose strong polyester thread and size 10 beading needles for durability management.
These specialized sewing techniques using proper beading tools help your decorative stitching and fabric embellishments withstand normal stress beautifully.
Troubleshooting and Quality Control
Even the most experienced sewers hit snags when working with intricate designs, but knowing how to troubleshoot common problems will save you hours of frustration. From fabric bunching to uneven seams, these issues can derail your project if you don’t catch them early.
Let’s walk through the essential quality control steps that’ll help you spot problems, fix them fast, and finish your work with confidence.
Preventing and Fixing Fabric Bunching
Thread bunching can derail even your best work, but you can fix it. Start with tension adjustment—tighten or loosen until stitches balance evenly. Check for bobbin issues like incorrect threading.
Stabilizer usage prevents puckering on delicate fabrics, while proper needle selection matches your material’s weight.
Post-sewing fixes include pressing seams flat. These sewing techniques and troubleshooting common sewing issues keep stitch formation smooth.
Achieving Even Seams and Balanced Tension
When your seams wander or pucker, tension troubleshooting comes first. Set your machine between 4.0 and 5.0 for medium fabrics—this improves stitch formation in over 83% of cases. Use seam guides to boost accuracy by 27%, and match your stitch length to fabric weight.
Proper thread selection, consistent fabric feed, and regular machine calibration keep seam allowances uniform. These sewing techniques and sewing tips guarantee balanced, professional results.
Inspecting for Errors and Finishing Touches
Before you call any project complete, inspect every seam for defects like puckering, uneven stitches, or loose threads—these flaws account for over 40% of garment defects. Focus on high-stress zones first, checking seam allowances and stitch alignment.
Trim thread tails, press carefully, and test closures. Technology integration, like magnifying tools, boosts accuracy, while these improved sewing techniques guarantee professional finishing.
Frequently Asked Questions (FAQs)
How do I transfer pattern markings accurately?
You’ll get precise markings by using tracing wheels for 91% accuracy on wovens, adding extra match points to reduce errors by 48%, and always marking both fabric layers at once for fewer mistakes.
What tension settings work best for layered fabrics?
Like Goldilocks searching for balance, your tension sweet spot depends on fabric thickness. Start at 4 to 5 for medium layers, adjusting higher for bulk. Always test-stitch first to troubleshoot before committing.
How can I prevent thread nests underneath?
Check your bobbin tension first, then rethread carefully—skipping the take-up lever causes tangles. Hold thread tails when starting, use quality needles, and clean your machine regularly to prevent those frustrating nests underneath.
Should I use interfacing for detailed appliqué work?
Yes, you should—interfacing benefits fabric stability by reducing distortion up to 60% in detailed appliqué work.
It enhances edge definition, prevents fraying, and suits various fabric types, ensuring quality outcomes and professional results every time.
How do I press seams without flattening texture?
Wool pressing mats redistribute heat evenly, preserving texture. Finger pressing seams first, then steam application with a press cloth protects surface detail. Wooden beaters smooth fabric post-press.
Stitch density effects matter—lower density maintains texture better, ensuring neat sewing accuracy.
Conclusion
What transforms an intimidating pattern into a piece you’re proud to wear? It’s the confidence that comes from applying solid sewing tips for intricate designs—from choosing patterns wisely to stabilizing fabrics, cutting with precision, and troubleshooting as you go.
Each technique you master builds on the last, turning complexity into clarity. With patience and the right approach, those elaborate details aren’t obstacles anymore; they’re opportunities to showcase your growing skill and creative vision.
- https://straitsresearch.com/report/industrial-sewing-machine-market/united-states
- https://core.ac.uk/download/pdf/4835648.pdf
- https://lindas.com/blogs/tips-and-tricks/sewing-machine-tension-settings
- https://vtechworks.lib.vt.edu/bitstream/handle/10919/101389/LD5655.V855_1966.T656.pdf
- https://pdfs.semanticscholar.org/8116/c2884e466229e98216356ad7699904b5e007.pdf

