This site is supported by our readers. We may earn a commission, at no cost to you, if you purchase through links.
 Shortening jeans while keeping the hem sounds tricky, but it’s as easy as pie with the right technique!
Grab those jeans and flip them inside out.
Measure how much shorter you want them, then cuff the extra fabric, pinning it in place.
Use a sewing machine to stitch close to the original hem, creating a neat faux hem that blends seamlessly with a flatbed sewing machine.
This way, you get the authentic look while wielding control over your style.
Ready for more tips and tricks on mastering jeans?
Table Of Contents
- Key Takeaways
- Choosing the Right Hemming Method
- Essential Supplies and Prep Work
- Hemming Techniques for Straight Leg Jeans
- Hemming Techniques for Tapered Leg Jeans
- Hemming With the Original Hem
- Creating a New Hem
- Tips and Tricks for Hemming Jeans
- Common Mistakes and Troubleshooting
- Frequently Asked Questions (FAQs)
- Conclusion
Key Takeaways
- Flip those jeans inside out and measure how much you want to chop off; then cuff the extra fabric and pin it in place, stitching close to the original hem for that seamless, authentic look. Don’t let hemming be the fashion disaster lurking in your closet.
- Arm yourself with the right tools: a trusty sewing machine, sharp fabric scissors, matching thread, and a good iron. Think of it as assembling your own sewing team—each piece plays a heroic role in your hemming adventure.
- Washing your jeans twice before hemming is a smart move to dodge surprises in the fit department. Hot water is your ally for pre-shrinking denim, much like rehearsing a play to avoid opening night jitters.
- Whether you’re dealing with straight, tapered, or flared legs, the right method is key. Remember, no two jeans are alike, and each style needs its own game plan—kind of like how different plants need different amounts of sunlight and water.
Choosing the Right Hemming Method
When you’re ready to shorten your jeans but keep the original hem, choosing the right hemming method is key.
Whether you’re dealing with straight, tapered, or flared legs, knowing how each type affects the final look will save you from fashion disaster and wardrobe malfunctions.
Determining the Hemming Method for Straight Leg Jeans
When hemming straight leg jeans, choose whether to keep the original hem or create a new one. You might prefer the original hem for a seamless look.
Here’s your game plan:
- Measure hem length with a trusty measuring tape.
- Make sure the hem height is right.
- Gather essential tools.
- Sew carefully, and voilà—mastery achieved!
Determining the Hemming Method for Tapered Leg Jeans
If you have tapered leg jeans, the hemming method is a bit different.
The key is that the leg opening width (A) is narrower than the width just above the new hem (B).
This means you’ll need to reduce the leg width before folding and stitching the new hem.
| Leg Opening Width (A) | Width Above New Hem (B) | Hemming Method |
|---|---|---|
| Narrower | Wider | Reduce leg width, remove previous stitching, then follow straight leg hemming steps |
Determining the Hemming Method for Flared Leg Jeans
When you’re dealing with flared leg jeans, opt for a stitched hem since the leg opening is widespread like a dancing bell.
Don’t forget:
- Binder clips keep hems precise.
- Preserve the original hem for authenticity.
- Measure the hem width twice, cut once.
- Choose a strong fabric type fit for fashion.
You’ll be the master of your jeans’ destiny!
Essential Supplies and Prep Work
When you’re gearing up to hem your jeans, gathering the right tools and taking some prep steps is like packing for a trip you don’t want to take twice.
Don’t forget to wash the jeans twice—those shrinking surprises are only cute for your wool sweater collection.
Gathering Essential Tools for Hemming Jeans
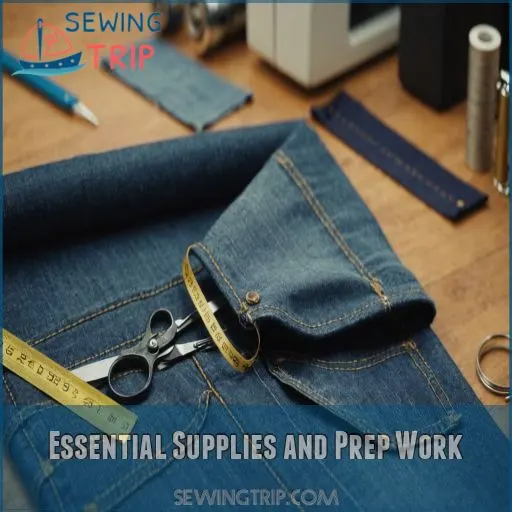
Start your hemming adventure by rounding up the essentials: a sewing machine that’s up for the job, fabric scissors sharp enough to slice through denim, matching thread that blends seamlessly, and trusty pins to keep everything in place.
Don’t forget an iron—it’s your secret weapon to victory!
This gear will have you hemming like a pro in no time.
Washing and Preparing Jeans for Hemming
Twice-washing your jeans before hemming is essential. Hot water helps pre-shrink the denim, ensuring a perfect fit after altering.
Consider your desired heel height when testing the new length – longer is always better than too short.
Ironing the jeans will also help the fabric lay flat for precise hemming.
- Wash jeans in hot water
- Allow to fully dry before hemming
- Iron jeans to remove wrinkles
- Consider heel height when testing length
- Longer is better than too short
Choosing the Right Thread and Needle for Hemming
Why fret over thread and needle choices when hemming jeans?
For denim, a sturdy thread weight and size 16/100 needle are your trusty companions.
Match the thread color to your jeans for seamless brilliance.
Tweak the thread tension until it’s just right—like tuning a guitar string.
Your jeans will thank you for keeping their rhythm.
Measuring and Marking the New Hemline
Getting the hemline just right can feel like threading a needle in the dark!
Grab your hemming tools, especially your trusty measuring tape.
Stand in front of a mirror, wear your favorite shoes, and mark the accurate length on the jeans with fabric marking tools.
Always leave wiggle room for hemline adjustments later.
Getting this right makes for a perfect finish!
Hemming Techniques for Straight Leg Jeans
Shortening straight leg jeans while keeping the original hem can be a game-changer for your wardrobe.
You’ll soon master folding, pinning, and stitching those hems like a pro, ensuring you’ll rock the perfect length without ever losing that authentic look!
Marking the New Hem Position
Now that you’ve gathered your hemming tools, it’s time to mark the new hem position.
Grab your trusty measuring tape and jeans – you’ll want to try them on to determine the perfect length.
Use fabric chalk or a washable marker to draw a straight line around the leg, 1-2 inches below your desired hemline.
This clear guideline will make sure your new hem is perfectly aligned. (Source)
Folding and Pinning the Hem
Folding and pinning your jeans’ hems might seem like a piece of cake, but a great pin job is really important.
Make sure your hems are even by using proper pin placement—aim for equal distances, keeping the fabric tension consistent.
Different pin types work wonders; sharp pins will slice through denim like butter, while dull ones may leave you frustrated.
Smart pinning equals fabulous-looking hems!
Stitching Around the Leg Opening
Let’s stitch around the leg opening with precision and flair! Make sure your machine settings are on point:
- Use a stitch length of 2.5-3 for durability.
- Adjust fabric tension to avoid puckering. Think of it as jeans yoga—smooth and stretched just right.
- Keep a steady sewing speed; watch it like a hawk eyeing dinner.
Finishing the Cut Edge and Topstitching
While finishing, use a zigzag stitch or serger finish to prevent fraying — sort of like giving your jeans a safety net!
Remember to allow some seam allowance before pressing with an iron.
Topstitching types like straight and decorative add flair. Think of it as giving your denim a little spa day, pampering those edges into a polished look.
Hemming Techniques for Tapered Leg Jeans
Shortening tapered leg jeans doesn’t have to be a hassle.
With a few smart techniques, you can reduce the leg width and remove the previous stitching to create a fresh, custom hemline that preserves the original look of your favorite denim.
Reducing Leg Width and Removing Previous Stitching
Starting with tapered jean hacks, grab your seam ripper and carefully undo stitches along the side seam.
Imagine it like peeling an onion—layer by layer, take it steady to avoid harming the denim fabric’s delicate threads.
Once freed, use hemming tools to adjust the width while setting your sewing machine to a suitable stitch choice.
Happy sewing!
Marking the New Hem Position and Folding the Hem
To mark the new hem accurately, grab your hemming tools and tape measure. Measure twice, mark once! Here’s a handy guide:
- Stand up straight: Keeping even hems requires good posture.
- Use chalk or a fabric pen: Avoid messy mistakes.
- Fold carefully: Match the lines for evenness.
- Pin securely: Stops those pesky shifts mid-sew.
Be precise; it’s jeans, not rocket science!
Hemming With the Original Hem
When you want to shorten your jeans but love that worn-in hem, don’t fret—there’s a clever technique to keep it intact.
You’ll look like you’ve just strolled out of a designer store, not a sewing marathon.
Cutting Excess Fabric and Finishing the Cut Edge
Once you’ve stitched the new hem, it’s time to deal with that excess fabric.
No need to get scissor-happy just yet – leave a small seam allowance, then use a zig-zag stitch or your trusty serger to finish that raw edge.
This clean, professional touch will have your jeans looking sharp in no time.
Ironing and Topstitching the New Hemline
Iron your hem flat like a pro, ensuring a crisp, clean finish.
Grab your matching thread and embrace topstitch styles for that polished look.
Here’s how:
- Set your stitch length to 2.5-3.
- Guide the fabric firmly, avoiding puckering.
- Opt for a contrasting thread color; it adds flair!
Master this, and your jeans will rock!
Tips for Preserving the Original Hem
Ironing is just half the battle in hemming jeans while keeping the original hem, especially when you need to learn how to hem jeans.
To master hem preservation, align pins close to the original hem; imagine them as steadfast sentinels.
Use machine settings that match your fabric type.
With a grin, embrace quirky sewing tricks, like using a powerful machine to avoid a bumpy ride!
Creating a New Hem
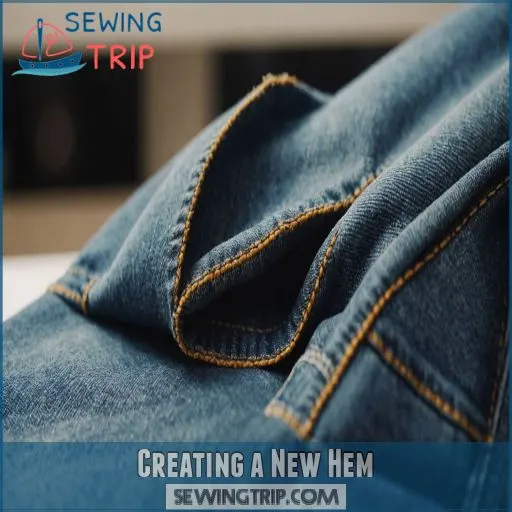
You’re about to transform those too-long jeans into the perfect length while keeping that beloved original hem.
It’s easier than you think—just grab your tools and get ready to rock a fabulous new look.
Measuring and Cutting the New Hemline
Measure and mark the new hemline, ensuring it’s the perfect length.
Grab your fabric scissors and carefully cut along the marked line, leaving a generous seam allowance.
This extra fabric will give you wiggle room when folding and stitching the new hem.
Take your time to get an even, straight cut for a professional finish.
Folding and Ironing the New Hem
When you fold the newly cut hem, think of it as tucking in a neatly wrapped gift.
Choose the right ironing board type for comfort.
Set your iron to steam for stubborn creases, unless your fabric whispers otherwise.
A narrow hem width works wonders.
Pinning and Topstitching the New Hem
You’ve ironed your new hem, and now it’s showtime with those pins!
Securely pin the hem to keep everything in line—nothing worse than wriggly fabric trying to escape.
Choose a topstitch style that matches your flair.
Use a strong sewing machine for that steady hand.
Sewing the New Hem in Place
Alright, let’s get stitching!
Set your sewing machine’s stitch length to 2.5-3 for a professional-looking finish.
Keep an eye on your fabric tension to avoid puckering.
Give yourself a seam allowance of about half an inch—like a buffer zone.
Topstitching techniques are your secret weapon here.
Even jeans appreciate some tender-loving topstitching!
Tips and Tricks for Hemming Jeans
Hemming your jeans doesn’t have to be a tough task.
With a few simple tips and tricks, you’ll be able to shorten your jeans while keeping the original hem intact.
This ensures a polished, professional look every time.
Pinning the Hem for the Desired Length
You’ve cut and ironed your new hem, now bring on the pins!
Slide into your jeans and stand tall—check how they fall with your favorite shoes.
Pinning’s like a dress rehearsal, so make sure each pin is a supporting actor holding the fabric without causing a tension drama.
Think of your hemming tools as your backstage crew, ready to assist.
Stitching the New Hem With a Straight Stitch
After pinning your hem to perfection, it’s time to bring out the sewing machine.
Align your needle size to the denim’s heft, ensuring a perfect marriage between power and precision.
As you guide the fabric, imagine you’re line-dancing—steady, rhythmic, and in control.
Cutting Excess Fabric and Leaving a Seam Allowance
Now that you’ve stitched your new hem, let’s trim the excess fabric.
Don’t go wild with the scissors; leave a half-inch seam allowance to keep things tidy.
Remember, fabric type matters—stretchy denim needs special love.
Consider finishing the edge with a zigzag stitch or serging.
Whipstitching adds a dash of flair if you’re feeling fancy!
Common Mistakes and Troubleshooting
Hemming jeans can be tricky, but don’t worry – we’ve got your back!
In this section, we’ll explore common mistakes to avoid and share smart troubleshooting tips to help you achieve a professional-looking finish every time.
Avoiding Common Mistakes When Hemming Jeans
You’ve pinned and stitched like a pro, but don’t let mistakes steal your thunder! Hemming unevenly is like putting socks on a rooster—just doesn’t work.
Watch for fabric bunching; it’s the nemesis of a neat hem.
Double-check your sewing machine settings and thread tension to keep everything smooth.
Measure twice, cut once to nail that hem length!
Troubleshooting Issues With the Hemline
Having trouble with hemline woes? It happens to the best of us! Uneven hems or stitching errors can make jeans look wonky.
Hem fraying and fabric bunching just add insult to injury.
To avoid a hem that’s too tight, practice makes perfect. And remember, even a bad hair day can’t outshine those trusty jeans. Keep experimenting!
Fixing Mistakes and Adjusting the Hemline
Mistakes happen, but don’t let hemming unevenly throw you for a loop!
For an uneven hemline, measuring tape is your trusty sidekick.
If your hem’s too short, add length by releasing stitches, though for a hem too long, resist hemming crooked and simply fold again.
Adjusting confidently means you aren’t left pulling your hair out.
Tips for Achieving a Professional Finish
Achieving a professional finish when hemming jeans is all about attention to detail.
Make sure your sewing machine is up to the task with a sharp denim needle.
Carefully guide the fabric as you stitch, keeping an eye on that seam allowance.
And don’t forget to press that new hem – a crisp, clean fold makes all the difference.
Frequently Asked Questions (FAQs)
How do you shorten jeans with an existing hem?
Ah, the art of hemming jeans without sacrificing that beloved original hem!
It’s a delicate dance, but with a few nimble steps, you’ll have those pants looking sharp in no time.
Just fold, pin, and stitch – voila, a custom fit that’s all your own.
Can I just cut my jeans to shorten them?
You can cut your jeans, but it’s a bit of a gamble!
You’ll need to hem them afterward; otherwise, the edges will fray faster than butter on a hot pancake.
Have some sewing skills? Go for it!
How do you hem jeans to preserve hem?
Want to preserve your jeans’ hem?
First pin the original hem in place, then stitch closely beneath it.
Trim excess fabric and use a zigzag finish.
Iron the new edge and topstitch to secure everything.
Should I keep the original hem on jeans?
Definitely keep the original hem on jeans for a polished look! It’s like giving your jeans a facelift without losing their charm.
Preserve the authentic finish while achieving the perfect length, ensuring style and functionality remain in sync.
Can jeans be hemmed by hand without a machine?
Ah, the age-old question – can you hem jeans without a machine?
Well, my friend, it’s certainly possible, but let’s just say it’ll be a workout for those biceps of yours.
Grab a needle and thread, roll up those sleeves, and get ready to channel your inner tailor!
How to hem jeans with decorative stitching?
To hem jeans with decorative stitching, fold the fabric, pin it, and use a sewing machine with a decorative stitch setting.
Make sure you’re stitching on the right side of the fabric for a polished look (Source).
What is the best way to hem stretchy jeans?
Stretchy jeans can be a real trip, but fear not!
Use a fabric-friendly needle and straight stitch along the original hem.
Guide the fabric gently, ensuring you’ve got a perfect fit without losing that comfy stretch.
Should I hem jeans before or after washing?
Always wash your jeans twice before hemming.
It lets you avoid surprises from fabric shrinkage.
After all, nothing says "Oops!" like perfectly hemmed jeans that end up an inch shorter than you intended.
How to ensure even hem length on both legs?
Balancing jeans hems is like walking a tightrope.
Compare both legs by folding them at the seams, laying them flat, and marking the hem.
Pin carefully, ensuring each leg mirrors the other’s length and angle.
Conclusion
Did you know that over 50% of people own jeans that need hemming?
Master the art of shortening jeans while keeping the hem, and you’ll effortlessly elevate your wardrobe game.
With the right tools and techniques, you can achieve that polished, professional look at home.
Remember, a neatly hemmed pair of jeans saves money on tailoring but also gives you control over your style.
So grab those jeans and start sewing with confidence today!


