This site is supported by our readers. We may earn a commission, at no cost to you, if you purchase through links.
- Choose a mechanical sewing machine to learn the basics. They’re affordable and user-friendly.
- Go for natural fibers like cotton or linen—they’re breathable and durable.
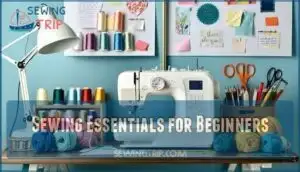
- Set up a comfy workspace with good lighting and storage.
- Master thread tension and stitch length to control the appearance of your seams.
- Practice makes perfect, so sew simple projects like pillowcases or tote bags to build your confidence.
Stay tuned for more tips to level up your sewing game.
Table Of Contents
Key Takeaways
- Start with a mechanical sewing machine and natural fibers like cotton or Linen.
- Set up a comfy workspace with good lighting, storage, and the right tools within reach.
- Master thread tension and stitch length for neat seams, adjusting for different fabrics.
- Practice with simple projects like pillowcases, tote bags, and zipper pouches to build confidence.
Sewing Essentials for Beginners
So, you’re keen to get stitching? Awesome! Before you jump into the fun stuff, let’s get you set up for success.
There are a few essentials you need to know about to make sure your sewing journey starts smoothly. From choosing the right sewing machine to selecting quality fabrics, we’ll guide you through the basics, so you can create with confidence.
Choosing the Right Sewing Machine
Picking out a sewing machine can feel overwhelming, but you don’t need to spend a fortune on your first one. Go for a mechanical model with the basics:
- Straight stitch presser foot
- Buttonhole presser foot
- Zipper foot
Eleanor Lofte, a professional seamstress, recommends a user-friendly owner’s manual, basic stitches, good lighting, an easy-to-read measurement guide, and extra bobbins.
Our top pick for beginners is the Brother CS7000X Sewing and Quilting Machine, a user-friendly, computerized model with advanced features and intuitive controls.
Selecting Quality Fabrics and Notions
Choosing fabrics is a big deal. You’ve got your natural fibers like cotton, linen, and wool, which are breathable and durable. Then there are synthetic fabrics like polyester and chiffon, often used for formal wear or drapes. For beginners, woven fabrics are a great choice because they’re easier to handle and hold in place. Quilting cotton is a popular option because it’s easy to use and versatile.
Now, let’s talk about sewing notions—all the extra tools and supplies you’ll need besides your fabric. This includes needles, thread, pins, elastics, zippers, and even specialized cottons. You can usually find these essentials in a travel sewing kit or at your local craft store.
Setting Up a Functional Workspace
Now, let’s talk about creating a space that inspires you to sew. Setting up a functional workspace is key to enjoying your sewing journey. Here are some tips to get you started:
- Lighting: Make sure your workspace has ample lighting to avoid eye strain. Natural light is ideal, so position your table near a window.
- Storage and Organisation: Invest in storage solutions to keep your tools organised. Clear plastic drawers or a pegboard are great for easy access.
- Ergonomics: Create a comfortable setup to avoid aches and pains. Adjust your chair and table height so your arms are parallel to the floor when sewing.
- Tools: Gather essential tools like scissors, pins, and measuring tape, and keep them within reach.
Mastering Basic Stitches and Techniques
Now that you’ve gathered your sewing essentials, it’s time to get started with stitches and techniques. This section will focus on the fundamental skills you need to sew with confidence. From understanding thread tension to sewing straight lines, you’ll be a pro in no time.
Understanding Thread Tension and Stitch Length
Understanding thread tension and stitch length is key to mastering basic stitches and creating neat, professional-looking seams. Here are some practical tips to guide you:
- Thread Tension Troubleshooting: If you notice visible strain and pulling in the seam, or the stitch is too loose and doesn’t lay flat, it’s time to adjust the thread tension. Remember, tension is usually lowered on thicker fabrics and increased on lightweight ones.
- Stitch Length Impact: Different fabrics require different stitch lengths. For example, heavyweight soft fabrics like terry cloth and fleece typically use 10-13 stitches per inch, while heavyweight structured fabrics like heavy coating and tweed use 7-12 stitches per inch.
- Sewing Machine Settings: Modern sewing machines often have automatic stitch tension controls that adjust based on fabric thickness or the number of layers. You can also manually adjust the upper thread tension using the numbered dial, ensuring the machine is threaded and the presser foot is down.
Sewing Straight Lines and Curves With Ease
Sewing straight lines and curves is all about precision and practice. Here are some tips to help you master this essential skill:
- Fabric choice: Select a fabric that’s easy to work with, like cotton or linen. Avoid slippery fabrics like satin or silk, which can be tricky for beginners.
- Marking techniques: Use tailor’s chalk or a fabric pen to mark your stitching lines. This will help you stay on track and make sure your stitches are straight and even.
- Sewing machine feet: Use the right sewing machine foot for the job. A quarter-inch foot is perfect for straight lines, while a clear foot provides visibility for curves.
- Ironing tips: Press your fabric before and after stitching to make sure you have a crisp, professional finish.
With these tips and plenty of practice, you’ll be sewing like a pro in no time!
Mastering Backstitching and Running Stitch
Backstitching and the running stitch are fundamental techniques in any sewist’s toolkit. Here’s how to master them:
- Backstitch Basics: The backstitch is a sturdy, go-to stitch for seams. It’s a simple "two steps forward, one step back" motion: push the needle forward twice, then bring it back once through the second hole. Repeat for a strong, secure seam.
- Running Stitch Know-How: The running stitch is a quick, versatile stitch. It’s perfect for gathering fabric or adding a simple, decorative line. Just push the needle in and out of the fabric at even intervals, like a dashed line.
- Practice Makes Perfect: Stitching is a skill, and like any skill, it takes practice. Grab some scrap fabric and thread and experiment with different stitch lengths and tensions to get a feel for how they affect your stitches.
Easy Sewing Projects to Build Confidence
Whether you’re a newbie or a seasoned sewist, building confidence is key. Easy sewing projects are the perfect way to boost your skills and your self-esteem. You’ll be amazed at how quickly you can create something useful and beautiful with just a few simple stitches and techniques.
From pillowcases to tote bags, zipper pouches to aprons, these projects will have you sewing like a pro in no time. So grab your machine and get ready to stitch your way to success!
Creating a Simple Pillowcase or Tote Bag
Now it’s time to put your skills to the test with some easy sewing projects! These projects are perfect for building your confidence and familiarity with sewing. Let’s start with creating a simple pillowcase or tote bag.
For a pillowcase, choose a soft, breathable fabric like cotton or linen. You can go with a solid color or a fun pattern. Cut your fabric to size, allowing for seams, and hem the edges. Then, simply sew three sides together, insert your pillow, and sew the remaining side closed.
Tote bags are a great way to practice your sewing and create something useful. Select a sturdy fabric like canvas or denim. Cut out your desired shape, adding straps, and sew it all together. You can add a lining or pockets for a more advanced project.
Sewing a Zipper Pouch or Coin Purse
Sewing a zipper pouch or coin purse is a great way to build your confidence with easy sewing projects. Here are some tips to help you get started:
- Choose the right zipper: For a coin purse, regular dressmaking zippers won’t work. Go for a YKK size 4.5 or a size 5 faux metallic zipper, which looks like metal but is made of nylon, making it easier to cut and sew.
- Fabric choices: You can use fabric scraps or fat quarters for your outer and lining fabric. Cotton fabric is a good option for both the exterior and lining of a coin purse.
- Zipper foot use: Attach a zipper foot to your sewing machine to easily stitch the zipper to the fabric.
Here are some quick project variations to try:
- Make a zipper pouch using fabric scraps for a unique, colourful design.
- Sew a coin purse with a cute, metallic zipper for a stylish touch.
- Experiment with different fabrics and linings to create a variety of zipper pouches as gifts for friends and family.
Making a DIY Apron or Tea Towel
Ready to take on another simple sewing project? Let’s talk about aprons and tea towels! These projects are a great way to build your sewing confidence and create something practical for your kitchen.
When it comes to apron design ideas, the sky’s the limit! You can go for a minimalist look, add some humour with funny sayings, or express your love for baking with cute designs. If you’re feeling extra creative, you can even design your own apron from scratch.
Tea towels are also a fun and easy sewing project. You can make them from leftover fabric or choose a plain weave design for a simple set. Go for a single colour or experiment with multiple colours for a braided look.
Here’s a quick comparison of apron and tea towel projects:
| Apron | Tea Towel | |
|---|---|---|
| Design Ideas | Baking themes, funny sayings, custom designs | Braided look with multiple colours, plain weave |
| Fabric Choices | Linen, cotton, flannel | Cotton, cotolin |
| Embellishments | Embroidery, patches, lace | Embroidery, applique |
Troubleshooting Common Sewing Mistakes
We’ve all been there: that moment when you realize something’s gone wrong with your sewing project. Don’t sweat it! In this section, we’ll tackle common sewing mistakes head-on and provide simple solutions to get you back on track.
Fixing Common Errors in Measuring and Cutting
Accuracy is key when you’re measuring and cutting. Here are some tips to avoid common mistakes:
- Measure twice, cut once: Always double-check your measurements before cutting. Make sure your fabric is aligned accurately with grain lines and laid out flat.
- Use sharp tools: Dull blades and scissors can lead to inaccurate cuts. Invest in sharp rotary blades and keep them well-maintained.
- Cut away from your body: Using a rotating cutting mat can improve accuracy and safety.
- Fabric shrinkage: Always consider fabric shrinkage when modifying patterns.
Dealing With Fabric Wrinkles and Distortion
Fabric wrinkles and distortion are common issues that can ruin your sewing projects. Here’s how to tackle them:
- Ironing Techniques: Master the art of ironing. It’s a game-changer for wrinkle removal and fabric prep.
- Pressing Methods: Learn the difference between ironing and pressing. Pressing is a gentler technique ideal for delicate fabrics.
- Wrinkle Prevention: Understand your fabric’s characteristics to prevent wrinkles. Some fabrics wrinkle more than others, so choose wisely.
- Steam Settings: Know when to use steam. Steam is a powerful tool for wrinkle removal, but not all fabrics respond well to it.
With these tips, you’ll keep your fabrics smooth and distortion-free, ensuring your sewing projects turn out flawlessly.
Solving Thread Breakage and Knotting Issues
Say goodbye to thread breakage and knotting issues! It’s time to troubleshoot and get your sewing back on track.
First, check your thread tension. Is it too tight or too loose? Adjust it to fit snugly.
Next, consider your needle type and bobbin tension. Are they compatible with the fabric you’re using? A simple swap might do the trick.
Advanced Sewing Techniques to Try Next
Now that you’ve nailed the basics, it’s time to level up your sewing game. In this section, we’ll explore some advanced techniques that will take your creations to the next level. From working with bias tape to mastering buttonholes, get ready to add some serious flair to your sewing repertoire.
Working With Bias Tape and Binding
Working with bias tape and binding is an advanced technique that can add a professional finish to your sewing projects. Bias tape is a versatile fabric tape cut on the bias, giving it a bit of stretch that’s perfect for curved seams and edges. It comes in single-fold and double-fold styles:
- Single-fold bias tape is folded once and typically used on one side of a project, like a hem or facing.
- Double-fold bias tape has an extra fold, making it ideal for binding or encasing fabric edges on both sides.
Here are some tips for using bias tape and binding:
- Use bias tape to finish raw edges, seams, and hems for a polished look.
- Sew binding slowly and carefully for a flawless finish.
- Press the binding inside and outside for a neat appearance.
Creating Ruffles, Gathering, and Shirring
Now that you’ve mastered the basics, it’s time to level up! Creating ruffles, gathering, and shirring are advanced sewing techniques that can add flair to your projects.
| Technique | Description |
|---|---|
| Ruffles | Add volume and texture to your creations. |
| Gathering | Create beautiful, flowing designs. |
| Shirring | Form delicate, decorative stitches. |
These methods can be used individually or combined for a unique look. Play around with different fabric types and stitch patterns to make them your own. You’ll be a pro in no time!
Mastering Buttonholes and Sewing Buttons
Now that you’ve got ruffles, gathering, and shirring down, let’s move on to buttonholes and sewing buttons. It’s time to level up your sewing skills!
Buttonholes can be a bit tricky, but they’re essential for adding buttons to your creations. There are a few different types of buttonholes to know:
- Basic rectangular buttonholes are the most common and can be made with a sewing machine or by hand.
- Bound buttonholes are more complex and involve adding an extra piece of fabric.
- Box buttonholes are the most common type and are usually seen on shirts and pants.
When it comes to button placement, you need to think about the number of buttons and your body’s pressure points, like the bust, belly, and hips.
To sew buttonholes, you can use tools like a buttonhole maker or a bound buttonhole tool. You can also sew them by hand or with a sewing machine.
Sewing buttons is a breeze once you know the type of button you’re dealing with. Flat buttons with 2 or 4 holes are the most common and can be sewn by hand or machine.
Frequently Asked Questions (FAQs)
What if Im scared to try new things?
Trying new things can be scary, but you don’t have to dive headfirst into the deep end. Start small, take baby steps, and you’ll be surprised at how quickly you gain confidence and a sense of mastery. Remember, everyone starts as a beginner.
How do I get the right pins?
Sewing pins have a point, shaft, and head. The right pins depend on the job. Long, flat-headed pins are great for grabbing layers of fabric. For knit fabrics, use rounded ballpoint pins. Large heads are ideal for lace and open-weave fabrics.
Where should I set up my sewing station?
Set up your sewing station wherever you have space—a corner, a cupboard, or a whole room. Make sure it’s well-lit, with a table for your sewing machine and nearby areas for cutting, pressing, and storage.
Whats a seam ripper?
Seam rippers are small sewing tools that cut and remove stitches. They’ve a handle, shaft, and head with a sharp point and U-shaped blade. Seam rippers are essential for any sewer.
Whats the best fabric to start with?
You’ve stumbled upon a goldmine of fabrics, perfect for newbie sewers like yourself. Cotton‘s a winner, but also try poplin, sandwashed cotton, polyester, or flannel.
Conclusion
Sewing is a breeze when you’ve got the right tools and tricks up your sleeve.
These simple sewing tips are your secret weapon to going from beginner to pro.
From choosing the right machine to mastering basic stitches and tackling easy projects, you’ll be sewing like a pro in no time.

