This site is supported by our readers. We may earn a commission, at no cost to you, if you purchase through links.

Needles break from hitting pins, using wrong needle sizes, or forcing thick fabric. Machine jamming happens when you pull fabric instead of letting feed dogs do their job.
Check your needle first – it’s the usual suspect in 70% of problems. Clean lint from the bobbin area monthly, and re-thread everything when issues arise.
The specific fixes for each problem can save you hours of frustration. Bobbin problems stem from improper threading or lint buildup in the case.
Table Of Contents
Key Takeaways
- Check your needle first – You’ll solve 70% of Singer problems by replacing bent, dull, or wrong-sized needles, and ensuring proper installation with the flat side facing back.
- Master thread tension basics – You can fix loose loops and puckered fabric by adjusting your tension dial gradually and testing on scrap fabric before starting your project.
- Clean your machine monthly – You’ll prevent most jamming and feeding issues by removing lint buildup from the bobbin area, feed dogs, and shuttle hook using a small brush.
- Thread correctly every time – You must thread with the presser foot raised and follow your manual’s exact sequence to avoid skipped stitches and thread breaks.
Common Singer Sewing Machine Problems
You’ll encounter several common issues with your Singer sewing machine, including thread tension problems, needle breakage, bobbin troubles, and machine jamming.
These problems typically stem from incorrect threading, worn needles, improper bobbin installation, or lint buildup in the machine’s moving parts.
Thread Tension Issues
Most thread tension issues stem from improper settings that throw your stitches completely out of whack. When your upper tension and bobbin tension aren’t balanced, you’ll see loose loops on top or tight puckers underneath. Thread quality plays a huge role too—cheap thread breaks easily and creates uneven stitches.
Proper thread tension adjustment transforms frustrating stitching disasters into perfectly balanced seams that make your projects shine.
Here’s how to fix thread tension issues:
- Check your tension dial setting against your manual’s recommendations
- Test stitch balance on fabric scraps before starting your project
- Adjust upper thread tension in small quarter-turn increments
- Verify bobbin tension by gently pulling the bobbin thread
- Re-thread your machine completely if problems persist
Patient adjustment beats rushing every time, ensuring that you achieve perfectly balanced seams and avoid stitching disasters with proper thread tension.
Needle Breakage
When your sewing machine needle breaks mid-project, it’s like hitting a brick wall.
Needle breakage happens when you’re using the wrong needle type for your fabric thickness or sewing at inconsistent speeds.
Bent needles are immediate red flags—replace them instantly.
| Problem | Solution |
|---|---|
| Wrong needle type | Match ballpoint to knits, universal to wovens |
| Thick fabric snags | Use heavy-duty needles (size 16-18) |
| Speed inconsistency | Maintain steady, moderate pace |
| Poor needle installation | Insert fully with flat side facing back |
Always perform a needle check before starting new projects to avoid sewing machine issues.
Bobbin Problems
Bobbins cause more sewing headaches than you’d expect, but these bobbin problems have straightforward fixes.
Here’s your bobbin check routine:
- Verify bobbin winding creates even, tight loops without loose spots or gaps.
- Confirm bobbin type matches your machine’s requirements (Class 15, 66, or 15J).
- Check bobbin insertion sits correctly with thread unwinding in the proper direction.
- Maintain bobbin tension by cleaning the case regularly and removing lint buildup.
Proper bobbin maintenance prevents most sewing machine bobbin problems before they start.
Machine Jamming
Your machine suddenly locks up mid-seam? Machine jamming ranks among the most frustrating sewing machine problems, but you can fix it quickly with the right approach.
Keep your sewing smooth—clear jams fast with simple fixes like cleaning lint and checking tension.
Start by examining the bobbin area for lint buildup, which blocks smooth thread movement.
Check your needle position—it should be fully inserted with the flat side facing back.
Poor thread quality creates tangles that jam mechanisms, so invest in good thread.
When fabric thickness exceeds your machine’s capacity, switch to a heavy-duty needle.
Tangled thread around the bobbin case requires careful removal with tweezers.
Address upper thread tension issues through proper threading.
Oiling machine components monthly prevents mechanical binding.
Sewing machine troubleshooting starts with cleaning—remove the needle plate and clear all debris.
Bobbin problems often contribute to jams, so make certain of correct installation.
Incorrect threading can also be a culprit, so always double-check threading path accuracy.
Regular sewing machine cleaning keeps jams at bay by removing dust and debris buildup completely.
Feed Dog Issues
When your sewing machine fabric feed goes haywire, you’re looking at feed dog issues that’ll drive you up the wall.
These metal teeth control fabric movement, and when they malfunction, expect uneven feeding and skipped stitches that’ll ruin your project.
Sewing machine feed dogs need proper attention for superior stitch quality.
- Check feed dog height – they should grip fabric without causing damage
- Cleaning feed dogs removes lint buildup that blocks smooth operation
- Verify fabric compatibility matches your machine’s feeding capacity
Regular maintenance keeps these components working smoothly.
Timing Problems
When your feed dogs aren’t cooperating, timing problems often lurk nearby. Singer sewing machine timing keeps your needle and hook working together like dance partners.
When this choreography goes wrong, you’ll see skipped stitches, thread tangles, or worse. Hook timing issues happen when your needle and shuttle hook don’t meet at the right moment.
Check needle alignment first – the needle should pierce the fabric just as the hook catches the thread loop. Turn your handwheel direction counterclockwise to manually test this timing.
Gear wear from heavy use can throw everything off balance. You’ll hear grinding sounds or feel resistance when turning the handwheel. Bent needles also disrupt sewing machine timing by changing where the thread loop forms.
Simple hook alignment checks can reveal obvious problems, but complex timing problems need professional repair. A qualified technician has the tools to adjust shuttle timing precisely, saving you from sewing machine problems that could damage internal components permanently.
Tangled or Broken Thread
Thread problems can turn your sewing session into a nightmare. Tangled thread and broken thread typically stem from incorrect threading, poor thread quality, or lint buildup around the bobbin area.
First, check your thread quality—cheap thread breaks easily. Verify needle compatibility with your thread weight.
Re-thread your machine completely, following the proper path through all guides and tension discs. Clean out lint buildup from the bobbin case and needle area.
Examine your tension balance—it should create even stitches on both fabric sides. These steps resolve most thread tension issues and sewing machine threading issues.
Motor Issues
Motor overheating in your Singer sewing machine signals trouble ahead.
Speed control problems and power fluctuations indicate worn carbon brushes or electrical issues.
Take breaks during extended sessions to prevent overheating. Check your power supply for stability and inspect the foot pedal for damage.
If sewing machine motor issues persist despite proper lubrication and cleaning, motor replacement becomes necessary. Don’t ignore burning smells or unusual noises—these motor problems require immediate attention to restore motor functionality.
How to Troubleshoot Singer Sewing Machine Problems
When your Singer sewing machine starts acting up, you’ll need a systematic approach to identify and fix the problem quickly.
Start by checking the four main trouble spots: the needle, bobbin, thread tension, and machine cleanliness to resolve most common issues.
Check The Needle
Your Singer’s needle holds the key to smooth sewing success. When stitches skip or fabric puckers, the needle is often the culprit. Bent needles wreak havoc on your projects, creating uneven seams and frustrating thread breaks.
Needle care starts with regular inspection. Run your finger along the needle’s shaft—any roughness means it’s time for a replacement. Needle alignment matters too; the flat side must face the back of your machine for proper insertion.
Thread matching your needle size to your fabric prevents needle breakage. Heavy denim needs a size 16 needle, while delicate silk requires a size 9. Different needle types serve specific purposes—ballpoint needles work best with knits, while sharp needles handle woven fabrics perfectly.
Follow these needle type guidelines:
- Replace needles every 6-8 sewing hours
- Match needle size to fabric weight
- Check for bends or burrs before each project
- Insert needles with flat side facing back
Damaged needles should be replaced immediately.
Check The Bobbin
Checking your bobbin often solves half your sewing machine tension problems before they start.
First, verify the bobbin type matches your Singer model—using the wrong class can cause persistent bobbin issues.
Examine the bobbin winding for evenness; lumpy or loose spots create thread tension issues.
For proper bobbin insertion, make certain it sits flush in the case with bobbin thread unwinding counterclockwise.
To find the right match, explore options for purchasing bobbin thread.
Test bobbin tension by holding the thread—it should pull smoothly without excessive resistance.
Replace old bobbins showing wear or damage, as they’re often the culprit behind stubborn bobbin problems that disrupt your stitching flow.
Check The Thread Tension
Your sewing machine’s tension problems often stem from imbalanced upper thread and bobbin tension. The tension dial controls how tightly your machine grips the thread, creating either loose loops or puckered fabric when misadjusted.
Upper thread issues can often be resolved with simple adjustments.
To address these issues, consider the following steps:
- Test tension adjustment on scrap fabric before starting your project
- Turn the tension dial clockwise to tighten, counterclockwise to loosen
- Check that upper thread tension matches your thread quality and weight
- Verify balanced stitch appearance looks identical on both fabric sides
- Address sewing machine tension problems before they damage your work, ensuring a properly adjusted machine and high-quality thread to prevent issues like puckered fabric.
Clean The Machine
After adjusting thread tension, you’ll want to tackle lint buildup that causes many sewing machine problems. A clean machine runs smoother and lasts longer.
Start your sewing machine cleaning routine by unplugging the machine and removing the needle plate. Use a small brush or tweezers for lint removal from the bobbin area and shuttle hook. Compressed air works well for stubborn debris, but don’t blow dust deeper inside.
| Cleaning Area | Tool Needed | Frequency |
|---|---|---|
| Bobbin Case | Small brush | After each project |
| Shuttle Hook | Lint brush | Weekly |
| Feed Dogs | Tweezers | Monthly |
| Needle Bar | Soft cloth | Monthly |
| Tension Discs | Compressed air | As needed |
For oiling machine parts, add 1-2 drops at designated points. Regular sewing machine maintenance prevents dust prevention issues and reduces sewing machine troubleshooting needs.
Preventing Singer Sewing Machine Problems
You can avoid up to 85% of Singer sewing machine problems through proper maintenance and correct operating techniques.
Regular cleaning, needle changes, and following your machine’s manual prevent most common issues before they start, which is a key part of correct operating techniques.
Regular Maintenance
Preventing problems starts with consistent sewing machine maintenance. Machine cleaning after each project keeps lint from building up in critical areas. Follow your manual’s oiling frequency recommendations—typically monthly for active users.
Needle replacement every 6-8 hours prevents fabric damage and thread breaks. Part inspection catches wear before it becomes costly repairs. Proper maintenance includes using the correct sewing machine lubricant.
Your maintenance checklist should include:
- Cleaning lint from bobbin area and feed dogs with a small brush
- Sewing machine lubrication at designated points using proper oil
- Sewing machine cleaning of exterior surfaces and threading guides
- Professional servicing every 3-4 years for internal adjustments
Proper Use of The Machine
Think of your Singer as a precision instrument that responds to careful handling. Proper machine use prevents most headaches before they start.
- Correct Threading: Thread with the presser foot raised, following your manual’s sequence exactly—skipping steps creates tension nightmares.
- Needle Selection: Match needle type and size to fabric weight; wrong needles break or skip stitches.
- Stitch Settings: Adjust length and width for your project—test on scraps first.
- Speed Control: Start slow, let feed dogs guide fabric naturally without forcing or pulling.
What is a Bobbin Winder?
Your bobbin winder is the mechanism that fills empty bobbins with thread before you start sewing.
When it’s not working properly, you’ll encounter uneven winding, tension problems, or complete failure to wind thread onto the bobbin, which can lead to issues such as tension problems.
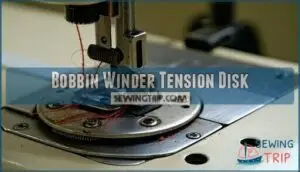
Bobbin Winder Tension Disk
Your Singer sewing machine’s bobbin winder tension disk controls thread flow during winding, preventing common sewing machine problems.
This small but mighty component guarantees winding consistency by maintaining proper thread slippage control.
When the disk material wears down, you’ll notice uneven bobbin winding or loose thread loops.
Regular tension adjustment keeps everything running smoothly.
Clean the bobbin winder tension disk monthly to remove lint buildup that affects performance.
Here’s your troubleshooting guide:
Issue Cause Solution
Proper maintenance prevents most bobbin winder issues before they start.
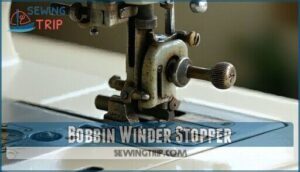
Bobbin Winder Stopper
Your bobbin winder’s stopper acts like a built-in safety net, automatically halting the winding process when your bobbin reaches capacity.
This prevents thread overflow and maintains winding consistency across all your projects.
When stopper problems arise, they’ll disrupt your entire sewing workflow.
Here’s your troubleshooting checklist:
- Stopper Adjustment – Verify the mechanism triggers at proper bobbin fullness
- Winder Calibration – Check alignment with your bobbin size specifications
- Stopper Replacement – Replace worn components affecting trigger sensitivity
- Material Compatibility – Confirm that thread weight works with stopper settings
- Bobbin Tension – Confirm consistent pressure throughout winding cycles
Bobbin Winder Stopped Working
When your bobbin winder suddenly quits, don’t panic—most fixes are straightforward.
Singer sewing machine problems like these often stem from mechanical issues that you can resolve yourself with basic sewing machine troubleshooting.
- Winder belt slipping: Check if the belt has loosened or shifted position
- Tension spring failure: Inspect springs for breaks or excessive wear
- Spindle alignment issues: Verify proper bobbin placement and engagement
- Clutch mechanism fault: Examine the clutch for proper operation and connection
Bobbin Winds Unevenly
When your bobbin winder creates uneven layers, you’re dealing with a common sewing machine problem that affects stitch quality. Several factors cause this frustrating issue.
Check your thread guide alignment first—misaligned guides create irregular winding patterns. Clean the winding spindle thoroughly, as lint buildup causes winding spindle issues that disrupt smooth operation.
Bobbin type compatibility matters more than you’d think. Using the wrong bobbin creates spacing problems that lead to uneven layers. Your machine’s manual lists compatible types.
Winder pressure adjustment controls how tightly thread winds onto the bobbin. Too much pressure creates tight spots, while too little causes loose areas. Find the sweet spot through testing.
Bobbin tension balance requires proper threading through tension disks. Clean these disks regularly to prevent thread tension issues. A common cause is a worn rubber ring that needs replacing.
These steps solve most bobbin winding inconsistencies.
Sewing Machine Not Picking Up The Bobbin Thread
Thread tangles can turn your sewing session into a frustrating puzzle. When your machine won’t pick up the bobbin thread, several culprits could be at play. Hook timing issues often prevent proper thread interaction, while incorrect needle height disrupts the catching mechanism.
Check these key areas for smooth operation:
- Inspect the thread path for snags or improper routing
- Examine the bobbin case for lint buildup or damage
- Verify tension balance between upper and bobbin threads
- Confirm correct needle height positioning
- Assess hook timing alignment beneath the needle plate
Why is My Sewing Machine Not Catching The Bobbin?
When your Singer sewing machine won’t catch the bobbin thread, you’re dealing with one of the most common stitching problems that can stop your project in its tracks.
This issue typically stems from incorrect needle installation, bobbin placement problems, or timing issues between the needle and shuttle hook.
The Needle is Damaged or Installed Incorrectly
Damaged or incorrectly installed needles are the culprit behind many bobbin-catching failures.
Your needle must sit with its flat side facing back, pushed completely into the needle bar, and secured tightly.
Bent needles create alignment issues that prevent proper hook timing, while dull needles struggle to penetrate fabric cleanly.
Check your needle size matches your fabric weight—universal needles work for most projects, but ballpoint needle types suit knits better.
Wrong needle insertion throws off the entire timing sequence.
Replace needles showing any damage immediately, and swap fresh ones every eight hours of use to prevent needle breakage and maintain perfect needle alignment.
The Bobbin Case and Bobbin Need to Be Checked
Two critical components work together to create perfect stitches: your bobbin case and bobbin. Start by verifying you’re using the correct bobbin type for your Singer model. Check that bobbin insertion follows the proper direction—the thread should unwind counterclockwise in most cases.
Examine these key areas for smooth operation:
- Clean lint removal from the bobbin case prevents thread jams
- Proper bobbin winding guarantees even thread distribution
- Correct bobbin tension creates balanced stitches
- Secure bobbin case placement eliminates wobbling
When bobbin problems persist, inspect your sewing machine bobbin case for cracks or damage that could disrupt thread flow.
The Fabric is Too Thick
Heavy fabric thickness can overwhelm your machine’s ability to catch the bobbin thread.
Upgrade to needle size 100/16 or 110/18 for tough layers like denim. A walking foot helps manage fabric layers evenly while longer stitch length prevents bunching.
Raise your presser foot pressure slightly and slow your sewing speed to prevent feed dog issues when handling thick materials.
It’s also important to check bobbin tension for smooth sewing.
The Needle Bar Height Needs to Be Adjusted
Even thick fabric can sew beautifully, but sometimes the real culprit behind missed stitches lies deeper inside your machine. When your Singer won’t catch the bobbin thread properly, incorrect needle bar height often causes timing misalignment that throws everything off balance.
Your needle bar position controls how the needle interacts with the shuttle hook below. If it’s too high or low, the timing gets disrupted, leading to skipped stitches and frustrating sewing sessions.
Here’s how to adjust your needle bar height correctly:
- Raise the needle bar to its highest position using the handwheel
- Locate the access hole behind the front cover or display panel
- Loosen the set screw slightly with a small Allen key
- Align the slash mark on the needle bar with the machine’s reference point
Professional adjustment may be necessary if timing issues persist after this fix.
The Shuttle Hook is Out of Time
When your needle bar height adjustments don’t solve the problem, the shuttle hook timing is likely the culprit. This timing issue occurs when your hook doesn’t meet the needle at the precise moment needed to catch the bobbin thread.
Your singer sewing machine relies on perfect synchronization between needle and hook. When timing issues develop, the hook either arrives too early or too late, missing the thread loop entirely. This creates frustrating skipped stitches and thread tangles.
Hook Timing Adjustment requires rotating the needle to its lowest position, then raising it 1/10 inch. The shuttle hook should meet the needle slightly above the eye. Vintage Machine Hooks often need Professional Hook Repair due to worn components.
Before attempting sewing machine repair yourself, try Shuttle Hook Cleaning to remove debris. However, timing adjustments involve precise measurements and specialized tools. Most sewing machine troubleshooting guides recommend professional service for hook timing problems to avoid damaging your machine’s delicate mechanisms.
Skipped stitches
Hook out of sync
Frequently Asked Questions (FAQs)
What is the most common sewing machine problem?
Thread tension issues top the list of sewing machine headaches you’ll encounter.
When your stitches look uneven, too tight, or too loose, you’re dealing with tension problems that affect stitch quality on both fabric sides.
Is there a reset button on a Singer sewing machine?
Like finding a hidden treasure, most Singer machines don’t have a traditional reset button.
Instead, you’ll unplug the machine for thirty seconds, then reconnect it.
This simple power cycle often resolves electronic glitches effectively.
What is the number one problem when a machine doesn’t sew properly?
Poor thread tension causes most sewing problems.
You’ll notice loose, tight, or uneven stitches when tension’s off.
Check your threading first, then adjust the tension dial gradually until stitches look balanced on both fabric sides, ensuring balanced stitches.
Why does my Singer sewing machine keep stopping?
Your Singer machine stops when there’s insufficient power, tangled thread, or lint buildup.
Check your foot pedal connection, clean the bobbin area thoroughly, and make certain you’re threading correctly with the presser foot raised.
Should I troubleshoot my Singer sewing machine?
Machine hiccups aren’t always serious roadblocks.
You should absolutely troubleshoot your Singer first—most issues stem from simple threading, tension, or needle problems.
Start with basic checks before considering professional repair services.
Why is my Singer sewing machine jamming?
Your machine’s jamming because of lint buildup in the bobbin area, wrong needle size, or improper threading.
Clean the shuttle hook, replace your needle, and rethread with the presser foot up, to address the issues causing the jam, focusing on improper threading.
Why is my Singer sewing machine Linty?
Like dust bunnies under your bed, lint accumulates in your Singer’s bobbin area and feed dogs during normal use.
You’re seeing buildup from fabric fibers, thread particles, and dust that naturally collect while sewing various materials.
Why is my Singer sewing machine not Symphony?
You’re likely referring to a specific Singer Symphony model that’s malfunctioning.
Check if it’s powered on, properly threaded, has the correct needle installed, and the bobbin’s inserted correctly.
Consult your manual for model-specific troubleshooting steps, which can help you identify and fix the issue with your Singer Symphony.
Why is my Singer sewing machine bobbin not working?
Hold your horses there, partner! Your bobbin’s likely inserted incorrectly, wound unevenly, or you’re using the wrong type.
Check it’s properly seated, winds smoothly, and matches your machine’s specifications for proper operation.
Ensure the bobbin is correctly managed to avoid issues.
What are some common Singer sewing machine problems?
Thread tension troubles, needle breakage, and bobbin issues top the list.
You’ll also face machine jamming, skipped stitches, and feeding problems.
Most stem from improper threading, wrong needle size, or lint buildup requiring simple adjustments.
Conclusion
Remember when sewing machines were supposedly "labor-saving devices"? You’ve now mastered the art of actually making them work.
Most singer sewing machine problems, x common issues solved, stem from simple oversights – wrong needles, poor threading, or neglected maintenance.
You’ll prevent 90% of future headaches by checking your needle first, cleaning lint monthly, and re-threading when issues appear.
Your Singer machine isn’t plotting against you; it just needs proper care and attention to deliver reliable stitching performance, with simple maintenance.

