This site is supported by our readers. We may earn a commission, at no cost to you, if you purchase through links.
 Thread guide sewing machine tension is all about balancing the pull between the top thread and bobbin thread for smooth, even stitches.
Start by threading your machine correctly—missteps here can throw tension off entirely. Use the tension dial to adjust the top thread tension; higher numbers tighten, lower numbers loosen.
For bobbin tension, give the thread a tug—if the case drops slightly, it’s just right. Too loose? Tighten the tiny screw on the bobbin case. Too tight? Loosen it.
Always test on scrap fabric first. Tension issues often stem from incorrect threading or mismatched thread and fabric, so double-check those, too!
Table Of Contents
Key Takeaways
- Double-check your threading—it’s often the root cause of tension issues. Raise the presser foot to seat the thread into tension discs properly.
- Use the tension dial to adjust top thread tension and the bobbin case screw for bobbin tension. Test on scrap fabric to find the right balance.
- Match thread weight, type, and fabric to avoid uneven stitches. Thicker threads need looser tension, while thinner threads need tighter settings.
- Clean tension discs regularly to remove lint and inspect for damaged parts like bent needles or worn bobbins to keep your machine running smoothly.
Thread Tension Basics
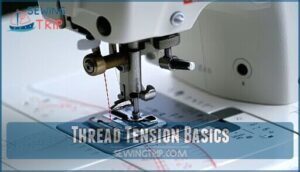
Thread tension controls how tightly the thread is pulled as you sew, ensuring balanced and even stitches.
Understanding how the tension regulator works helps you achieve smooth results on both sides of your fabric.
Resistance on Thread
Thread resistance happens as your thread glides through the machine, meeting friction along its path. This balance determines smooth stitching.
- Resistance factors: Fabric thickness, thread material, and tension settings all play a role.
- Thread path: Verify proper threading to avoid unnecessary drag.
- Tension measurement: Adjust your tension dial carefully to balance resistance and create even stitches.
Perfect Thread Tension
Achieving perfect tension is finding the “tension sweetspot” where balanced stitches form effortlessly.
Balanced stitches are the heart of sewing—find your tension sweet spot for flawless seams every time.
When upper thread tension and lower thread tension align, you’ll see consistent seams and fabric harmony on both sides.
Use a thread tension guide to test adjustments on scrap fabric.
Thread quality matters—cheap threads can sabotage even the best sewing machine tension, so keep experimenting with different threads to find the right one, and remember that achieving perfect tension is crucial for fabric harmony.
Tension Regulator Function
The tension regulator is your sewing machine’s brain for balancing thread.
It works by controlling the tension discs, which grip the thread, and the thread guide, ensuring smooth flow during hook wrapping.
Paired with the check spring, it keeps tension steady as the needle moves.
Adjust the tension dial sewing projects with care, using a thread tension guide for precision.
Factory-Preset Tension
Most sewing machines come with factory settings designed for 50 or 60 wt. thread, ensuring balanced stitches. These default tension settings work well for standard projects.
They may struggle with mixed thread weights or fibers. Always start with initial tension testing on scrap fabric.
Adjusting from preset settings helps solve sewing machine tension problems, ensuring smooth stitching and avoiding common sewing machine tension solutions.
Proper threading helps avoid incorrect threading causes, which is crucial for maintaining proper threading and achieving sewing machine efficiency.
Factors Affecting Tension
Thread tension isn’t just about the machine; it’s influenced by fabric type, thread weight, and even batting.
Understanding these factors helps you adjust settings for smooth, balanced stitches every time.
Batting and Fabric Type
When working with batting and dense fabrics, sewing machine tension can get tricky.
Batting friction and fabric density affect thread stress and stitch balance.
Here’s how to manage it:
- Use polyester batting for less drag.
- Adjust tension for dense materials like denim.
- Loosen tension on loose-weave fabrics.
- Test stitches on scrap fabric to avoid surprises.
To prevent skipped stitches, it’s important to select the right needle and maintain proper thread stress and stitch balance.
Thread Thickness and Material
Thicker threads need looser tension, while thinner ones require tighter settings.
Slippery threads, like PTFE, demand extra care to avoid slipping. Decorative threads often call for adjustments to prevent breakage.
A deeper understanding of thread weight standards can further refine your tension adjustments.
Here’s a quick guide:
| Thread Type | Suggested Tension | Common Use |
|---|---|---|
| Thick Cotton | Looser (2–3) | Quilts, Denim |
| Metallic/Decorative | Very Loose (1) | Embellishments |
| Slippery Threads | Heavier (5–6) | Synthetic Fabrics |
This guide provides a starting point for working with different thread types, including thick cotton, metallic/decorative, and slippery threads.
Thread Fiber and Weight
Matching thread fiber and weight matters more than you’d think.
Mismatched thread types, like cotton on top and polyester underneath, can throw off tension. Heavier threads need looser settings, while lightweight ones prefer tighter tension.
Decorative threads or topstitching threads? They’re picky, often needing special adjustments.
Understanding different thread materials can greatly improve your sewing results. Always test your thread blends to avoid uneven stitches or frustration.
Sewing Machine Settings
Balancing thread tension starts with the right sewing machine settings. Check the tension dial sewing defaults—usually at 4—and adjust stitch length for fabric type.
Make certain feed dogs are raised, the presser foot is down, and the needle position suits your project.
Understanding proper machine adjustments can greatly improve stitch quality. A smooth bobbin tension adjustment and consistent upper thread tension keep your stitches neat and frustration-free, ensuring a proper sewing experience.
Common Tension Issues
Thread tension problems can lead to loose loops, uneven stitches, or fabric puckering, making your sewing projects frustrating.
Understanding common issues like threading mistakes or mismatched thread weights helps you spot and fix these errors quickly, which is crucial for sewing projects.
Loose Top Tension
Loose top tension often leads to looping back stitches and bobbin thread visibility on your fabric’s underside.
To fix this:
- Check the tension dial setting and increase the upper thread tension slightly.
- Confirm the presser foot pressure is adequate for the fabric type.
- Verify proper threading by raising the presser foot, letting the thread seat into the tension discs securely, which helps prevent bobbin thread visibility.
Uneven Stitches
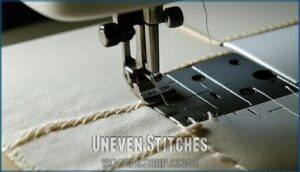
Uneven stitches often mean thread tension isn’t balanced.
Skipped stitches or inconsistent stitch length can stem from improper threading, needle issues, or a misaligned presser foot.
Check the fabric feed—if it’s uneven, smooth it out.
Adjust tension slowly, testing on scrap fabric until stitch quality improves.
Balanced stitches should look even on both sides, ensuring clean results.
Automatic Tension Limitations
Automatic tension systems sound convenient but aren’t foolproof. Fabric variability, thread diversity, and project complexity often demand user override.
Here’s why:
- Dust buildup affects sewing machine tension, requiring regular maintenance.
- Thread tension issues arise when auto settings struggle with mixed thread types.
- Tension adjustments are still necessary for thicker quilts or decorative threads.
To address these issues, verify spool position for proper threading. Keep tweaking for balanced stitches to ensure the best results, and remember that regular maintenance and proper threading are key to avoiding tension issues.
Threading Errors
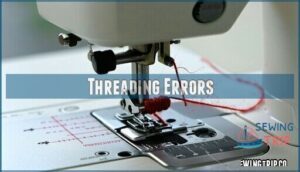
Incorrect threading is a sneaky culprit behind poor stitches.
Incorrect threading often hides in plain sight, silently sabotaging your stitches—double-check every step for smooth, balanced results.
Always thread your sewing machine with the presser foot raised, so the tension disks engage properly.
Misusing the thread guide or bobbin threading incorrectly can throw off thread tension.
Double-check your sewing machine threading, ensuring smooth flow through guides.
A quick thread tension adjustment afterward keeps your stitches balanced and even, which is crucial for achieving smooth flow.
Adjusting Thread Tension
Adjusting thread tension guarantees your stitches are balanced and smooth on both sides of the fabric.
By fine-tuning the tension dial and checking for thread snagging, you can prevent common sewing issues like looping or puckering, ensuring smooth stitches.
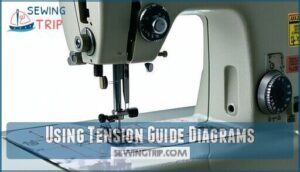
Using Tension Guide Diagrams
Understanding a thread tension diagram is like having a map for perfect stitches.
These visual aids simplify tension troubleshooting and help you match fabric and thread for stitch perfection.
Keep one handy to check:
- Proper thread guide usage for smooth flow.
- Balanced top and bobbin thread tension.
- Clear paths to avoid tangles.
- Ideal settings for tension adjustments.
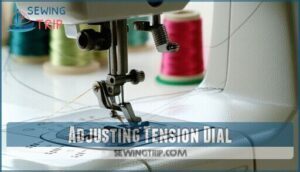
Adjusting Tension Dial
Once you’ve used diagrams to understand sewing machine tension adjustments, it’s time to turn the tension dial.
Start with the default setting, usually 4, and adjust in small dial increments.
Test swatches help spot issues tied to thread type or fabric thickness.
If stitches still misbehave, tweak the thread tension slightly until both sides look smooth and balanced.
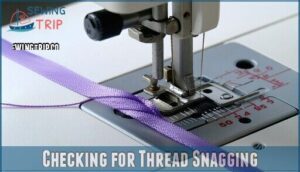
Checking for Thread Snagging
After adjusting the tension dial, check for thread snags along the thread path. Misaligned thread guides or hook obstructions can disrupt sewing machine tension.
Verify that the thread flows smoothly through the tension release and needle eye. A quick thread guide adjustment often resolves tension troubleshooting issues.
Balanced guide alignment prevents uneven stitches and keeps your sewing frustration-free. Proper thread seating impacts balanced stitch formation and is crucial for smooth sewing operations, ensuring even stitches, and maintaining balanced thread tension.
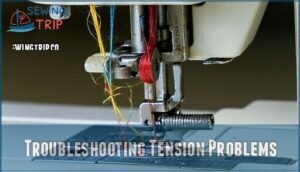
Troubleshooting Tension Problems
When your stitches look uneven or loops appear where they shouldn’t, it’s a clear sign of tension trouble.
By checking for thread imbalances, damaged parts, or lint buildup, you can quickly pinpoint and fix the issue.
Identifying Tension Imbalance
Spotting tension imbalance starts with inspecting stitch appearance. Look for looping threads underneath or fabric puckering on top.
Run your fingers over stitches to feel for smoothness. Tension testing on scrap fabric helps pinpoint issues.
Listen for audible cues like thread snapping. Balanced thread tension guarantees the top thread and bobbin thread pull evenly, avoiding stitch balance problems.
Checking for Damaged Machine Parts
Start by inspecting for bent needles or rough surfaces on tension parts—these can wreak havoc on your stitches.
Check metal bobbins for damage and make certain they wind evenly. Examine the tension release mechanism for wear, as it may stick.
Regular sewing machine maintenance, including cleaning, prevents these issues. Damaged machine parts often signal it’s time for sewing machine repair. Regular maintenance can help prevent issues, making regular cleaning a crucial part of upkeep.
Cleaning Tension Discs
Tension discs often collect lint, disrupting thread tension.
Regular lint removal is essential for smooth sewing.
Use cleaning tools like a soft brush or dental floss to clear buildup.
Verify proper disc alignment during cleaning to avoid tension issues.
Preventative cleaning keeps your sewing machine in top shape.
Afterward, perform a tension reset by testing stitches on scrap fabric to ensure smooth sewing.
Adjusting Bobbin Tension
After cleaning tension discs, focus on the bobbins.
That tiny screw on the bobbin case spring adjusts bobbin thread tension—turn right to tighten, left to loosen.
Use a bobbin tension guide for accuracy, especially with mixed bobbin thread weights.
Check bobbin winding issues and make certain the bobbin case tab is smooth.
Small tweaks prevent big stitching headaches.
Frequently Asked Questions (FAQs)
How to get sewing machine tension right?
Test stitches on scrap fabric, adjusting the tension dial incrementally.
If loops appear underneath, tighten the top thread; if they’re on top, loosen it.
Aim for smooth, balanced stitches on both sides of the fabric.
How does humidity affect thread tension?
Think of humidity as your sewing machine’s mischievous cousin.
High humidity swells threads, increasing friction and tension. Low humidity dries threads, making them brittle and loose.
Always test stitches, adjusting tension to match the environment.
What role do tension springs play?
Tension springs regulate how tightly the thread is held as it moves through the machine.
They work with tension discs to balance thread flow, ensuring smooth stitching and preventing loops or puckering on your fabric.
Can thread tension vary with sewing speed?
Funny how speed can throw a wrench in sewing!
Yes, thread tension can shift with sewing speed.
Faster stitching increases thread friction, so adjust tension slightly or slow down for consistent, balanced stitches.
How to handle tension issues with specialty threads?
Loosen the top tension for delicate specialty threads like metallics or silk, and use a smoother bobbin thread.
Test on scrap fabric, adjust gradually, and make certain the thread flows freely to avoid snapping or tangling.
Does needle type influence thread tension?
A needle’s like a conductor; it orchestrates thread flow.
The wrong type—too thick, thin, or dull—creates tension issues, snagging or skipping stitches.
Match needle size and type to fabric and thread for harmony.
Conclusion
It’s ironic how such a small thing like thread tension can make or break your sewing project.
Mastering thread guide sewing machine tension isn’t hard if you follow the basics: proper threading, adjusting the tension dial, and fine-tuning the bobbin.
Don’t skip testing on scrap fabric—it saves headaches later.
Keep your machine clean, check for damage, and match thread to fabric.
With practice, even tension and flawless stitches will become second nature, and you’ll be happy sewing!

