This site is supported by our readers. We may earn a commission, at no cost to you, if you purchase through links.

The key to success with those shifty materials is gentle handling. Think of them as delicate dancers, not wrestling opponents.
Try these tips for handling slippery fabrics:
Use a walking foot on your machine.
Pre-wash and press your fabric.
Pin carefully, using lots of pins close together.
Remember, patience is key – rushing leads to frustration (and possibly tears in your fabric!).
Want to conquer even more slippery fabric challenges? We’re here to help.
Table Of Contents
Key Takeaways
- A walking foot can effectively tackle thick seams and bulky layers, providing benefits such as enhanced sewing outcomes with synchronized feeding. Use a walking foot and fabric weights to prevent slipping and ensure smooth sewing.
- Pre-wash and press your fabric gently to avoid creases and maintain its quality.
- Protect your slippery fabrics from fraying by trimming edges with a rotary cutter and applying zigzag stitching.
- Stabilize your fabric with lightweight interfacing or spray starch for easier handling while sewing.
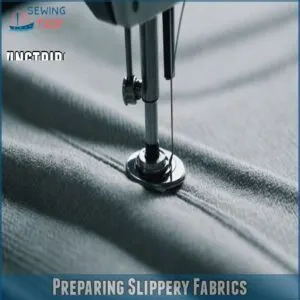
Preparing Slippery Fabrics
When you’re ready to tackle slippery fabrics, start by gently washing and pressing to let them shine without causing a fuss or leaving creases.
Cut with care using sharp tools and mind those edges to keep everything neat and fray-free—after all, even the slipperiest fabric deserves a good start!
Washing and Pressing
When tackling slippery fabrics, start with a gentle wash.
Use the right water temperature—no boiling baths allowed!
After washing, follow the drying methods recommended on the label.
A cool iron setting and trusty pressing tools are your best friends, so wrinkles don’t stand a chance.
Think of pressing as giving your fabric a comforting spa treatment!
Cutting With Care
Because slippery fabrics can be tricky, let’s conquer cutting!
Before you even think about snipping, lay your pattern pieces on top, using pattern weights to keep everything put.
Now, carefully cut your slippery fabrics, working in manageable layers to prevent shifting.
A rotary cutter and a self-healing mat can be your best friends here, making precise cuts a breeze.
Remember, a little extra care goes a long way with these fabrics.
Let’s get sewing!
Using The Right Tools
Now that your fabric’s cut, let’s chat tools.
Using the right ones can save you a heap of trouble.
Rotary cutters make slicing slippery fabric a breeze.
Add fabric weights instead of pins to keep things stable.
When handling slippery or challenging materials, consider learning why and when to use a walking foot.
Try a walking foot on
Preventing Frayed Edges
As you sharpen your tools, remember, frayed edges are party crashers to be avoided!
Keep those slippery fabrics intact with these tips:
- Trim edges with a rotary cutter for precision.
- Apply zigzag stitching to secure loose threads.
- Use tissue paper beneath fabric to prevent shifting.
With a bit of preparation, you’ll glide through fabric stabilization like a pro!
Stabilizing Slippery Fabrics
Taming slippery fabrics starts with using the right tricks to keep them stable, like lightweight interfacing or a spritz of starch to make them behave.
You’ll also want to choose the perfect needle and high-quality thread to prevent any stitch mishaps, ensuring a smooth and frustration-free sewing experience.
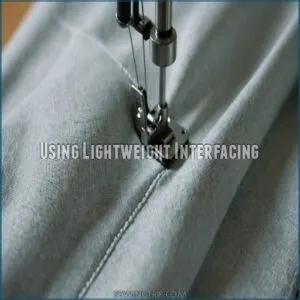
Using Lightweight Interfacing
Lightweight interfacing is your secret weapon for taming slippery fabrics.
First, pick the right interfacing type and weight to match your fabric’s delicate nature.
Carefully place it around seam allowances or hems, adding structure without bulk.
Apply it with precision and a bit of humor—remember, bumpy interfacing is no friend to anyone!
Chat with fellow sewists for tips and tricks!
Spray Starch Alternatives
After lightweight interfacing, it’s time to think about non-stiffening options.
When dealing with slippery fabric, alternatives to spray starch are a lifesaver.
Try these: You can also explore temporary fabric adhesives online, like those found through temporary fabric adhesive products.
- Temporary Adhesives: Secure layers without stiffness.
- Fabric Starch: A classic for a reason, but use sparingly to avoid stiffening.
Choosing The Right Needles
Selecting the ideal needle can be like finding a needle in a haystack!
Choose sharp needles for crisp, clean stitches on slippery fabrics.
Opt for microtext or ballpoint needles for fine materials to avoid snagging.
Here’s a quick guide:
| Needle Type | Needle Size | Usage |
|---|---|---|
| Microtex | 60/8-70/10 | Fine fabrics |
| Ballpoint | 70/10-90/14 | Knits |
| Universal | 80/12 | General sewing |
| Sharp | 70/10-80/12 | Wovens, slippery fabrics |
Selecting High-Quality Thread
Now that you’ve got the perfect needle, let’s talk thread!
Choosing the right thread is key for sewing slippery fabrics.
Think of it as the glue that holds your masterpiece together.
Here’s what to keep in mind:
- Match your thread color to your fabric.
- Select a thread weight appropriate for your fabric.
- Prioritize thread durability for long-lasting results.
Happy sewing!
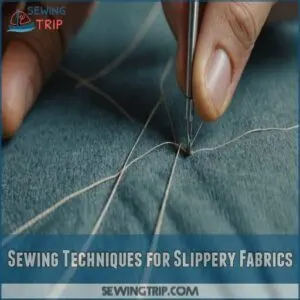
Sewing Techniques for Slippery Fabrics
When you’re wrangling slippery fabrics, it’s like trying to hold onto a slippery fish at times, but it doesn’t have to be that tricky.
By mastering simple sewing techniques like pinning, adjusting stitch settings, and using fabric weights, you’ll transform these pesky materials into your sewing best friend.
Pinning and Basting
Why wrestle with slippery fabrics when you’ve got pinning and basting on your side?
Use fine pins or fabric clips, and always pin perpendicular to seams.
Try basting methods like using a long stitch length to stabilize your work.
Remember, tissue paper can be your best ally against fabric shifting.
Here’s a quick reference:
| Technique | Benefit | Tip |
|---|---|---|
| Pinning | Stabilizes fabric | Use fine pins |
| Basting | Holds seams in place | Long stitch |
| Fabric Clips | Minimizes damage | Alternative to pins |
Adjusting Stitch Settings
Tackling slippery fabrics? Tweak those sewing machine settings for smoother sailing.
First, shorten the stitch length just a smidge; this gives you more control.
Next, lighten the tension slightly to prevent puckering—your fabric will glide like butter.
To achieve optimal stitch quality and fabric handling, adjusting the presser foot height is crucial, for instance, ensuring the ideal 5/16 inch space between the presser foot and the throat plate adjustment. Don’t forget to adjust the presser foot pressure and use the right needle size.
These little tweaks make a big difference!
Using Fabric Weights or Clips
When wrestling with slippery fabrics, reaching for fabric weights or clips can be your best ally.
Imagine them as tiny sentinels, keeping things in place and preventing your project from sliding into chaos.
Opt for pattern weights for delicate fabrics; these gems excel where pins sometimes fail.
It’s the little things like these that save you a lot of hassle and fabric.
Utilizing Fabric-Specific Techniques
Sewing slippery fabrics can feel like wrangling a slippery fish, but with the right techniques, you’ll master it.
Try hand-rolled hems or flat rolled edges for smooth finishes.
Use the tissue paper technique to stabilize fabric during cutting, and for a more precise control consider investing in a gathering tool kit.
Bias tape application and gathering techniques also help manage those tricky fabrics.
Mastering Slippery Fabric Seams
Taming those slippery fabric seams might seem like you’re trying to catch a greased pig, but with the right techniques, you’ll sew like a pro.
Mastering the art of sewing narrow hems with techniques like pressing hem allowance can elevate your skills, master French seams and rolled hems while using a walking foot to gain control, and soon you’ll wonder why you waited so long to start.
Choosing Seam Finishes
Because slippery fabrics can be tricky, choosing the right seam finish is key to neat finishes.
For a polished look, consider techniques like pre-washing silk fabrics to minimize shrinkage and prevent water marks, then experiment with hidden seams or decorative stitches.
Consider your project; hidden seams work wonders for a polished look, while decorative stitches add a touch of flair.
Serging techniques create strong, professional edges.
Using French Seams or Rolled Hems
Think of French seams and rolled hems as your secret weapons in tackling slippery fabrics.
They add finesse without fraying your nerves—or the fabric!
They’re perfect for:
- Adding durability: No unsightly frays here!
- Creating clean finishes: Professional-looking and polished.
- Simplifying fabric choice: Tame those unruly textures with ease.
For those tricky rolled hems, a specialized rolled hem foot can be a game-changer, making the process smoother and the results more precise.
Let these techniques bolster your sewing prowess!
Working in a Controlled Environment
When grappling with slippery fabrics, even a small breeze can ruin your masterpiece!
Create a symphony of sewing success by ensuring your workspace is draft-free and well-organized.
Keep your table sturdy, lighting excellent, and tools—like tissue paper and extrafine pins—close at hand.
Hand basting can tame fabric shifting, turning chaos into control.
Using a Walking Foot or Roller Foot
Having a controlled sewing space is great, but let’s add some tools of the trade—namely, a walking foot or roller foot.
These nifty gizmos offer even feed, improving seam stability like magic.
Here’s why they rock:
- Walking foot benefits: Balanced fabric control.
- Roller foot comparison: Smooth stitching on tricky materials.
- Even stitch length: Consistent results you’ll love.
Finishing and Maintaining Slippery Fabrics
You’re almost at the finish line with your slippery fabric masterpiece, but maintaining it requires a few more savvy steps.
Carefully press seams to keep them crisp.
Use a pressing cloth to dodge fabric mishaps.
And definitely take breaks—your sanity will thank you!
Pressing Seams and Hems
You’re working with slippery fabrics, and pressing seams and hems is key.
Don’t crank up the iron temperature; instead, set it low to protect fabric shine.
Pressing firmly anchors the iron to set seams and shape darts, as discussed in techniques for how to press sewn fabric.
Use pressing tools to guide the seam allowance, focusing on the pressing direction for sharp creases.
Stabil
Using a Pressing Cloth
Got your seams looking sharp? Keep your style on point by using a pressing cloth.
It’s your heat shield, keeping delicate fabrics safe.
Here’s how to keep it smooth:
- Choose: Opt for cotton or silk.
- Position: Lay it flat over seams.
- Press: Use light pressure.
- Protect: Avoid direct heat contact.
Stay ahead in your sewing game!
Preventing Shine or Imprints
So, you’ve mastered the pressing cloth—great job!
Now, let’s prevent those pesky shine marks.
Place a silk organza or press cloth between your slippery fabrics and the ironing board.
This protects against imprints and keeps your work looking flawless.
Remember, gentle heat and a light touch are your best friends when ironing delicate materials.
When working with delicate or slippery fabrics, it’s essential to master smooth fabric feeding techniques to prevent bunching and ensure a professional finish. Experiment with different Heat Control settings to find what works best for your fabric.
Happy sewing!
Taking Regular Breaks
Avoiding shine is one thing, but don’t forget to take regular breaks while sewing slippery fabrics.
Beat eye strain and muscle fatigue and boost productivity with these tips:
- Set a timer every 30 minutes.
- Stretch your muscles to prevent discomfort.
- Rest your eyes by focusing on distant objects.
- Hydrate to maintain mental clarity.
Troubleshooting Slippery Fabric Projects
When you’re knee-deep in slippery fabric chaos, don’t worry, we’ve all been there—it just takes a few clever tricks to get back on track.
From re-cutting that pesky fabric to saving a wonky lining, we’ll turn sewing mishaps into masterpieces.
Common Mistakes and Solutions
Pressing those silky seams perfectly is a game-changer, but watch out!
Puckering and fabric shifting can sneak up if you choose the wrong needle or thread.
Spotting incorrect stitch length is another classic blunder.
Tackling these with confidence means using the right tools: an even feed foot, and having a solid understanding of how to stabilize stretchy fabric, stabilizing fabric tips, or a temporary fabric adhesive spray.
Now you’re ready to sew!
Re-Cutting Slippery Fabric
You’ve spotted an uneven cut—time to fix it!
Ever had fabric misbehaving like a rebellious teen?
Re-cutting slippery fabric isn’t scary if you follow this: smooth it out on a cutting mat, use rotary cutter techniques, and try pattern weight alternatives instead of pins.
This combo stabilizes the fabric, helping you regain control and precision.
Using a Tissue Paper Sandwich Technique
When slippery fabric makes you question your sanity, try the tissue paper sandwich technique.
Lay tissue under and over your fabric to stop fabric slippage and boost cutting accuracy.
Use small pattern weights to hold everything in place.
Grab your rotary cutter and feel like a sewing ninja, whether you’re sewing silk, satin, or chiffon.
Salvaging a Wonky Lining
Got a wonky lining? No worries, let’s make it right. Use the tissue paper sandwich method to control slippery fabric. Here’s a quick fix:
- Re-cut misaligned sections.
- Adjust patterns for better alignment.
- Stabilize with fusible tape.
- Glue stick for temporary hold.
These steps tackle lining mistakes and guarantee a smooth response to fabric slippage challenges.
Frequently Asked Questions (FAQs)
Can you sew slippery fabric?
Sewing slippery fabric feels like trying to pin down a ghost, but you can master it!
Use weights instead of pins.
Choose fine needles.
Keep your tension low.
Practice on scrap fabric to perfect your technique.
How do you stop fabric from slipping?
Keep fabric from slipping by using weights or pins to anchor it down.
Try tissue paper as a sandwich layer or a rotary cutter for precision.
Opt for a walking foot or spray starch for extra grip.
How do you cut slippery fabric?
When cutting slippery fabric, sandwich it between tissue paper to prevent sliding.
Use a rotary cutter for clean edges, and add pattern weights for extra stability.
Breathe, focus, and think of it like a yoga exercise!
Can a walking foot make a sewing table slippery?
A whopping 60% of sewists swear by a walking foot, but it won’t make your table slippery.
Instead, it helps fabrics glide smoothly, preventing bunching.
Just keep your workspace clean and uncluttered for the best results.
What tools should I use for slippery fabrics?
To handle slippery fabrics, consider the benefits of using a walking foot, such as preventing fabric shifting and puckering, particularly beneficial for quilting or working with challenging fabrics, as seen in this walking foot sewing guide. Tackle slippery fabrics with these essentials: sharp scissors or a rotary cutter, fabric weights, silk pins, and a walking foot for smoother sewing.
Don’t forget tissue paper or spray starch for added grip and stability.
How do you keep fabric from shifting while sewing?
Did you know 70% of sewers struggle with slippery fabrics? Use pattern weights, a walking foot, and plenty of pins. Shorten your stitch length for better control! You’ve got this!
How to stabilize slippery fabric?
Grab some spray starch, press the fabric carefully, and use lightweight interfacing.
Fabric weights can be used to secure your pieces and stop shifting.
Also, consider basting the fabric with a long stitch for extra control before sewing.
How to make fabric less slippery?
When the chips are down with slippery fabric, try using spray starch or lightweight interfacing to stiffen it.
Both help tame those mischievous fibers, making them easier to cut and sew without losing your patience.
What is the best stitch for slippery fabric?
For slippery fabrics, use a shorter stitch length, around 10-15 stitches per inch, to gain better control.
A straight stitch or a narrow zigzag works best, offering stability without puckering or distorting your fabric.
How to cut slippery fabric for beginners?
You’ve got this!
Secure slippery fabric with pattern weights, and use a rotary cutter on a mat.
Sandwich fabric between tissue paper layers for stability.
Test on scraps first, so you’ll be confident cutting smoothly.
How can I prevent fraying after washing?
Combat fabric fraying with a serger or zigzag stitch all around the edges.
Fray Check products work wonders too.
They’ll provide a neat finish and save you from turning your laundry into a stringy nightmare.
What are the best fabric scissors to use?
Like a hot knife through butter, quality fabric scissors like Gingher and Kai effortlessly slice through cloth.
Choose sharp, stainless steel blades with a comfortable grip.
Bonus tip: Keep them away from paper to maintain their edge!
Can I use a serger on slippery fabrics?
A serger can work, but it’s tricky. Use a walking foot for better control. Shorten your stitch length and practice on scraps first. You got this!
How do I handle curved seams on silky materials?
Cutting curved seams on silky materials can feel like taming a wild beast.
Use lightweight fusible interfacing to stabilize edges.
Sew slowly with a small stitch length and pin perpendicular to the edge for better control.
What is the best method to store slippery fabrics?
Storing slippery fabrics can feel like taming a restless dragon, right?
Roll them instead of folding to prevent creases.
Keep them in breathable cotton or muslin bags, and store in a cool, dry place to avoid damage.
Conclusion
So, who knew sewing could turn into a slippery slope?
With these tips for handling slippery fabrics, though, you’re well on your way to spinning those tricky textiles into your next masterpiece.
From choosing the right tools to mastering those seams, you’ve got a handle on it all.
Remember, some patience and a little humor will go a long way.
Get started, experiment, and soon enough, slippery fabrics won’t stand a chance against your newfound skills.
Ready, set, sew!
- https://m.youtube.com/watch?v=zugo7ChuPdA
- https://journals.sagepub.com/doi/10.1177/0040517519858757
- https://www.researchgate.net/publication/258196583_Investigation_of_the_techniques_decreasing_the_seam_slippage_in_chenille_fabrics_Part_I
- https://sewmesomethingcourses.com/online-sewing-community/
- https://www.forbes.com/sites/ellevate/2020/09/07/stitching-together-five-ways-online-sewing-communities-are-reducing-work-stress/

