This site is supported by our readers. We may earn a commission, at no cost to you, if you purchase through links.
 We’ve all been there – that dreaded Sewing Machine noise! Don’t worry, troubleshooting sewing machine noise issues is often simpler than you think.
Start by checking for loose or worn parts, lack of lubrication, bent or damaged needles, incorrect threading, and dirty or clogged mechanisms. A little TLC can go a long way in silencing that annoying rattle or grind.
Begin by identifying the type of noise your machine is making – is it clicking, grinding, or thumping? By pinpointing the source, you’ll be one step closer to a quiet, smooth sewing experience.
Let’s get started and tame that noisy beast!
Table Of Contents
- Key Takeaways
- Common Causes of Sewing Machine Noise
- Identifying Different Types of Sewing Machine Noises
- Tools Needed for Sewing Machine Noise Diagnosis
- Step-by-step Guide to Diagnosing Noise Issues
- Lubricating Your Sewing Machine to Reduce Noise
- Cleaning and Maintenance to Prevent Noise Problems
- Replacing Worn or Damaged Parts Causing Noise
- Adjusting Tension and Timing to Eliminate Noise
- When to Seek Professional Sewing Machine Repair
- Preventing Future Sewing Machine Noise Issues
- Frequently Asked Questions (FAQs)
- Conclusion
Key Takeaways
- Don’t panic if your sewing machine starts making weird noises – it’s not possessed, we promise! You can troubleshoot most issues by checking for loose threads, cleaning the bobbin area, and oiling those moving parts.
- A little TLC can go a long way in silencing that annoying rattle or grind. Regular maintenance, like cleaning and oiling every 1-3 months, can prevent damage and loud noises.
- Using the right needles and threads is key to a smooth, quiet sewing experience. Match your Needle Size to your fabric type and thread weight, and choose the right thread for your project to avoid any "creative differences."
- If your machine is over 30 years old, it might be time to think about a newer, quieter model. But before you upgrade, try troubleshooting and maintenance to keep your trusty sidekick running smoothly for years to come.
Common Causes of Sewing Machine Noise
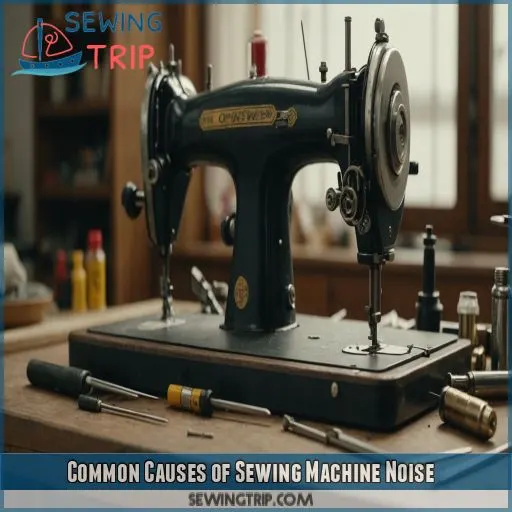
Is your trusty sewing machine making more noise than usual? From loose parts to lack of lubrication, there are several common culprits that can turn your peaceful sewing session into a noisy affair. Let’s explore the most frequent causes of sewing machine noise and learn how to restore the zen to your crafting space.
Loose or Worn Parts
Is your sewing machine making a racket?
Loose or worn parts might be the culprit.
It’s like having a squeaky wheel on your shopping cart – annoying and inefficient.
Check for wobbling parts, loose screws, or thread breaking frequently.
These are telltale signs of wear and tear.
Don’t let your trusty machine fall apart at the seams.
A little TLC can go a long way in silencing those stitches.
Lack of Lubrication
Is your sewing machine sounding like a rusty robot? Lack of lubrication might be the culprit. Regular oiling keeps your machine purring like a kitten, reducing noise and extending its lifespan. Here’s what happens when you neglect this important maintenance:
- Friction between moving parts increases, causing that awful grinding sound
- Wear and tear accelerates, potentially leading to costly repairs
- Your machine’s performance suffers, resulting in uneven stitches and frustration
Don’t let your trusty stitching companion suffer in silence – keep it well-oiled and happy!
Bent or Damaged Needles
Another common culprit for sewing machine noise? Bent or damaged needles. Just like a worn-out record player needle, a wonky sewing needle can cause quite a racket. Let’s break down the needle noise nuisance:
| Needle Issue | Sound | Solution |
|---|---|---|
| Bent needle | Clicking | Replace needle |
| Dull needle | Thumping | Switch to new needle |
| Wrong size | Rattling | Use correct needle size |
| Incorrect type | Scraping | Match needle to fabric |
Don’t let a tiny needle become a big headache. Keep your stitches smooth and your machine humming happily!
Incorrect Threading
If your needle isn’t the culprit, let’s thread the eye of this problem.
Incorrect threading can turn your sewing machine into a noisy neighbor.
It’s like trying to dance with your shoes on the wrong feet – things just don’t line up right.
Check your thread path, making sure it’s seated properly in all guides and tension discs.
A misstep here can lead to thread breaking and a symphony of unwanted sounds.
Dirty or Clogged Mechanisms
Is your sewing machine sounding like it’s been possessed by a grumpy ghost?
Dirty or clogged mechanisms might be the culprit.
Lint buildup in your bobbin case or feed dogs can create a racket that’d wake the dead.
It’s time to grab your cleaning tools and show that grime who’s boss.
A regular maintenance schedule is key to keeping your machine purring like a contented cat.
Misaligned Components
When your trusty sewing machine starts sounding like a grumpy old car, misaligned components might be the culprit. These pesky issues can turn your peaceful sewing session into a noisy nightmare. Here’s what you need to watch out for:
- Needle plate misalignment: It’s like your machine’s teeth are out of whack
- Feed dog alignment problems: Think of it as your fabric’s personal roller coaster
- Bobbin case misalignment: The heart of your machine needs to be in the right place
Identifying Different Types of Sewing Machine Noises
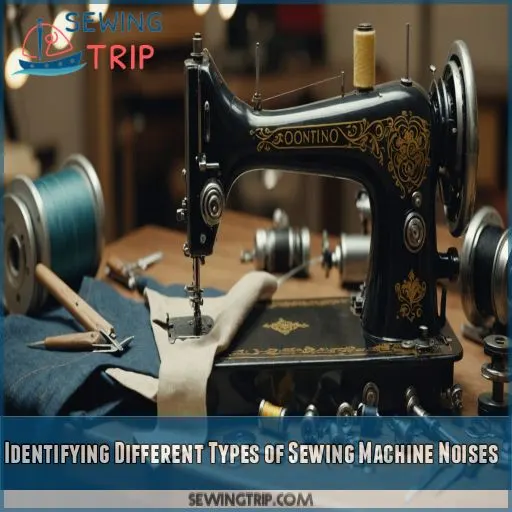
Is your sewing machine making strange noises? Learning to identify different types of sewing machine sounds can help you pinpoint the problem and get your trusty stitcher humming smoothly again.
Clicking Sounds
Heard a click-click-click from your trusty sewing companion? Don’t panic! Clicking sounds often point to timing issues or a loose needle.
It’s like your machine’s way of saying, "Hey, something’s off!"
Check if your needle’s snug as a bug and your tension’s just right.
If the clicking persists, it might be time to give your bobbin area a once-over.
Quick fixes can often nip these noisy nuisances in the bud!
Grinding Noises
Ever heard your sewing machine make a sound like it’s chewing gravel? That’s a grinding noise, and it’s not music to any sewist’s ears. Don’t panic, though – this common issue often has simple solutions. Here are some quick tips to help you diagnose and fix that pesky grind:
- Check for loose threads or fabric caught in the bobbin area
- Inspect the needle for damage or misalignment
- Make sure all moving parts are properly lubricated
Thumping or Knocking
When your sewing machine sounds like it’s playing a drum solo, you’ve got a thumping or knocking issue on your hands.
This noise often points to loose parts, needle strikes, or worn bearings doing the cha-cha inside your machine.
It could also be timing issues or motor problems throwing a wrench in the works.
Don’t let these noises drive you up the wall – they’re common and often fixable!
High-pitched Squealing
If you’re hearing a high-pitched squealing from your sewing machine, don’t panic!
It’s like your machine’s way of crying for help.
This sound often points to belt tension issues, a dry needle bar, or motor problems.
Think of it as your faithful stitching companion asking for a little TLC.
Let’s tackle these squeals and get your machine purring like a kitten again.
Rattling or Vibrating
When your sewing machine starts rattling or vibrating, it’s like your trusty sidekick’s got the jitters. This noisy dance often points to loose parts or worn bearings. Check these usual suspects:
- A loose motor that’s ready to boogie
- Worn bearings singing their swan song
- A bobbin playing hide-and-seek
- A needle bar that’s lost its groove
- Fabric tension that’s gone rogue
Don’t let these issues throw you off your game. With a bit of TLC, you’ll have your machine purring again in no time.
Tools Needed for Sewing Machine Noise Diagnosis
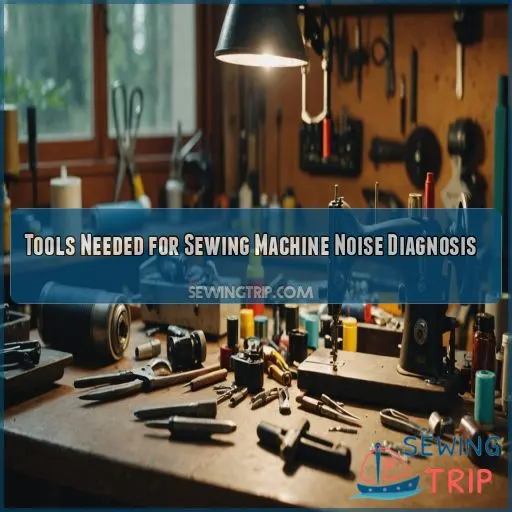
You’ll need the right tools to diagnose those pesky sewing machine noises that keep you up at night. From screwdrivers to a trusty flashlight, having these essentials on hand will make you feel like a sewing machine whisperer in no time.
Screwdrivers and Wrenches
| Tool Type | Common Sizes | Uses |
|---|---|---|
| Flathead | 2mm, 3mm | Plates, tension |
| Phillips | #0, #1 | Covers, parts |
| Wrench | 8mm, 10mm | Nuts, bolts |
Keep these handy, and you’ll be ready to silence those stitches in no time!
Lint Brush and Cleaning Cloths
Now, let’s talk about your sewing machine’s best friends: the lint brush and cleaning cloths.
These DIY solutions are your secret weapons against pesky fabric lint and other debris that can cause machine problems.
A stiff-bristled brush is perfect for sweeping away stubborn fuzzies, while soft cloths help you wipe down surfaces.
Regular cleaning keeps your stitches smooth and your machine purring like a well-oiled kitten.
No puckered seams here!
Sewing Machine Oil
You’ll need the right oil to keep your sewing machine purring like a contented cat.
Not just any oil will do – stick to specialized sewing machine oil.
Apply it sparingly to key points (check your manual for specifics) every 8-10 hours of sewing time.
Brands like Singer and Schmetz are reliable choices.
Store your oil in a cool, dry place to keep it fresh and ready for action.
Replacement Parts Kit
A DIY replacement parts kit is your secret weapon against sewing machine noise.
It’s like having a mini repair shop at your fingertips!
Stock up on essentials like bobbins, needles, and tension springs.
You’ll save a bundle compared to professional repairs.
Many kits even include tools for free motion quilting.
Check your local craft store or online for affordable options.
Ready to become a sewing machine whisperer?
Flashlight for Inspection
You’ve got your screwdrivers and cleaning tools, but don’t forget the trusty flashlight! It’s your secret weapon for shedding light on those pesky noise culprits. Here’s why a flashlight is essential:
- Illuminates hard-to-see areas like the bobbin case
- Helps spot tiny thread snippets or lint buildup
- Makes it easier to check for bent needles or misaligned parts
With a flashlight in hand, you’ll feel like a sewing detective, ready to crack the case of the noisy machine!
Step-by-step Guide to Diagnosing Noise Issues
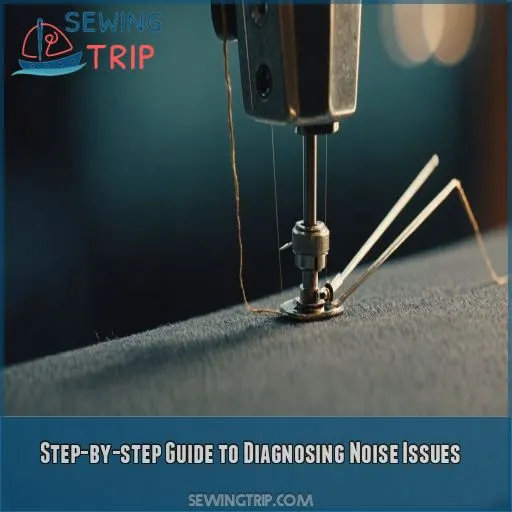
Is your sewing machine making a racket? Don’t worry, we can help you figure out what’s causing those pesky noises. By following these simple hacks, you’ll be able to pinpoint the source of the problem and get your machine running smoothly again in no time.
Visual Inspection
Now that you’ve got your tools ready, it’s time to put on your detective hat.
Start with a thorough visual inspection of your sewing machine.
Look for obvious culprits like a bent needle, loose screws, or a worn belt.
Don’t forget to check the bobbin area for any broken bits or frayed thread.
Isolating the Noise Source
Now that you’ve given your machine a once-over, it’s time to play detective with those pesky noises.
Listen closely as you operate your machine at different speeds.
Is it a constant hum or an intermittent rattle?
Try to pinpoint where the sound’s coming from – the needle area, bobbin case, or motor.
Checking Tension and Timing
Now that you’ve pinpointed the noise, it’s time to play detective with your machine’s tension and timing. These two culprits often team up to create a ruckus. Here’s your game plan:
- Check upper thread tension
- Inspect bobbin tension
- Sync needle and hook timing
- Balance feed dog movement
- Adjust presser foot pressure
Examining Bobbin Area
Now that you’ve checked the tension and timing, it’s time to peek under the hood – or in this case, the bobbin area.
This little powerhouse can be the root of many noisy issues.
Start by removing the bobbin case and giving it a good once-over.
Look for any lint buildup, thread tangles, or signs of wear.
A clean bobbin area is a quiet bobbin area!
Lubricating Your Sewing Machine to Reduce Noise
Is your sewing machine making a racket? Proper lubrication can work wonders in quieting those noisy mechanisms, so let’s explore some oiling techniques that’ll have your machine purring like a contented cat in no time.
Proper Oiling Techniques
Now that you’ve identified the noise source, it’s time to oil your machine.
Think of it as giving your trusty sewing companion a spa day!
Grab your machine oil and apply it sparingly to the moving parts.
Use the manual to locate oiling points and avoid getting oil on fabrics or electrical components.
Frequency of Lubrication
Keeping your sewing machine well-oiled is like giving it a spa day – it’ll run smoother and quieter. But how often should you pamper your trusty stitching companion? The answer depends on a few factors:
- Machine age: Older models need more TLC
- Usage frequency: Daily sewers, oil up more often
- Environmental conditions: Dusty rooms call for extra care
- Manufacturer recommendations: Always check your manual
Recommended Lubricants
| Lubricant Type | Pros | Cons |
|---|---|---|
| Sewing Machine Oil | Designed for machines | Can be pricey |
| Mineral Oil | Affordable, versatile | May not last as long |
| Synthetic Oil | Long-lasting | More expensive |
| Silicone Spray | Easy to apply | Not suitable for all parts |
| All-Purpose Oil | Readily available | May be too thick |
Areas Requiring Regular Oiling
Now that you’ve got the right oil, let’s talk about where to use it.
Your sewing machine’s got some thirsty spots!
Focus on moving parts like the hook race, needle bar, and presser bar.
Don’t forget those hard-to-reach areas in the bobbin case.
A well-oiled machine is like a happy camper – it’ll hum along quietly and efficiently, keeping your sewing sessions peaceful and productive.
Avoiding Over-lubrication
Oiling your sewing machine is important, but don’t go overboard!
Too much lubrication can attract dust and gunk, turning your sewing sanctuary into a sticky mess.
Stick to the recommended oil type and follow your manual’s guidelines on lubrication frequency.
If you’ve accidentally gone oil-happy, gently wipe away excess with a clean cloth.
Cleaning and Maintenance to Prevent Noise Problems
You’d be surprised how much quieter your sewing machine can run with a little TLC. Regular cleaning and maintenance keeps your machine running smoothly and can also nip those annoying noises in the bud before they become a real headache.
Removing Lint and Debris
Now that you’ve oiled your machine, let’s tackle the lint monster lurking in your sewing nook. Removing lint and debris is really important for smooth, quiet operation. Here’s your battle plan:
- Arm yourself with a lint brush and cleaning tools
- Target the bobbin area – it’s a lint magnet
- Blow out dust from hard-to-reach spots
Cleaning Feed Dogs and Bobbin Case
Now that you’ve tackled the lint, let’s focus on those feed dogs and bobbin case. These little workhorses can be lint magnets, causing your machine to sound like a grumpy old car. Here’s a quick guide to keep them purring:
| Area | Cleaning Frequency | Tools |
|---|---|---|
| Feed Dogs | After every project | Lint brush, tweezers |
| Bobbin Case | Weekly | Soft cloth, cotton swab |
| Tension Discs | Monthly | Air duster, fine brush |
Dusting Internal Mechanisms
Now that you’ve tackled the feed dogs and bobbin case, it’s time to dust off those internal mechanisms.
Think of it as spring cleaning for your sewing machine’s innards!
Grab a soft brush or air duster and gently remove any lingering lint or debris.
Pay special attention to hard-to-reach nooks and crannies.
Keep up with regular dusting, and you’ll be stitching in silence in no time!
Proper Storage Practices
Now that you’ve dusted off those pesky internal mechanisms, let’s talk about keeping your trusty sewing companion safe when it’s not in use. Proper storage is key to preventing noise issues and extending your machine’s life. Here are some storage tips to keep your stitches silent:
- Use a dust cover to shield your machine from lint and debris
- Store in a climate-controlled area to avoid moisture damage
- Position the machine on a level surface, away from direct sunlight
Regular Maintenance Schedule
Now that you’ve got your machine stored properly, let’s talk about keeping it in tip-top shape.
Think of your sewing machine as a car – it needs regular TLC to run smoothly.
Set up a cleaning routine, stick to a lubrication schedule, and know when it’s time for parts replacement.
Replacing Worn or Damaged Parts Causing Noise
You’ve tried cleaning and oiling your sewing machine, but it’s still making a racket.
Now it’s time to get a little more serious and replace those worn or damaged parts that are causing the noise.
Whether it’s a bent needle, a worn-out bobbin case, or a frayed belt, we’ll walk you through the process of identifying and replacing the culprits, so you can get back to sewing in peace.
Needle Replacement
A bent or damaged needle can cause frustrating noise issues in your sewing machine.
It’s important to choose the right needle type, size, and brand for your project.
Needles come in various types, like universal, ballpoint, and jeans needles.
Using the wrong needle can result in breakage and noisy performance.
Always match your needle to your fabric and thread.
Keep a few spares on hand to quickly fix any needle-related noise problems.
Bobbin Case Inspection and Replacement
Bobbin Case Basics: First, let’s identify your bobbin case type. There are two main types: front-loading and drop-in. Knowing yours is key for correct bobbin placement and cleaning. So, get familiar with your machine’s manual to spot any issues.
Signs of Wear: If your machine’s acting up, check for these red flags: thread jams, uneven stitches, or excessive noise. These could mean it’s time to replace the bobbin case.
Cleaning Techniques: Keep your case lint-free. Use a small brush to gently remove any debris. A blast of compressed air can also help.
Belt and Gear Examination
If your sewing machine is making a racket, the culprit could be worn-out or damaged belts and gears.
Over time, these parts can become loose, frayed, or stretched out, causing all sorts of unwanted noise.
First, check the belt condition.
If it’s loose, adjust the tension.
If it’s frayed or stretched, it’s time for a belt replacement.
Gear wear and tear can also cause a ruckus.
Check their alignment and replace if needed.
Presser Foot Adjustment
Let’s tackle presser foot adjustment to silence that noisy sewing machine. Here are four steps to get you started:
- Check foot height: Make sure the presser foot is at the correct height to avoid putting too much pressure on the fabric.
- Choose the right foot type: Select a presser foot that matches your fabric and sewing style.
- Adjust foot alignment: Align the presser foot with the edge of the fabric to prevent bunching.
- Tweak foot tension: Adjust the presser foot tension to avoid putting too much strain on the machine.
Hook Race Replacement
Replacing the hook race can be a game-changer for a noisy sewing machine. But before you start, know what you’re getting into.
| Hook Race Type | Compatibility | Replacement Cost | Installation Complexity |
|---|---|---|---|
| Standard | Most machines | $10-$30 | Easy |
| Ball-bearing | High-end machines | $50-$100 | Medium |
| Ceramic | Specialized machines | $20-$50 | Hard |
| Custom | Rare machines | $100-$500 | Expert |
Choose the right hook race for your machine and follow a step-by-step installation guide to make sure the replacement goes smoothly.
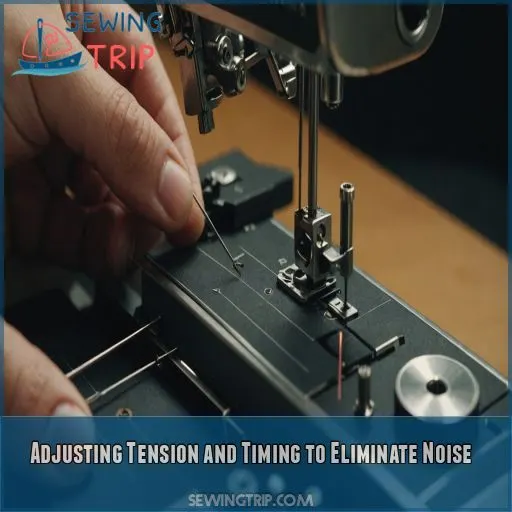
Adjusting Tension and Timing to Eliminate Noise
As you work to silence your sewing machine’s annoying noises, you’ll want to focus on adjusting tension and timing to eliminate the culprit behind the clatter. By fine-tuning your machine’s upper thread tension, bobbin tension, needle and hook timing, feed dog timing, and presser foot pressure, you’ll be well on your way to a quieter, more efficient sewing experience.
Upper Thread Tension Adjustment
Now that you’ve replaced those worn-out parts, it’s time to tackle the upper thread tension. Think of it as finding the perfect balance for your stitches. If it’s too tight, your fabric might pucker; too loose, and you’ll get uneven stitches. Adjust the tension dial until your stitches look smooth and even. Your machine (and fabric) will thank you!
Bobbin Tension Fine-tuning
Let’s get your bobbin tension just right. You know, that sweet spot where your stitches are smooth and even. To fine-tune your bobbin tension, you’ll need to:
- Use a tension gauge or a small screwdriver to adjust the bobbin case spring.
- Test the tension by pulling on the bobbin thread.
- Check for uneven stitch tension and adjust as needed.
- Be careful not to over-tighten, as this can cause more problems.
Synchronizing Needle and Hook Timing
Now that you’ve fine-tuned your bobbin tension, it’s time to synchronize your needle and hook timing. Think of it like a perfectly choreographed dance – the needle and hook need to move in harmony to produce a smooth, even stitch. Here’s a quick reference guide to help you get it right:
| Needle Timing | Hook Timing |
|---|---|
| Early needle timing | Results in loose stitches |
| Late needle timing | Results in tight stitches |
| Perfectly timed needle | Produces a balanced stitch |
| Check your machine manual | For specific timing instructions |
| Test and adjust as needed | To achieve the best stitch quality |
Balancing Feed Dog Timing
To balance feed dog timing, check that the feed dogs are properly aligned and adjust the timing if necessary. Misaligned feed dogs can cause skipped stitches, poor stitch quality, and noise. Regular sewing machine maintenance can help prevent timing issues. By fine-tuning the feed dog timing, you’ll be on your way to smooth, quiet stitching.
Presser Foot Pressure Adjustment
Time to get a grip – literally! Adjusting your presser foot pressure can make all the difference in eliminating noise and improving stitch quality.
If it’s too loose, you’ll get fabric puckering and skipped stitches.
Too tight, and you’ll risk needle breakage.
Find that sweet spot for an even feed and smooth sailing.
Your machine (and your sanity) will thank you!
When to Seek Professional Sewing Machine Repair
You’ve tried everything to silence your sewing machine’s strange noises, but sometimes it’s best to admit defeat and seek professional help. If you’re experiencing persistent unusual noises, complex internal issues, electrical or motor problems, or if your machine is still under warranty, it’s time to call in a sewing machine repair expert to get your stitches humming smoothly again.
Persistent Unusual Noises
Your trusty sewing machine’s making weird noises and you’re at your wit’s end. Don’t worry, friend! If the unusual noises persist after troubleshooting, it’s time to seek professional help. Consult your user manual or contact the manufacturer for guidance. A professional repair can save you from further frustration and potentially costly damage down the line.
Complex Internal Issues
Sometimes, it’s what’s inside that counts.
If you suspect complex internal issues, don’t try to be a hero.
Identifying worn or broken parts can be tricky, and troubleshooting broken parts requires expertise.
Save yourself the headache and seek professional help to repair internal issues before they become a bigger problem.
Electrical or Motor Problems
 View On Amazon
 - Flickering lights or a burning smell: Check your power cord and circuit breaker.
- Motor making weird noises: It might need replacement.
- Machine not turning on: Time to troubleshoot with a pro!
Warranty Considerations
Now that you’ve identified potential electrical or motor problems, it’s time to think about warranty considerations. Check your sewing machine’s warranty duration and repair coverage – you might be surprised at what’s included! Look for the service center location and replacement policy. If you’re out of warranty, don’t worry, there are still options available to get your machine humming again.
Cost-benefit Analysis of Repair Vs. Replacement
When weighing repair vs. replacement, consider the following:
- Repair cost: Will the fix exceed half the machine’s value?
- Age of machine: Is your trusty sidekick over 30 years old?
- Machine value: Is it a rare or high-end model worth preserving?
- Repair expertise: Can you find a reliable, experienced technician?
Be honest with yourself – it might be time to upgrade!
Preventing Future Sewing Machine Noise Issues
Now that you’ve quieted your sewing machine’s noise problems, you’ll want to make a habit of preventing future issues. Simple things like cleaning and oiling regularly, threading properly, and using the right needles and threads will keep your sewing machine humming happily for years to come.
Regular Cleaning and Oiling Routine
Now that we’ve covered when to seek professional help, let’s talk prevention. A regular cleaning and oiling routine is key to keeping your sewing machine purring like a kitten. Here’s a simple schedule to follow:
| Frequency | Task | Why |
|---|---|---|
| Daily | Wipe down machine | Remove lint and debris |
| Weekly | Oil machine | Keep parts lubricated |
| Monthly | Deep clean machine | Remove built-up grime |
| Every 3 months | Replace oil | Keep oil fresh and effective |
| Every 6 months | Store machine properly | Prevent rust and damage |
Proper Threading Techniques
Now that you’ve got a regular cleaning and oiling routine down, let’s tackle proper threading techniques to prevent future sewing machine noise issues. Consult your machine’s threading diagram and make sure to thread your bobbin correctly. Pay attention to thread types and tensions, and adjust as needed. Proper threading can make all the difference in a smooth, quiet sewing experience.
Using Appropriate Needles and Thread
When it comes to preventing sewing machine noise, using the right needles and threads is key. Don’t be like me, who once tried to sew denim with a needle meant for silk (it wasn’t pretty). Here are three things to keep in mind:
- Match your needle size to your fabric type and thread weight.
- Choose the right thread for your project – consider factors like fiber content and weight.
- Ensure thread compatibility with your machine and needle type to avoid any, ahem, "creative differences".
Avoiding Overworking the Machine
Don’t push your sewing machine to its limits! Pace your projects, and give it a break every few hours. Choose fabrics wisely, considering your machine’s capacity. Remember, it’s not a marathon – take breaks, rest your machine, and come back to your project refreshed. This will prevent overworking and reduce noise issues down the line.
Storing the Machine Correctly
When you’re done sewing, don’t just shove your machine in a corner. Store it correctly to prevent future noise issues. Here are some tips:
- Dust covers are your friend: Use a machine cover or dust cover to keep debris out.
- Clean before storing: Give your machine a quick wipe-down before putting it away.
- Climate control is key: Store your machine in a room with a stable temperature and humidity level.
- Reserve a special storage space: Designate a specific spot for your machine to prevent bumps and scratches.
Frequently Asked Questions (FAQs)
Why does my sewing machine keep making noise?
Ah, the age-old sewing machine serenade – music to no one’s ears! If your machine’s making a ruckus, check for loose threads, clean the bobbin area, and oil those moving parts – it’s time to get your sew on!
How do you fix a noisy sewing machine?
Hey there, seamstress! If your sewing machine is making noise, don’t panic! First, stop sewing and clean the machine according to the manual. Check for lint and dust buildup, and make sure the bobbin area is clear. If the noise persists, consider consulting the user manual or seeking professional help.
What is the problem if sewing machine runs noisy?
Hold the phone, seamstress extraordinaire! If your sewing machine is running noisy, the culprit might be a wonky needle, improper threading, or a dirty bobbin area. Check and clean these areas to get your machine purring smoothly again.
Why does my sewing machine make a loud clunking sound?
Sounds like your sewing machine is throwing a tantrum! A loud clunking sound usually indicates a problem with the bobbin or needle. Check if your bobbin is properly seated or if your needle is bent or dull.
How often should I oil my sewing machine bearings?
You should oil your sewing machine bearings every 1-3 months, depending on usage. Regular oiling keeps them running smoothly, preventing damage and loud noises. Check your machine’s manual for specific guidance, and happy sewing!
Can low-quality thread cause unusual sewing machine noises?
Oh boy, are you in for a treat! Using low-quality thread can be like inviting a noisy roommate into your sewing machine – it’s a recipe for disaster! Cheap thread can cause vibration, leading to unusual noises.
Will using a walking foot reduce machine vibration noise?
Using a walking foot can help reduce vibration noise by stabilizing the fabric and promoting smooth movement, but it won’t eliminate underlying issues. Check your machine’s balance and timing to tackle the root cause of the noise.
What role does bobbin type play in noise reduction?
If you’re dealing with noise reduction, the type of bobbin you use can make a difference! Switching to a metal bobbin can help reduce rattling and clunking sounds, giving you a smoother sewing experience.
Can a sewing machines age affect its noise level?
Your sewing machine’s age can indeed affect its noise level. As machines mature, mechanical parts wear out, causing clunks, creaks, and groans. If your machine is over 30 years old, it might be time to think about a newer, quieter model.
Conclusion
The sweet sound of silence! You’ve made it through the troubleshooting process, and your sewing machine is purring like new.
By identifying and tackling common culprits like loose parts, lack of lubrication, and worn needles, you’ve mastered the art of troubleshooting sewing machine noise issues.
Keep your machine humming with regular maintenance, and remember: a quiet stitch is a happy stitch.
Happy sewing, and may your machine stay silent and smooth!

