This site is supported by our readers. We may earn a commission, at no cost to you, if you purchase through links.
Make sure the needle isn’t bent and matches your fabric type. Adjust the tension; too loose or tight threads can cause headaches.
Clean out lint and dust, especially under the plate, since even a tiny buildup can mess things up. Hearing weird noises? Your machine might need oiling or a quick alignment check.
Still acting out? It might be timing or worn parts. Sometimes, even the pros need a helping hand—or a tune-up!
Table Of Contents
Key Takeaways
- Check threading first—misthreading often causes issues like thread bunching or skipped stitches.
- Replace bent or dull needles promptly and match the needle type and size to your fabric type.
- Clean lint regularly from the bobbin case, feed dogs, and needle plate to prevent jams and uneven stitches.
- Adjust tension and presser foot pressure carefully to ensure smooth stitching and avoid fabric damage.
Common Sewing Issues
You’ve probably faced frustrations like thread bunching or needles breaking while sewing. These common issues might seem tricky, but with the right steps, they’re easy to fix.
Thread Bunching Under Fabric
Thread bunching under fabric often points to tension problems or bobbin threading issues.
Tension troubles or bobbin mishaps? Smooth stitching starts with checking your threading and balancing the tension right!
Check the bobbin tension, thread the machine correctly, and clean around the needle plate and feed dog.
A fabric stabilizer can help prevent puckering if the material is slippery.
When sewing machine problems like this arise, simple sewing machine troubleshooting saves time and frustration, and is a key part of sewing machine troubleshooting.
Needle Breaking or Getting Stuck
Needle issues can stop sewing in its tracks.
A bent needle? Replace it.
Breaks happen when thread tension’s too tight or fabric’s tugged unfairly—don’t wrestle your work.
Reinsert the needle correctly, tighten the clamp screw, and match needle to fabric thickness.
Cheap needles? Skip them.
Invest in quality sewing machine needles to keep projects running smoothly.
Skipping Stitches and Fabric Bunching
Skipped stitches and fabric bunching can feel like sewing’s "pause button".
Check these troubleshooting tips:
- Inspect the needle plate for burrs or wear.
- Clean feed dogs—lint buildup disrupts stitch formation.
- Balance sewing machine tension to avoid uneven stitches.
- Use fabric stabilizers for tricky materials.
- Verify correct bobbin threading—accuracy matters!
Master these, and sew smoothly again with correct techniques!
Strange Noises and Machine Seizing
If your machine growls or freezes mid-stitch, it’s not cold feet—it’s a problem. Strange noises often mean loose screws, bobbin case issues, or internal obstructions.
Check for lint buildup and make certain of proper lubrication. Motor malfunctions might need professional sewing machine repair.
Regular sewing machine troubleshooting, like inspecting for signs of wear, keeps these sewing machine problems from escalating into costly hassles.
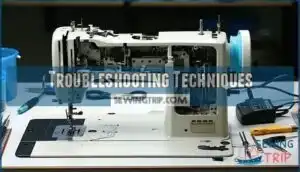
Troubleshooting Techniques
Sometimes, sewing machines act up like stubborn pets.
Start with a systematic approach to troubleshooting.
First, unplug the machine for safety and inspect for anything obvious—lint buildup or loose parts.
Use isolation testing by checking one issue at a time, like needle alignment or thread routing, to pinpoint the root cause.
With common sewing machine problems, diagnostic steps are your best friend: remove the bobbin, re-thread the machine, and clean under the needle plate.
Don’t forget to verify your fix by running the machine on scrap fabric.
If the issue persists, revisit each step carefully.
Sewing machine maintenance, like regular cleaning, prevents many headaches.
Tackle each issue methodically, and you’ll feel like a pro at sewing machine repair!
Needle and Thread Problems
Needle and thread issues can throw off your sewing project faster than you expect.
From bent needles to tangled threads, understanding a few simple fixes will keep your machine running smoothly, which involves addressing issues like bent needles.
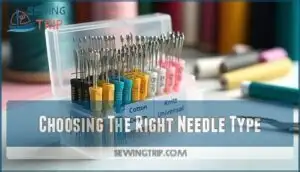
Choosing The Right Needle Type
Using the right sewing machine needle isn’t just a detail—it’s the backbone of smooth stitches.
Match needle types to fabric compatibility: ballpoint for knits; sharp for wovens.
Needle sizes matter too—thin for delicate, thick for heavy weights.
Specialty needles handle tricky materials like leather. A key aspect is understanding appropriate needle dimensions for different tasks.
Check shank types for your machine, and replace bent needles immediately to avoid disaster.
Matching Thread to Needle and Fabric
For smooth sewing, match thread weight, fabric type, and needle size carefully. These elements work together like a perfect trio to guarantee great stitch quality and tension balance.
- Use lightweight thread for delicate fabrics; thicker threads suit heavyweights.
- Pair ballpoint needles with knits and sharp ones for sturdy fabrics.
- Test combos on scrap fabric before sewing.
Different projects require specific needle types for ideal results.
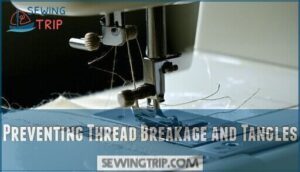
Preventing Thread Breakage and Tangles
Poor thread quality is like using a dull pencil—it just won’t work right.
Always check your spool for tangles, manage bobbin tension carefully, and verify proper threading through your sewing machine.
Tight thread tension or snags can lead to frustrating breaks.
For smooth sewing, keep your machine clean and use strong, reliable threads to avoid tangling.
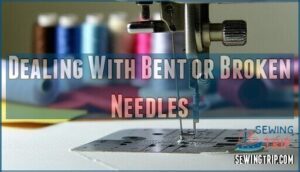
Dealing With Bent or Broken Needles
Bent or broken needles can halt your sewing faster than you think.
Check your sewing machine needle for proper alignment and make certain it’s securely inserted.
High-quality needles last longer, so invest wisely.
Avoid needle bending by removing pins as you sew. Match needle compatibility to fabric, and keep your machine oiled for smooth stitching and less breakage, ensuring high-quality needles and proper maintenance for smooth stitching.
Machine Maintenance Tips
Keeping your sewing machine in top shape doesn’t take much time, but it saves you from headaches down the road.
Regular sewing machine care prevents frustration and ensures smooth stitching—small efforts today save major repairs tomorrow.
Clean, oil, and inspect it regularly to keep everything running smoothly and avoid costly repairs.
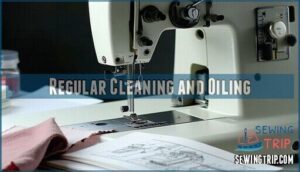
Regular Cleaning and Oiling
Neglect cleaning, and lint buildup will sabotage stitches quicker than you’d guess.
Regular lint removal, especially from the bobbin case and feed dogs, keeps things running smoothly.
Follow your manual for oiling frequency—overdoing it’s messy!
Never use compressed air; it just pushes lint deeper.
Scrap testing after cleaning confirms it’s purring perfectly—your best sewing partner deserves proper care!
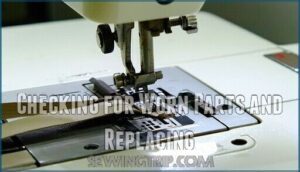
Checking for Worn Parts and Replacing
Inspecting sewing machine parts regularly is key to avoiding costly repairs.
Check feed dog wear and bobbin case damage for smooth stitching.
Verify the needle clamp holds tight and examine motor brush condition to prevent stalling.
Don’t forget the belt replacement if it’s frayed or slipping.
Consider a feed dog replacement if yours is too worn.
Quick fixes now beat major sewing machine troubleshooting later.
Stay sharp, not stuck!
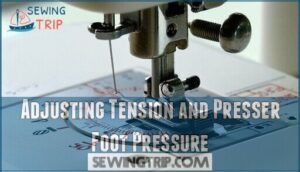
Adjusting Tension and Presser Foot Pressure
If your seams look messy, it’s time to adjust tension and presser foot pressure. Perfect tension equals flawless stitch formation and smooth fabric feed.
Here’s how:
- Test tension settings on scrap fabric for seam quality.
- Tweak presser foot pressure to match fabric thickness, ensuring even stitches.
- Don’t forget the bobbin tension—small adjustments make big differences.
Advanced Repair and Support
When your sewing machine faces advanced issues like hook timing or misaligned needles, it’s time to step up your troubleshooting game.
If the fixes feel too tricky, knowing when to call a professional can save you frustration and further damage.
Fixing Hook Timing and Decorative Stitch Issues
Hook timing is key to decorative stitches and perfect seam alignment.
If stitches skip or thread breaks, check needle position and adherence to timing adjustments.
Adjust the hook as the manual suggests.
| Problem | Cause | Fix |
|---|---|---|
| Skipped stitches | Wrong timing | Align needle with hook tip |
| Poor decorative stitch quality | Incorrect settings | Adjust stitch length/width |
| Stuck needle or thread breaks | Needle misalignment | Tighten and position needle |
Dealing With Misaligned or Bent Needles
If your sewing machine needle feels off, check its positioning and alignment first. Loose clamp screws or poor needle quality might cause trouble. Verify the needle moves smoothly and isn’t bent.
Common culprits for broken needles include tight thread tension and rough fabric handling.
- Always tighten the clamp screw.
- Inspect needle alignment often.
- Replace bent needles immediately.
- Use correct thread tension.
- Practice gentle fabric handling.
Knowing When to Seek Professional Help
Sometimes, it’s best to call repair services when your sewing machine faces complex repairs, like microswitch malfunctions in computerized models or vintage machines needing special care.
Attempting fixes without professional expertise can worsen issues. Here’s when to seek help:
| Issue | DIY Risk | Call a Technician If… |
|---|---|---|
| Hook Timing Problems | High chance of misalignment | Stitches are irregular or skipped |
| Internal Electrical Failures | Potential for permanent damage | Buttons or screens malfunction |
| Bent Needle Damaging Fabric | Improper fixes ruin threads | Needle hits plate repeatedly |
When considering repair, it’s essential to weigh the DIY risk against the potential benefits of professional assistance, especially for issues like internal electrical failures or bent needle damaging fabric, which can lead to further complications if not addressed correctly.
Finding Reliable Repair Services for Complex Issues
A reliable sewing machine repair shop is your best friend when problems go beyond DIY fixes.
Focus on these essentials when choosing one:
- Verify technician qualifications and experience.
- Look for service warranties to guarantee quality.
- Request repair cost estimates upfront.
- Seek specialists for vintage machines.
- Choose authorized sewing machine repair centers for genuine parts and expertise.
When selecting a repair shop, consider the importance of genuine parts and the benefits of working with authorized centers.
Frequently Asked Questions (FAQs)
What is the most common problem of the sewing machine?
Thread bunching under the fabric is the most common sewing machine issue.
It’s like your machine throwing a tantrum—caused by incorrect threading, tension problems, or a dirty bobbin case needing attention.
What is the number one problem when a machine doesn’t sew properly?
Did you know 85% of sewing machine issues stem from incorrect threading?
When your machine won’t sew properly, double-check the top thread and bobbin threading—it’s often that small misstep causing all the headaches!
What type of needle should I use for a particular fabric?
Choose a needle that matches your fabric: ballpoint for knits, sharp for tightly-woven fabrics like denim.
Use a universal needle for most projects.
Always check your sewing machine manual for recommended needle types.
How often should I change my sewing machine needle?
Change your sewing machine needle every eight hours of sewing or at the start of each project.
Dull needles cause thread breaks and skipped stitches, so don’t wait—replace it for smoother sewing sessions.
How do I prevent thread fraying or breaking?
Make sure your needle matches the fabric, and check it’s not dull or bent.
Use good-quality thread, avoid tension that’s too tight, and clean lint from the bobbin case—your machine will thank you!
How do I ensure I’m using the right type of thread for my project?
Like matching the right dance partner, pick thread that suits your fabric—use polyester for stretch, cotton for quilting, or silk for delicate projects.
Avoid mismatches to keep your stitches smooth and drama-free.
How to address uneven fabric feeding problems?
To fix uneven fabric feeding, clean lint from feed dogs, check for wear, adjust presser foot pressure, and make certain fabric is fully supported during sewing.
Use a walking foot for smoother feeding on tough fabrics.
Why does my sewing machine emit burning smells?
Nearly 60% of burning smells from sewing machines come from motor overheating.
Clean lint, check for stuck moving parts, and make certain of proper lubrication.
Don’t ignore it—continuing could risk motor damage or even fire hazards.
How to fix inconsistent stitch width or patterns?
Check the stitch settings, ensuring they’re not accidentally adjusted.
Clean around the feed dogs and needle plate for debris.
Use the correct presser foot, and inspect tension and thread paths for alignment or snags.
What causes thread spooling unevenly on the bobbin?
When thread spools unevenly on the bobbin, it’s like winding a lopsided clock gear—it won’t run smoothly.
Causes include incorrect thread tension, dirty bobbin winder, or threading mishaps.
Adjust tension, clean, and rethread.
Conclusion
When your sewing machine acts up, think of it like a puzzle waiting to be solved.
Troubleshooting sewing machine problems doesn’t have to be intimidating—start by checking simple issues like threading, tension, and needle condition.
Clean regularly, match your needle and thread to the fabric, and keep an eye on worn parts.
For stubborn problems, advanced repairs or professional help might be the answer.
With consistent care, your machine will stay primed for smooth stitching.
- https://www.youtube.com/watch?v=5pUfdpjpS5M
- https://www.daintydressdiaries.com/2021/04/common-sewing-machine-problems-how-to-fix-them.html
- https://www.quora.com/What-are-some-problems-with-home-sewing-machines
- https://www.justanswer.com/small-appliance/rbfwh-sewing-machine-trouble.html?membershipModelTrialType=NoTrial
- https://edisonvacuums.com/sewing-machine-issues-diy-or-visit-a-repair-shop/

