This site is supported by our readers. We may earn a commission, at no cost to you, if you purchase through links.

Start with essential tools: sharp glass-headed pins, specialty needles, and a reliable rotary cutter for precise work. Choose breathable fabrics like silk or bamboo jersey with 4-way stretch for maximum comfort.
Master techniques like sewing elastic securely and working with tiny seam allowances – it’s easier than you think! Your tutorials diy lingerie journey begins with simple bralettes and advances to couture-inspired designs.
Just imagine slipping into something perfectly fitted to your body, knowing you crafted every delicate detail yourself. The secrets to professional-looking results await.
Table Of Contents
Key Takeaways
- You’ll need essential tools like glass-headed pins, specialty needles, and a rotary cutter to create custom-fitted lingerie that matches your style and body shape.
- You can start with simple bralette patterns using natural, breathable fabrics with 4-way stretch, then advance to more complex designs as your skills improve.
- You’ll master critical techniques like securing elastic with zigzag stitches, working with tiny seam allowances, and handling delicate materials like silk and lace.
- You can transform your favorite well-fitting bra into a custom pattern by carefully unpicking it, analyzing its construction, and digitizing the pieces with proper notches and grainlines.
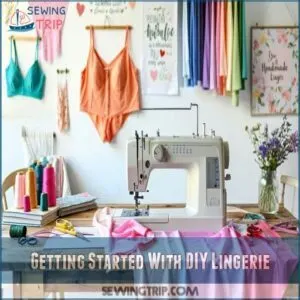
Getting Started With DIY Lingerie
You’ll be amazed at how easy it’s to create your own custom-fitted lingerie with just a few basic supplies and some simple sewing skills.
Whether you’re looking to save money or want to express your creative style, making your own bralettes and underwear lets you choose fabrics you love while ensuring the perfect fit for your body.
Essential Supplies for Lingerie Sewing
Getting your lingerie sewing kit ready is like assembling your superhero utility belt.
You’ll need sharp glass-headed pins for precise work, a rotary cutter and self-healing mat for clean cuts, and sturdy pattern weights (coins taped together work great in a pinch).
Don’t forget speciality machine needles for delicate fabrics, a magnetic pin cushion to keep things tidy, and a reliable seam ripper for those oops moments.
For more information on sewing tools, research and gather all the necessary items before starting your project.
Choosing The Right Fabric for Lingerie
Now that you’ve got your supplies ready, let’s talk about fabric comfort – it’s what makes or breaks your DIY lingerie. You’ll want to test different fiber types by running them across your inner wrist to gauge softness. Understanding the right lingerie fabric is essential for a comfortable and durable piece.
For the best lingerie fabrics that’ll last longer than store-bought pieces:
- Pick natural fibers like silk or bamboo jersey for breathability
- Look for 4-way stretch fabrics for maximum movement
- Shop reliable fabric sources that specialize in lingerie fabric for maximum quality and longevity.
Tips for Working With Elastic and Lace
From elastic types to lace trimming, mastering lingerie sewing starts with handling delicate materials.
When working with stretch lace, pin within seam allowances and use a 3-step zigzag stitch for strength.
For DIY bralette straps, pre-stretch your elastic slightly while sewing to prevent rippling.
Test different elastic widths on scrap fabric first – your future self will thank you for this extra step!
Can You Make Your Own Lingerie
You’ll be amazed at how easy it’s to create your own beautiful lingerie at home with just basic sewing skills and the right materials.
Whether you’re dreaming of a comfy cotton bralette or a fancy lace number, you can craft custom pieces that fit perfectly and match your style without breaking the bank.
Beginner Bralette Sewing Patterns
Ready to start your DIY lingerie journey? Let’s kick things off with beginner-friendly bralette patterns that’ll make you feel like a pro.
The Barrett Bralette offers a sporty pull-on style with adjustable straps, while the Sierra DIY Bralette gives you a wrap-around halter design. For something unique, try the Noelle Halter Bralette – it doubles as a crop tank and features customizable straps.
You can find more free bra patterns to explore and create your own custom lingerie pieces.
DIY Bralette Projects
Now that you’ve got the basics down, let’s explore some creative DIY bralette projects that’ll transform your lingerie drawer. These bralette sewing tutorials are perfect for upcycling old clothes and creating custom pieces you’ll love.
- Turn a stretchy tank top into a comfy bralette using just scissors and basic hand-stitching
- Transform lace curtains into delicate triangle bralettes with simple elastic straps
- Create adjustable bralette straps from old bra hardware and ribbon
- Repurpose silk scarves into luxurious bandeau-style pieces with minimal sewing
These lingerie hacks let you experiment with fabric choices while developing your bra making skills. Plus, you’ll save money while creating pieces that fit perfectly.
Versatile Bralette Designs
Looking to expand your DIY lingerie wardrobe?
Versatile bralette designs let you create pieces that work for any occasion.
Start with a basic bandage-style pattern that transforms from athletic wear to loungewear.
Try the two-part wrap design that fits sizes S to L, or whip up a 30-minute bandeau that’s perfect for layering.
These customizable bralette patterns adapt beautifully from day to night.
Unique Bralette Styles
Diving into unique bralette styles lets you break free from cookie-cutter designs. From sporty numbers without frills to custom-fit lace designs, there’s a DIY bralette pattern for every style preference. Understanding corset making techniques can also help in creating well-structured and comfortable lingerie pieces.
- Sporty styles shine with clean lines and thin straps.
- DIY lace bralettes offer comfort without sacrificing style.
- Create a no-sew bralette by refashioning an old bra.
- Crochet patterns work beautifully for beginners using simple stitches.
Mastering Lingerie Sewing Skills
You’ll feel like a pro when you master the essential skills of lingerie sewing, from precise cutting techniques to working with delicate elastics and tiny seam allowances.
Whether you’re creating your first bralette or tackling a complex design, these fundamental techniques will help you create beautiful, comfortable pieces that fit perfectly, using skills like delicate elastics.
Precise Cutting Techniques for Lingerie
Now that you’re ready to create your dream lingerie, let’s nail those precise cuts.
For pattern marking on delicate fabrics, place tissue paper underneath to prevent shifting. When cutting lace and silks, use sharp dressmaker’s shears and make long, confident strokes.
Keep your cutting tools razor-sharp and clean for seam accuracy. Your tutorialsdiy journey starts with getting these basics down pat.
Sewing Elastic Securely and Comfortably
After mastering those precise cuts, let’s secure those stretchy bits! Working with elastic in diy lingerie isn’t just about stitching – it’s about comfort.
Start by testing your elastic’s firmness and marking quarter points for even distribution. Understanding sewing underwear basics is essential for a professional finish.
When sewing lingerie, pull thread tails to prevent snags, and remember: don’t overstretch! Use a zigzag stitch 1/8" from the edge, then fold and topstitch with a three-step zigzag for secure seams.
Using a Zig Zag Stitch for Seams and Elastic
The zig zag stitch is your secret weapon for sewing lingerie that moves with you. While regular straight stitches can snap under tension, zig zag stitches flex and stretch.
Here’s what you need to know about mastering elastic tension and seam finishing:
- Set your stitch length between 2.0-2.5mm for ideal thread tension
- Test fabric stretch by pulling gently – your stitches should stretch with it
- Choose a wider width (2.5-3.0mm) for elastic application
- Start with light pressure on elastic edges
- Use a 3-step zig zag for extra durability on high-stress areas
Working With Small Seam Allowances
Now that you’ve mastered your zig-zag stitch, let’s tackle those tiny seam allowances.
Working with micro sewing techniques in DIY lingerie requires a steady hand and sharp tools.
Keep your seam allowances at 1/4 inch or less for clean finishes on your DIY bralettes. Grab some precision cutting tools and mark your lines clearly – those narrow hemming methods will look so much better when you nail the tiny stitch control.
Creating a DIY Lingerie Pattern
You’ll discover how to transform your favorite bra into a custom pattern that fits like it was made just for you.
With just a few measurements and some careful unpicking, you’ll reveal the secrets of creating your own lingerie patterns that you can use again and again.
Finding The Right Bra to Use as a Pattern
When diving into pattern making for your first DIY bra, selecting the perfect base garment is vital. Starting with a well-fitting bra you already own saves time and guarantees your custom creation will match your body’s unique shape.
- Choose a simple bra without complex construction details – molded cups or intricate strapping can complicate the pattern-making process
- Pick a bra that fits comfortably in the band and cups, even if it’s slightly worn
- Consider using a basic bralette design for your first pattern, as they’re more forgiving and easier to replicate, which helps in creating a well-fitting bra
Unpicking and Analyzing The Bra’s Construction
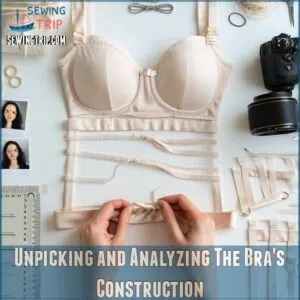
Taking apart a store-bought bra reveals its hidden construction secrets. Start your bra dissection by carefully removing each component – elastic, hooks, straps, and underwire.
Inspect how the fabric pieces connect and note the seam placement. Pay attention to the construction methods used for cups and band.
Document everything with photos or sketches – these details will guide your DIY bra tutorial journey.
Creating a Digital Pattern From The Bra Pieces
Now that you’ve carefully disassembled your bra, it’s time to digitize those pieces.
Fire up Adobe Illustrator and scan your pressed pattern pieces at their actual size.
Start by tracing the asymmetrical parts with the pen tool, then tackle the symmetrical ones by marking center points and folding.
Keep an eye out for any bumps or ridges that need smoothing—digital drafting makes these adjustments a breeze.
Adding Notches, Grainlines, and Seam Lengths
Let’s jazz up your lingerie patterns with essential markings that’ll make your sewing journey smooth sailing.
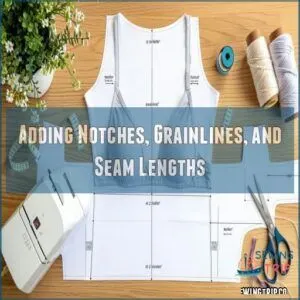
When adding notches and grainlines to your DIY bralette straps, precision matters more than you’d think.
- Mark seam allowances at key points where pieces join, typically 1/4 inch for lingerie making
- Add notch placement markers every 2-3 inches along curved edges
- Draw grainline orientation arrows parallel to fabric selvage for pattern accuracy
Sewing a Bra From Scratch
You’re about to transform your sewing space into a mini lingerie workshop where you’ll create a gorgeous custom bra that fits like it was made just for you (because it was).
With your machine threaded and workspace ready, you’ll learn how to piece together cups, bands, and elastic like a pro, turning simple materials into something that’s both beautiful and wearable.
Preparing The Machine and Workspace
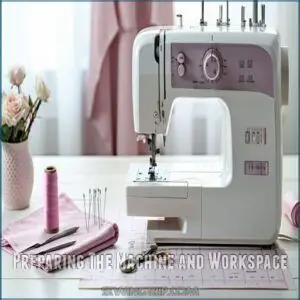
Getting your sewing station ready makes all the difference in bra making. Start by checking your machine’s tension settings and installing a new size 70/10 needle. Clean out any lint and oil the moving parts.
Here’s what your workspace needs:
| Area | Must-Haves | Nice-to-Haves |
|---|---|---|
| Machine | Thread snips, spare needles | Needle threader |
| Work Surface | Pattern weights, pins | Rotating mat |
| Storage | Thread rack, elastic organizer | Tool carousel |
Position your tools within arm’s reach – you’ll thank yourself later for having a well-organized work surface and machine!
Sewing The Bra Pieces Together
Once you’ve cut your bra pieces, lay them out in order of assembly – this’ll make your bra making journey smoother.
Match your notches carefully and pin the cups to the band, keeping fabric tension even.
For perfect seam alignment, start from the center and work outward.
Take it slow with each piece – rushing through bra piece assembly is a rookie mistake many first-timers make.
Adding Elastic and Notions to The Bra
With your bra pieces ready to go, let’s talk about adding those all-important elastic bits and notions.
Start by measuring your elastic types – you’ll need wider bands for the bottom and thinner ones for straps.
Pin your elastic slightly stretched along the edges, then use a 3-step zigzag stitch to secure it.
Remember to check your adjustable bra straps and closures before sewing – nobody wants a wardrobe malfunction!
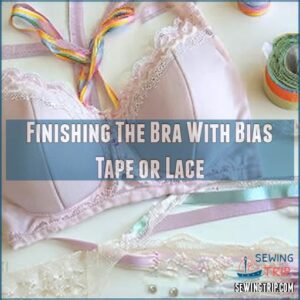
Finishing The Bra With Bias Tape or Lace
After securing your elastics, you’ll want to give your bra a polished look.
Bias tape’s your best friend here – it neatly wraps those raw edges while adding a fun pop of color.
Pin the tape along your bra’s edges, baste the layers together, and stitch it down.
For extra flair, try lace trim instead – it’ll transform your basic bralette into something truly special.
Helpful Tools for Lingerie Sewing
You’ll want to stock up on some handy tools that’ll make your lingerie-making journey as smooth as silk, from precision rotary cutters to nifty pattern weights that keep everything in place.
With a rotating cutting mat and cover stitch machine in your corner, you’ll transform delicate fabrics into stunning pieces that fit like a dream.
Using a Rotary Cutter for Accurate Cuts
A rotary cutter revolutionizes your bra making journey with clean, precise cuts that scissors just can’t match.
For your DIY lingerie sets, replace those wobbly scissor lines with smooth, professional edges.
Place your fabric flat, align your ruler, and glide the blade like you’re slicing butter.
Investing in a Rotary Cutter Tool can substantially enhance your sewing experience.
Remember to engage the safety lock between cuts – those blades mean business!
Your bralette patterns will thank you.
The Benefits of a Rotating Mat for Cutting
A rotating cutting mat is your secret weapon for precision cutting in lingerie sewing.
You’ll love how it spins smoothly as you work, letting you tackle those tricky curves and delicate pieces without shifting your fabric or stretching it out of shape.
For diy lingerie sets, this mat’s non-slip surface grips fabric perfectly while rotating 360 degrees, making your cutting efficiency skyrocket while saving precious materials.
Pattern Weights for Holding Patterns in Place
Pattern weights are game-changers when you’re working on delicate lingerie sewing patterns. Unlike pins that can leave holes in your fabric, these clever tools keep everything perfectly still while you cut.
Here’s what makes them essential for bra making:
- They won’t damage delicate fabrics like silk and lace
- You’ll cut pieces more accurately
- They’re faster than pinning
- They work great with both paper and fabric patterns
The Convenience of a Cover Stitch Machine
While pattern weights keep your pieces steady, let’s talk about a game-changer for your diy lingerie sets – the cover stitch machine.
If you’re tired of popped stitches on stretchy fabrics, this tool’s your new best friend.
Perfect for hemming techniques and elastic bindings, it creates professional-looking finishes that’ll make your handmade bras look store-bought.
You can find a Cover Stitch machine designed for various sewing tasks.
Plus, it maintains stitch quality even when your fabric stretches.
Advanced Lingerie Sewing Techniques
You’ll master the art of working with luxurious silks and delicate laces while creating stunning couture-inspired lingerie pieces that fit like a dream.
Whether you’re adding intricate button loops or crafting custom straps, these advanced techniques will transform your handmade intimates from simple to simply spectacular.
Working With Silk and Lace
Now that you’ve got your tools ready, let’s tackle silk and lace – those dreamy fabrics that’ll take your lingerie from basic to breathtaking.
Here’s your game plan for working with these delicate materials:
To achieve professional results, understanding sewing silk techniques is essential for handling delicate fabrics.
- Test your silk fabric care method on a scrap first – wash cold and air dry to prevent shrinkage
- Pin lace trimming within seam allowances to avoid visible holes
- Use a fresh needle and decrease stitch length when sewing delicate fabrics
- Layer tulle fabric embellishments between silk pieces for a professional finish
Creating a Couture-Inspired Lingerie Design
Creating couture-inspired lingerie lets you channel your inner designer with luxurious details.
Start with custom pattern drafting to guarantee a perfect fit, then elevate your design with hand-finishing details and lace appliqué techniques.
| Element | Technique | Effect |
|---|---|---|
| Silk | French seams | Invisible joins |
| Lace | Hand appliqué |
Adding Details Like Button Loops and Straps
Moving beyond basic design, let’s add those special touches that make your lingerie truly unique.
Button loops and DIY bralette straps aren’t just pretty – they’re game-changers for fit and style.
To create adjustable straps, fold elastic strips lengthwise, stitch, then thread through slider hardware.
For button loops, use narrow fabric tubes or elastic cord, securing them with seam reinforcement at stress points.
Fitting a Changing Figure in Lingerie Sewing
Regularly adapting lingerie patterns to your changing figure guarantees comfort and confidence. When measuring, take front and back measurements separately for spot-on sizing charts and fit adjustments.
- Master the art of "reading wrinkles" in your test garments
- Learn to identify those pesky shoulder fit issues
- Tackle the mysterious relationship between bust points and armholes
- Perfect your princess seamline techniques
- Embrace your body’s unique changes with custom-made bras
Your measuring techniques should account for figure fluctuations – start by checking shoulder slope and adjusting bra patterns for beginners accordingly.
Frequently Asked Questions (FAQs)
What is ‘DIY lingerie’?
Just like crafting a signature dish, DIY lingerie lets you create custom undergarments that fit perfectly.
You’ll learn to sew, design, and customize intimate wear using patterns, fabrics, and basic sewing techniques.
Can You Make your own lingerie?
You can absolutely make your own lingerie with basic sewing skills and the right materials.
Start with simple bralettes or underwear using stretch fabrics, following beginner-friendly patterns that guide you through each step.
Can lingerie make a girl a DIY girl?
Making lingerie transforms crafting skills into empowering self-expression.
Through sewing intimate pieces, women develop confidence, creativity, and practical abilities that extend beyond the sewing room into other DIY projects and personal growth opportunities.
This process allows women to develop confidence and various skills.
How can I spice up my lingerie wardrobe?
Don’t wait for a special occasion to feel fabulous.
Try crafting a DIY bralette with stretchy lace, transform old silk garments into matching sets, or experiment with unique designs like wrap-around styles and sporty cuts.
Do you need sewing experience to make lingerie?
You can start with beginner-friendly bralette patterns that require minimal sewing skills.
Stick to simple projects using stretchy fabrics and basic stitches – you’ll learn essential techniques while creating beautiful pieces you’ll love wearing.
What materials do you need to make lingerie?
For making lingerie, gather stretch fabrics like silk or cotton-blend knits, elastic bands, closures, and decorative elements.
Essential tools include sharp scissors, fine pins, a sewing machine with stretch stitch capabilities, and pattern paper.
How do I choose the right fabric?
Gone are the days of randomly picking pretty fabrics!
Test softness by gliding across your wrist, stick to natural fibers like silk, and shop from credible retailers.
Quality matters more than looks alone.
What types of elastics work best?
Pick plush-band elastic for comfort against skin, fold-over elastic for clean edges, and clear elastic for invisible support.
Use wider elastics (½-¾ inch) for better stability and thinner ones for delicate looks.
How can I modify a pattern for fit?
Start by measuring your bust, underbust, and waist. You’ll want to add or subtract inches where needed, keeping proportions balanced. Make a muslin test piece before cutting your final fabric.
What are some common sewing mistakes to avoid?
Skip pinning through elastic bands or lace edges – they’ll pucker.
Watch your seam allowances, and always test your needle size on scrap fabric.
Remember to backstitch at starts and ends.
Conclusion
You’re ready to rock your own handmade intimates! With these tutorials DIY lingerie techniques under your belt, you’ll save money while creating pieces that actually fit your unique shape.
No more wrestling with mass-produced sizes or settling for bland designs. From basic bralettes to intricate masterpieces, you’ve got the skills to craft beautiful, comfortable lingerie that makes you feel amazing.
So grab your fabric, fire up that sewing machine, and let your creativity shine through every stitch.

