This site is supported by our readers. We may earn a commission, at no cost to you, if you purchase through links.
 Ready to make your own corset? It’s a task that requires skill and precision, but with the right information you can create something beautiful and unique. Don’t be intimidated – this step-by-step guide will help you learn how to make a corset from scratch.
With some patience, an eye for detail, and of course the right materials, even beginners can create stunning pieces like experienced professionals.
So if you’re ready to start making magical garments of power, let’s get started!
Table Of Contents
- Key Takeaways
- Materials and Fabric Choices
- Understanding Boning
- Step-by-Step Corset Making
- Creating a Custom Corset With Duct Tape
- Purchasing Supplies and Making Adjustments
- Making a Muslin for Fitting
- Step-by-Step Corset Making: Final Fabric
- Step-by-Step Corset Making: Finishing Touches
- Styling and Reveal
- Completed Corset
- Conclusion
Key Takeaways
- Prepare high-quality corset fabrics and choose a suitable corset pattern.
- Position steel boning strategically for support and create boning channels.
- Follow a step-by-step construction process and finish edges professionally.
- Customize the corset using measurements, fittings, and personalizations.
Materials and Fabric Choices
For your corset, choose high quality fabrics. Coutil or satin are traditional options, but for beginners, a linen cotton canvas blends durability and softness ideally. When searching Etsy for corset patterns, look for overbust, underbust, or hybrid styles to suit your project.
Varying the sentence structure and length will make the writing sound more natural and less robotic.
Fabrics for Corsets
You’ll want to start with traditional coutil or modern options like cotton, linen, and satin for corset fabrics that are both structured yet supple against your skin. Consider cottons like linen or canvas for their durability and breathability. For outer layers, choose smooth, glossy satins or taffetas.
Lighter linens work well for linings. With cost, durability, texture and style in mind, you can find the perfect fabric match.
Finding the Right Corset Pattern
Choose a corset pattern perfect for you, like an artist selecting their brush. Consider fabric types and boning placement for your desired result. Add a modesty panel or lining. Use waist tape for stability and comfort. Whether drafting or using a custom pattern, finding the right one makes your dream corset.
Adjust it to your shape. Focus on details. The right pattern fits you beautifully.
Corset Pattern Sources
Browse Etsy for beginner-friendly corset patterns. With endless options for overbust and underbust styles, Etsy offers patterns for all skill levels. From simple corset designs to ornate Victorian-inspired masterpieces, Etsy vendors provide patterns in custom sizes and unique designs.
Peruse the pattern descriptions to find sizes and styles suited to your figure. Read customer reviews to assess fit and quality before purchasing a PDF download.
Understanding Boning
When choosing materials for constructing your corset, understanding boning is essential. Plastic and steel are the two main options, each offering benefits in flexibility or durability, and you’ll need to create boning channels either directly sewn or as separate fabric tubes to house the boning and provide structure.
Types of Boning (plastic Vs. Steel)
Spanning your corset with plastic bones allows for flexible movement, while steel bones shape an hourglass silhouette.
- Plastic boning allows you to bend and move freely.
- Steel boning provides a rigid structure for that dramatic corset shape.
- Choose plastic for a costume corset and steel for waist training.
Combine both types for the best of both worlds – some flexibility with structure in the right places.
Position the steel bones at the center front, center back, and sides for support.
Test what works for your body and preferences. With thoughtful bone choices, you’ll achieve your ideal corset fit and function.
Boning Channels
After sewing the panels together, you’ll house the boning in channels. Channels can be either directly sewn into the fabric or created with separate fabric tubes. Boning channel techniques vary depending on your preference and corset style. For steel bones, straight bones are commonly used and can be inserted directly into a seam allowance.
They can also be sandwiched between two layers of fabric. Spiral bones are more flexible and require their own separate channels to allow for movement. When sewing boning channels, it’s important to use sturdy materials that can withstand pressure without tearing or fraying.
Placing boning channels evenly along both sides of each panel ensures proper support throughout the corset structure.
Step-by-Step Corset Making
Armed with your corset pattern pieces, you’re ready to begin constructing your corset. First, carefully cut out the fabric panels according to your pattern. Then, sew the pieces together and press them well before adding boning and channels.
Finally, finish off the edges with tidy bias tape. Be sure to check for any mistakes in the cutting or sewing and correct them as you go to ensure your corset pieces fit together properly.
Cutting the Fabric
To cut the fabric, measure and mark the pieces according to your chosen corset pattern. Trace the pattern onto the fabric with care, using chalk for darker fabrics or a tracing wheel and paper for lighter ones.
- The outer layer pieces, cut on the bias for stretch and drape.
- The inner layer cut on the straight grain for strength.
- The interfacing pieces that provide structural support.
With precision and foresight, transform the flat fabric into the three-dimensional form of your custom corset.
Sewing the Panels Together
Iron your panels with steam before sewing for a smooth finish. Align the panels precisely and pin them, matching seam lines and markings. Use a 5/8 seam allowance and stitch carefully. Press seams open or to one side. Your precision in stitching and pressing results in a flawless corset that fits your form wonderfully.
Adding Boning and Channels
Add boning and channels to provide structure and support, ensuring a well-fitted corset that accentuates your figure. Sew fabric tubes to house the boning, aligning them with the seams. Insert plastic or steel bones for rigidity.
Space them closely for maximum shaping. Hand-stitch channels directly to the interior fabric for a couture finish. Be mindful of the grain line when cutting. A boned muslin finalizes the fit. Set grommets at the back closure.
Finishing Edges With Bias Tape
Once the key bones are in place, lovingly caress your labor of love with bias tape, gently wrapping the rough edges to protect tender skin.
- Choose bias tape that matches or contrasts with your corset fabric.
- Fold and press the bias tape before sewing it onto the edges.
- Start by pinning one edge of bias tape to an edge of your corset panel.
- Sew along the fold line on top of the bias tape, making sure all raw edges are enclosed.
- Keep doing this until all edges are neatly finished.
Now that you’ve mastered finishing touches with bias tape techniques, your corset’s ready for its grand debut!
Creating a Custom Corset With Duct Tape
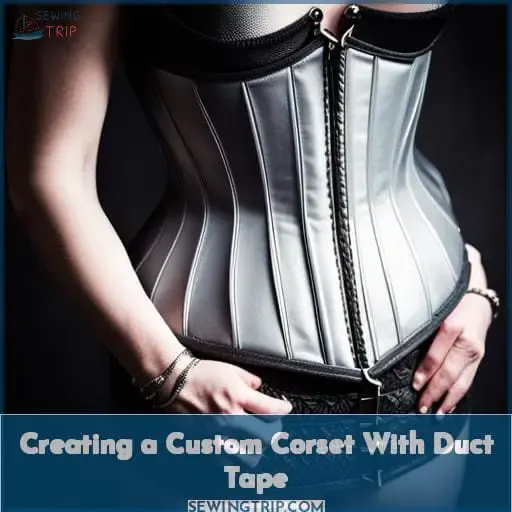
Making a custom corset that fits your unique measurements perfectly is an achievable DIY sewing project. To create a duct tape custom corset pattern, you’ll follow a tutorial, make a form of your torso, draft a paper pattern from the duct tape pieces, and adjust the measurements for gap and reduction.
Creating a duct tape form of your torso allows you to design a corset pattern precisely tailored to your body’s contours. After drafting a paper pattern using the measurements from the duct tape mold, you can tweak the dimensions to create your desired shape and fit.
Taking care to accurately transfer the customized measurements from the duct tape cast to the paper pattern is crucial for achieving a well-fitted corset. With some clever use of duct tape and pattern drafting, you can sew a corset that hugs your curves in all the right places.
Reasons for Making a Custom Corset
Uncommon obstacles prevent proper pattern positioning. Reasons for crafting your own corset include unmatched vertical lengths, thriftiness, and unusual body shapes unaccommodated by ready-made designs.
Customizing a personalized fit enables creative expression through contemporary waist cinching tailored just for you.
Following a Duct Tape Tutorial
Lucy from Lucy’s Corsetry carefully creates a custom duct tape form by following YouTube’s tutorial. First, mark the center front, center back, and waistline on the duct tape form. Next, determine the panel width and number based on your desired silhouette.
Then, test different seam shapes with sharpies to find what works best. After that, draft a paper pattern using the measurements from the duct tape form. Finally, purchase boning, grommets, a grommet setter, and laces to complete your DIY corset project.
Drafting the Paper Pattern
You’ll want to carefully transfer those duct tape shapes onto paper to draft your initial pattern pieces. Take your time to meticulously sketch each panel, marking the seam allowances. Consider design variations like adding grommets or using spiral lacing.
Make small adjustments to the waist and hip measurements for comfort. Record all changes to the pattern for future reference. Play with the boning channels, experimenting with straight versus spiral shapes before cutting the final fabric.
Making Pattern Adjustments
After drafting the paper pattern, you’ll need to make adjustments to the measurements to allow for lacing gaps and waist reduction. Carefully alter the duct tape pattern pieces to be slightly smaller than your actual measurements.
This ensures a snug custom fit when laced up, with room for movement. Mark adjustments clearly on the drafts. Record all modifications to recreate the perfectly fitted stomacher and hourglass shape next time.
Fitting is a meticulous process, but worth the effort to achieve your ideal sculpted bust and cinched waist.
Purchasing Supplies and Making Adjustments
After creating your duct tape corset form, you’ll need to purchase supplies like plastic boning, grommets, and laces to construct your corset. When drafting the final pattern, remember to adjust the measurements to be smaller than your natural waist to allow for waist reduction and a lacing gap.
Buying Boning, Grommets, and Laces
While shopping for grommets, you realize that the hard work of pattern drafting was more enjoyable than picking out grommet colors. As you browse eyelet options, thoughts turn to your corset’s structure. Will plastic boning provide enough support? Should lacing run the full length or stop at the hips? Underbust styles require careful engineering.
You ponder historical methods as you select decorative outer layers. This project connects you to generations of artisan craftswomen.
Adjusting Measurements for Waist Reduction
Achieving the perfect waist reduction is essential for creating a custom fit that accentuates your curves and provides optimal comfort.
- Test duct tape tension.
- Leave room for the boning gap reduction.
- Refine through the muslin adjustment process.
- Consider rib compression and reduction technique.
- Allow space at the bottom facing.
When making historical corsets, renowned corset makers would hand stitch each piece with care.
Preparing for Significant Waist Reduction
You’ll want to allow at least 4-6 inches of waist reduction for a dramatic silhouette, as the average natural waist reduction is only around 2 inches. When preparing for significant waist reduction, focus on the fit through the hips and ribs more than achieving the smallest waist possible.
Here are some tips for safely achieving waist reduction:
Reduction Amount: 2-3 inches
Preparation Tips: Wear a well-fitted corset 1-2 hrs, 2-3x/week
Reduction Amount: 3-5 inches
Preparation Tips: Wear a well-fitted corset 2-4 hrs, 3-5x/week
Reduction Amount: 5-7 inches
Preparation Tips: Wear a well-fitted corset 4-6 hrs, 5-6x/week
Allow time for your body to adapt gradually. An improved fit and your comfort should take priority over numbers.
Keeping Records of Pattern Alterations
To ensure the perfect fit, keep detailed records of any adjustments you make to your pattern along the way. Document each alteration methodically, noting the date, pattern piece, adjustment location, adjustment type, and adjustment amount.
Track top facing width changes, simplified boned bodice contour shifts, and adjustments for that big night out evening dress or historical recreation.
Making a Muslin for Fitting
Making a muslin mock-up of your corset allows for test fittings before cutting into the final fabric. Using thread to temporarily lace the mock-up, you create boning channels and insert bones, making adjustments based on the review of the fit before moving on to the real corset.
Using Thread to Temporarily Lace Up the Muslin
Go ahead and loop your threaded needle through the eyelets on your test corset, cinching it up to check the fit before you commit to boning.
- Check overall fit and make adjustments
- Mark areas needing alteration
- Simulate boning structure
- Perfect panel shaping
- Practice lacing techniques
This essential step gives you the chance to perfect your muslin’s fit before cutting into fashion fabric. Making a mockup prevents wasted time and costly mistakes when constructing your corset.
Creating Boning Channels in the Muslin
Next, pinch together fabric for channels, and insert mock-bones through the hand-crafted corset’s skeleton. Sew evenly spaced straight seams into the muslin lining to create vertical boning channels. Insert zip ties, straws, or cable ties as mock bones before temporarily lacing the muslin.
Make channel width adjustments for more comfortable mock bone insertion. Refine the muslin’s overall shape and fit by pinching, smoothing, and aligning seams flat.
Reviewing Muslin Fittings and Adjustments
After creating the boning channels in your muslin, it’s time to review the fittings and make any necessary adjustments. Did you achieve a satisfactory fit, or is further tweaking needed? Conduct successive muslin fittings to assess areas needing refinement, marking adjustments directly on the pattern.
Closely evaluate gaps, tightness, and alignment, making small incremental changes to achieve the right silhouette. Consider drape, appearance, and comfort when making alterations before approving the fit and cutting the final fabric.
Patience is key, along with maintaining meticulous records and taking an iterative approach for an ultimately liberating, well-fitted corset.
Step-by-Step Corset Making: Final Fabric
To achieve a satisfactory fit for your corset, you’ll need to carefully sew the outer fabric to the lining fabric. This step ensures that both layers of fabric are securely attached and will provide structure and support.
Once the fabrics are joined, you can proceed to sewing the straps and top facing before adding eyelets for lacing.
Achieving a Satisfactory Fit
Get those minor kinks worked out through additional muslin fittings before moving forward, as patience is key for accomplishing your custom corset dreams. When refining the fit, use common tailoring techniques like pinching in extra fabric and marking adjustments with chalk.
Consider how boning and lacing impact sizing. With a few fit refinements, you’ll achieve your ideal shape for showstopping style.
Sewing the Outer Fabric to the Lining Fabric
Before the heavy lifting begins, stitch your dream’s outer shell to its silky lining so you may slip inside its embrace. Pin your outer fabric and lining together with right sides facing, matching notches and raw edges.
Baste with long running stitches just inside the seam allowance. Machine sew using your preferred corsetry stitch. Press open the seams. Your corset’s lining and outer fabric are now united as one.
Sewing the Straps and Top Facing
Next, you’ll sew the straps and top facing to the corset for a finished look and secure fit.
- Pin the straps in place along the neckline edge.
- Topstitch the straps using a 1/2-inch seam allowance.
- Attach the top facing, right sides together, along the neckline seam.
- Clip curves and notch corners for a smooth finish.
- Turn the facing to the inside and press well.
With the straps and facing attached, your custom corset is complete and ready to wear.
Adding the Eyelets
Now drive the grommets through the patterned fabric for that custom corset closure. With care, prepare the area and mark where the holes should be punched. Firmly position each grommet and hammer it in place, setting the eyelets perfectly.
Finish by lacing up the corset, admiring your handiwork in creating this fabulous, figure-forming garment.
Step-by-Step Corset Making: Finishing Touches
Let’s bring your custom corset to life with finishing touches. Carefully close the bottom edge by trimming away excess fabric, line it up perfectly, then sew it shut to encase the boning ends. Add a facing back there too for a clean finish and flip it over to topstitch that down neatly.
Now it’s time for those final details like bias tape edging, grommets and laces in the back, and any other personal touches you desire to make this corset truly unique.
Sewing the Bottom Facing
While carefully feeding the bottom edge through your sewing machine, remember to frequently straighten any tangles to ensure the stitches stay parallel. As you attach the bottom facing, take care to catch the outer fabric and lining together in your stitches for a tidy finish along the hem.
Avoid visible gathering by gently easing in any fullness and press the finished edge for a crisp look. Choose between hand-sewing the facing or using a machine edge stitch to secure it in place. Experiment with finishing techniques like adding trim or binding to personalize your corset’s bottom edge.
Sewing Down Facing
To add a polished touch to your creation, sew down the facing fabric along the bottom edge. Use sharp needles and polyester thread for sturdiness. Lay the facing right sides together along the corset’s lower edge.
Sew with a 1/4 seam allowance, leaving a 2 gap at center back. Trim seam allowances, clip curves, and understitch. Turn the facing right side out through the gap and press. Slipstitch the gap closed. Topstitch the facing 1/8 from the edge for a couture finish. Your custom duct tape corset now has clean lines and a professional look.
Adding Final Touches and Details
Adding lace trim and rhinestones along the top edge puts a feminine finishing touch on your one-of-a-kind corset, bringing your vision to life. Adorning your corset with delicate lace and sparkling gems makes a dramatic statement.
French Alençon lace and Swarovski crystals lend an elegant, glamorous air. Arranging the embellishments in an artistic design that reflects your personal style transforms the corset into a wearable work of art.
Dainty floral motifs or bold Art Deco patterns can reflect your unique aesthetic. Final embellishments like beading and ribbons complete your couture corset with bespoke beauty.
Styling and Reveal
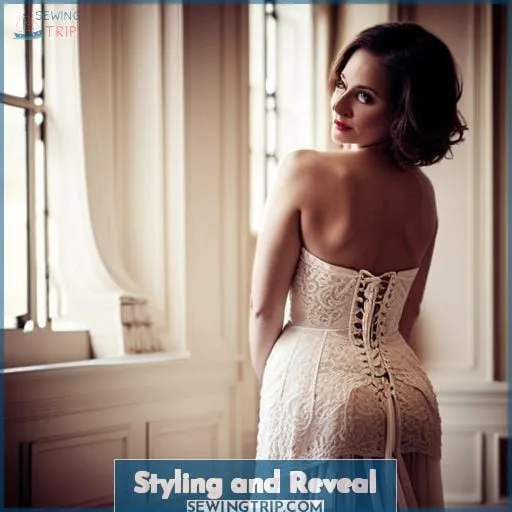
Sewing the stomacher is a key finishing touch for your corset. Carefully pin and hand-sew the stomacher to cover the lacing gap, while also ensuring it can still easily open and close. With a stomacher in place and laces threaded through the grommets in the back, your corset is complete.
Making the Stomacher
Complete the stomacher for a prim and proper finish. Channel Marie Antoinette with layers of decadent satin and sumptuous embroidery. Adorn the central panel with metallic accents, glimmering jewels, and intricate beading for an opulent persona.
Affix your stomacher masterpiece between the corset front lacing to bestow an imposing presence. Drape sheer organza at the neckline, evoking Versailles’ excess with each frothy flutter. Sculpt into the boned bodice, reigning supreme. Corseted curves caress your form as the stomacher’s splendor captivates all who see it.
Styling the Finished Corset
Lace up your corset over a period bodice and voluminous skirt for an enchanting historical look. Complete your ensemble with leather accessories like gloves and boots, a ruffled tulle skirt, and romantic curls framed by a flower crown headpiece.
Go for vintage makeup looks with a bold red lip, winged eyeliner, and brushed-up brows. Feel regal, powerful, and free as you step into this exquisite costume. Revel in its delicate femininity while staying true to your fierce spirit within.
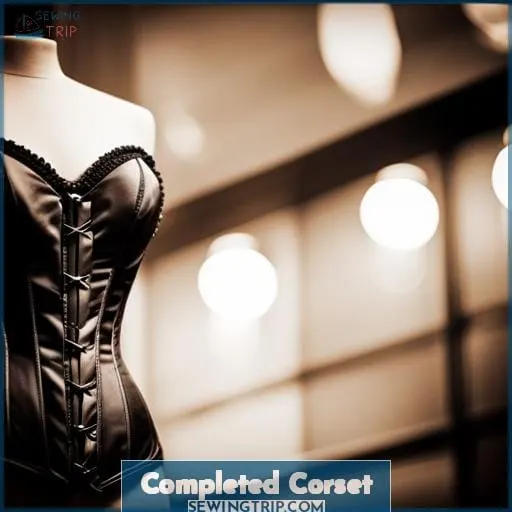
Completed Corset
Seeing yourself decked up in the finished creation, you’ll swell with pride at crafting this accessory by hand. Gliding the corset over your body, you’ll cinch it little by little, relishing the gradual embrace.
Testing its limits with deep breaths, you’re pleased by the flexible yet formidable hold.
Adding a petticoat, the layers transform into a regal ballgown silhouette. Decorating with feathers or rhinestones, your embroidery skills personalize it further.
Slipping on gloves, you become a mysterious Victorian lady. Lacing it up with ribbons, it’s a pirate’s bustier.
However you style it, the corset is versatile and alluring. Most of all, it fits you flawlessly because you crafted it yourself.
Whenever you don this custom couture, you’ll exude confidence and creativity.
Conclusion
Making your own corset is a rewarding experience and a great way to add a personal touch to your wardrobe. With a few materials, some patience, and a step-by-step guide, you can create a corset that is fitted exactly to you.
Whether you opt for traditional coutil, modern linen, or a custom pattern made with duct tape, you’ll be able to produce a corset that is both comfortable and fashionable.
By taking the time to thoroughly research the materials, boning, and pattern, and by adjusting your pattern for a perfect fit, you’ll end up with a beautiful corset that you can be proud of.

