This site is supported by our readers. We may earn a commission, at no cost to you, if you purchase through links.
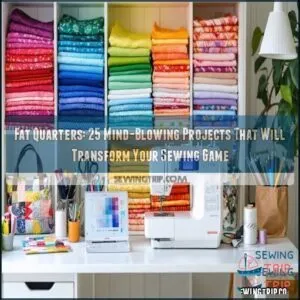
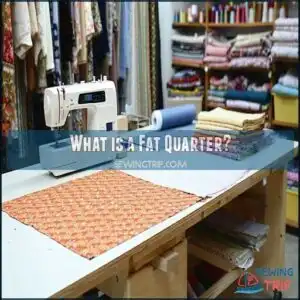
These are quarter-yard cuts of fabric, but instead of a long, narrow strip, you get a square(ish) piece, typically 18" x 22".
This clever shape makes them perfect for projects that need variety without a lot of waste.
Whether you’re stitching up quilt blocks, tote bags, or quick home decor items, fat quarters are the go-to.
They’re also a dream for anyone overwhelmed by fabric choices—you can snag them in coordinated bundles.
Ready to sharpen your skills? Fat quarter projects are where creativity meets practicality!
Table Of Contents
Key Takeaways
- You can use fat quarters for endless projects like quilts, tote bags, coasters, and baby accessories, all while minimizing fabric waste.
- Organize fat quarters by folding or rolling them to prevent creases and make your stash easy to access for future projects.
- Fat quarters offer wide creative possibilities due to their 18”x22” size, making them ideal for cutting larger shapes and coordinating patterns.
- Coordinated fat quarter bundles simplify fabric selection, saving time and ensuring your projects look polished and cohesive.
Fat Quarter Basics
You’ll find that a fat quarter, measuring approximately 18" x 22", offers more versatile cutting options than traditional quarter-yard cuts, making it the perfect solution for quilters and crafters who want variety without buying full yardage.
Fat quarters are the ultimate fabric hack—versatile, budget-friendly, and perfect for quilters who crave variety without excess yardage.
These pre-cut fabric pieces, originally popularized in quilt shops during the 1980s, help reduce fabric waste while giving you enough material to create everything from coasters to tote bags with just one simple cut, which is a great way to achieve variety without excess.
What is a Fat Quarter
A fat quarter is quilting’s little secret weapon.
Unlike a standard quarter yard that measures 9" x 44", a fat quarter is cut differently—measuring approximately 18" x 22".
This fabric treasure began as a smart solution for quilters who needed wider pieces.
FQ advantages include more usable area for cutting larger shapes and fewer seams in your projects.
Fat Quarter Sets offer coordinated prints that make project planning easier, and provide a smart solution.
Fat Quarter Sizes and Shapes
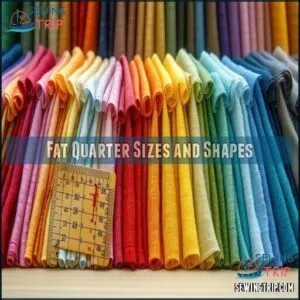
Typically, fat quarters come in standard dimensions that vary slightly depending on fabric width.
When working with these precut dimensions, remember:
- Traditional fat quarters measure approximately 18" x 22" (45cm x 55cm for metric conversions)
- Wide-width fabrics might yield fat quarters closer to 20" x 22"
- Fat Quarter Sets often maintain consistent sizing for project suitability
Shape limitations stem from cutting variations, but most quilting patterns accommodate these standard dimensions perfectly, which is why standard dimensions are important, and understanding fabric width is crucial.
Benefits of Using Fat Quarters
Now that you understand the dimensions, let’s talk about why fat quarters will become your new sewing best friend.
You’ll love the cost savings when purchasing these precut bundles. With fat quarters, you’ll enjoy incredible fabric variety without buying full yardage.
Their unique shape offers remarkable project versatility – perfect for countless patterns and tutorials. Many quilters swear by Fat Quarter Sets because they provide coordinated fabrics that eliminate guesswork while maximizing creative possibilities.
They also simplify fabric selection, saving valuable time for quilters.
Reducing Fabric Waste With Fat Quarters
Using fat quarters helps you stretch your fabric stash while minimizing waste.
Stretch your fabric stash with fat quarters—they’re the secret to maximum creativity and minimal waste!
Their size is perfect for Scrap Fabric Projects and Creative Repurposing Ideas, making every inch count.
Here’s how they reduce waste:
- Efficient Cutting Techniques: Maximize fabric use with minimal scraps.
- Leftover Fat Quarters: Ideal for small projects or accents.
- Minimal Waste Quilting: Perfect for easy fat quarter quilt patterns.
Choosing Fat Quarters
Choosing the right fat quarters can feel like picking candy from a jar—exciting but overwhelming.
By focusing on colors, patterns, and project needs, you’ll make selections that bring your creative vision to life.
Selecting Fat Quarters for Quilting Projects
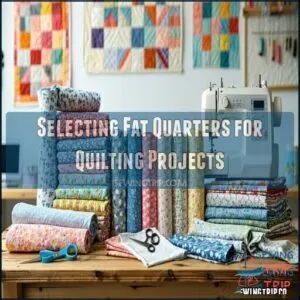
When picking fat quarters for quilting, think about fabric weight and fiber content—cotton works best for most quilt patterns.
Match color palettes and print scale to your project’s vibe; bold prints pop in modern quilts, while subtle tones suit classic designs.
Always consider project suitability, ensuring your fat quarter choices align with the pattern’s needs for a polished finish.
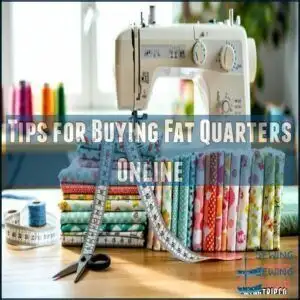
Tips for Buying Fat Quarters Online
Shopping online for fat quarters? It’s a breeze with a few tips! Prioritize sellers with solid reputations and clear return policies.
Check fabric quality through reviews and photos to avoid surprises. Compare shipping costs to snag the best deal. Finally, explore bundle variety—coordinated sets save time and spark creativity.
Many quilters appreciate the larger square cuts available from fat quarters.
- Verify dimensions to guarantee accurate cuts.
- Read reviews for color accuracy.
- Check bundle options for diverse fabric prints.
- Compare prices across multiple stores.
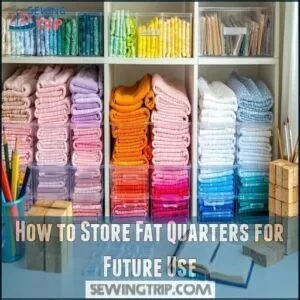
How to Store Fat Quarters for Future Use
After snagging those perfect fat quarters online, keeping them organized is key.
Fold them neatly to prevent creases, then stack by color or pattern.
Use clear containers for easy visibility and add silica packs for humidity control.
Protect against moths with cedar blocks, and track your stash using a simple inventory system.
Your precuts deserve VIP treatment!
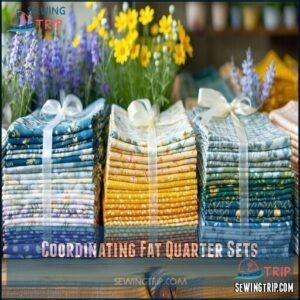
Coordinating Fat Quarter Sets
Think of coordinating fat quarter sets as the ultimate cheat sheet for quilting and fat quarter projects.
These bundles often feature matching color palettes, print scales, and fabric types, making them perfect for themed creations.
Whether you’re tackling a tote bag or a quilt, theme bundles save time and guarantee project suitability.
Plus, they’re a dream for pattern-matching perfectionists! These bundles also simplify fabric selection for many projects.
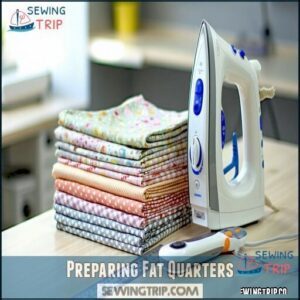
Preparing Fat Quarters
Getting your fat quarters ready is the first step to sewing success, and it’s easier than you think.
By ironing out creases and squaring up the edges, you’ll save yourself headaches later and guarantee every cut is spot on, which leads to sewing success.
Why Ironing Fat Quarters is Important
Ironing fat quarters isn’t just busywork—it’s the secret to project success. Those pesky creases from bundling? They’re stubborn, thanks to fabric memory.
Pressing your precuts smooths everything out, ensuring accuracy when cutting and sewing. A wrinkle-free start gives your projects a professional finish, whether it’s a quilt or a pouch.
For ideal results, consider adjustable heat settings based on the fabric type. Skip this step, and you’re asking for uneven seams!
How to Iron a Fat Quarter for Best Results
To iron fat quarters perfectly, set your iron to the right temperature for the fabric type—cotton often needs medium-high heat.
Use steam sparingly to avoid distorting precuts. Press, don’t slide, to keep edges sharp and prevent creases.
A clean ironing board helps, too. Consider fabric pressing options for ideal results.
Treat ironing like a quick workout—focused, efficient, and rewarding when those creases vanish!
Removing Creases From Fat Quarters
Creases in fat quarters can be stubborn due to fabric memory, but they’re no match for these tips:
- Use steaming techniques—your iron’s steam setting works wonders.
- Try alternative methods like a damp cloth over the fabric while pressing.
- Prevention tips? Store fat quarters rolled, not folded, to avoid deep creases.
A little fabric care goes a long way!
Squaring Up Fat Quarters
Straight edges make sewing smoother, so squaring fat quarters is key.
Lay fabric on a cutting mat, align selvages, and spot any wonkiness.
Use a ruler (size matters!) and rotary cutter for accurate measurements.
Glide the iron first for crisp cuts.
A quality mat guarantees consistent, clean cuts.
Squaring challenges?
Hold fabric by selvages to check alignment—it’s like taming unruly hair with precision tools!
Sewing With Fat Quarters
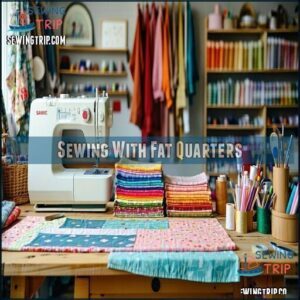
Sewing with fat quarters lets you turn small fabric cuts into big creative wins, whether you’re piecing together a quilt or crafting a handy tote bag.
These versatile fabric squares are perfect for experimenting with patterns, reducing waste, and tackling projects that are as fun as they’re functional, making them ideal for creative wins.
Cutting Accurate Rectangles From Fat Quarters
Cutting fabric accurately from fat quarters doesn’t have to feel like rocket science.
Start with a quality cutting mat and a sharp rotary cutter for clean edges. Align your ruler carefully, keeping an eye on the fabric grain for precision.
Iron out any stubborn creases beforehand—trust me, they’ll mess with your measurements. Accurate measurement techniques make all the difference!
Assembling a Quilt Top With Fat Quarters
Creating a quilt top with fat quarters is like solving a fun puzzle. Follow these steps:
- Arrange blocks in a Column Layout for balance.
- Verify a consistent Seam Allowance when sewing.
- Check Block Orientation to match the fat quarter pattern.
- Use Joining Methods like chain piecing for speed.
Fat quarters offer more usable width compared to standard cuts.
- Add Borders/Edging to frame your quilt project beautifully.
Sewing Together Fat Quarter Blocks
Piecing fat quarter blocks takes practice! Start by planning your block arrangement carefully; it’s like solving a colorful puzzle.
Use consistent seam allowances for smooth joins, and focus on joining methods that match patterns precisely.
Pressing blocks after sewing keeps everything flat and neat. Follow sewing tutorials to perfect this satisfying fat quarters sewing project.
Your quilted masterpiece begins here!
Quilting Techniques for Fat Quarter Quilts
Mastering quilting with fat quarters starts with smart cutting strategies and efficient layouts.
Use fabric combinations that shine in an easy fat quarter quilt. Focus on block construction, managing seams carefully for smoother joins.
Follow a quilting tutorial like Suzy Quilts’ Thrive pattern for guidance. These techniques transform simple fat quarter projects into vibrant, detailed quilts perfect for showcasing your creativity.
Fat Quarter Projects
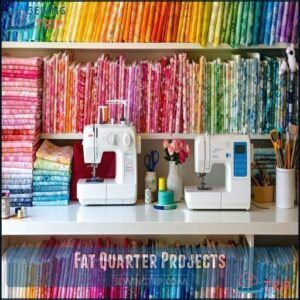
Fat quarter projects let you turn small fabric cuts into practical and creative items, from bags to home decor.
With just a few simple steps, you’ll see how these pre-cut pieces can inspire endless sewing possibilities.
Tote Bags and Accessories
A fat quarter can turn into a stylish sewing project, like a Picnic Tote or trendy accessories.
Tote bag styles vary based on fabric choices and handle options. Add interfacing usage for durability, and try accessory embellishments to personalize your design.
- Use bold patterns or solids for impact.
- Mix fat quarters for unique designs.
- Sew sturdy handles from scraps.
- Experiment with pockets for usability.
Baby and Home Projects
Whether you’re sprucing up nursery decor or tackling home organization, fat quarters are perfect for baby projects and home decor.
Craft adorable ruffle diaper covers, sewn with ease, or create DIY gifts like a secret pocket pillow.
For playroom ideas, try a doll tent or fabric trays for small toys—saving your fabric scraps never felt so rewarding!
Fat Quarter Quilt Tutorials
If you’ve ever wanted to turn fat quarters into a masterpiece, easy fat quarter quilts are your ticket.
Beginner patterns, like the Fat Quarter Mixer, make magic with large prints, while lap quilt designs offer cozy results.
Printable tutorials guide every stitch. Feeling festive? A Christmas quilt transforms holiday fabric into cheer.
Remember, quilt backing options complete your creation.
Drawstring Bags and Pouches
Drawstring bags and pouches are fuss-free sewing projects perfect for beginners or seasoned pros.
Experiment with fabric choices to match any occasion, and use lining techniques for a sturdy finish.
Use closure options like cords or ribbons, and play with size variations and embellishment ideas to make them versatile DIY projects.
From a compact pouch to a spacious Drawstring Backpack, their size variations and embellishment ideas make them versatile DIY projects that never go out of style.
DIY Coasters and Other Small Projects
Ready for fast, fun fabric crafts? Create fabric coasters and other small DIY projects using fat quarters.
These easy projects make perfect gift ideas and are ideal for using fabric scraps!
Here’s a quick list:
- Fabric coasters: Layer Coaster Materials like batting for absorbency.
- Jewelry trays: Small, stylish, and customizable.
- Lavender sachets: Freshen drawers effortlessly!
Frequently Asked Questions (FAQs)
What is a Fat Quarter project?
A stitch in time saves nine.
A Fat Quarter project uses a pre-cut fabric piece (18"x22") for crafts like drawstring bags, quilts, or coasters—offering endless creative possibilities without needing full yards of fabric.
What do you need for a Fat Quarter project?
For a fat quarter project, you’ll need fat quarters (obviously), sewing essentials like needles, thread, scissors, and possibly batting or lining.
Add closures like buttons or zippers, and don’t forget a sewing machine for precision.
What can I make with a fat quarter?
Picture a treasure chest of possibilities—you can create drawstring bags, quilts, coasters, baby bibs, or tote bags.
Fat quarters inspire endless crafts, blending creativity and practicality, perfect for gifts or personal projects, making them a great way to explore your practicality.
Can you use Fat quarters in a bag?
You can absolutely use fat quarters for bags!
They’re perfect for creating small pouches, drawstring bags, or even tote bags.
Their size offers enough fabric variety while limiting waste—plus, the unique prints add personality!
Why are fat quarter creases so hard to work out?
Fat quarter creases are tough because fabric is tightly folded during bundling, and natural "fabric memory" holds those creases.
Pressing with steam or using a damp cloth while ironing typically helps smooth things out.
Can you sew a peek a Boo pouch from a fat quarter?
Imagine turning a fat quarter into a cute peek-a-boo pouch!
Yes, it’s possible.
You’ll cut windows, use clear vinyl, and stitch up the sides.
Add a zipper, and voilà—a functional, stylish project!
Can you use Fat quarters to make a quilt?
Yes, you can use fat quarters to make a quilt.
With their variety of colors and patterns, they’re perfect for creating unique designs.
Many quilt patterns are specifically designed to use these versatile fabric pieces!
What can you make with a fat quarter?
You can create quilts, wallets, baby bloomers, drawstring bags, or even sunglasses cases with a fat quarter.
It’s perfect for small crafts, gifts, or organizing hacks—like turning scraps into something surprisingly stylish and functional!
You can use a fat quarter for various purposes, including gifts.
Are Fat quarters a good way to buy fabric?
Buying fat quarters is like grabbing a sampler platter at a restaurant—small but packed with variety.
They’re perfect for projects needing multiple fabrics, reduce waste, and let you experiment with colors and patterns affordably.
How do I store fat quarters to prevent creasing?
Store fat quarters by folding them neatly and laying them flat in a drawer or clear storage bin.
Avoid overstacking to minimize pressure.
Rolling them instead of folding is another great option to prevent deep creases.
Conclusion
Fat quarters fuel your creativity while cutting down on waste, making them the ultimate fabric friend for sewing enthusiasts.
From quilts to coasters, these versatile cuts offer endless options to explore. Whether you’re a beginner or seasoned pro, tutorials with fat quarters help you hone skills and create stunning projects fast.
So, grab those bundles, iron out the creases, and stitch your way to greatness. With fat quarters, you’re just one project away from a masterpiece!
- https://knotandthreaddesign.com/
- https://angiesartstudio.com/2010/12/08/fabric-coasters-a-quick-and-easy-sewing-project/
- https://pollybarks.com/blog/bento-bag-tutorial
- https://hearthandvine.com/fabric-bowl-covers/
- https://www.reddit.com/r/quilting/comments/136y855/how_do_you_get_fat_quarters_without_buying_bundles/

