This site is supported by our readers. We may earn a commission, at no cost to you, if you purchase through links.
Making a swimsuit from scratch is easier than you think, and with this tutorial, you’ll be rocking a custom-made suit in no time.
First, find a pattern that flatters your figure (think Faye or Sophie Swimsuit) and modify it to fit your body type.
Choose the right fabric, like Lycra blends or polyester mixes, Choose the right fabric, like Lycra blends or polyester mixes that resist shrinkage well, and don’t forget to pre-wash and dry it.
.
With a stretch needle and zig-zag stitch, you’ll be sewing like a pro in no time.
But, what about sizing and fit?
Table Of Contents
- Key Takeaways
- Preparing the Pattern and Fabric
- Choosing the Right Fabric and Notions
- Understanding Swimsuit Sizing and Fit
- Cutting Out the Fabric
- Sewing the Swimsuit Together
- Applying Elastic to the Swimsuit
- Finishing the Edges of the Swimsuit
- Adding a Lining to the Swimsuit
- Tips and Tricks for Sewing a Swimsuit
- Finalizing the Swimsuit
- Frequently Asked Questions (FAQs)
- Conclusion
Key Takeaways
- You’re just a few steps away from liberating yourself from ill-fitting swimsuits – and it all starts with finding a pattern that flatters your figure (think Faye or Sophie Swimsuit) and modifying it to fit your body type. Don’t be afraid to get creative and add a personal touch with unique design elements that’ll make your swimsuit truly one-of-a-kind.
- When it comes to choosing the right fabric, look for something specifically designed for swimwear, like Lycra blends or polyester mixes, Choose the right fabric, like Lycra blends or polyester mixes that resist shrinkage well, and don’t forget to pre-wash and dry it.
to remove any excess dye or finish. You want a stretchy material that’ll hug your body in all the right places, but also provide the right amount of support and flexibility.
- Sewing a swimsuit can seem intimidating, but with the right tools and techniques, you’ll be a pro in no time. Use a stretch needle and a zigzag stitch to conquer those curves, and don’t be afraid to experiment with different notions and thread colors to add some personality to your suit.
- To make your handmade swimsuit last all season long, be sure to hand-wash it in cold water, avoid wringing or twisting, and lay it flat to dry. And remember, a little TLC goes a long way – with proper care, your swimsuit will stay fabulous and keep you feeling like a beach bum queen all summer long.
Preparing the Pattern and Fabric
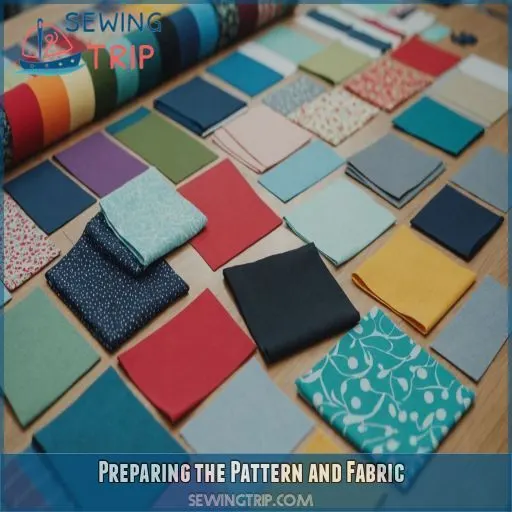
You’re about to begin a fantastic adventure: making your very own swimsuit from scratch! To get started, you’ll need to prepare your pattern and fabric, which involves finding or creating a swimsuit pattern, understanding the guidelines, and selecting the perfect fabric and lining to bring your design to life.
Finding a Swimsuit Pattern
You’re on a mission to make your own swimsuit! Start by finding the perfect pattern. Browse online or in craft stores for indie patterns like the Faye or Sophie Swimsuit, and read reviews to guarantee it’s the right fit.
Creating a Custom Pattern
Now that you’ve found a swimsuit pattern, let’s get creative and make it truly yours. To create a custom pattern, consider these tweaks:
- Modify the pattern to flatter your body type
- Add a personal touch with unique design elements
- Experiment with different swimsuit styles
Understanding Pattern Guidelines
Now that you’ve created your custom pattern, it’s time to decipher the guidelines! Pay attention to grain lines, seam allowances, and notch placement to guarantee a smooth sewing experience. Scaling techniques will also help you achieve the perfect fit.
Choosing the Right Fabric
Now that you understand pattern guidelines, it’s time to pick the perfect fabric for your swimsuit! You want a stretchy material that will hug your body in all the right places.
- Look for fabric specifically designed for swimwear, like Lycra blends or polyester mixes.
- Spoonflower’s Sport Lycra is a great option, offering 4-way stretch and a UPF rating of 50+.
- Consider the fabric weight: you want something lightweight and breathable.
- Power mesh is another great option for added support and flexibility.
- Avoid anything too thin or flimsy – you want your swimsuit to last!
Selecting Lining Fabric
Now that you’ve picked the perfect fabric, let’s talk lining! You’ll want a lining fabric that’s just as fabulous as the outside. Here are some options worth thinking about:
| Lining Fabric Types | Description |
|---|---|
| Tricot | Lightweight, smooth, and quick-drying |
| Power mesh | Breathable, flexible, and supportive |
| Swimwear lining | Specially designed for swimwear, often with 4-way stretch |
| Neutral-colored fabric | Blends in with the outer fabric, perfect for a bombshell swimsuit |
| Stretch lace | Adds a touch of elegance and sophistication |
Choosing the Right Fabric and Notions
Now that you’ve got your pattern ready, it’s time to choose the perfect fabric and notions to bring your swimsuit to life. You’ll want to pick a high-quality swimwear fabric that’s got the right amount of stretch, comfort, and durability to keep you looking and feeling great all summer long.
High-Quality Swimwear Fabric
Get ready to immerse yourself in swimwear fabric selection! For a comfortable and durable swimsuit, choose high-quality fabric with 4-way stretch, like nylon or polyester blends with at least 8% spandex. Your body (and your sewing machine) will thank you!
Characteristics of Good Swimwear Fabric
When choosing your swimwear fabric, look for stretch recovery, high fabric density, and UV protection for a comfortable, long-lasting suit. Quick drying and chlorine resistance are also must-haves. Your dream swimsuit starts with the right fabric, so pick wisely for a stress-free sewing experience.
Types of Swimwear Fabric
Now that you know what makes good swimwear fabric, let’s explore your options! You’ve got three fabulous types to choose from:
- Lycra blends: Add stretch and flexibility to your swimsuit with these super-stretchy fabrics.
- Quick-drying fabrics: Perfect for active swimmers, these fabrics dry fast and prevent cling.
- Chlorine-resistant fabrics: Protect your swimsuit from harsh pool chemicals with these durable fabrics.
Swimwear Notions and Thread
You’ve chosen your swimwear fabric, now it’s time to pick the perfect notions and thread! Opt for high-quality elastic, like cotton/poly or natural rubber, and durable polyester thread from brands like Gutermann or Mettler. Match your notion colors and use ballpoint needles to prevent thread breakage.
Understanding Swimsuit Sizing and Fit
As you start making your own swimsuit, getting the sizing and fit just right is vital – after all, you want to feel confident and comfortable in your handmade creation.
To achieve this, you’ll need to understand how to take your measurements.
You’ll also need to work with negative ease and choose the perfect size.
All of this must be done while dealing with the sometimes-tricky area of swimsuit sizing.
Measuring for a Swimsuit
When measuring for a swimsuit, ditch the tape measure anxiety! Wrap a flexible tape around your natural waistline, bust, and hips. Note these numbers and compare them to a reliable swimsuit size chart. Accurate measurements will be your BFF for a custom, supportive fit that rocks!
Understanding Negative Ease
Now that you’ve got your measurements, it’s time to talk negative ease – the secret to a flattering swimsuit fit. Think of it like a gentle hug: you want your suit to skim your body, not squeeze it. Aim for 3-5 inches of negative ease for a comfortable, confident fit.
Grading Between Sizes
When grading between sizes, consider your body measurements and the swimsuit’s negative ease. Here are some tips to get the perfect fit:
- Measure and record your body measurements to determine the right size adjustments.
- Compare your measurements to the pattern’s measurement chart.
- Make pattern alterations to accommodate your body shape.
- Don’t forget to factor in fabric stretch for a comfortable fit.
Choosing the Right Size
Now that you’ve mastered grading between sizes, it’s time to pick the perfect fit! Refer to a swimsuit size chart, take your body measurements, and consider the fabric’s stretch. Don’t be afraid to size down – remember, swimsuits should fit snugly, like a second skin.
Cutting Out the Fabric
Now that you’ve got your pattern and fabric ready, it’s time to cut out the pieces that will become your dream swimsuit. Grab your scissors, rotary cutter, or craft knife, and get ready to bring your swimsuit design to life – carefully, of course, since we’re working with slippery, stretchy fabric!
Preparing the Fabric for Cutting
Now that you’ve mastered swimsuit sizing and fit, let’s get ready to cut out your fabric! To prepare your fabric for cutting, make sure to:
- Pre-wash and dry your fabric to remove any excess dye or finish
- Iron out any wrinkles to make sure you cut accurately
- Lay out your fabric on a flat surface, smoothing out any air pockets
Cutting Out the Pattern Pieces
Now that you’ve prepared your fabric, it’s time to cut out the pattern pieces. Lay the fabric design-side down, smooth it out, and fold it in half. Place the pattern on the fabric, aligning the straight edge with the folded edge.
| Cutting Considerations | Tips and Tricks |
|---|---|
| Fabric Grain Alignment |
Always cut parallel to the grain for stability.
Double-check your pattern for precise cuts using Left-Handed Scissor Benefits.
.
Use sharp scissors or a rotary cutting wheel.
Cut carefully to avoid distorting the fabric.
Tips for Accurate Cutting
Now it’s time to cut out your fabric! Grab your trusty rotary cutter and mat, and make certain your fabric is smooth and wrinkle-free. Align your pattern pieces with the grain, and cut carefully, using a ruler or other straightedge for accuracy.
Cutting Out the Lining Fabric
Now that you’ve mastered accurate cutting, let’s move on to cutting out the lining fabric! You’ll want to make sure it’s slightly larger than the swimsuit pattern panels. Here are three tips to keep in mind:
- Choose the right lining fabric: Opt for a neutral-colored swimsuit fabric with 4-way stretch.
- Use a sharp blade: Cut out the lining fabric using sharp scissors or a rotary cutting wheel to prevent fraying.
- Keep it smooth: Use pins or fabric weights to keep the lining fabric in place while cutting to guarantee accuracy.
Sewing the Swimsuit Together
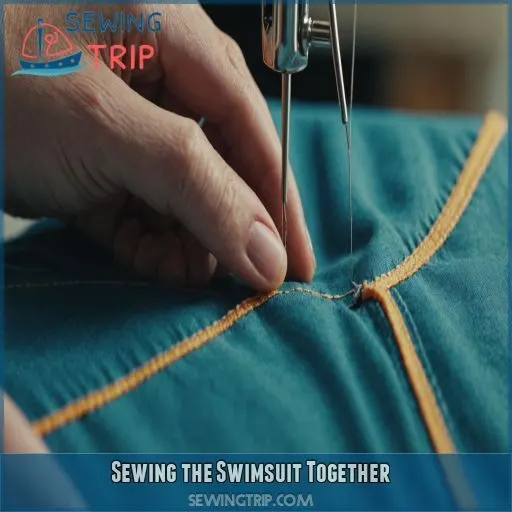
Now that you’ve cut out your swimsuit fabric, it’s time to bring your masterpiece to life by sewing the pieces together.
This is where the magic happens, and your swimsuit starts to take shape.
To get started, set up your sewing machine with a zig-zag stitch or a stretch needle, and get ready to sew the suit panels together, followed by the lining panels.
Setting Up Your Sewing Machine
Now that you’ve cut out your fabric, it’s time to set up your sewing machine! Choose a stretch needle and a high-quality polyester thread. Adjust your tension control and select a zig-zag stitch or lightning bolt stitch. Don’t forget to use a walking foot for control or loosen machine foot pressure.
.
Sewing the Suit Panels Together
Now that your sewing machine is set up, it’s time to bring your swimsuit to life! Place the front and back panels on top of each other, aligning the seams, and sew together using a zig-zag stitch or stretch needle, handling the fabric gently to avoid stretching.
Sewing the Lining Panels Together
Now that you’ve conquered sewing the suit panels together, it’s time to give the lining some love! Align the lining panels carefully, then sew them together using a zig-zag stitch or stretch needle, just like you did with the suit panels.
Basting the Liner and Suit
Now that you’ve sewn the lining panels together, it’s time to bring the liner and suit together. Use a simple up-and-down running stitch to baste them at the neck, arm, and leg openings. This temporary stitch will keep everything in place as you finish the suit.
Applying Elastic to the Swimsuit
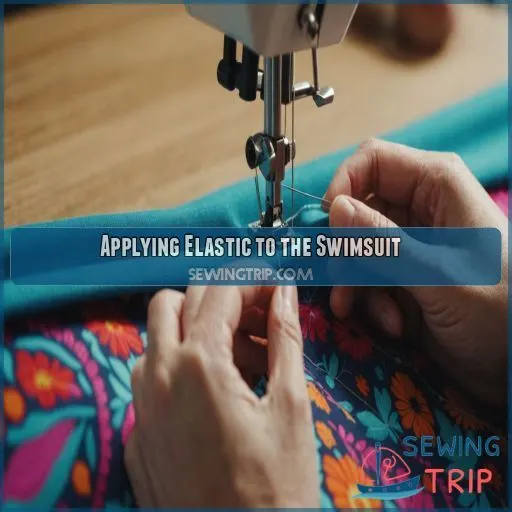
Now that you’ve sewn your swimsuit together, it’s time to add the elastic that will keep everything in place – don’t worry, it’s easier than you think. With a few simple steps, you’ll be able to securely attach the elastic to your suit and be one step closer to rocking your handmade swimsuit at the beach.
Choosing the Right Elastic
The final stretch – choosing the right elastic for your handmade swimsuit! You want elastic that’s comfortable, yet durable. Opt for a type with a medium to high tension, like cotton/poly or natural rubber. Consider the width: 1/4 inch is standard, but 1/2 inch or 3/4 inch may be better for larger suits. Your swimsuit’s elasticity depends on it!
Applying Elastic to the Suit
The moment of truth – applying elastic to your swimsuit! Choose from various elastic types, like cotton/poly or natural rubber, and consider the style that suits your swimwear design. Cut the elastic to size, then pin it to the suit’s edges, making sure to align it with the fabric’s fold line. Now, get ready to sew it in place!
Securing the Elastic With a Zig-Zag Stitch
You’ve successfully applied the elastic to your swimsuit – now it’s time to secure it with a zig-zag stitch! Use a stretch needle and elastic thread to create a strong, flexible seam. Vary your zig-zag stitch width and length to match your fabric’s stretch. Control your stitch tension to prevent puckering or distortion. Mastery is just a few stitches away!
Finishing the Edges of the Swimsuit
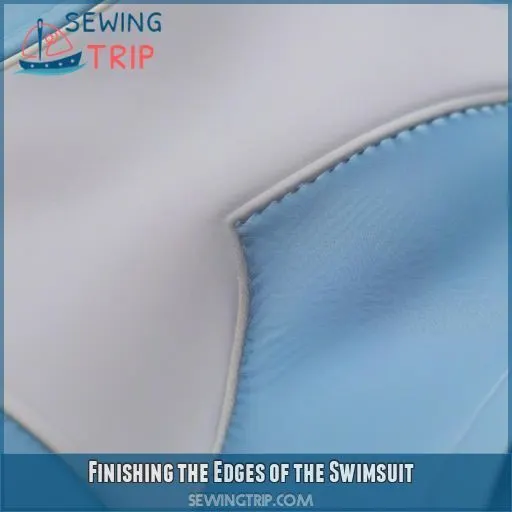
Now that you’ve sewn your swimsuit together, it’s time to give it a professional finish by tidying up those raw edges. In this step, you’ll learn how to fold, press, and stitch your way to a beautifully finished swimsuit that will make you feel like a total rockstar.
Folding Over the Edge of the Fabric
Now that you’ve applied the elastic, it’s time to fold over the edge of the fabric to create a smooth, professional finish.
This step is all about creating a seamless connection between the elastic and fabric.
Fold the edge of the fabric over twice to create a casing, making sure to tuck the raw edge under as you go.
Securing the Edge With a Zig-Zag Stitch
You’ve folded the edge of the fabric, now it’s time to secure it with a zig-zag stitch. This flexible edge finishing technique using serger-free seam finishes is a game-changer for stretchy seam security.
. Use a zig-zag stitch to enclose the elastic edge, ensuring swimsuit seam stability. Don’t pull the fabric too tight, just let the stitch do its magic for a smooth, flexible finish.
Finishing the Edges of the Lining
Now that you’ve secured the edge of your swimsuit, it’s time to finish the edges of the lining. This step is essential for a professional finish and to prevent fraying.
- Use a zig-zag stitch or an overlock stitch to finish the edges of the lining.
- Fold the lining edge by 1/4 inch and press for a crisp fold.
- Choose a lining fabric that complements the outer fabric.
- Consider enclosed edge options for a seamless finish.
Adding a Lining to the Swimsuit
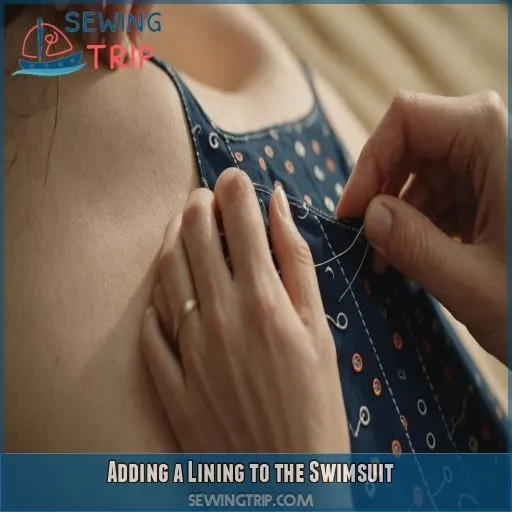
You’re getting close to finishing your handmade swimsuit – now it’s time to add the lining, which will give your suit a professional finish and make it more comfortable to wear. In this step, you’ll learn how to attach the lining to the suit and secure it with a zig-zag stitch, ensuring a snug and stretchy fit.
Attaching the Lining to the Suit
Now that you’ve finished the edges of your swimsuit, it’s time to attach the lining to the suit. This is where things can get a bit tricky, but don’t worry, we’re here to help.
| Lining Placement Tips | Lining Fabric Choices |
|---|---|
| Place the lining on the wrong side of the suit fabric | Choose a lining fabric that complements the outer fabric |
| Match the lining seams to the suit seams | Consider a neutral-colored lining for a clean look |
| Leave a small opening for turning | Opt for a lining fabric with 4-way stretch |
To attach the lining, simply place it on the wrong side of the suit fabric, matching the seams.
Securing the Lining With a Zig-Zag Stitch
Now that you’ve attached the lining to the suit, it’s time to secure it with a zig-zag stitch. This step is like adding the final touches to a masterpiece – it’s what makes everything come together seamlessly. To get it just right:
- Use a zig-zag stitch variation that allows for a bit of give, so your fabric can still stretch.
- Keep your lining seam allowance consistent to avoid any bulkiness.
- Pay attention to your stitch tension, as it can impact the fabric’s stretch control – and don’t forget to use a ballpoint needle for smooth sailing.
Tips and Tricks for Sewing a Swimsuit
Now that you’ve got the basics of swimsuit sewing down, it’s time to finesse your skills with some expert tips and tricks that’ll make your handmade swimsuit truly shine. From handling super-stretchy fabrics to mastering the art of sewing elastic, we’re about to take your swimsuit game to the next level!
Handling Stretchy Fabrics
Now that your lining is in place, it’s time to tame the stretchy beast! When handling stretchy fabrics, think gentle, not gangly. Use a light touch, and avoid pulling or tugging on the fabric. Use pins and clips strategically, maintaining an even seam allowance. Don’t forget to switch to stretch stitches on your machine – your fabric will thank you!
Using a Walking Foot or Loosening Machine Foot Pressure
The art of taming temperamental fabrics! When sewing stretchy swimsuit materials, achieving an even stitch can be a challenge. To conquer this, try these four tips:
- Invest in a walking foot: This nifty accessory helps guide fabric smoothly under the needle.
- Loosen machine foot pressure: Ease up on the pressure to prevent bunching and dragging.
- Adjust machine tension: Find the sweet spot for your fabric and thread.
- Test and tweak: Experiment with different settings to achieve the perfect stitch.
Practicing Sewing Scraps to Elastic
Now it’s time to get comfy with sewing scraps to elastic. Don’t worry, it’s a breeze! To master this skill, try practicing with different scrap sizes, needle types, and stitch selections. See the table below for a quick guide.
| Scrap Size | Needle Type | Practice Time |
|---|---|---|
| 2×2 inches | Ballpoint | 10-15 minutes |
| 1×4 inches | Stretch | 15-30 minutes |
| 3×3 inches | Twin | 30-45 minutes |
Finalizing the Swimsuit
You’re almost done with your handmade swimsuit – now it’s time to finalize the details and make sure everything is just right. In this last step, you’ll inspect your suit for quality, make any necessary adjustments, and learn how to care for your new favorite swimwear to make it last all season long .
Inspecting the Suit for Quality
Inspect your masterpiece for quality, checking seam strength, elastic tightness, and lining fit. Make sure the fabric stretches smoothly and the overall fit is spot-on. Try it on, twirl, and strike a pose – you earned it! Be brutally honest; if it’s not perfect, don’t worry, it’s an easy fix.
Making Adjustments as Needed
You’ve made it to the final stretch. Now it’s time to make adjustments as needed. After inspecting your suit for quality, you might need to make some tweaks. Here are a few things to check:
- Is your seam allowance even?
- Did your fit testing reveal any areas that need adjustment?
- Are your straps comfortable and adjustable?
- Does the suit flatter your body shape, or do you need a pattern alteration?
Caring for Your Handmade Swimsuit
You’ve made it – your handmade swimsuit is finally complete!
Now, let’s talk about caring for your new baby.
To prevent chlorine damage, hand-wash it in cold water after each use.
For sun protection, dry it inside out.
Store it in a breathable bag to extend its fabric lifespan.
Follow these simple tips and your swimsuit will stay fabulous all season long!
Frequently Asked Questions (FAQs)
How do I make my own swimsuit?
Get ready to tap into your inner fashionista! Making your own swimsuit is a liberating experience. Start by finding a pattern online or in craft stores, then pick a 4-way stretch fabric that’ll hug your curves in all the right places.
How much fabric do you need to make a swimsuit?
When making a swimsuit, you’ll need about 1-2 yards of 4-way stretch fabric, like Lycra or spandex, depending on the design and your size – don’t forget to add a little extra for seam allowance and lining .
What material do you use to make swimsuits?
You’ll want to use a stretchy fabric with 4-way stretch, typically a blend of 80-90% nylon and 10-20% lycra or spandex . Spoonflower’s Sport Lycra is a great option, offering a UPF rating of 50+ and a moisture-wicking finish .
What thread to use for a bathing suit?
Ah, the thread of truth! When sewing a bathing suit, you’ll want to use a high-quality polyester thread, like Gutermann or Mettler, that can withstand the stretch and stress of chlorine and saltwater – your suit’s BFF!
How long does it take to sew a swimsuit?
Sewing a swimsuit can take anywhere from a few hours to a full day, depending on your skill level and the complexity of the design. Don’t worry, with practice, you’ll be a pro in no time!
Can I use a regular sewing machine for swimwear?
Fortunately, you can fashion fabulous swimwear with a regular sewing machine! Just fit it with a stretch needle, and select a stretch stitch or zig-zag setting to conquer those curves and create a comfortable, carefree swimsuit.
What is the best way to care for a handmade swimsuit?
You’ve poured love into making your swimsuit, now give it some TLC! Hand wash it in cold water, avoid wringing or twisting, and lay it flat to dry – your handmade beauty will thank you!
Can I make a swimsuit with a built-in bra or support?
You can make a swimsuit with a built-in bra or support by adding bra cups, using a pattern with a built-in bra, or incorporating a shelf bra with elastic for extra support .
Are handmade swimsuits suitable for competitive swimming or water sports?
Did you know 95% of competitive swimmers wear custom-fit suits? While handmade swimsuits can be suitable for water sports, they mightn’t provide the same level of performance and durability as store-bought, high-tech suits designed for competition.
Conclusion
Gone are the days of squeezing into off-the-rack swimsuits that make you feel like a stuffed sausage.
Now, you’re a master swimsuit-maker, Now, you’re a master swimsuit-maker, thanks to this tutorial on making a swimsuit from scratch.
.
With these 10 easy steps, including proper needle maintenance, you’ve got the skills to create a custom-made suit that flatters your figure and makes you feel like a beach bum queen.
, you’ve got the skills to create a custom-made suit that flatters your figure and makes you feel like a beach bum queen.

