This site is supported by our readers. We may earn a commission, at no cost to you, if you purchase through links.
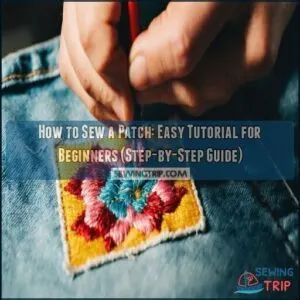
First, pick a patch that matches your style or fixes the tear—iron-on for quick fixes or sew-on for durability.
Clean the fabric, trim loose threads, and flatten it out.
Pin the patch where you want it to stay.
Thread your needle with a sturdy thread that blends or pops, depending on your design.
Knot the end, then start stitching—try a basic running or backstitch for neat results.
Keep your stitches close and tight to secure the patch.
Once done, check for gaps and tie off.
Want to level up? There’s always decorative stitching!
Table Of Contents
Key Takeaways
- Prep the fabric by cleaning, trimming loose threads, and smoothing out wrinkles to ensure a secure patch application.
- Use pins, iron, or adhesive to hold the patch in place and sew with tight, evenly spaced stitches like backstitch for durability.
- Choose thread and patch materials that match the fabric type and style for both functionality and aesthetics.
- Reinforce edges with extra stitching or backstitches for long-lasting results, and tie off securely to prevent unraveling.
Choosing The Right Patch
When choosing a patch, think about its purpose—whether it’s meant to fix a tear or add a decorative touch.
Consider the patch’s purpose—repair a tear or make a stylish statement; the choice sets the tone for your creative project.
Make sure the material, size, and style suit both your fabric and how you plan to use the finished piece.
Selecting The Patch Material and Size
Choosing the right patch material and size is the foundation of a successful project.
It’s all about matching the patch to your fabric so it lasts and looks great.
Here’s how to decide:
- Patch Size: Make certain the patch is at least half an inch larger than the tear for secure and durable coverage.
- Fabric Durability: Match fabric patches (e.g., cotton, denim) to your clothing type for long-lasting results.
- Design Alignment: Pick a patch design that complements the fabric texture and placement area.
- Material Compatibility: Choose tough materials that can handle frequent washing and wear.
A well-chosen patch blends style with functionality—yours will, too!
There are many options for different patch materials available for purchase.
Iron-on Vs Sew-on Patches
Picking between iron-on and sew-on patches depends on how you’ll use the item and your time. Both options have perks, but here’s the breakdown:
- Iron-on Patches: They’re quick to apply and perfect for lightweight fabrics. Adhesion strength fades after several washes, so they’re better for less-used items.
- Sew-on Patches: If efficiency isn’t your goal, sew a patch instead. This method wins on long-term durability, making it ideal for heavy-use items like jackets or bags.
- Hybrid Approach: Stabilize the patch with an iron-on application, then sew for added strength. This tactic combines fabric compatibility with secure, lasting results.
Decorative Vs Functional Patches
Sometimes, sewing a patch isn’t just about fixing a tear—it’s about making a statement or telling a story.
Decorative patches are bold, eye-catching pieces that let you express your personality or creativity.
Functional patches, however, focus on repair durability and blending in for practical applications.
Whether you’re sewing patches on backpacks or jackets, your goals—style or utility—should guide your decision.
Here’s a quick comparison to help:
| Patch Type | Purpose | Best For |
|---|---|---|
| Decorative | Style & Visual Storytelling | Jackets, Bags, Hats |
| Functional | Repairs & Durability | Knees, Elbows, Uniforms |
| Embroidered | Durability & Design | Jackets, Backpacks |
| Iron-On | Easy Application | Casual Wear, Quick Fixes |
Choose wisely, and let your patches shine!
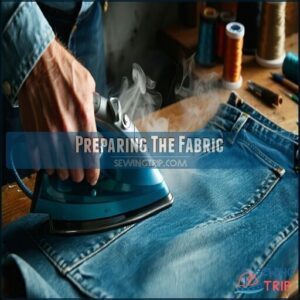
Preparing The Fabric
Before you sew a patch, make sure the fabric is clean, smooth, and ready to go.
Removing loose threads, getting rid of fluff, and ironing out wrinkles will help the patch stick better and last longer.
Cleaning The Area Around The Tear
A clean surface is the backbone of any successful patch sewing tutorial.
Before applying a patch, you’ll want to prep the fabric properly to guarantee a smooth patch application.
Follow these easy steps:
- Pre-cleaning solutions: Gently wash the area with mild soap and cold water. Hot water or fabric softeners might ruin the fabric’s texture.
- Lint removal: Remove dirt, lint, or stains with a soft cloth or lint roller.
- Drying methods: Pat the area dry completely and smooth wrinkles—this guarantees a secure base for sewing.
Preparation is key for exceptional sewing results!
Removing Loose Threads and Fluff
Before you sew a patch, don’t skip the critical step of tidying up your fabric—consider it the “pre-sewing prep” everyone needs.
Start with thread trimming: grab tweezers for stubborn bits or small scissors for a precise snip around frayed edges. Think of it as giving your garment a polished haircut! Tweezers vs scissors? Use both—each excels in different scenarios.
Next, handle surface debris removal with a lint roller. Roll it across the area to clear fluff, dust, and stray threads. A clean sewing surface makes a big difference in avoiding snags during patch sewing.
If you make a mistake, using a seam ripper is a good solution. This step is crucial for a successful patching process, ensuring your work is error-free and professional-looking.
Smoothing Out Wrinkles
Wrinkles can sabotage your patch sewing efforts, so smooth your fabric like a pro!
Start by checking those care labels for proper heat settings. Then, gently lay it flat and explore these tips:
- Use steaming options to relax stubborn creases.
- Work with slow, steady strokes from the center outward.
- Let the fabric cool between passes to avoid distortion.
- Choose ironing techniques suited to your fabric type.
These sewing tips guarantee wrinkle prevention and a polished patch finish!
Securing The Patch
To keep your patch steady while you sew, it’s important to secure it in place first.
Whether you’re using an iron, pins, or both, this step guarantees your patch won’t shift or wrinkle as you work.
Using Iron-on Patches for Temporary Placement
Iron-on patches are perfect for quick fixes, offering temporary stability before sewing reinforcement.
Here’s how to attach a patch effortlessly:
- Set Up Your Iron: Adjust to 350°F for cotton or 310°F for polyester. Skip the steam—it’s a no-go for adhesive.
- Prep the Fabric: Make certain it’s clean and smooth. Wrinkles or dust? They’ll ruin the bond.
- Position the Patch: Align it exactly where you need it. Precise patch placement is key.
- Press and Hold: Firmly iron for 20 seconds.
- Check Adherence: Test adhesion; it’s temporary but handy for sewing stabilization. Enjoy patch application ease!
Sewing Pins for Holding The Patch in Place
Pins are your best friends when stabilizing patches for sewing. They’ll keep everything in place, guaranteeing your stitches are clean and precise.
Let’s talk about pin types and secure pinning.
Here are easy steps to avoid fabric damage and guarantee smooth patch placement:
- Place pins strategically: Space them an inch apart along the edge to hold the patch firmly without bunching the fabric.
- Angle for control: Insert pins at a 45-degree angle inward to stop shifting while stitching.
- Flatten the fabric: Smooth outward from the patch center before adding pins, avoiding wrinkles or folds.
- Reinforce corners: Pop in extra pins at corners, especially for oddly-shaped patches.
Quick tip: Safety pins work as great pin alternatives!
Ironing The Patch for Extra Durability
Once you’ve pinned the patch, adding heat makes it sturdier.
Set your iron to 320°F, but don’t go rogue—always check the fabric’s heat tolerance.
Place a pressing cloth over the patch to prevent damage and keep things smooth.
Firmly press the iron for 15-20 seconds, focusing on even heat settings.
For tricky spots like curved areas or slippery fabrics, a touch of fabric glue or temporary adhesive spray can help lock the patch in place.
Whether it’s an iron on patch or prepping for sewing patches, this step guarantees better patch adhesion.
Done right, your patch application will stay put through washing and wear, and you’ll boost patch durability like a pro without breaking a sweat, ensuring a successful and long-lasting adhesion.
Threading and Knotting The Needle
Threading and knotting a needle might sound tricky, but it’s easier than you think with a little practice.
Once your needle is threaded and your knot is secure, you’re ready to start sewing your patch like a pro!
Choosing The Right Thread Color and Type
Your thread choice is the unsung hero of patch sewing. The right sewing thread guarantees durability and enhances the appearance of your project. Color matching is vital—your thread should blend in seamlessly or purposely stand out for a decorative flair. Imagine it like pairing the perfect tie with a suit—it elevates the overall finish.
Here are 5 things to keep in mind when selecting thread:
- Thread Material: Use polyester for most fabrics and heavy-duty thread for denim or thicker materials.
- Color Matching: Match the thread to the fabric or patch’s background; neutral colors like gray or tan work well.
- Thread Weight: Choose heavier thread for high-stress areas like knees or elbows.
- Stitch Visibility: Keep colors slightly darker for subtle blending.
- Fabric Compatibility: Test thread strength against fabric for durability. For specialized tasks, consider using specific patch threads for superior results.
Doubling The Thread for Extra Strength
Doubling your thread is a smart way to improve thread strength and stitch durability when sewing patches.
Start by cutting an 18-inch thread, thread it through the needle’s eye, and bring the ends together, tying a good knot. This trick works wonders on fabrics with extra thickness, like denim or canvas.
Use the right needle size to match your fabric and boost efficiency. Keep your thread ends even for stable, neat stitches. Don’t skip the knot—it anchors your work.
Maintaining steady tension prevents puckering, so your patch lies flat. With practice, this sewing technique becomes second nature!
Backstitching The Patch
Backstitching is one of the strongest and easiest ways to secure your patch.
Backstitching provides unmatched strength and durability, making it the ultimate go-to technique for securing patches with confidence and style.
It helps hold the edges firmly in place, so the patch doesn’t loosen or peel over time, which makes backstitching a reliable method.
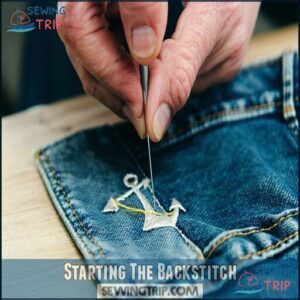
Starting The Backstitch
How do you start a backstitch? Begin by making an Anchor Knot hidden behind the patch to secure your thread.
Insert the needle through the fabric from the underside, pulling it up. For needle placement, take a small step back, overlapping the previous stitch.
This stitch overlap strengthens your work. Use consistent spacing between stitches for a neat finish, and keep an eye on thread tension to avoid puckering.
Many crafters prefer using specialized knot thread for added durability. Mastering this essential technique makes patch sewing techniques reliable and builds confidence in your hand sewing tutorials!
Maintaining Consistent Stitches
When perfecting backstitches, consistency is your secret weapon.
Uneven stitches can make even your hard work look rushed.
Pay attention to these patch sewing techniques:
- Stitch Length: For delicate fabrics, shorter stitches work best. Thick materials? Go with longer ones.
- Tension Control: Hold the fabric gently—too tight, and it puckers; too loose, and stitches might slip.
- Needle Angle: Keep it straight for neat, clean entry and exit points.
- Sewing Speed: Steady hands win the race. Slow and smooth guarantees precision.
- Practice Techniques: Like learning to ride a bike, your sewing skills improve with practice over time.
Consistency makes your sewing shine!
Checking for Patch Stability
Time to run a quick “patch stability test” to verify your hard work pays off! Start by gently tugging around the edges to check patch adhesion. If it shifts or corners lift, reinforce with extra stitches.
Next, lightly stretch the surrounding fabric—good stitch strength should keep everything intact without pulling loose.
Examine the edges closely for stitch security. Tight, evenly spaced stitches mean you’re golden, but any gaps or loose threads call for minor tweaks.
Spot any fraying or stray threads? Trim them away for a clean look.
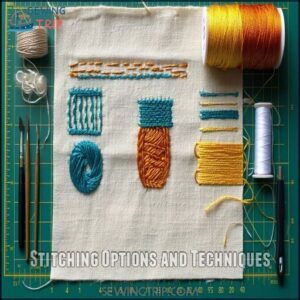
Stitching Options and Techniques
In the context of sewing a patch, picking the right stitch can make all the difference.
From simple running stitches to decorative whip stitches, you’ve got plenty of options to match both your style and the patch’s purpose, which can be considered a complete concept in the decision-making process.
Choosing The Right Stitch for The Job
Picking the right stitch isn’t just practical—it sets the tone for your patch’s look and longevity.
Think about durability vs. aesthetics when choosing these sewing stitches:
- Backstitch: Tough and reliable for strong patch attachment.
- Running stitch: Lightweight and simple for beginner patch sewing techniques.
- Whip stitch: Neat for fabric compatibility on curved edges.
- Decorative stitches: Add flair while guaranteeing stitch visibility blends in gracefully.
Consider fabric type considerations to guarantee compatibility.
Match stitches, thread thickness, and stitch spacing to your fabric for success!
Using a Running Stitch or Whip Stitch
If you’re sewing a patch by hand, using a running stitch or whip stitch is a practical choice. The running stitch is simple and works well for lighter fabrics, offering an even finish when you maintain 1/8” stitch lengths.
It’s perfect for quick fixes or adding patches to clothing. The whip stitch, on the other hand, wraps neatly around the patch edge and adds durability.
This method shines on tough fabrics like denim or canvas. To ensure the best results, consider the following tips:
- Use strong thread to boost stitch durability.
- Adjust tension to prevent wrinkles.
- Practice both techniques on scrap fabric.
Adding Decorative Stitches for a Personal Touch
Decorative stitches add flair to any patch, transforming it into a mini masterpiece. Use Embroidery Floss or Decorative Threads to experiment with unique Stitch Patterns like zigzag or chain. Try Bead Embellishments for sparkle or Unique Borders to frame your design.
Here’s a quick guide:
| Stitch Type | Best For | Tools Needed |
|---|---|---|
| Chain Stitch | Intricate Patterns | Embroidery Needle, Floss |
| Zigzag Stitch | Bold, Eye-catching Edges | All-purpose Needle, Thread |
| Overcast Stitch | Smooth, Finished Lines | Sewing Needle, Oversized Thread |
| Bead Embellishing | Highlighted Accents | Thin Needle, Beads |
Take your time stitching, and remember—creative patch sewing should be as fun as it’s functional!
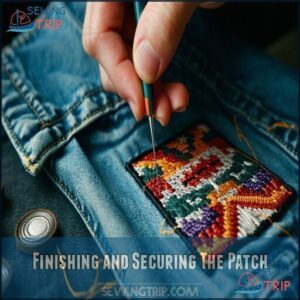
Finishing and Securing The Patch
Now it’s time to make sure your patch stays put for the long haul.
You’ll secure the edges with a strong backstitch, tie off the thread tightly, and snip any extra thread for a neat finish.
Backstitching Around The Patch
Backstitching around your patch is the final step to guarantee it stays put, no matter what. With a steady rhythm and careful technique, you can master this essential method from any sewing tutorial.
Here’s your patch application guide:
- Control backstitch tension to avoid puckering or loose edges.
- Anchor your thread with a secure knot before starting.
- Overlap stitches slightly for seamless durability.
- Use an invisible backstitch for a polished look.
- Employ a cornering technique to keep stitches neat around edges.
Every stitch adds strength and style, so take your time and align closely with the patch’s edge!
Tying Off The Thread Securely
Tying off the thread securely is the final step in mastering patch sewing.
Use simple knotting techniques: loop the thread twice on the backside for added strength. Pull gently but firmly to maintain even thread tension.
To prevent unraveling, weave the needle through nearby stitches before making the final knot—it’s like giving your patch a safety net! Gently tug the knot to make sure it’s snug.
Hiding tails? Snip off the excess close to the fabric edge without cutting the knot. These sewing basics guarantee durability and polish, key for anyone learning to sew a patch with confidence.
Cutting Excess Thread
Once you’ve tied the thread securely, it’s time to give your patchwork a polished, clean finish by trimming the thread tails. Smooth finishes make all the difference when you sew a patch.
Here’s how to handle thread trimming like a pro:
- Grab the best scissors you have—sharp, preferably small ones. Hold them at a slight angle.
- Trim the thread tails, leaving about 1/8 inch near the knot for secure knotting without disturbing your stitches.
- Take a moment to check for stray threads around the edges—don’t let any sneak by!
- Brush away loose thread bits to reveal your neat, finished work.
Careful trimming techniques help prevent fraying and maintain durability. No one wants to snip too close and undo their hard work! Take your time; patience pays off.
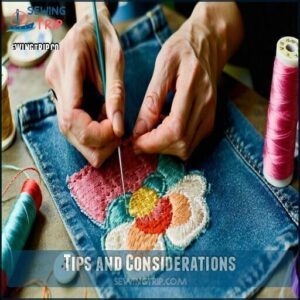
Tips and Considerations
When sewing a patch, it’s important to think about where you’re placing it and how it fits the fabric.
Taking a little extra time to secure it properly with the right stitches will make sure it stays in place and looks great.
Choosing The Right Patch Placement
Choosing the right patch placement can make or break your project.
For repairs, center the patch completely over the damaged area; always extend coverage half an inch beyond the hole for durability. Avoid stretching zones like knees or elbows for long-lasting results.
Decorative patches? Prioritize both aesthetic functionality and comfort by placing them in visible yet practical spots.
Here’s a quick guide:
| Patch Purpose | Ideal Placement | Why It Matters |
|---|---|---|
| Repairs | Center over holes | Maximizes hole coverage |
| Uniform regulations | Follow official placement | Guarantees compliance |
| Decorative appeal | Sleeves, chest, bags | Adds style and personality |
Think ahead—strategic placement guarantees your patch shines!
Considering The Fabric Type and Texture
When sewing patches on fabric, picking the right fabric type and texture can make all the difference. Smooth fabrics like cotton or twill are ideal because they’re easy to work with, while textured fabrics like denim or canvas add durability.
Avoid stretchy materials—they’re a headache to manage! Fabric weight impacts the drape, feel and overall garment durability.
- Fabric Compatibility: Match the patch material with the fabric for a seamless bond.
- Texture Matching: Pick a fabric that complements the patch’s design.
- Patch Durability: Guarantee both fabric and patch endure wear and washing effortlessly.
Adding Extra Security With Multiple Backstitches
To make your patch last, focus on reinforcement stitching with layered backstitches.
This sewing technique strengthens patch attachment, especially for high-wear spots like knees.
Keep your stitch density consistent and overlap each backstitch slightly—too loose, and the patch might come undone; too tight, and the fabric could pucker.
Thread overlap adds durability, ensuring the patch stays firmly in place.
Don’t skip secure knotting at the start and finish of your work—it’s like tying a bow on a gift.
With simple hand-sewing techniques, sewing patches becomes a breeze for beginners!
Common Mistakes and Troubleshooting
Mistakes happen, but knowing what to watch for can save you time and frustration.
Learn how to fix loose patches, uneven stitches, and other common issues to keep your project looking neat.
Avoiding Bunched or Uneven Stitches
Uneven stitches or bunching can make sewing patches a headache, but don’t worry—it’s all about balance and control. Keep stitch tension steady, as loose threads or pulled fabric can ruin your efforts.
Secure your fabric—use tape, pins, or fabric stabilizers to stop movement. If hand sewing patches, keep stitches small and spaced evenly. For machine sewing, rely on the presser foot and feed dogs to guide fabric smoothly. Choosing the correct needle is also essential for avoiding issues.
- Tips to avoid uneven stitches:
- Choose the right needle for your fabric weight.
- Adjust the stitch length for clean, uniform results.
- Maintain a steady hand or rhythm, no matter the sewing technique.
Patience makes perfect!
Dealing With Loose or Detached Patches
Loose or detached patches can ruin your hard work, but they’re easy to fix with a steady hand and a little patience.
Start by inspecting the patch for weak stitching or frayed edges. Add extra backstitches to keep it anchored firmly. If it’s misaligned, don’t fret—re-anchor it with pins for a better fit before sewing.
For stubborn fabrics or patches that just won’t stay put, grab a patch adhesive to hold everything in place while you work. Reinforcement techniques, like edge securing with small, even stitches, can make a big difference.
Here’s a quick cheat sheet to troubleshoot:
Problem Reason Solution
Slow down, and before you know it, you’ll master how to attach patches securely!
Fixing Common Errors and Adjusting The Patch
Mistakes happen. Uneven stitches or fabric puckering? Take these steps to fix them:
- Adjust thread tension or reinforce patch alignment with pins. Slow and steady wins the race!
- Smooth patch placement by ironing first—wrinkles are no friend to sewing.
- Repair loose edges using tight backstitches. For needle breaks, double-check your sewing techniques and avoid forcing tough spots!
The steps provided are crucial for fixing mistakes in sewing, ensuring a smooth finish.
Frequently Asked Questions (FAQs)
How to sew on a patch?
Start by pinning the patch in place, matching thread color.
Hand sew with tiny, even stitches or use a machine for speed. Secure edges well, ensuring durability.
Take your time—it’s easier than it looks!
Is patch sewing easy?
It might seem tricky at first, but sewing a patch is as simple as threading a needle and stitching step by step.
With patience and practice, you’ll turn it into second nature!
Is patch sewing a decorative art?
Yes, patch sewing is a decorative art.
It lets you personalize fabric items with creative designs while also adding flair.
With practice, you’ll craft unique, eye-catching pieces that showcase your personality and style.
What is patching sewing?
Think of patch sewing as giving your clothes a second chance—or a makeover.
It’s the skill of attaching patches to fabric, blending creativity and practicality to repair, customize, or decorate clothing and accessories, which can be seen as giving them a makeover.
How do you sew a patch with catch stitch?
To sew a patch with a catch stitch, position the patch, anchor your thread.
Make crisscrossing stitches from the patch edge to the fabric.
Keep them evenly spaced for a secure, decorative look.
How long does it take to sew a patch?
It usually takes 15-30 minutes to sew a patch, depending on its size and shape.
If you’re hand-sewing and adding detail, expect longer.
With practice, you’ll get faster and more precise!
What is the best hand stitch for patches?
The backstitch is your best bet for sewing patches by hand.
It’s strong, discreet, and keeps edges secure.
Plus, it’s easy to learn!
Just overlap stitches slightly for durability—it’s like patch insurance!
How to keep patches straight when sewing?
Imagine 85% of crooked patches stem from poor prep.
Use pins, fabric tape, or adhesive spray to hold the patch steady.
Practice patience, check alignment twice, and adjust under proper light for perfect results.
How to sew a patch onto a hole?
To sew a patch onto a hole, position it so it overlaps the edges, securing it with pins.
Use small, even stitches around the patch’s edge.
Reinforce heavily-worn areas for durability, and tie off securely.
How to attach patches to fabric?
Patches are like stories stitched onto fabric.
To attach one, position it firmly, secure it with pins, then hand sew using small, tight stitches or machine sew with a straight stitch for durability and charm.
Conclusion
Sewing a patch might seem tricky, but it’s really just like piecing together a puzzle where you control the outcome.
With the right patch, clean fabric, and a sturdy thread, you’re set for success.
Follow this easy tutorial on how to sew a patch: pin it in place, stitch consistently, and check your work.
Remember, practice makes perfect—don’t stress about imperfections.
Soon, fixing tears or adding flair will feel like second nature.
Ready to give it a try?


