This site is supported by our readers. We may earn a commission, at no cost to you, if you purchase through links.
 You’ll be hanging beautiful custom curtains in no time with this simple tutorial.
How to sew curtains isn’t rocket science—start by measuring your windows accurately, then add extra inches for hems and headers.
Choose fabric that matches your style (and light-filtering needs), cut your panels with sharp scissors, and pin everything in place before sewing.
You’ll need to create straight seams for the sides, a double-folded hem at the bottom, and a rod pocket or tabs at the top.
Don’t panic if your first stitch isn’t perfect—even seasoned sewers keep a seam ripper handy.
Wait until you see the money-saving magic of DIY window treatments.
Table Of Contents
Key Takeaways
- You’ll save money by making your own curtains, with proper measuring (adding extra inches for hems and headers) being the crucial first step for professional-looking results.
- You should choose fabric based on both style and function—considering weight for proper draping, light-filtering needs, and maintenance requirements like washability.
- You’ll need essential tools including sharp fabric scissors, measuring tape, pins, and a reliable sewing machine, with pre-washing fabrics helping you avoid surprises later.
- You can achieve professional results by properly pressing seams, adding drapery weights for better drape, and considering decorative trims or tassels as finishing touches.
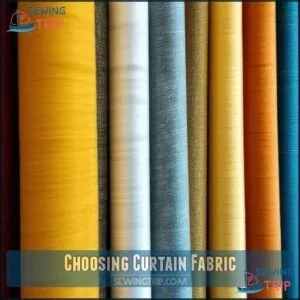
Choosing Curtain Fabric
You’ll save yourself a ton of headaches by picking the right curtain fabric before your first stitch, just like choosing the perfect ice cream flavor before committing to a whole gallon.
Your fabric choice sets the tone for your entire room, determining how much light filters through, how well your curtains hang, and whether you’ll be cursing or celebrating when it’s time to iron them. Your fabric choice sets the tone for your entire room.
Choosing fabric isn’t just a decision—it’s the foundation that determines whether your curtains whisper elegance or shout amateur.
Types of Fabric for Curtains
Selecting the perfect drapery fabric will make or break your curtain project.
Natural options like heavy cotton or cotton-linen blends offer durability with casual elegance, while synthetics provide easy cleaning and light blocking.
Consider fabric weight for proper draping, texture options for visual interest, and print variety to match your décor.
Exploring different curtain fabric options can help refine your choice.
Remember, your fabric choice impacts both function and style—choose wisely!
Factors to Consider When Selecting Fabric
The journey to perfect curtains begins with smart fabric selection. Consider fabric weight (lighter for sheer looks, heavier for insulation), light control needs, and how patterns complement your room decor.
Don’t forget maintenance requirements—some fabrics need dry cleaning while others are machine washable. Match your drapery fabric to your budget considerations, as decor fabric prices vary dramatically.
Your fabric choice ultimately determines both function and style.
How to Choose The Best Fabric for Your Curtains
Now that you’ve considered your options, let’s find your perfect curtain fabric match! Think of it as fabric dating—you’ll know "the one" when you see it.
- Test fabric weight by draping it over your arm—heavier fabrics offer better light filtration
- Consider print scale: larger rooms support bolder patterns, smaller spaces need subtler designs
- Match durability needs to room function (kitchens need washable options!)
- Bring home color swatches to see how they play with existing décor
Measuring Window Dimensions
You’ll want to grab your measuring tape and get those window dimensions just right, as even a half-inch mistake can turn your dream curtains into awkward too-short pants for your windows.
Accurate measurements are your best friend in this process, saving you from that dreaded moment when you realize your beautiful new curtains don’t quite cover what they’re supposed to, which can be a dreaded moment.
Measuring Your Window for Curtains
Your window’s measurements are the foundation of gorgeous curtain success.
To measure properly, extend your tape measure 8-10 inches beyond each side of the frame for rod placement that creates a height illusion.
Measure from intended rod position to where curtains will end (windowsill, below sill, or floor).
For proper fullness options, your curtain width should be 1.5-3 times your window width, depending on desired look. Don’t skimp on extra fabric!
Calculating Fabric Requirements
Now that you’ve measured your windows accurately, let’s tackle the math of fabric calculation!
To determine how much fabric you’ll need, multiply your window width by a fullness factor (usually 2-2.5).
Don’t forget to account for pattern repeats, lining needs, and seam allowances.
For a 36" window, you’ll want about 72-90" of fabric width, plus extra length for hemming.
Easy as pie!
Determining Curtain Length and Width
The perfect curtain length and width can transform your windows from bland to grand.
Measure from your rod placement (go high for a height illusion) to where you want curtains to end—floor, sill, or in-between.
For width, multiply your window measurement by 2-3 for a proper fullness factor.
Don’t skimp on fabric widths—curtains need extra fabric to look luxurious when gathered.
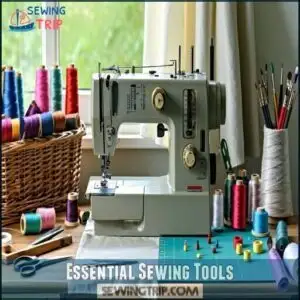
Essential Sewing Tools
To make stunning curtains, you’ll need the right tools to keep things smooth and frustration-free.
From sharp scissors to a reliable sewing machine, having the essentials makes the process easier—and saves you from chasing stray pins across the floor, which is a key part of a frustration-free experience.
Must-Have Supplies for Curtain Making
Start with quality curtain fabric, like sturdy cotton or blends, for durability.
Grab a sewing machine, strong thread, measuring tools, and sharp fabric scissors—your "dream team" of sewing supplies. Don’t skip on pins or cutting implements for precision.
Add hanging hardware, like rings or hooks, for a seamless finish. Different projects may require specific fabric options.
Fun fact: even mistakes give curtains personality!
Essential Tools for Sewing Curtains
You’ve got your supplies, now grab these must-have tools for smooth sewing. A reliable sewing machine keeps stitching fast and tidy.
Sharp fabric scissors? Absolute lifesavers—avoid the dreaded jagged edges. Stock various thread types for matching colors.
And don’t skip pressing equipment like an iron to sharpen every seam. Precision with measuring tools seals the deal.
For accurate fabric marking, consider using tailors chalk options.
- Sewing machine for efficient stitching
- Fabric scissors for clean cuts
- Ironing equipment for crisp seams
Tips for Working With Fabric
Before you start cutting, pre-wash fabrics to avoid surprises later—fabric shrinkage is no joke.
Pay attention to grain direction for neat lines and match fabric patterns carefully. Use fabric pressing to keep things smooth.
Got thicker fabric weight? Adjust your sewing machine.
Here’s a quick helper:
| Tip | Why It Helps |
|---|---|
| Pre-wash fabrics | Prevents future shrinkage |
| Check grain lines | Guarantees straight, even edges |
| Match patterns | Keeps design visually aligned |
Cutting Fabric Panels
Cutting fabric panels might sound tricky, but with the right steps, you’ll slice through it like a pro.
Measure carefully, keep your lines straight, and don’t sweat it—precision here sets you up for flawless curtains!
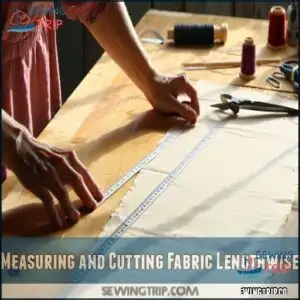
Measuring and Cutting Fabric Lengthwise
When measuring curtain fabric, align the fabric grain lengthwise to prevent skewed panels.
Use a measuring tape for accuracy, and double-check twice—don’t cut corners (literally!).
Sharp cutting tools guarantee clean edges for waste reduction.
Fabric preparation, like ironing, helps smooth wrinkles.
Precise measuring fabric saves time later—because who wants uneven curtains ruining your sewing tutorial moment, and it’s all about achieving waste reduction.
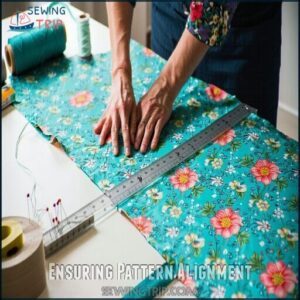
Ensuring Pattern Alignment
Getting pattern alignment right makes your curtains look polished. Focus on matching repeats and centering motifs for a seamless visual flow. A smart cutting strategy prevents fabric waste and guarantees straight seams.
Understanding fabric grain is also vital for preventing distortions, and you can learn more about it at Understanding fabric grain.
To achieve perfect alignment, follow these steps:
- Lay fabric flat, checking alignment at edges.
- Match patterns before pinning or cutting.
- Use a ruler for precision.
- Double-check fabric matching before sewing to ensure a polished look.
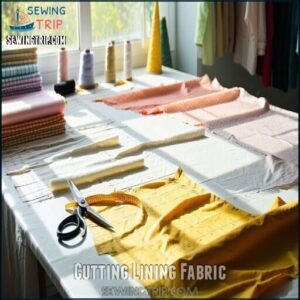
Cutting Lining Fabric
Now that your main fabric is ready, it’s time for the curtain lining.
Choose lining fabric types based on your needs—light blocking or added structure.
Use accurate measurements, cutting techniques, and add 3 inches less height than the main panel for cleaner hemming differences.
Remember, lining fabric makes sewing curtains more polished, like wearing socks with shoes—practical and stylish!
Sewing Curtain Panels
Sewing curtain panels is easier than you think, especially with a few beginner-friendly techniques.
Grab your fabric, stitch it with confidence, and soon you’ll have custom curtains that look like a million bucks!
Sewing With Pleater Tape
After cutting fabric panels, it’s time to master pleater tape for flawless curtain pleats.
Choose pleater tape types suited for your fabric, then pin it along the top panel edge.
Use stitching techniques that avoid pleat hook slots and sew with precision.
Adjust pleat spacing evenly, secure pleats with hooks, and voilà—professional pleating worthy of any curtain tutorial!
Sewing Traditional Curtains
Sewing traditional curtains is easier than you think! Start with simple hemming techniques, ensuring clean edges for a polished look.
Choose fabric wisely for style and function, then follow this sew curtains tutorial for success.
- Pick the right lining options for texture.
- Fold hems carefully for straight lines.
- Experiment with pleat styles for flair.
- Use sturdy tools for precision.
- Test hanging methods early!
Tips for a Professional Finish
For a professional finish, press all curtain seams and hems—you want them crisp, not crinkly.
Check your pattern matching before sewing; uneven patterns can scream “DIY.”
Don’t skip lining—it adds structure and blocks light.
Secure hems with weights for perfect drape.
Creating Pleats and Folds
Creating pleats and folds might sound tricky, but it’s all about the right technique and a little patience.
With some careful folding, pressing, and maybe a sip of tea between steps, you’ll give your curtains a polished, professional look.
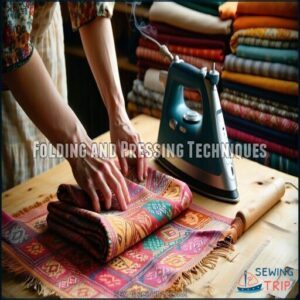
Folding and Pressing Techniques
Before pleat shaping or sewing hems, ironing seams makes all the difference. Fold fabric neatly, press edges firmly, and don’t skip this step—it’s the secret to clean lines.
For hem creasing, use steam for crisp folds. Control tension while prepping seams to avoid wavy edges.
Pleating techniques by hand can also add unique textures. Ironing feels tedious, but trust me, it’s like laying a smooth runway for perfection!
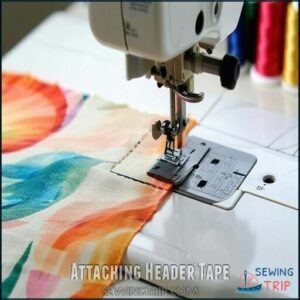
Attaching Header Tape
Header tape makes curtain making a breeze! Pick tape types based on your style—flat, pleated, or gathered.
Align it with the curtain’s top edge, folding ½ inch under for clean edges. Use stitching techniques to secure the tape, focusing on even distribution and pleat control.
Don’t forget to secure ends tightly—no loose threads, just polished results!
Gathering Panels
Now that your header tape is attached, it’s time to create that beautiful fullness in your curtain panels.
Pull the strings on your header tape gently and watch the magic happen! Different pleat types will create unique looks.
For even distribution, work from the center outward. Secure your gathers by tying off the strings or stitching them in place.
Your curtains are taking shape!
Hemming and Finishing
You’re in the home stretch now, and those polished hems will make your curtains look store-bought instead of homemade.
No one will guess you made them while binge-watching your favorite show.
With just a few careful folds, some straight stitches, and those secret drapery weights that professionals use, you’ll transform your fabric into curtains that hang beautifully.
You’ll make your windows the star of the room with curtains that have been finished with beautifully polished hems.
Folding and Sewing Hems
Now that your panels show beautiful pleats, it’s time to handle those edges.
Hemming transforms raw fabric edges into polished curtain borders.
For side hems, fold and press ½ inch twice, then stitch using your sewing machine.
For bottom hems, create a generous 2-inch hem allowance for a professional look.
Try blind hems for invisible stitching or mitered corners for a crisp finish that’ll make your neighbors wonder if you hired a pro!
Attaching Drapery Weights
Why do your curtains need weights? They’re the secret to that perfect, professional drape!
Here’s how to attach them:
- Choose weights based on fabric type – chain weights for sheers or cloth-covered for heavier fabrics
- Position weights in each bottom corner for ideal weight placement
- Space additional weights evenly along wider panels
- Secure by hand-stitching inside the hem
- Test the drape before final securing
Finishing Touches
Now that you’ve attached your drapery weights, it’s time for those finishing touches that’ll make your curtains truly shine.
Trim any loose threads with sharp scissors and give everything a final inspection.
Consider adding decorative trim or tassel details along the hemming for extra flair.
Double-check your cord placement and verify all curtain hardware is properly installed.
A quick steam or press will smooth out any remaining wrinkles before hanging your masterpiece!
Hanging Curtain Options
You’ll transform your beautiful handmade curtains into stunning window treatments with the right hanging method, just like finding the perfect shoes to complete your favorite outfit.
Whether you prefer the classic elegance of rod pockets or the modern simplicity of ring clips, your choice will dramatically impact both the function and style of your finished curtains.
Ring Clips and Rod Pockets
Now that your hems are finished, let’s talk about hanging options.
Ring clips and rod pockets offer two popular ways to display your beautiful DIY curtains.
When choosing between curtain rings and rod pocket curtains, consider these four factors:
- Style preference – clips create casual folds while pockets offer a gathered look
- Fabric considerations – heavier fabrics work better with clips
- Hardware choices – make certain your curtain rod matches your chosen hanging method
- Convenience – clip rings make curtains easier to open and close
For various styles, consider using specialized curtain fasteners to enhance your curtain hanging experience.
Curtain Hooks and Tabs
The humble curtain hook transforms ordinary panels into elegant window treatments.
When sewing curtains, you’ll find various hook types that slip into heading tape pleats.
Curtain tabs create a casual, rustic look—simply sew fabric loops along the top edge, spacing them 4-6 inches apart.
For heavier fabrics, reinforce tabs with interfacing to increase weight capacity.
DIY alternatives include using ribbon or repurposed fabric strips as curtain accessories, which can add a unique touch to your window treatments, making them more elegant.
Choosing The Right Hanging Option
Every hanging option dramatically changes how your curtains look and function.
Clip rings offer easy sliding and a casual vibe, while rod pockets create a gathered, seamless appearance.
Curtain hooks provide precision with pleated styles, and hidden tabs blend convenience with elegance.
For maximum flexibility, consider tiebacks too, and remember that your curtain installation success depends on matching the right hardware—curtain rod, rings, or clips—with your room’s style.
DIY Curtain Making Tips
You’ll save yourself countless headaches and avoid the dreaded "why-won’t-these-hang-right" dance by mastering these simple curtain-making tips before your fabric hits the sewing machine.
From preventing crooked hems to keeping your patterns matched perfectly, these practical pointers will transform your DIY curtain project from potentially frustrating to fantastically rewarding.
Common Mistakes to Avoid
Watch out for these common pitfalls when sewing curtains! Even DIY pros sometimes stumble upon simple mistakes that can turn your dream drapes into a fabric fiasco.
- Skimping on measurements leads to too-short curtains that scream "amateur hour"
- Ignoring pattern direction causes mismatched prints that draw the eye for all the wrong reasons
- Rushing through hemming creates uneven edges that won’t hang properly
- Forgetting to adjust sewing machine tension results in puckered seams and weak stitches
Troubleshooting Common Issues
Even the most careful curtain makers hit snags sometimes! Let’s tackle those frustrating issues that can pop up mid-project.
| Problem | Quick Fix | Prevention |
|---|---|---|
| Fabric bunching | Rip seams and resew with proper tension | Pin thoroughly before sewing |
| Uneven hems | Measure twice, hang to check, then trim | Use a level and mark with chalk |
| Pattern mismatch | Match prints before cutting | Buy extra fabric for alignment |
When your sewing machine jams, clean the bobbin area and rethread everything from scratch. This will help prevent future issues and ensure a smooth sewing process, allowing you to complete your project efficiently and effectively with proper tension.
Maintenance Tips for Long-Lasting Curtains
Throughout your curtains’ lifetime, regular maintenance will save you from headaches down the road.
Vacuum curtains monthly to prevent dust buildup, and follow fabric care labels for proper washing frequency. For stubborn stains, spot clean immediately with gentle soap.
Rotate panels every six months to prevent sun damage and mildew.
When storing, avoid plastic bags—cotton pillowcases make perfect breathable storage solutions for your handmade window treasures, ensuring they remain in good condition with proper washing frequency.
Achieving Professional Results
You’ll transform your homemade curtains from "clearly DIY" to "wow, did you buy those?" with just a few professional finishing touches.
The secret to store-bought looking curtains isn’t magic—it’s simply careful pressing, strategic embellishments, and attention to those final details that make all the difference.
Ironing and Pressing Techniques
Behind every professional-looking curtain lies the secret weapon of proper ironing and pressing techniques. Don’t skip this essential step in your sewing process if you want curtains that hang beautifully.
- Set your iron temperature based on fabric types – delicates need low heat, while cotton can handle high
- Press seams open first, then flat for cleaner lines
- Use a presser foot during machine hemming for even stitches
- Steam stubborn wrinkles with curtain steaming for luxurious drape
- Maintain your iron by cleaning it regularly to prevent fabric staining, ensuring a cleaner and more professional finish
Adding Decorative Trims and Embellishments
Now that your curtains are perfectly pressed, let’s add some pizzazz! Decorative trims transform simple curtains into showstoppers.
Try tassel fringe along bottom edges or braid fringe on inside edges for elegant definition. Pom-pom trim adds playful charm, while beaded edges catch light beautifully.
When you sew curtains, secure trim placement with straight pins first, then attach using your preferred method: sewing, fabric tape, or glue.
Curtain embellishments like bullion fringe or fabric appliqués create that custom-made look you’ll love, and with the right trim, you can achieve a showstoppers effect.
Achieving a Luxurious Finish
Three key techniques transform homemade curtains into designer masterpieces.
First, invest time in proper seam finishing and blind hems for that "invisible stitching" look.
Second, don’t skip drapery weights – they’re what gives curtains that perfect fall.
Finally, consider both lining and interlining; they’re not just for light blocking but add substantial body.
Shirring, a technique that utilizes elastic thread in the bobbin, can also add a unique decorative touch.
Remember, pattern matching at seams isn’t optional for luxurious results – it’s where amateur and professional work truly diverges.
Frequently Asked Questions (FAQs)
Are curtains easy to sew?
Yes, curtains are one of the easiest sewing projects you’ll tackle.
You’re just working with straight lines and rectangular shapes, making them perfect for beginners while still saving you money on home décor.
How long does it take to sew a curtain?
You’ll spend eternity sewing curtains," joke the veterans.
In reality, expect 2-4 hours for your first panel, including measuring, cutting, and hemming.
You’ll get faster with practice as you develop technique.
How do you sew curtains?
Measure your window, cut fabric with extra inches for hems, fold and press edges.
Sew side seams first, then top rod pocket, and finally the bottom hem.
You’ll have beautiful custom curtains!
Can I make my own curtains?
DIY curtains can save up to 75% compared to store-bought options.
You’re absolutely capable of making your own curtains with basic sewing skills, some fabric, and a few simple tools.
It’s easier than you’d think!
How do you hang a curtain on a sewing machine?
I think you’re mixing up concepts – curtains are hung on curtain rods, not sewing machines.
You’ll use your sewing machine to make curtains, then hang the finished product on your window’s curtain rod.
How do you decorate DIY curtains?
You can jazz up your curtains with fabric paint, ribbon trim, or iron-on appliqués.
Try adding tassels at the corners, decorative buttons, or even stenciled patterns.
It’s your chance to get creative!
Can a beginner sew curtains?
Picture yourself transforming fabric into beautiful window dressings with just a few straight lines.
You’ll find curtains are one of the friendliest sewing projects around – perfect for beginners with basic machine skills.
How to make curtains step by step?
You’ll need to measure your window.
You’ll need to cut fabric with extra inches for hems, fold and press edges.
Then, sew side seams first, then top hem for rod pocket, and finally sew bottom hem, which includes the complete process of hemming.
What is the best stitch for sewing curtains?
For curtains, you’ll want a straight stitch set at medium length. It’s strong, clean-looking, and won’t pucker your fabric. You can also use a zigzag stitch for hemming lightweight fabrics.
What is the rule of thumb for curtains?
Did you know 90% of design experts recommend curtains should be 2-5 times your window’s width for proper fullness?
You’ll also want them to hang 4-6 inches wider than your window frame, which is a complete concept related to the width and hanging of the curtains.
Conclusion
Who knew learning how to sew curtains could transform your home without emptying your wallet?
You’ve now mastered the essential steps—from selecting fabric to hanging your finished masterpiece.
Remember, practice makes perfect, and even the occasional crooked seam adds character!
With these DIY curtain skills in your toolbox, you’ll save hundreds while creating custom window treatments that perfectly match your style.
Ready to tackle another window? Your home (and budget) will thank you!

